Traditional wooden spoon techniques for handmade soap bars include using grain-aligned stirring motions, selecting chemical-resistant hardwoods like maple or ash, crafting curved bowls for effective folding, implementing Viking-inspired carving methods, applying protective oil finishes, creating flat-edged designs for scraping, working with green wood for custom molds, and utilizing notched patterns for swirl textures. You'll find these time-tested approaches enhance both functionality and aesthetics while preserving the artisanal qualities that make your soap bars truly distinctive.
Numeric List of 10 Second-Level Headings
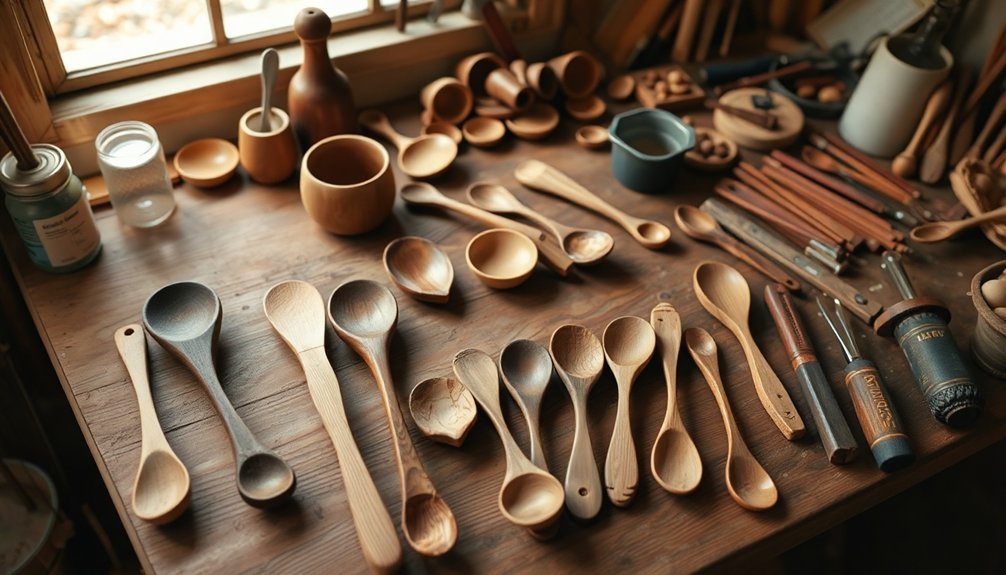
The ten essential second-level headings for traditional wooden spoon carving encompass the complete crafting journey.
When you're planning your wooden spoon project for handmade bars, consider organizing your approach with these key sections:
- Selecting the Right Wood
- Essential Tools and Equipment
- Creating Design Templates
- Initial Roughing Techniques
- Bowl Hollowing Methods
- Handle Shaping Approaches
- Surface Smoothing and Sanding
- Food-Safe Finishing Options
- Decorative Carving Elements
- Care and Maintenance Instructions
Each heading represents a vital step in your spoon-making process.
From choosing between hardwoods like cherry or maple to applying the final protective oil, these sections will guide you through traditional techniques while ensuring your spoons are both beautiful and functional.
You'll find that organizing your knowledge this way makes the craft more accessible.
For safety during the carving process, always wear cut-resistant gloves and position your hands carefully to avoid potential injuries.
Using Grain Direction for Proper Stirring Motion
When you're stirring with a wooden spoon, the direction of wood grain affects both performance and longevity in your kitchen tasks.
You'll find that spoons carved with grain flowing along the handle into the bowl offer superior strength during cross-grain pressure, preventing breakage when you're mixing thick batters or doughs.
Your stirring motion becomes more natural and efficient when using a spoon designed with ergonomics that complement the wood's natural grain structure.
During candy making, it's essential to use your wooden spoon to give the hot sugar syrup three or four turns before stretching to ensure proper consistency.
Understanding Wood Grain Flow
Five essential aspects of wood grain flow determine the effectiveness of your wooden spoon during stirring.
First, inspect grain direction visually, similar to checking animal fur, to avoid tear-out during carving.
Second, align your stirring motion with the natural grain flow to guarantee smooth interaction with ingredients and prevent splintering.
When selecting wood, consider how different species exhibit unique grain patterns affecting both appearance and durability. Carving against the grain will cause fiber lift and result in a rough surface on your wooden spoon.
Radial cuts offer stability with straight grain patterns, while tangential cuts provide decorative elements but greater susceptibility to deformation.
Finally, recognize how grain orientation minimizes movement issues when humidity changes.
Cross-Grain Strength Benefits
Understanding cross-grain strength benefits requires appreciating how wood fibers naturally align to create durability in your wooden spoon.
When carving, you'll want to work with the grain's natural flow rather than against it.
Bent branches offer significant advantages for spoon making. They provide continuous fiber structure throughout the handle and bowl, minimizing weakness points that often occur in straight-grained wood. Utilizing crooks allows for uninterrupted fibers to run along the bowl's bottom, maximizing durability when the spoon encounters resistance during stirring.
This continuity is especially important at the crank—the shift between handle and bowl—where stirring forces concentrate.
For ideal stirring performance, select wood with natural curves that follow your intended design.
This approach not only strengthens your spoon but enhances its ergonomics and balance.
You'll need to increase thickness in areas with short grain to compensate for reduced strength, particularly where the spoon must withstand repeated stirring motions.
Spoon Design Ergonomics
Proper spoon design ergonomics begins with aligning grain direction to support natural stirring motions. When crafting your wooden spoons, guarantee the grain runs longitudinally along the handle to maximize strength and prevent breakage during use.
You'll find that well-balanced spoons with ergonomic handles reduce wrist strain during prolonged stirring. Consider implementing a silicone grip for additional comfort during extensive mixing sessions. Consider the weight distribution—a balanced spoon creates smooth, effortless motions that won't fatigue your hand.
For deep pots, craft longer handles to keep your hands safely away from heat.
When shaping the spoon head, match its curvature to your intended use. Some curves excel at scooping while others perform better for stirring.
Finish your creation with natural oils and smooth, contoured grips to enhance comfort and control while preserving the wood's natural beauty.
Heat-Resistant Hardwood Selection for Caustic Solutions
When working with lye and other caustic solutions, you'll find ash wood provides excellent chemical resistance while maintaining its structural integrity.
Maple offers superior durability against caustic materials, making it an ideal choice for spoons used in soap-making or food preparation involving alkaline ingredients.
Orienting your cuts perpendicular to the grain creates cross-grain strength that prevents your wooden utensils from splitting when exposed to harsh chemicals and heat.
For optimal performance, maintain temperatures above 70 degrees Celsius when working with wooden utensils in sodium hydroxide solutions, as this ensures proper chemical activation without degrading your hardwood tools.
Ash for Lye Safety
Three critical factors determine the safety and effectiveness of homemade lye: proper ash selection, protective equipment, and heat-resistant tools.
When selecting ash, exclusively use hardwoods like hickory, beech, and ash for their high potassium content. Avoid softwoods entirely as their resins will contaminate your lye solution.
Always wear protective gear—gloves, goggles, and appropriate clothing—when handling lye. Keep vinegar nearby to neutralize accidental spills or contact. The highly alkaline solution formed when wood ash mixes with water can cause severe burns if proper precautions aren't taken.
For your equipment, choose non-reactive materials like wood for ash hoppers, glass or ceramic for collection containers, and stainless steel or ceramic for boiling pots. Never use aluminum tools as lye rapidly corrodes them.
Work in well-ventilated areas and store your finished lye in secure, non-reactive containers with tight-fitting lids to guarantee long-term safety.
Maple's Caustic Resistance
Selecting the right wood for your lye-handling tools is just as important as the protective gear you wear. Hard maple stands out for its exceptional resistance to caustic solutions, making it ideal for soap-making implements.
With a Janka hardness of 1,450 lbf and specific gravity between .56 and .71, maple provides durability while its chemical composition offers natural protection. Its straight grain pattern contributes to structural integrity when exposed to harsh chemicals during soap making. You'll find its cellular structure helps resist degradation when exposed to alkaline solutions.
| Property | Hard Maple | Benefit for Caustic Use |
|---|---|---|
| Density | 44.0 lbs/ft³ | Reduced liquid absorption |
| Chemical Structure | High cellulose content | Better chemical resistance |
| Thermal Stability | Excellent | Withstands hot lye solutions |
| Surface Treatment | Takes finishes well | Can be sealed for protection |
Apply protective coatings to enhance maple's natural caustic resistance and extend your tool's lifespan.
Cross-grain Durability Benefits
The strategic orientation of wood grain offers five essential benefits when crafting tools for caustic environments.
When you're working with caustic solutions at temperatures above 70°C, hardwoods like oak and walnut provide superior heat resistance and structural integrity compared to softwoods.
Cross-grain construction distributes stress evenly throughout the handle, creating tools that withstand harsh conditions while maintaining their shape. This orientation also enhances resistance to sodium hydroxide exposure, vital for immersion heater handles. For maximum protection, a fire-retardant coating can be applied to these wooden tools to further minimize damage during extreme temperature exposure.
- Enhanced thermal stability – Your tools won't warp or crack under heat stress
- Reduced moisture retention – Less swelling means longer-lasting implements
- Superior caustic resistance – Protection against chemical breakdown
- Impressive load distribution – Handles that won't fail when you need them most
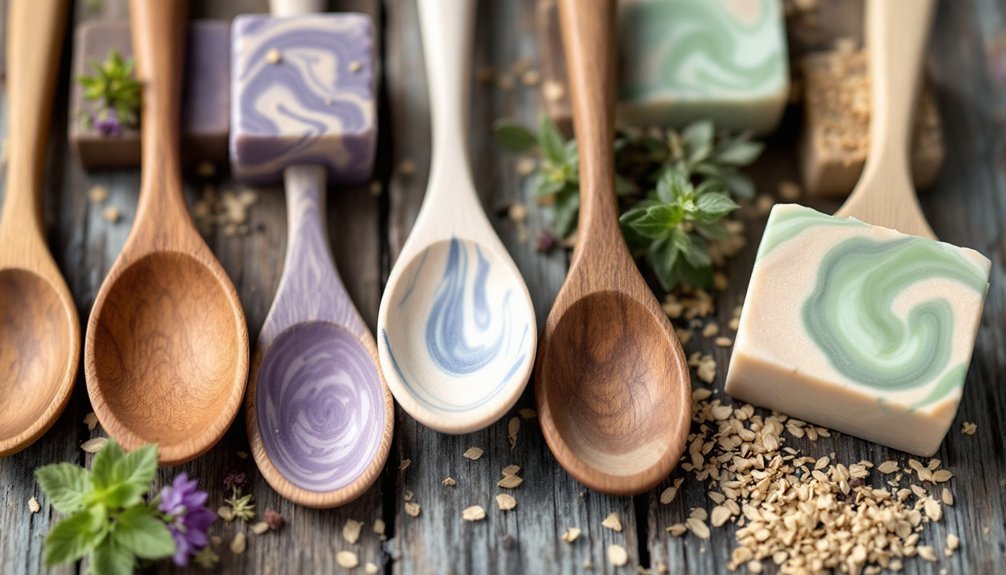
Curved Bowl Designs for Effective Soap Folding
While curved bowl designs aren't traditionally associated with soap folding techniques, they've found their place in various crafting disciplines that require similar attention to detail and precision.
Though more commonly used in ceramics and woodworking, these design principles can inform your approach to creating ergonomic tools for soap making.
When crafting wooden implements for soap work, consider how traditional spoon carvers use gouges and spokeshaves to achieve smooth, functional curves.
Select woods like oak, maple, or walnut for their durability and aesthetic appeal.
The curvature in your tools should serve both visual interest and practical function—a well-designed curve fits comfortably in your hand while providing the structural integrity needed for soap manipulation.
Though soap typically relies on molds rather than folding, understanding curved design principles can elevate your crafting technique and could be enhanced with techniques similar to how artisans like Michal Keren Gelman apply delicate relief patterns to create texture and visual interest in their work.
Viking-Inspired Spoon Carving for Lye Mixtures
Ancient Viking craftsmen developed spoon carving techniques that remain remarkably relevant for today's soap makers working with lye mixtures. Their preference for hardwoods like oak and ash creates stirring implements that withstand caustic lye solutions.
When selecting wood, you'll want to look for tight grain patterns that resist chemical absorption. Modern carvers often choose Iroko wood for its exceptional hardness and durability when crafting functional spoons.
Traditional Viking methods emphasize using greenwood, especially from fruit trees like apple, which remains workable for weeks while providing exceptional durability.
Begin with an axe for rough shaping before refining with a spoon gouge and knife.
- Choose hardwoods – Feel the satisfaction of working with materials that will last generations
- Work with the grain – Experience the meditative flow of carving with nature, not against it
- Hand-sharpen your tools – Connect with ancient craftsmen through shared ritual
- Oil finish – Witness your creation transform with each protective layer
Ergonomic Handle Techniques for Extended Mixing Sessions
Much like Viking craftsmen designed spoons for specific tasks, modern woodworkers now focus on creating handles that protect the body during long mixing sessions.
When selecting a wooden spoon, look for hardwoods like beech or maple with handles between 12-14 inches for ideal leverage and heat protection.
You'll experience less fatigue with rounded or tapered handles that allow natural grip adjustments. For thick mixtures, try the flipping technique—using the handle end to provide better leverage without straining your wrist. This technique is particularly effective for dough development as it enhances oxygen exposure while reducing arm strain.
To maintain your ergonomic tools, apply food-grade mineral oil regularly and hand wash instead of using dishwashers.
Consider spoons with silicone grips for enhanced control during wet conditions. A balanced design with even weight distribution between handle and bowl will greatly reduce hand strain during extended use.
Natural Oil Finishing for Chemical-Resistant Utensils
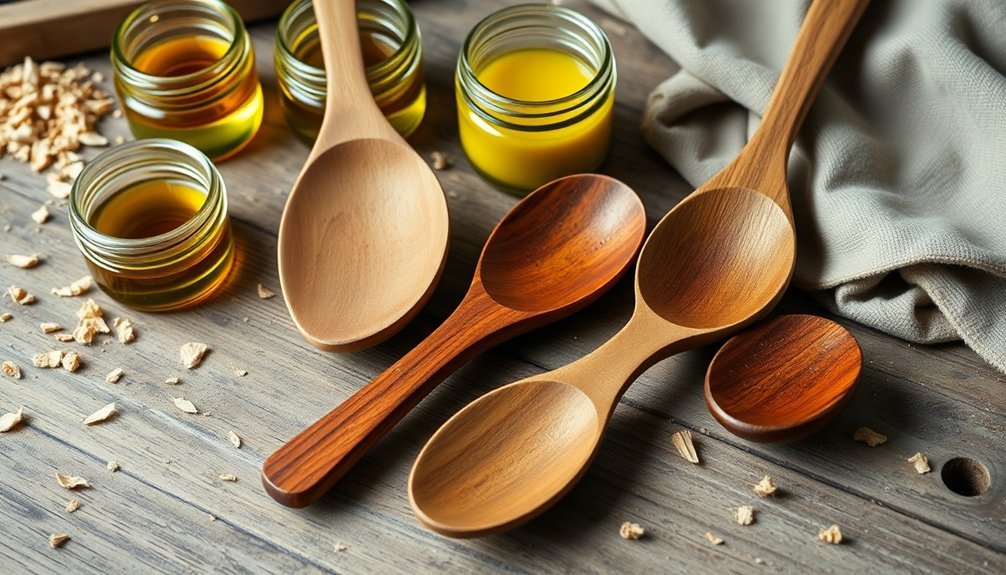
Selecting the right food-safe oil for your wooden spoons creates a natural barrier against chemicals and moisture while enhancing the wood's natural beauty.
You'll want to contemplate tung or walnut oil for their excellent polymerization properties, which provide superior protection for frequently used kitchen utensils.
When applying, remember to work with thin coats, allowing proper drying time between applications, and wiping away excess oil to prevent sticky residue on your finished pieces. Regular maintenance will significantly extend the lifespan of your wooden kitchen tools as they endure moisture cycles and heavy use.
Food-Safe Oil Options
When preparing wooden spoons for culinary use, the right finish makes all the difference between a utensil that's truly food-safe and one that might introduce unwanted chemicals into your cooking.
Choose pure, plant-based options that enhance both beauty and functionality.
- Polymerized tung oil creates a durable, water-resistant barrier that won't leach into foods, perfect for spoons that face frequent washing.
- Walnut oil penetrates deeply to protect your spoons while celebrating the wood's natural character without excessive yellowing. Apply multiple coats and allow for proper drying to ensure the wood is fully saturated.
- Polymerized linseed oil offers excellent protection with faster curing than its raw counterpart, saving you valuable preparation time.
- Pure mineral oil works in a pinch but requires consistent reapplication to maintain effectiveness.
Avoid vegetable cooking oils at all costs—they'll quickly turn rancid and harbor bacteria.
Application Best Practices
Three essential steps separate amateur wooden spoon finishing from professional results that create genuinely chemical-resistant utensils.
First, thoroughly prepare your surface by sanding with progressively finer grits until the wood feels silky smooth to touch.
When applying natural oils, opt for multiple thin coats rather than one thick layer. Tung oil offers superior chemical resistance for wooden bar tools, while hemp oil provides an eco-friendly alternative. A homemade Danish oil mixture combining equal parts boiled linseed oil, varnish, and mineral spirits also works exceptionally well for bar utensils.
Apply each coat evenly, then immediately wipe away excess to prevent a gummy buildup.
Finally, respect the curing time between coats. Even fast-drying oils need proper curing to develop full chemical resistance.
You'll need patience—proper curing can take days or even weeks depending on your oil choice. This waiting period isn't optional; it's what transforms your wooden utensils into durable, resistant bar tools.
Traditional Flat-Edge Spoons for Clean Scraping
Artisans have meticulously crafted flat-edge wooden spoons for centuries, creating utensils that excel at clean scraping tasks in kitchens worldwide.
These traditional tools, typically made from hardwoods like cherry, maple, and walnut, feature a distinctive flat edge that's perfect for mixing ingredients and scraping the sides of pots without leaving residue behind.
When you're looking for the perfect flat-edge spoon, consider:
- Hardwood construction – Cherry and maple offer superior durability that will serve you for generations
- Hand-carved bowls – Created with carving gouges that provide the ideal depth for gathering ingredients
- Ergonomic handles – Shaped with drawknives for comfortable grip during extended use
- Food-safe finishes – Danish oil or mineral oil that protect while maintaining wood's natural beauty
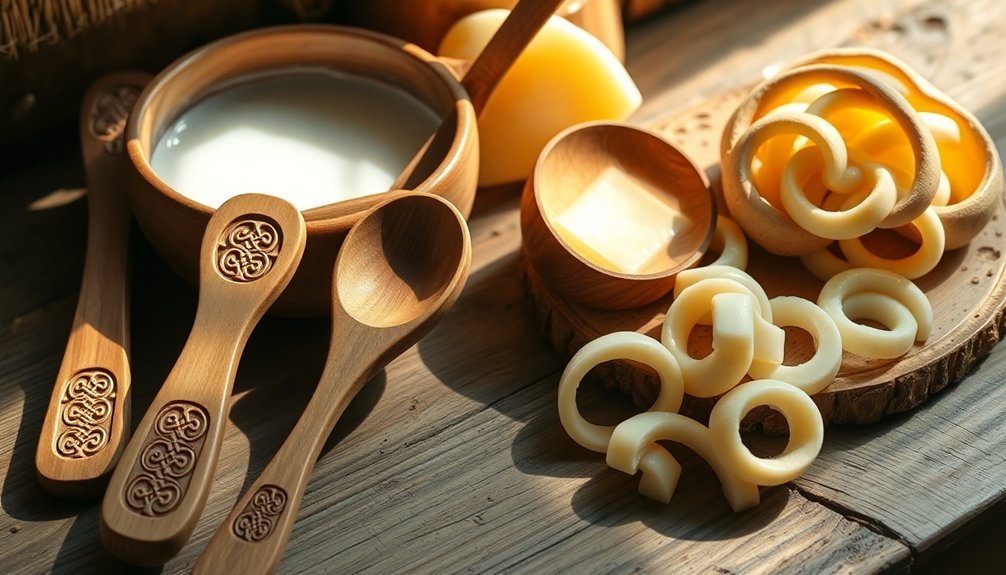
Green Wood Working for Custom Soap Bar Molds
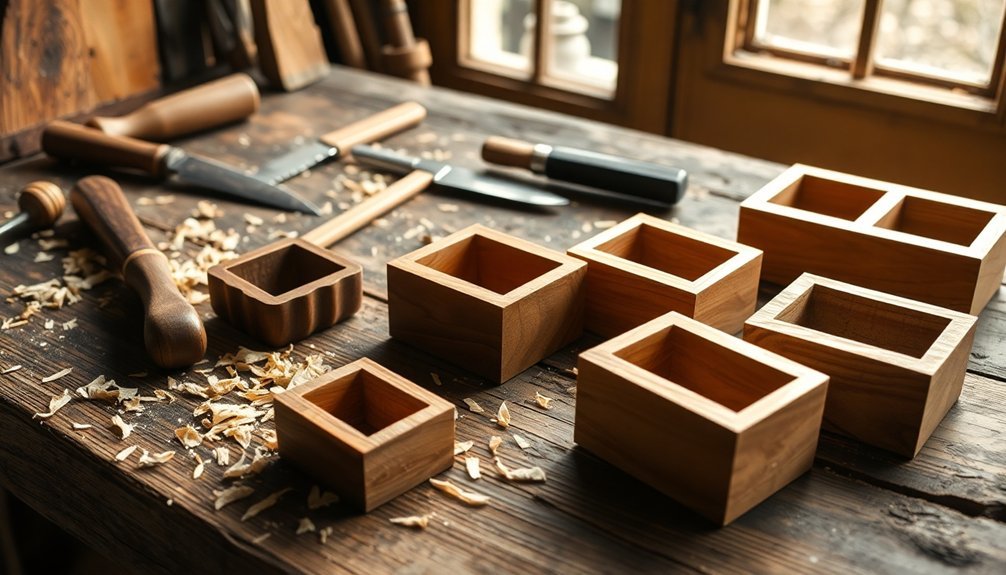
Green wood working extends beyond kitchen utensils into the artistic domain of soap making, offering craftspeople a sustainable method for creating custom soap bar molds. When working with freshly cut wood, you'll need to understand grain direction to carve effectively while considering the wood's moisture content.
| Wood Type | Best For | Maintenance | Durability | Cost |
|---|---|---|---|---|
| Walnut | Detailed designs | Medium | High | $$$$ |
| Oak | Large batches | High | Very high | $$$ |
| Cherry | Decorative molds | Medium | Medium | $$$$ |
| Birch | Beginner projects | Low | Medium | $$ |
| Ash | All-purpose | Medium | High | $$$ |
Remember to line your wooden molds with parchment paper or silicone for easy soap release. While requiring more preparation than commercial alternatives, wood molds offer unmatched customization and represent a worthwhile investment for artisanal soap makers committed to sustainability.
Historical Notched Spoons for Tracing Swirl Patterns
While traditional soap makers relied on simple wooden utensils for their craft, historical evidence specifically documenting notched spoons for creating swirl patterns remains scarce.
You'll find that early soap production focused more on functionality than artistry, with wooden spoons primarily used for mixing lye and fats rather than decorative techniques.
- Lost techniques – The possibility that notched tool methods existed but weren't documented creates a mysterious gap in artisanal soap-making history.
- Imaginative potential – You can envision how custom-carved spoon edges might've created unique textures and swirls.
- Rediscovered craft – Modern soap artisans now experiment with wooden tools that their ancestors might've used.
- Handcrafted connection – Working with wooden implements links you to generations of soap makers who valued natural materials.
Frequently Asked Questions
How Long Does a Wooden Soap Spoon Typically Last?
Your wooden soap spoon can last around five years with proper care. You'll extend its life if you hand wash it, keep it dry, and apply food-safe oils regularly to prevent cracking and warping.
Can Wooden Spoons Cause Discoloration in Certain Soap Recipes?
Yes, your wooden spoons can cause discoloration in soap recipes. They might release lignin pigments, absorb fats, or react with lye in alkaline mixtures. Using stainless steel or silicone alternatives prevents these issues.
Are Specific Wood Types Better for Milk-Based Soaps?
No specific wood type is better for milk-based soaps. You'll need to line any wooden mold with parchment or freezer paper regardless of wood type to prevent sticking and maintain temperature control.
How Do You Prevent Wooden Utensils From Warping During Use?
To prevent wooden utensils from warping, choose hardwoods like oak, avoid soaking them, hand wash with mild soap, dry immediately, store in cool dry places, and regularly apply mineral oil or beeswax for protection.
Should Carved Spoons Be Seasoned Before First Soap-Making Use?
No, you shouldn't use wooden spoons for soap-making at all. Lye will damage them regardless of seasoning. Instead, choose stainless steel or plastic utensils to protect your spoons and guarantee better soap-making results.
In Summary
You've now explored ten time-tested wooden spoon techniques that'll revolutionize your handmade soap making. By incorporating these traditional methods into your craft, you'll not only honor ancient artisanal practices but also achieve superior results in your soap bars. Don't underestimate the power of properly carved, finished, and utilized wooden tools—they're the secret behind those perfect swirls and textures that set your handmade soaps apart.


Leave a Reply