Making your own wooden miter box today offers significant advantages over store-bought alternatives. You'll get precise control over soap cuts with custom angles and dimensions tailored to your specific needs. It's a cost-effective solution that lets you create consistent, professional-looking soap bars while reducing waste. Plus, you'll have a durable, personalized tool that enhances your workflow and productivity. Discover how this traditional woodworking project can revolutionize your soap-making process.
The Historical Significance of Wooden Miter Boxes in Soap Making
While wooden miter boxes are commonly associated with woodworking today, they played an essential role in traditional soap making during the 19th century.
Though now a woodworker's staple, wooden miter boxes were vital tools for 19th-century soap makers seeking precise, uniform cuts.
You'll find that craftsmen relied on these precision tools, often handmade from maple or oak, to cut their soap bars with remarkable accuracy.
When you make sure your soap bars are uniform, both aesthetically and in weight, you'll achieve better customer satisfaction and consistent pricing.
The durability of these wooden tools meant that artisans could use them to create two or three different angle cuts, allowing for more intricate designs in their final products.
Handcrafted from sturdy woods, these miter boxes became indispensable tools that revolutionized how soap makers approached their craft, offering precision that was previously difficult to achieve through other methods.
Essential Materials and Tools for Your DIY Soap Miter Box
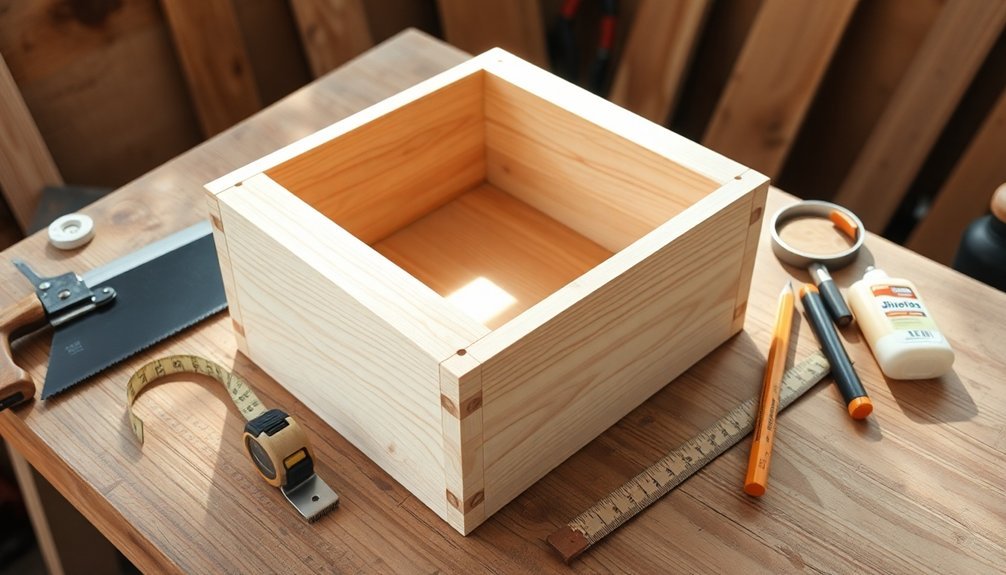
To begin building your soap miter box, you'll need two 3/4-inch by 2 3/4-inch pieces of one by three wood that will serve as your main structure.
Your essential tools should include a fine saw (like a gent or tenon saw), a marking gauge, a wide chisel, double-sided tape, and clamps or a vise for stability during construction.
The quality of your wood selection is vital, so choose straight-grained, stable lumber that won't warp or twist during use.
Required Tools List
Before diving into your miter box project, you'll need several essential tools and materials to guarantee precise, professional results.
You'll want to start with two pieces of one by three wood, measuring 3/4 inch by 2 3/4 inches, which will form your frame's foundation.
When you need to cut, a fine saw like a gent saw or tenon saw is important for achieving clean, accurate angles.
Don't forget to include a marking gauge in your toolkit – it's necessary for maintaining parallel cuts and proper alignment with your reference lines.
You'll also require a wider chisel for creating step-down cuts opposite the knife wall.
Finally, keep double-sided tape on hand for temporary assembly work, as it helps maintain square alignment throughout the construction process.
Project Wood Selection
Since quality wood forms the foundation of your miter box, selecting the right materials becomes essential for long-lasting performance.
You'll want to choose one by three wood pieces that measure 3/4 inch by 2 3/4 inches, ensuring maximum durability and strength for your project.
When you're picking out your wood, look for straight, knot-free pieces that won't warp or split during use. High-quality lumber will help you maintain precise angles and clean cuts throughout the life of your miter box.
You'll need enough material to create both the base and sides of your box, plus extra for testing cuts.
Remember to inspect each piece carefully for any defects or irregularities that could affect your box's performance and longevity.
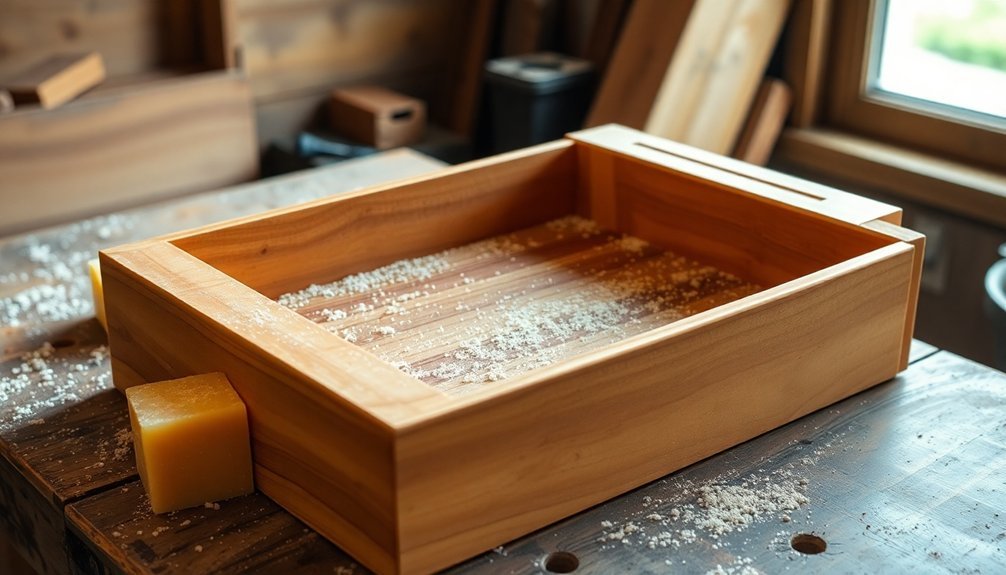
Design Considerations for a Soap-Specific Miter Box
Crafting a miter box specifically for soap cutting requires thoughtful design choices that differ from traditional woodworking miter boxes.
You'll need to plan for dimensions that accommodate standard soap bars, typically 3×4 inches, while ensuring there's enough space for comfortable cutting.
To protect your miter box from soap-induced moisture, you'll want to apply a water-resistant finish or select naturally resistant materials.
Don't forget to include both 45-degree and 90-degree cutting slots for versatile design options.
You'll also benefit from adding adjustable guides that can handle different soap sizes and shapes.
For stability during use, incorporate non-slip features like rubber feet or a grippy base.
This prevents unwanted movement while you're cutting, ensuring precise, clean soap cuts every time.
Precise Measurements and Cutting Guidelines
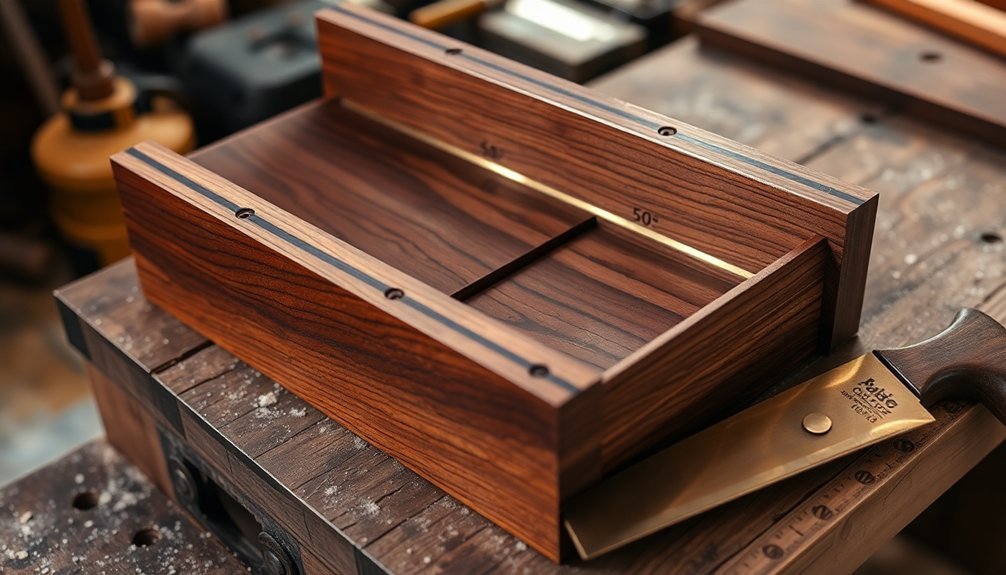
When creating accurate cuts for your wooden miter box, proper measurement techniques serve as the foundation for success.
You'll want to start by using a marking gauge to guarantee parallel cuts that maintain uniform miter angles throughout your project.
Leave a half-inch clearance above your frame for better saw control, and mark a precise 45-degree knife wall to guide your cuts.
You'll achieve the cleanest results by using a fine saw, like a gent saw or tenon saw, following the knife wall you've created.
During assembly, double-sided tape comes in handy for temporarily securing parts while guaranteeing they stay square and perfectly aligned with your gauge lines.
These careful measurements and cutting techniques will help you build a miter box that delivers consistent, professional-quality results every time.
The Advantages of Custom Angles for Soap Cutting
Custom angles in your miter box let you control precise diagonal slices, ensuring each bar of soap meets your exact specifications.
You'll appreciate how adjustable cutting guides enable consistent thickness across multiple batches, whether you're creating standard bars or specialty shapes.
The well-planned angles produce clean, smooth edges on your soap surfaces, resulting in professional-quality bars that enhance your product's visual appeal.
Precise Diagonal Slicing Control
The art of diagonal soap cutting reaches new heights with a properly designed wooden miter box, which gives you unprecedented control over your slicing angles.
You'll find that setting specific angles, like 30, 45, or 60 degrees, lets you create unique soap designs while maintaining consistency across your entire batch.
When you pair your miter box with a fine saw, you're able to achieve smoother edges and professional-looking results.
You'll notice how the box's stable structure helps you maintain steady control throughout each cut, preventing soap damage and ensuring clean lines.
What's more, this precise control means you'll waste less soap during the cutting process.
Custom Guides For Thickness
Building custom thickness guides into your wooden miter box takes soap cutting precision to the next level.
You'll discover that tailored dimensions guarantee each bar meets your exact specifications, while adjustable angles let you create unique bevels for eye-catching designs.
Your custom guides eliminate guesswork and reduce waste, making batch production smoother and more efficient than ever.
- Feel the satisfaction of perfectly uniform cuts every time you slice through your handcrafted soap
- Experience the joy of creating professional-looking bars that showcase your attention to detail
- Enjoy the freedom to experiment with different angles and designs without fear of costly mistakes
- Take pride in crafting a personalized tool that reflects your dedication to the soap-making art
The cost savings and versatility you'll gain from custom guides make this investment in your craft truly worthwhile.
Clean Edge Surface Results
When crafting artisanal soaps, achieving clean edge surfaces becomes effortless with precisely angled cuts from your wooden miter box.
You'll find that custom angles allow you to create professional-looking soap bars with pristine edges that enhance their visual appeal.
Your homemade miter box lets you tailor the cutting angles specifically for your soap designs, giving you complete control over the finished product.
You'll notice a significant reduction in chipping and damage, especially when working on intricate patterns.
The precision you'll achieve means consistent thickness across all your soap bars, making packaging and presentation more uniform.
Plus, you'll waste less material since accurate cuts eliminate the need for corrections or redos.
These clean edges aren't just about aesthetics – they're essential for maintaining professional standards in your soap-making business.
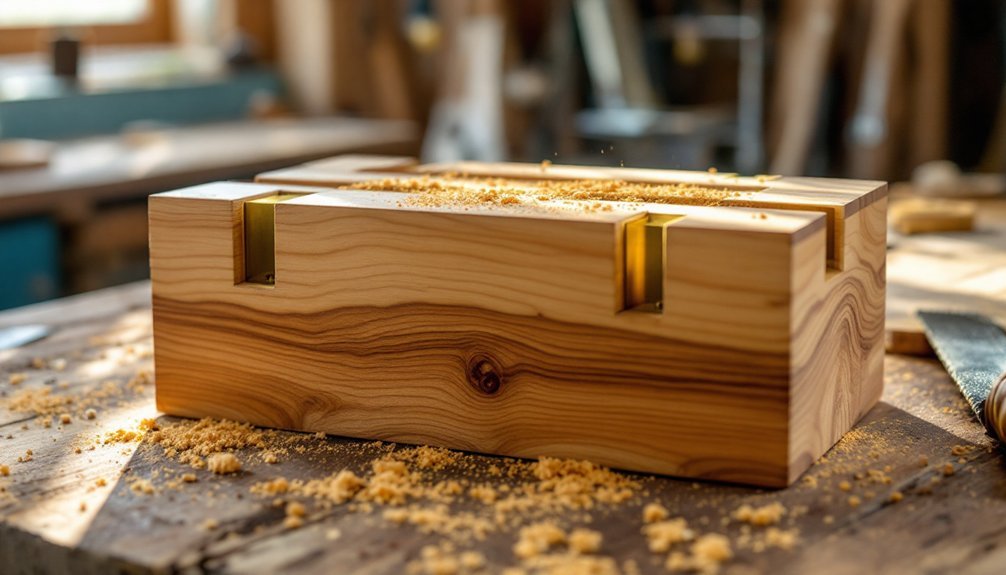
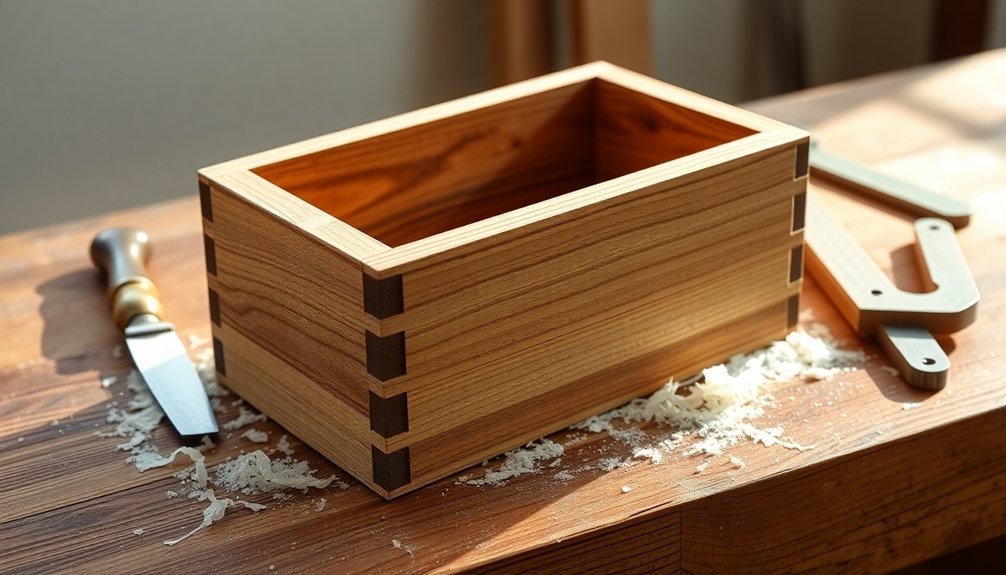
Building Your First Wooden Soap Miter Box
Creating a wooden soap miter box begins with selecting two pieces of one by three lumber, each measuring 3/4 inch by 2 3/4 inches.
You'll need to cut a precise 45-degree angle knife wall, which guarantees your cuts remain clean and accurate. Using a marking gauge, create parallel cuts while maintaining about half an inch above the frame for proper cutting depth.
Secure the assembly in a vise and verify it's square before proceeding with your cuts.
- Feel the satisfaction of crafting your own precision tool from scratch
- Experience the joy of achieving perfectly angled cuts every time
- Master the art of traditional woodworking with your handmade creation
- Take pride in using a miter box you've built with your own hands
When cutting, keep your fine saw (gent or tenon) tight against the knife wall for best results.
Safety Features and Ergonomic Considerations
To protect yourself while ensuring maximum comfort, your wooden miter box should incorporate several essential safety and ergonomic features.
You'll want to design it with rounded edges and a comfortable grip that'll reduce hand fatigue during extended cutting sessions. Add raised sidewalls to prevent your saw from slipping, and apply non-slip materials to the base for enhanced stability.
Make your miter box adjustable to achieve precise angles that standard models don't offer, which helps you avoid dangerous improper cuts.
Don't forget to customize the height and width to match your body mechanics – this lets you maintain a natural posture while working. When you've positioned everything correctly, you'll notice less strain on your back and arms, making your cutting tasks both safer and more comfortable.
Maintaining Your Handcrafted Miter Box
You'll need to establish good storage and cleaning habits to protect your handcrafted miter box investment.
Store your miter box in a climate-controlled space away from moisture, and consider mounting it on a dedicated shelf or workbench where it won't be disturbed.
Keep your miter box's performance sharp by brushing out sawdust after each use and wiping down the surfaces with a clean, dry cloth.
Proper Storage Techniques
Once you've invested time crafting your wooden miter box, proper storage becomes essential for its longevity.
Keep your miter box in a cool, dry space away from direct sunlight to prevent warping and wood degradation. You'll want to cover it with a protective dust cloth when it's not in use, keeping debris from settling on its surface.
Don't forget to designate a specific storage area where other tools won't bump or damage your handcrafted piece.
- Feel proud knowing you're protecting your handmade workshop companion
- Rest easy that your careful storage will preserve your craftsmanship for years
- Experience satisfaction as your miter box maintains its precision over time
- Enjoy peace of mind that your workshop investment is well-protected
Remember to regularly inspect joints for wear and reinforce them with wood glue when needed.
Regular Cleaning Methods
Regular maintenance of your wooden miter box begins with three essential cleaning steps. First, you'll need to remove accumulated sawdust using a soft brush or cloth, as buildup can compromise your cutting accuracy.
Next, wipe down the wooden surfaces with a slightly damp cloth, but be sure to dry it thoroughly to prevent warping.
To protect your miter box long-term, you should apply a thin coat of mineral oil to the wood surfaces periodically. This helps maintain the finish while preventing unwanted moisture absorption.
Don't forget to check for loose screws and joints – tighten them immediately to maintain proper alignment.
Finally, inspect your knife wall regularly for signs of wear or damage. When you notice any dullness or nicks, sharpen the blade to guarantee your cuts remain precise and clean.
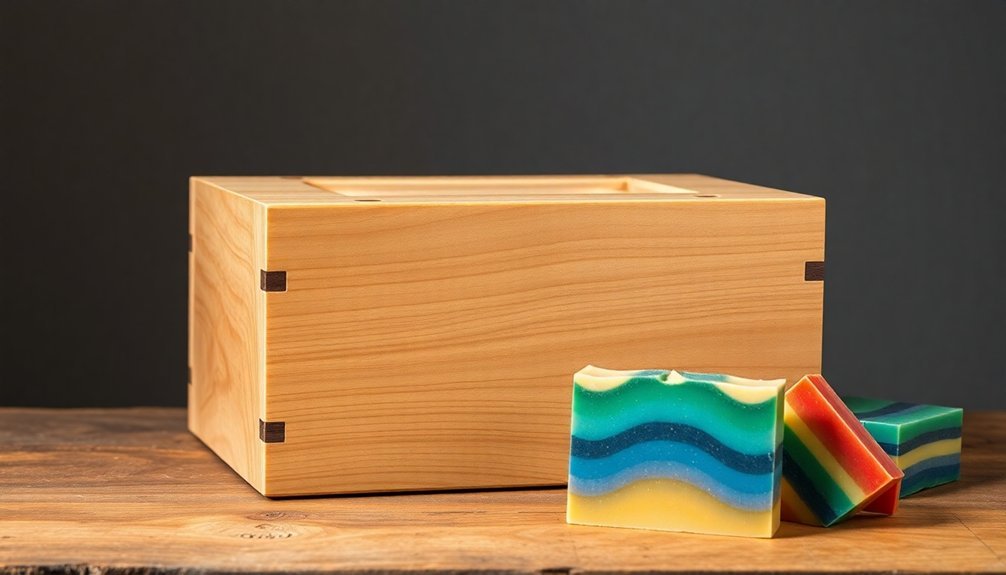
Common Cutting Techniques for Artisanal Soaps
When crafting artisanal soaps, selecting the right cutting technique makes the difference between professional-looking bars and amateur results.
You'll find that using a wire cutter provides smooth, even slices without dragging, while a sharp serrated knife works best for softer soaps. For precision angles and shapes, you can't go wrong with a miter box, which helps you achieve consistent, clean cuts every time.
Remember to let your soap cool properly before cutting to guarantee it's firm enough for the best results.
- Imagine the satisfaction of perfectly straight edges that'll make your soaps stand out
- Picture the endless creative possibilities with adjustable blade settings
- Feel the confidence of wielding professional-grade cutting tools
- Envision your customers' delight when they see your flawlessly cut bars
Adapting Your Miter Box for Different Soap Sizes
A well-designed miter box needs adaptability to handle soaps of varying dimensions. To customize your box, start by measuring your soap bars' dimensions and adjust the internal width to guarantee they fit snugly.
Customization is key – measure your soap bars first and design your miter box to ensure a perfect, snug fit every time.
You'll want to incorporate removable spacers or adjustable side walls that let you quickly modify the box for different sizes.
Make your cutting process more efficient by marking specific lines on the box for each soap size you work with.
When you're ready to cut, choose a fine-toothed saw like a gent saw to prevent chipping and achieve clean cuts.
Don't forget to test-fit your soap before making the first cut – this guarantees you'll get the precise angles and depths you're aiming for.
With these adjustments, your miter box will serve you well across various soap-making projects.
Time-Saving Benefits of a Personal Miter Box
Making a custom miter box can drastically reduce the time you spend on woodworking projects.
You'll eliminate trial and error with pre-made boxes that don't quite fit your needs, and you won't waste precious minutes switching between different tools. Your personalized miter box adapts quickly to various wood sizes, keeping your workflow smooth and uninterrupted.
- You'll feel confident knowing every angle is precise, exactly as you designed it
- You'll experience the satisfaction of working with a tool that fits your hands perfectly
- You'll enjoy the rhythm of efficient cutting with a box that matches your technique
- You'll take pride in using a custom solution you created yourself
The quick build time means you'll start saving time immediately, turning your woodworking sessions into more productive and enjoyable experiences.
Achieving Professional-Grade Soap Cuts at Home
Your woodworking skills can transform into remarkable soap-making precision with a custom miter box. You'll achieve professional-looking cuts by creating a box that's perfectly sized for your soap bars, ensuring each slice meets your exact specifications.
With a well-crafted miter box, you'll master those essential 45-degree angles that give your soaps a polished, retail-worthy appearance. Using a fine saw like a gent or tenon saw through the guide slots will produce clean edges that won't need extra finishing.
Don't forget to clamp your box securely – it's the key to maintaining stability while you work.
Optimizing Your Soap Production Workflow
While crafting beautiful soaps requires artistic skill, establishing an efficient workflow transforms your hobby into a streamlined operation.
You'll maximize your productivity by implementing standardized recipes and organizing your workspace with designated areas for measuring, mixing, and pouring. Using quality equipment like stick blenders and precise measuring tools guarantees accuracy and consistency across batches.
- Your heart will swell with pride as you watch your production speed double
- You'll feel a sense of accomplishment when each batch turns out perfectly consistent
- The satisfaction of running a well-oiled soap-making operation will energize you
- You'll experience the joy of creating more of what you love with less stress
Remember to regularly review and adjust your workflow, identifying bottlenecks and making improvements to keep your operation running smoothly and effectively.
Frequently Asked Questions
What Is the Point of a Miter Box?
A miter box helps you make precise angled cuts in wood by guiding your saw at specific angles. You'll get cleaner, more accurate joints for frames, moldings, and trim work without needing expensive power tools.
Is a Mitre Box Worth It?
Yes, a miter box is worth it. You'll get precise angle cuts for professional-looking joints and cleaner woodworking results. It's especially valuable if you're working on trim, molding, or picture frames regularly.
What Is the History of the Miter Box?
You'll find that miter boxes emerged in the 19th century when carpenters needed precise angle cuts. They've evolved from simple wooden guides to today's sophisticated electric models, but their core purpose remains unchanged.
What Can You Do With a Miter Box?
You can create perfect 45° and 90° angle cuts for picture frames, molding, and trim work. You'll easily make joints for furniture, cabinets, and baseboards while maintaining consistent cutting accuracy across multiple pieces.
In Summary
You'll find that crafting your own wooden miter box for soap making is a game-changer for your production process. Beyond saving money, you're gaining precise control over cut angles and sizes while connecting with soap making's rich history. Your custom-built box will streamline your workflow, deliver professional results, and adapt to your specific needs. It's an investment in quality that'll enhance your soap making journey.


Leave a Reply