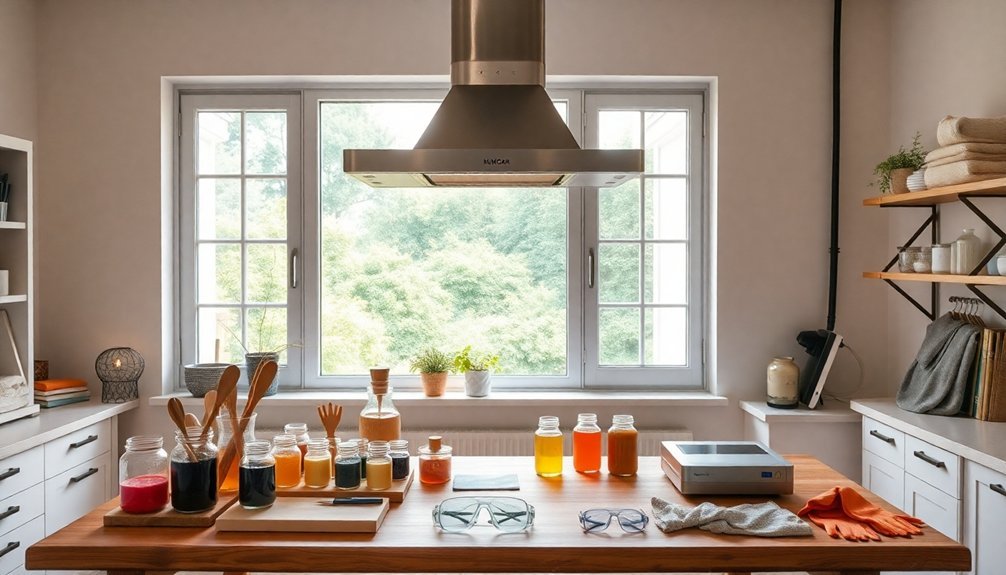
Before making soap, you'll need protective gear including nitrile gloves, chemical-resistant goggles, and appropriate clothing. Always work in a well-ventilated area and understand that lye (sodium hydroxide) is caustic but essential for saponification. Use stainless steel, glass, or heavy-duty plastic containers—never aluminum—and measure ingredients precisely with a digital scale. Keep vinegar nearby for neutralizing spills, and maintain a dedicated workspace away from food areas. The journey to beautiful handmade soap starts with these safety fundamentals.
Essential Protective Gear for DIY Soap Crafting
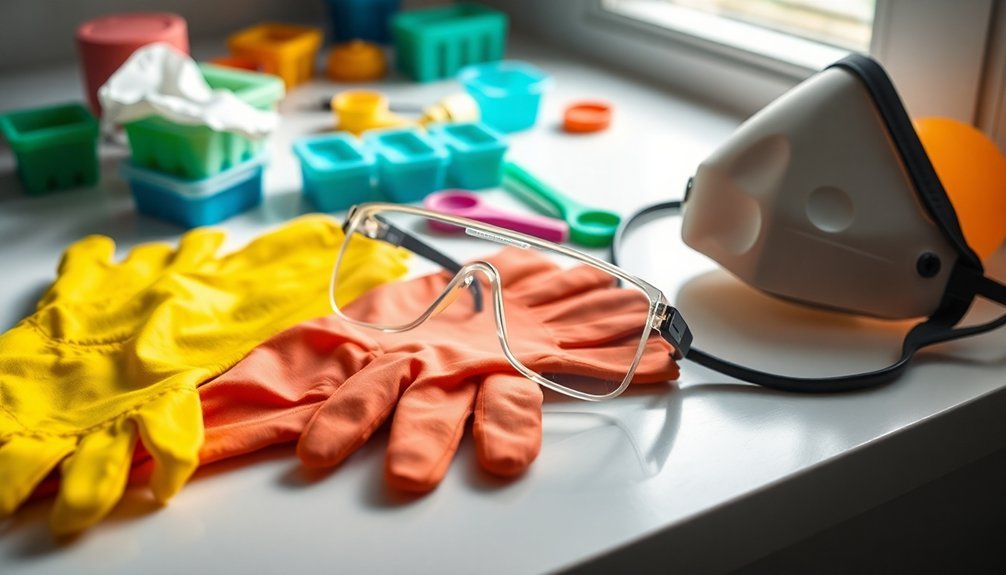
When crafting homemade soaps, proper protective equipment isn't optional—it's crucial. Start with nitrile gloves to shield your hands from caustic lye and raw soap ingredients.
Don't forget chemical-resistant safety goggles to protect your eyes from unexpected splashes. Your respiratory system needs protection too. Use a respirator with appropriate cartridges when mixing lye with water to filter out harmful fumes.
Your eyes and lungs deserve the same protection as your hands when working with lye—never compromise on proper goggles and respirators.
Wear long sleeves, long pants, and closed-toe shoes with non-slip soles to minimize skin exposure and prevent accidents. Add an apron or lab coat for extra protection against spills. Always keep a first aid kit accessible in your workspace for immediate response to any safety incidents.
Cotton clothing is preferred over synthetic materials that might melt on contact with certain ingredients. Always verify all gear fits properly—ill-fitting protection compromises your safety during the soap-making process.
Understanding Lye: The Science Behind Safe Handling
Lye's powerful alkaline structure (NaOH or KOH) makes it essential for triggering saponification, yet requires careful handling due to its caustic nature.
You'll need to understand that during proper saponification, the lye completely transforms, leaving no harmful residue in your finished soap. When lye reacts with fats, it causes the glycerol cap to separate from fatty acids, creating soap and glycerin.
When working with this reactive compound, you can neutralize potential dangers by always adding lye to water gradually and keeping vinegar nearby to counteract accidental spills.
The Chemistry Explained
When working with lye in soap making, you're handling one of the most powerful chemical agents in the craft. Understanding the chemistry behind it will help you work safely and create better soap. Lye (NaOH or KOH) reacts with fats in a process called saponification, transforming these ingredients into soap. The handling of lye requires proper safety precautions to prevent potential chemical burns or other injuries.
| Chemical Component | Function in Soap Making |
|---|---|
| Sodium Hydroxide (NaOH) | Creates hard bar soap |
| Potassium Hydroxide (KOH) | Creates liquid soap |
| Triglycerides (oils/fats) | Provide cleansing properties |
| Glycerin (byproduct) | Adds moisturizing benefits |
During saponification, lye molecules split fat molecules, creating fatty acid salts (soap) and glycerin. The dual nature of soap molecules—with water-loving heads and oil-loving tails—is what gives soap its cleaning power.
Neuturalizing Caustic Properties
The fascinating chemistry of saponification leads us to an important aspect of soap making: neutralizing lye's caustic properties. When done correctly, the process leaves no active lye in your finished soap, making it safe for skin.
Using soap calculators is vital for determining the precise amount of lye needed for your specific oils. This prevents excess lye that could cause irritation. The complete saponification process transforms caustic sodium hydroxide into mild soap through its reaction with fatty oils.
Temperature control plays a significant role—keeping solutions between 90-100°C guarantees proper reaction in more complex processes. Remember that the proper neutralization ratio is critical when working with strong acids like sulfonic acid in more advanced soap formulations.
You'll want to maintain vigorous agitation during neutralization for thorough mixing. Adding small amounts of already-made soap can actually help facilitate the neutralization process by improving contact between reactants.
Setting Up Your Soap Making Workspace
Setting up your soap making workspace properly starts with designating a dedicated mixing area away from food preparation surfaces.
You'll need to organize safety equipment, including gloves, goggles, and aprons, within arm's reach before handling any ingredients.
Good ventilation is essential—install a window fan or exhaust system to draw fumes away from your work area and establish proper airflow. Choose a sturdy, flat table for your work surface that can withstand spills and is easy to clean after your soap making sessions.
Designate Dedicated Mixing Area
Creating a dedicated mixing area forms the foundation of safe soap making. Position your station near a sink for easy cleanup while maintaining good ventilation to disperse lye fumes. Keep your workspace clutter-free and organize supplies strategically to prevent cross-contamination and accidents. Ensure this area remains pet-free zone to protect curious animals from exposure to dangerous ingredients.
| Area Component | Safety Consideration | Practical Benefit | Must-Have Feature |
|---|---|---|---|
| Work Surface | Sturdy, flat, non-porous | Prevents spills and contamination | Heat resistance |
| Storage | Labeled, secure containers | Prevents accidents | Airtight seals for chemicals |
| Mixing Zone | Away from food prep areas | Prevents cross-contamination | Dedicated tools only |
| Emergency Station | Easily accessible | Quick response to accidents | Vinegar for lye spills |
Remember to measure all ingredients before starting and keep children and pets away from your soap making area at all times.
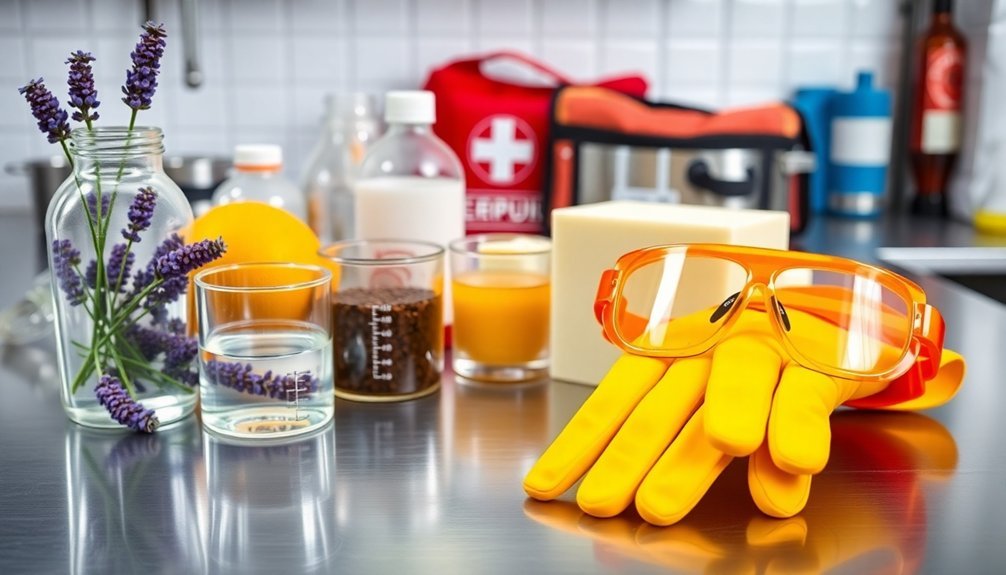
Organize Safety Equipment First
Properly organized safety equipment serves as your first line of defense against soap making hazards. Before measuring any ingredients, gather your protective gear including safety goggles to shield your eyes from splashes, rubber or nitrile gloves to protect hands from caustic lye, and an apron to safeguard clothing.
Don't forget closed-toe shoes and long sleeves for thorough protection.
- Position your first aid kit within immediate reach, along with a container of vinegar (which neutralizes lye) for quick response to accidents.
- Arrange measuring tools separately from protective equipment to prevent cross-contamination.
- Set up your respirator or mask near your mixing station – you'll need it when working with lye to prevent inhalation of harmful fumes.
Ensure your workspace remains clean and clear of any clutter to prevent accidents and maintain efficiency throughout the soap-making process.
Proper Ventilation Setup
When working with lye and other soap-making chemicals, adequate ventilation becomes as essential as your protective gear.
Always mix lye in a well-ventilated area to prevent dangerous fume accumulation. Set up your workspace near windows and use exhaust fans to direct fumes away from your breathing zone.
Never work in enclosed spaces like small bathrooms or closets. Instead, choose large, open areas where air circulates freely.
Position your work table near windows for natural airflow, and supplement with mechanical ventilation like exhaust fans or fume extractors. The harmful vapors released during lye mixing can cause respiratory irritation if inhaled.
While air purifiers can help maintain air quality, they're not sufficient alone for lye fumes.
Remember to regularly maintain your ventilation systems by cleaning fans and replacing filters as needed.
For additional protection when ventilation isn't ideal, wear a proper respirator.
Proper Equipment Selection for Traditional Soap Methods
Successful traditional soap making begins with selecting the right equipment for safe and effective production. When choosing containers, opt for stainless steel, glass, or heavy-duty plastic vessels that won't react with lye.
The foundation of quality soap making lies in choosing proper equipment—stainless steel, glass, or heavy-duty plastic containers that resist lye reactions.
Never use aluminum containers as they'll react with lye and potentially contaminate your soap.
- Essential tools: Invest in a reliable thermometer to monitor temperatures, rubber gloves and safety goggles to protect yourself from chemical burns, and an immersion blender to speed up emulsification.
- Mold options: Silicone molds offer flexibility and easy release, while wooden molds can be customized for unique designs. Even simple items like lined cardboard boxes work well for beginners. This reflects the historical evolution from ancient soap makers who utilized wooden and terracotta molds to shape their soap paste.
- Mixing implements: Use non-reactive spoons or paddles for manual mixing, particularly for cold-process soaps where controlling trace is vital.
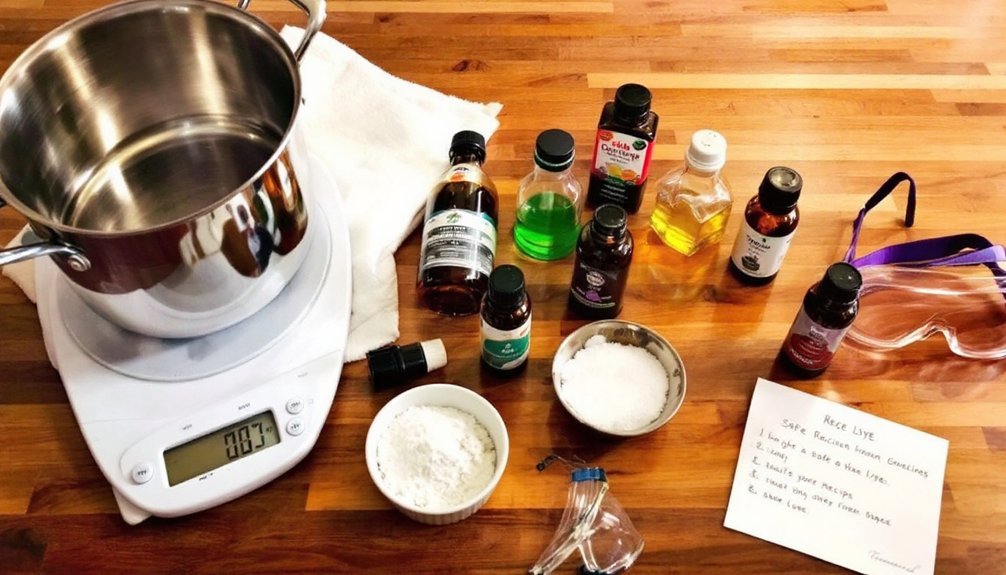
Measuring Ingredients: Precision Equals Safety
Accurate measurement forms the cornerstone of safe soap making, much like a chef follows exact proportions in a delicate recipe. You'll need to weigh—not measure by volume—all ingredients to guarantee your soap isn't dangerously lye-heavy or ineffectively oil-heavy. Unlike cooking where approximations often work, successful saponification requires exact measurements for each ingredient in your soap recipe.
| Measurement Type | Accuracy | Safety Impact |
|---|---|---|
| Digital Scale | Highest | Essential |
| Kitchen Cups | Poor | Dangerous |
| Percentages | Scalable | Reliable |
Always use a lye calculator to determine exact amounts needed for your specific oils. Different oils require different lye ratios—a miscalculation can result in caustic soap that burns skin. Pre-measure all ingredients before starting, and maintain detailed records of each batch. Remember that environmental factors like humidity can affect measurements, especially with hygroscopic lye.
Ventilation Requirements for Cold Process Soap Making
Beyond precise measurements, proper ventilation stands as your next line of defense in safe soap making.
When working with lye and essential oils, you'll release caustic fumes and VOCs that require immediate removal from your workspace. Don't rely solely on air purifiers—they can't handle the specific challenges of soap making chemicals. Mixing lye with distilled water creates a reaction that produces dangerous fumes which must be properly ventilated.
- Choose your location wisely – Work outdoors when possible or use a room with windows that open and a fan exhaust system directing air outward.
- Protect your lungs – Wear appropriate respiratory protection when handling lye and fragrance oils.
- Maintain air circulation during curing – Place your freshly made soaps in well-ventilated areas with consistent airflow to prevent moisture buildup and mold formation.
Step-by-Step Lye Solution Preparation
Preparing your lye solution correctly represents the most critical phase of soap making, where precision can mean the difference between a beautiful bar and a dangerous mess.
Always wear safety goggles, rubber gloves, and protective clothing before starting.
First, measure your lye and water precisely with a digital scale—never eyeball these amounts.
Place your water in a heat-resistant container, then slowly add the lye to the water—never the reverse.
Stir gently with a stainless steel or heat-resistant plastic spoon until fully dissolved.
The mixture will heat up rapidly and release fumes, so work in a well-ventilated area.
The chemical reaction you're witnessing is the beginning of saponification process, which transforms your ingredients into soap.
Allow your solution to cool to approximately 100°F before combining with oils.
Always clearly label containers and keep your workspace organized to prevent accidents.
Emergency Response for Chemical Accidents
Despite your best preventive measures, accidents can still happen when working with caustic substances like lye. Knowing how to respond quickly can prevent serious injuries and minimize damage.
Always keep your emergency response kit within reach of your soap making area.
When a chemical accident occurs:
- Act immediately – For skin contact, flush with cold water for 15 minutes. For eye exposure, use an eyewash station or clean running water, then seek medical attention.
- Contain spills safely – Neutralize lye spills with vinegar before cleanup. Always wear protective gear and avoid touching chemicals directly. Regular maintenance of ventilation systems is essential to prevent harmful chemical vapor accumulation during cleanup.
- Document the incident – Record what happened, the response taken, and any injuries to improve future safety protocols and comply with regulations.
Child and Pet Safety During Soap Production
Establish secure work zones by designating a specific area for soap making that's completely off-limits to children and pets.
Install childproof locks on cabinets containing lye and other toxic ingredients, and always store these materials on high shelves out of reach.
Label all containers clearly with "POISON" warnings and keep the poison control number (1-800-222-1222) posted prominently in your workspace.
Remember that sodium hydroxide lye can cause severe burns on contact, making it vital to maintain a completely kid-free environment during the soap-making process.
Secure Work Zones
When creating handmade soap, your workspace must be completely off-limits to children and pets due to the dangerous chemicals involved.
Establish a dedicated area that's well-ventilated and clutter-free to prevent accidents. Choose a location where pets are naturally inactive or time your soap-making sessions during their nap times to minimize risks. Remember that lye is caustic and requires appropriate safety precautions to prevent serious burns or injuries.
- Create physical barriers – Set up your workspace in a room with a door you can close, or use baby gates to block access while you're working with caustic ingredients.
- Store supplies securely – Keep all soap-making ingredients in locked cabinets or high shelves with clear warning labels.
- Maintain vigilance – Develop emergency protocols and keep spill kits nearby containing absorbent materials like kitty litter and paper towels.
Poison Prevention Measures
The hazardous chemicals used in soap making require stringent poison prevention measures to protect your loved ones. Keep all soap-making supplies in their original, clearly labeled containers and store them in high cabinets secured with child-safety latches. Never transfer chemicals to food containers that might confuse children. Melt-and-pour products are safer alternatives when making soap with children around.
| Prevention Strategy | For Children | For Pets |
|---|---|---|
| Storage Solutions | Use locked cabinets at adult height | Keep in closed rooms pets can't access |
| Work Area Safety | Create a separate workspace | Use barriers during soap production |
| Emergency Planning | Post Poison Control: 1-800-222-1222 | Save vet emergency contact |
| Education | Teach children about "no-touch" items | Train pets to avoid work areas |
Remember to properly dispose of unused chemicals following local guidelines rather than storing them indefinitely, reducing potential exposure risks.
Curing and Storage Safety Protocols
Proper curing and storage of handmade soap guarantees both safety and quality, while extending the product's shelf life.
After unmolding your soap (typically after 48 hours), wear gloves to protect your skin from residual lye and cut it into bars to increase surface area for better drying.
Your soap needs to cure for at least six weeks in a cool, dry location with consistent airflow. Maintaining temperature between 60-80°F creates ideal conditions for the curing process.
During this time:
- Monitor weight changes regularly to track water evaporation and determine when your soap is fully cured
- Use fans and dehumidifiers to accelerate the curing process safely without compromising quality
- Avoid plastic wrapping freshly cured soap and instead store in breathable containers like cardboard boxes, away from bathroom humidity
Responsible Waste Disposal for Soap Makers
Responsible waste disposal represents a critical aspect of ethical soap making that extends beyond your workshop walls. Improper disposal can contribute to water pollution and community health issues, while proper methods protect both the environment and your legal standing.
Consider implementing soap recycling techniques like scraping and reprocessing. You'll reduce landfill waste while potentially creating new revenue streams through recycled products or donations. Organizations like Clean the World offer partnership opportunities that divert soap from landfills while helping communities in need. Their impressive program has diverted 29 million pounds of soap waste from landfills since 2009.
Soap recycling transforms waste into opportunity—benefiting your business, the environment, and communities worldwide.
Always comply with local waste management regulations to avoid fines. Implement energy-efficient practices in your recycling process to minimize your carbon footprint.
Remember that eco-friendly packaging for your recycled soap completes the sustainability cycle and appeals to the growing market of environmentally conscious consumers.
Frequently Asked Questions
Can I Substitute Lye With a Safer Alternative?
No, you can't substitute lye in true soap making. If you're concerned about safety, try melt-and-pour soap bases instead. They're pre-made with lye but allow you to create custom soaps without handling lye directly.
How Do I Know When My Soap Is Safe to Use?
Test your soap's pH (8-9 is ideal), use phenolphthalein to check for lye, and guarantee proper curing (4-6 weeks). You'll know it's safe when it doesn't turn pink or cause skin irritation.
What Causes Soap to Overheat During Curing?
Your soap overheats during curing when exothermic saponification reactions generate excessive heat. This can happen if you're using high temperatures, certain additives like milk or sugar, or over-insulating your molds in warm environments.
Can I Make Soap Without Specialized Equipment?
Yes, you can make soap without specialized equipment. Use kitchen items like measuring scales, stainless steel pots, and silicone molds. Improvise with shoeboxes lined with freezer paper and a kitchen thermometer for temperature control.
Are Natural Colorants Safer Than Synthetic Ones?
Natural colorants aren't inherently safer than synthetic ones. Both have potential risks if not used properly. You'll find that FDA-approved synthetic colorants offer more consistency, while natural options vary in quality and safety profiles.
In Summary
You've now equipped yourself with the vital safety knowledge needed to begin your soap making journey. Remember, protection isn't optional—it's essential. Prioritize proper gear, meticulous measurements, and a well-organized workspace. Always respect lye's dangerous properties while understanding its chemistry. By following these safety protocols and being prepared for emergencies, you'll create beautiful soaps without unnecessary risks. Happy crafting!


Leave a Reply