Artisanal bar cutting relies on traditional tools like wire cutters, bench scrapers, and rulers to achieve uniform slices. You'll need a stable cutting surface and proper temperature control (below 70°F) for ideal consistency. Prepare by sanitizing your workspace, marking clear cutting lines, and wearing protective gear. Apply consistent pressure while cutting to create clean edges. Different cultures employ unique techniques, from Marseille's olive oil soap traditions to specialized scoring methods that preserve intricate designs. These centuries-old practices await your hands.
The Origins of Artisanal Soap Slicing
Four thousand years of soap-making history laid the foundation for today's artisanal soap slicing traditions.
While ancient Babylonians created soap-like substances around 2800 BC, the deliberate cutting of soap into bars evolved through millennia of craftsmanship.
The art of soap cutting transcends time—transforming ancient formulations into perfectly portioned expressions of human ingenuity.
As soap production became a respected trade in medieval Europe, guilds developed specialized techniques for cutting their valuable creations.
These early artisans used simple tools to slice soap blocks into uniform pieces, establishing practices that modern soap makers still honor.
You'll find echoes of this history in Mediterranean regions like Marseille and Castile, where traditional soap cutting reflected the premium nature of olive oil-based soaps.
This heritage of hand-slicing continues today as artisans reject mass manufacturing to maintain control over the aesthetic and quality of each bar.
Traditional soap making, particularly the cold process method, ensures that natural glycerin remains in the final product, enhancing its moisturizing properties.
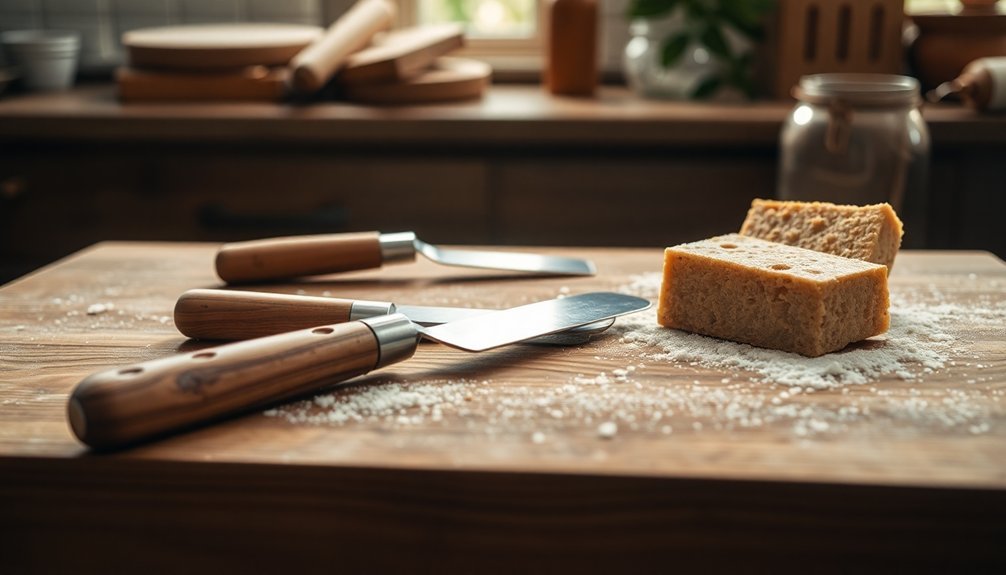
Essential Tools for Traditional Bar Cutting
The artisan's touch begins with selecting the right implements for soap cutting. You'll need basic hand tools that balance precision with craftsmanship while guaranteeing your safety throughout the process.
| Essential Tool | Purpose |
|---|---|
| Wire Cutter | Creates clean, smooth cuts through soft soap bars |
| Bench Scraper | Provides straight edges and uniform thickness |
| Rulers/Guides | Guarantees consistent measurements between cuts |
| Cutting Board | Offers stable surface that won't damage blades |
| Safety Gloves | Protects hands during precision cutting work |
When working with handmade soaps, these traditional tools offer better control than power alternatives. Securing your materials with clamps or vises prevents unwanted movement during the cutting process. Your measuring tape becomes invaluable for marking uniform sizes, while files can smooth any rough edges after cutting. Remember that properly maintaining these simple tools preserves both their functionality and the quality of your artisanal bars.
Preparing Your Workspace for Safe Cutting
Creating a safe, functional workspace marks your first step toward successful artisanal bar cutting. Keep your area below 70°F to maintain chocolate consistency, and guarantee ample lighting for precision work.
Position a sturdy cutting surface at a comfortable height to prevent strain during extended sessions. Organize your tools by frequency of use, making sure they're easily accessible but not cluttering your workspace.
Label designated areas for cutting, cooling, and cleaning to improve efficiency. Before beginning, sanitize all surfaces and tools with soap and warm water, then dry thoroughly.
Don't forget personal safety—wear protective gloves, secure long hair, and avoid loose clothing that could interfere with your work. Working in a cooler environment helps prevent chocolate from melting during handling and improves assembly success. Regular breaks will prevent fatigue and help you maintain the focus needed for artisanal precision.
Measuring and Marking Techniques for Uniform Bars
You'll need a reliable straight edge and marking tools to create perfectly uniform artisanal chocolate bars.
Position your ruler firmly against the chocolate block and mark your cutting lines with a light touch using an edible marker or the tip of a knife.
These precise markings will serve as your cutting guide, ensuring each piece maintains consistent dimensions for professional presentation.
For the most accurate measurements, especially with artisanal chocolates, always use weight measurements rather than volumetric ones.
Essential Marking Tools
Precision marking stands at the heart of creating uniform artisanal chocolate bars.
You'll find pencil marking is the simplest approach for indicating cutting lines without damaging your chocolate. For more professional results, consider using stencils that create consistent marks across multiple batches.
When aiming for brand recognition, consider using stamping tools imprint designs or logos directly onto your bars. Higher-end operations might leverage laser marking for unprecedented precision, while hot seal marking offers an elegant embossed finish.
To maintain consistency, incorporate measurement guide templates alongside your marking tools. These pre-made guides guarantee uniform divisions across all your chocolate bars. Using digital scales ensures your chocolate bars have consistent weight across batches.
Pair these with square templates or grid guides when you need perfectly geometric shapes and evenly spaced sections in your final product.
Straight Edge Techniques
Now that you've established your marking guides, implementing proper straight edge techniques will transform those markings into perfect chocolate bars.
Position your straight edge firmly along the marked lines, ensuring it doesn't shift during cutting. Apply light, consistent pressure when cutting through tempered chocolate to prevent tearing or jagged edges.
For uniform thickness (typically ½ to ¾ inches), use PVC pipes as guides on either side of your chocolate slab. This creates a level surface for your straight edge to glide across. The food safe PVC pipes are readily available at home improvement stores and work perfectly for chocolate applications.
When measuring, allow for a small overlap if you're using acetate sheets for wrapping.
Timing is critical—cut when the chocolate is set but still slightly pliable.
The Classic Wire Cutter Approach
To master the classic wire cutter approach, you'll need to develop precise grip techniques that guarantee clean, even cuts across your chocolate bars.
Your chocolate's temperature must be carefully controlled—too warm and it'll stick to the wire, too cold and it might crack during cutting. Proper control of temperature is crucial, just as in the tempering process where chocolate must reach specific temperatures to develop the correct crystal structure.
Maintaining proper wire tension is equally essential, as a taut wire creates smooth edges while a loose one can drag through the chocolate and create uneven surfaces.
Precision and Grip Technique
Mastering the classic wire cutter approach requires equal attention to both precision and grip technique. You'll want to maintain a firm but not overly tight grip on your cutter, ensuring control without strain. Hold your position steady while cutting to achieve uniform pieces.
When preparing your workspace, opt for non-reactive surfaces like marble or granite instead of wood, which can absorb chocolate's natural oils. Remove beveled edges from chocolate blocks before cutting to improve stability. Using a serrated knife is recommended for achieving clean cuts through chocolate blocks of any size.
Your cutting angle should remain shallow, especially with thicker chocolates that require more force. Apply consistent pressure throughout your cut, moving swiftly but carefully along a straight path. This preserves the chocolate's texture and creates clean edges that enhance both appearance and melting properties.
Temperature Control Essentials
Temperature control represents the cornerstone of successful artisanal chocolate cutting, as even minor fluctuations can dramatically affect your results.
You'll need to maintain chocolate within the 105°F-115°F range for ideal cutting consistency. Using instant digital thermometers helps you monitor these critical temperature changes accurately.
When working with your wire cutter, remember these temperature essentials:
- Apply heat intermittently rather than continuously to maintain stability
- Consider the ambient room temperature's effect on your chocolate's setting time
- Use dry heat methods for safer, more controlled cutting
- Make sure your cutting tools are slightly warmed to prevent chocolate drag
- Adjust your approach seasonally—humidity and temperature fluctuations require different techniques
Your thermostatic control will determine the quality of your cuts, especially when using classical wire cutting techniques with varied blade sizes. For professional results, consider that commercial chocolate cutting machines offer stainless steel blades in sizes ranging from 10mm to 40mm for precise portion control.
Wire Tension Mastery
Wielding the classic wire cutter effectively hinges on your ability to master wire tension. When cutting artisanal chocolate bars, you'll find that proper tension guarantees even thickness and clean edges without unnecessary waste.
Select stainless steel or copper wires for their durability and resistance to corrosion. You'll need to adjust tension based on chocolate hardness—softer varieties require less tension to prevent crumbling.
Position the wire perpendicular to the chocolate surface and maintain a slow, steady cutting motion. Properly tempered chocolate with its characteristic snap quality will respond better to wire cutting techniques than untempered varieties.
Your hand positioning matters too. Keep your wrist at a comfortable angle and place your fingers strategically on the ergonomic handles to maintain consistent force.
With regular practice and experimentation, you'll develop the precision needed for professional-quality cuts while minimizing hand fatigue during high-volume production.
Knife Methods for Precision Edges
Professional artisanal bar cutting requires three essential knife techniques to achieve those coveted clean edges.
First, select the right knife—serrated for crusted bars, straight-edge for smoother textures.
Second, prepare your blade by lightly oiling it or warming it under hot water for chocolate-topped bars.
Third, execute firm, smooth cutting motions after scoring your lines.
For perfect precision cuts, always:
- Chill your bars slightly before cutting to minimize crumbling
- Position a ruler as a guide for straight, uniform slices
- Wipe your knife clean between each cut
- Apply cooking spray to prevent sticking when needed
- Score the surface before cutting through crusts to prevent cracking
Remember to adjust your technique based on your bars' texture—firmer pressure for dense bars, gentler for delicate ones. Placing your dessert on a stable chopping board provides the ideal surface for achieving perfectly portioned bars.
Achieving Decorative Patterns Through Slicing
You can create stunning geometric patterns by scoring your chocolate bars with parallel lines, crosshatches, or diamond shapes before they fully set.
These deliberate markings not only guide your cutting but also produce visually appealing textures that enhance the artisanal quality of your bars.
Try experimenting with different tools such as combs, textured rollers, or custom-made stamps to imprint unique surface effects that will make your chocolate creations truly distinctive.
For professional-looking results, ensure your chocolate is properly tempered before attempting any decorative cutting techniques.
Geometric Scoring Techniques
Masterful artisans create mesmerizing decorative patterns on chocolate bars through the meticulous art of geometric scoring. You'll find that precision tools like serrated blades and specialized cutters enable the creation of visually stunning designs while maintaining structural integrity.
When approaching geometric scoring, consider these essential techniques:
- Use mathematical precision to map out balanced, proportional patterns
- Apply light pressure with serrated blades to prevent breakage
- Incorporate decorative elements like hatching or crosshatching for visual interest
- Verify score depth is consistent to maintain uniform breaking points
- Balance aesthetic appeal with structural requirements
The scoring's depth and pattern directly impact how your chocolate breaks, creating both functional and decorative elements. Be aware that slight variations in angles or slopes can create visual illusions when sections are rearranged, similar to the principle behind certain chocolate bar tricks.
Surface Texturing Effects
Surface texturing effects transform ordinary chocolate bars into tactile works of art through specialized slicing techniques.
You'll need proper equipment like texture analyzers with polycarbonate probes to understand how your chocolate responds to cutting implements.
The physical properties of your chocolate greatly impact texturing success. Higher fat content creates smoother cuts, while cocoa particle size influences the precision of your patterns.
Maintain ideal temperature control to prevent sticking during the texturing process. Remember that storing chocolate above 30°C accelerates bloom due to melting and recrystallization issues, which can ruin your textured surfaces.
Your slicing techniques directly affect both tactile sensation and visual appeal. Create marbling patterns by strategically cutting through layered chocolates of different colors.
Consider how your textured surfaces will enhance the consumer's eating experience—rough textures release flavors differently than smooth ones.
Master these elements, and you'll produce chocolate bars with professional aesthetic appeal that delight both the eye and palate.
Curing Considerations Before the Cut
Before cutting your artisanal chocolate bars, proper curing demands careful attention to several critical factors. You'll find that post-harvest processing notably impacts final quality, with most defects originating during this stage rather than harvesting.
Consider these critical considerations:
- Confirm beans have been properly fermented to develop desirable flavor profiles.
- Verify complete drying to prevent mold formation and quality deterioration.
- Allow for adequate resting time to mellow astringent or acidic notes.
- Store in ideal temperature and humidity conditions to prevent bloom.
- Protect from light and moisture exposure that can compromise stability.
For optimal quality results, ensure cacao beans have rested in breathable sacks for three to twelve months after initial processing.
Troubleshooting Common Cutting Challenges
When working with artisanal bars, you'll inevitably face cutting challenges that can affect your final product's appearance and quality.
Uneven cuts often result from dull blades or improper pressure application. Keep your cutting tools sharp and clean to prevent soap debris buildup.
Monitor your environment closely—temperature and humidity greatly impact cutting success. Warm conditions cause blades to flex, resulting in wavy cuts, while improper humidity affects soap consistency.
Pay attention to your soap's composition. High oil content or inadequate curing leads to crumbling, while additives like herbs create resistance during cutting. Beware of using too many natural colorants that can affect the texture and cutting properties of your soap.
If you notice hard spots or lye pockets, adjust your formulation.
When demolding, timing is essential. Remove soap neither too early nor too late to prevent sticking issues that complicate cutting and compromise edges.
Cultural Variations in Soap Cutting Traditions
Beyond the technical challenges we just explored, soap cutting practices vary dramatically across cultures, reflecting centuries of tradition and regional artistry.
You'll find unique tools and techniques shaped by local customs, from Thai carvers using fruit-carving methods to Middle Eastern artisans crafting intricate floral designs.
When exploring global soap traditions, you'll notice these distinctive elements:
- Religious and ceremonial significance, where soaps symbolize purification
- Family-preserved techniques passed down through generations
- Regional adaptations using locally available materials
- Cultural motifs that represent important landmarks or heritage symbols
- Integration of modern tools with ancient practices
Many communities, like Lebanon's Bader Hassoun Eco-Village, specialize exclusively in traditional soap-making, preserving methods that would otherwise be lost to time while embracing sustainable innovations. The Soap Museum in Sidon, restored in 2000 from a 17th-century soap factory, now serves as a vital cultural heritage site showcasing the rich history of soap-making in the Levant region.
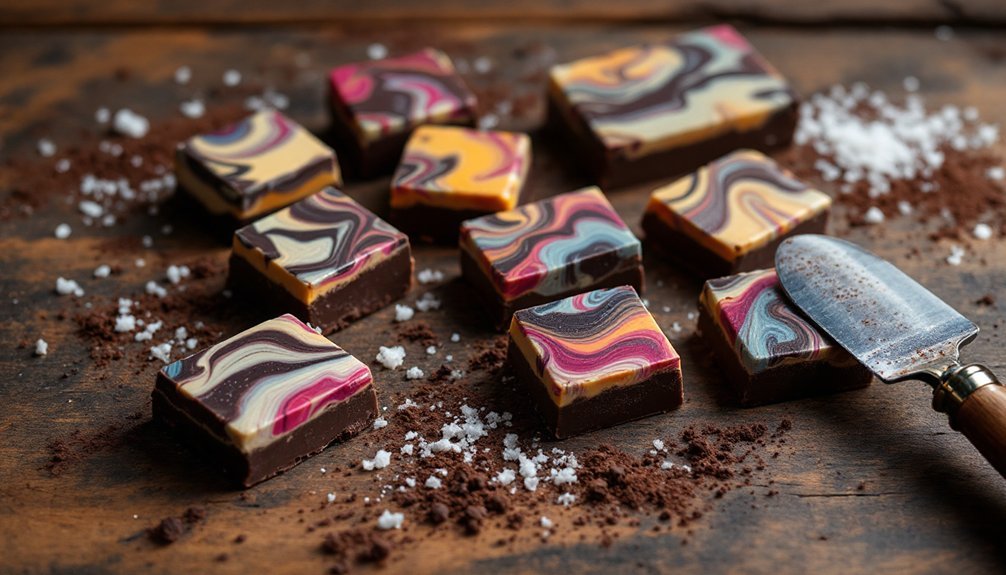
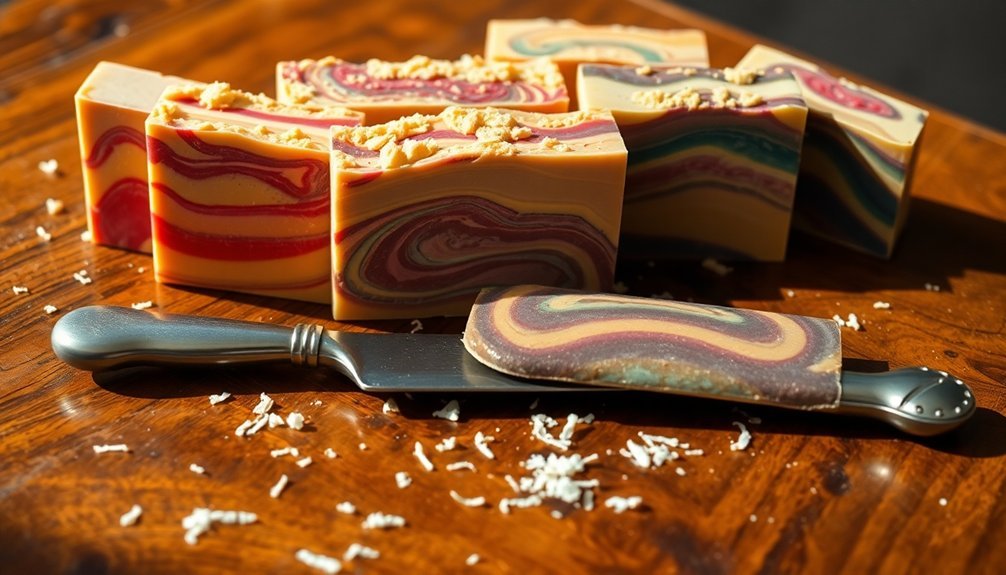
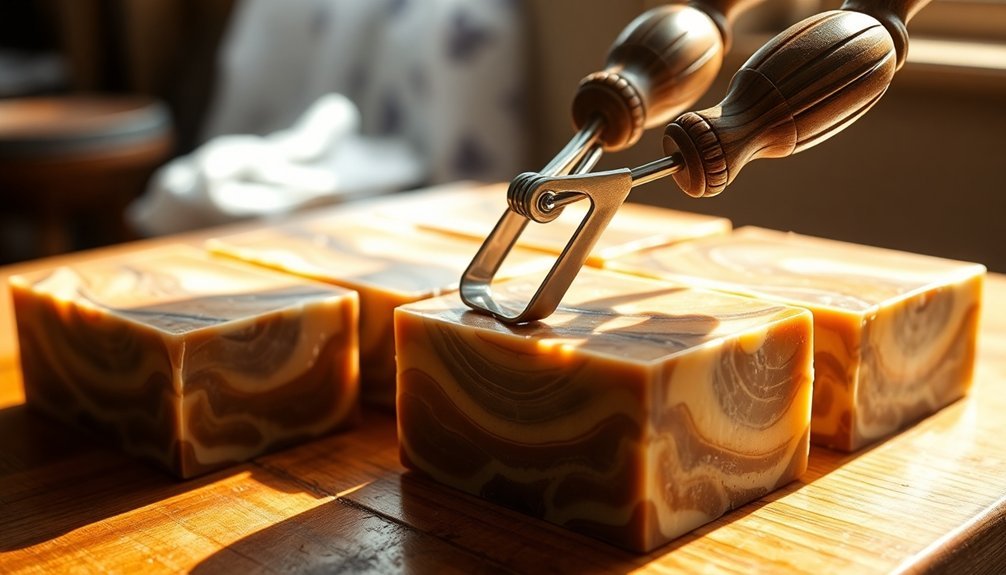
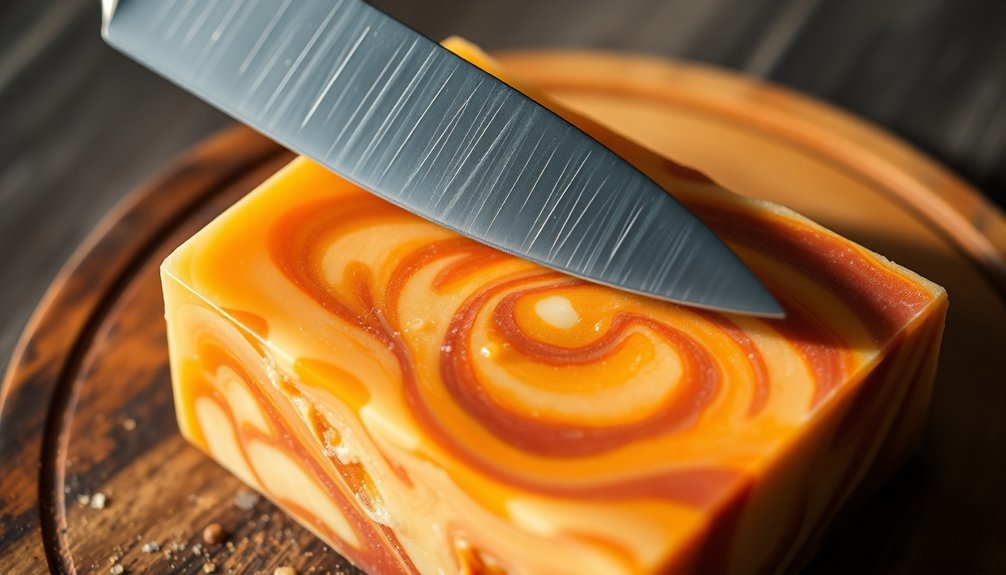
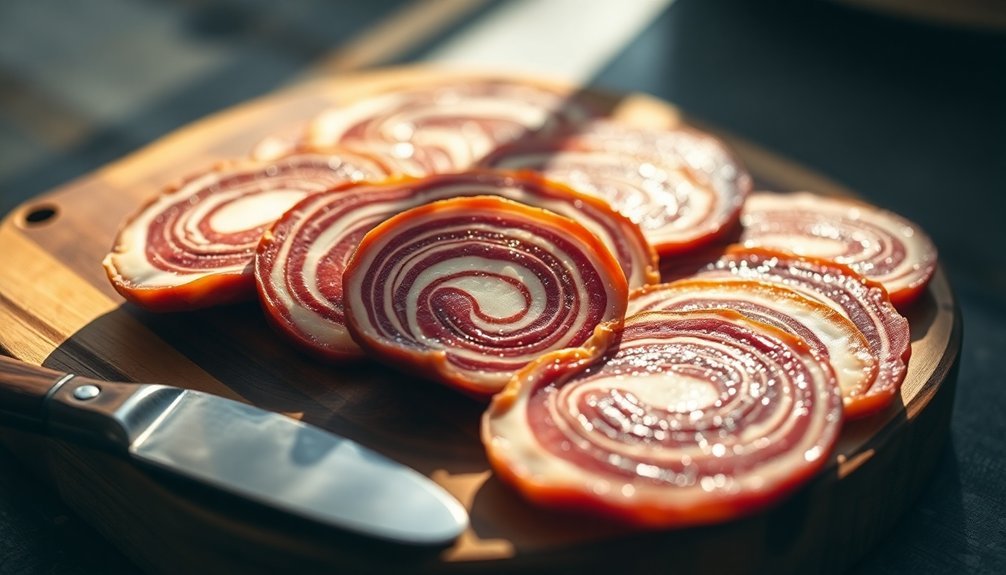
Preserving Designs When Slicing Marbled Soaps
The preservation of delicate marbled designs represents one of the most significant challenges in artisanal soap cutting.
Capturing the essence of marbled swirls demands precision and patience—artisanal soap cutting is truly where craft meets artistry.
You'll need to guarantee your soap has fully hardened before attempting to slice it, preventing any distortion of those intricate patterns.
Choose a tool that's exceptionally sharp to minimize drag, which can smear colors and ruin your design.
Apply even pressure as you cut, working on a slip-resistant surface that won't shift unexpectedly. For best results, cut your bars in a single session using a straight-down motion rather than sawing.
Before cutting, visually inspect your soap from multiple angles to identify the best cutting points that showcase the marbling.
After slicing, consider gently trimming edges and buffing surfaces to enhance the final presentation of your artisanal bars.
Weather conditions like excessive humidity may necessitate moving your soap loaf to a room with a dehumidifier running to achieve optimal firmness for clean cutting.
Packaging Freshly Cut Bars
Packaging freshly cut bars properly guarantees your artisanal soaps maintain their quality while creating a memorable impression on customers.
After cutting, allow your soaps to firm up slightly before wrapping. Kraft paper provides an eco-friendly option that's both biodegradable and cost-effective, while cellophane preserves moisture. Using boxes can give your soaps a professional look and can be customized with your branding.
When selecting your packaging strategy, consider these essential factors:
- Moisture control – wax paper or parchment paper creates an effective barrier
- Branding opportunities – cigar bands or wrap-around labels minimize waste
- Legal requirements – include ingredients, weight, and contact information
- Environmental impact – opt for recyclable or biodegradable materials
- Gift appeal – ribbons or twine add a professional finishing touch
Demonstration: Step-by-Step Traditional Cutting Process
Mastering the traditional cutting process requires patience, precision, and proper technique to transform your chocolate slabs into professional-quality artisanal bars.
Begin with room-temperature chocolate to prevent crumbling. Select a sharp chef's knife or bread knife, ensuring it's clean and recently sharpened. Place your chocolate on a wooden or marble board for stability.
Hold the knife at a slight angle and apply gentle, consistent pressure as you slice. Cut with deliberate, fluid motions rather than sawing. For optimal results, you can add a teaspoon of vegetable oil per 8 ounces of chocolate before molding to achieve better cutting consistency.
For traditional bars, mark your intended cuts first, then proceed from the center outward. Wipe your blade between cuts to maintain cleanliness.
Remember to slice slowly—rushing leads to uneven edges. This measured approach preserves the integrity of your chocolate while honoring the centuries-old craft of hand-cutting.
Frequently Asked Questions
How Long Does Hand-Cut Ice Last Compared to Machine-Made Ice?
Your hand-cut ice will last considerably longer than machine-made ice due to larger size, lower surface area, and fewer impurities. You'll notice it melts 30-50% slower, preserving your drink's flavor better.
Can Artisanal Ice Techniques Apply to Home Cocktail Enthusiasts?
Yes, you can easily apply artisanal ice techniques at home. Try directional freezing with a cooler, use silicone molds for spheres, or create clear ice with filtered water for elevated home cocktails.
Are There Sustainable Alternatives to Traditional Ice Cutting Tools?
Yes, you'll find sustainable alternatives in eco-friendly de-icers, precision tools that reduce waste, electric bandsaws that increase efficiency, and digital fabrication technologies. Community engagement and reusable materials also promote more environmentally conscious ice practices.
How Do Different Water Sources Affect Clarity and Carving Properties?
Different water sources directly impact your chocolate's clarity and carving properties. You'll find purified water minimizes impurities for clearer finish, while hard water creates firmer textures that are easier but less precise to carve.
What Certifications Exist for Professional Artisanal Ice Cutters?
You won't find specific certifications for artisanal ice cutters. Instead, focus on food safety certifications, equipment training, and bartending courses to enhance your credentials. Sommelier training can also complement your craft.
In Summary
You've now discovered the time-honored techniques of hand-cutting artisanal bars. With the right tools and preparation, you'll create uniform, beautiful soaps that honor traditional methods. Remember, patience is key when working with delicate designs. Whether you're preserving intricate marbling or simply seeking consistency, these slicing traditions connect you to generations of artisans. Try these methods today, and you'll never return to mass-produced bars again.


Leave a Reply