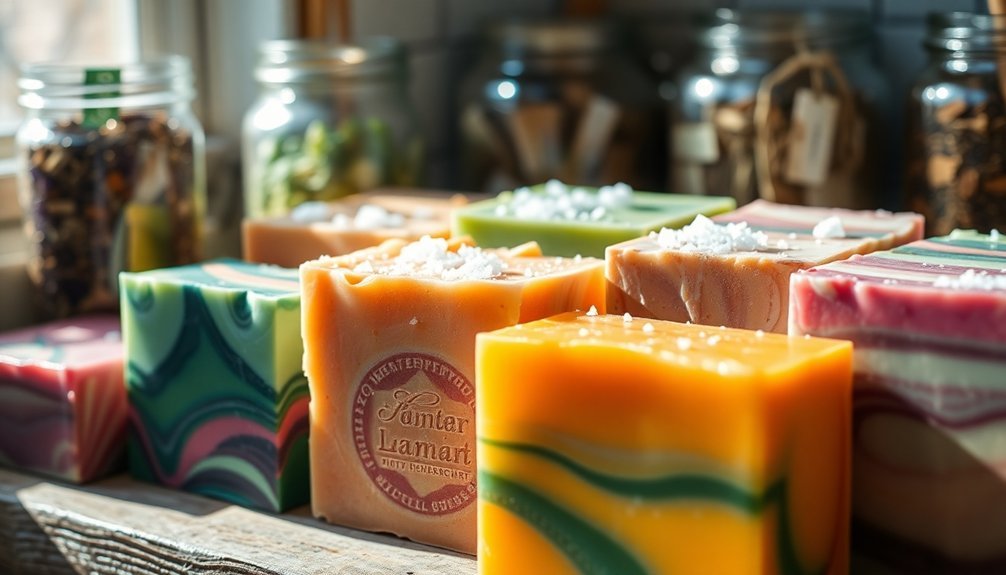
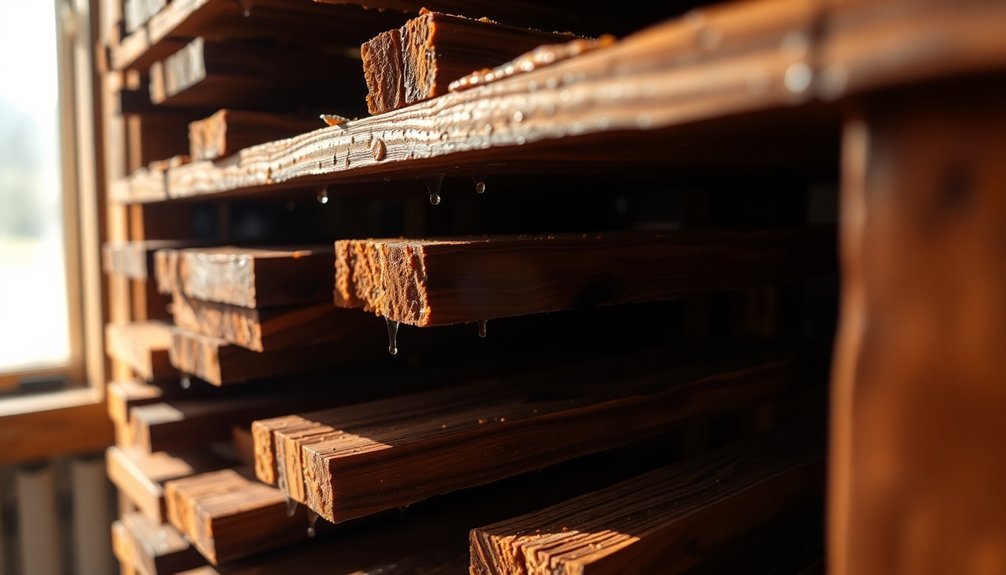
Properly curing soap bars requires a 4-8 week process in a well-ventilated space with 40-60% humidity and temperatures between 65-75°F. Space your bars 1 inch apart on breathable surfaces like wire racks. Monitor weight loss weekly until it stabilizes, indicating ideal moisture levels. Test bar hardness with a thumb press and pH levels with strips or the zap test. Your patience will transform soft, harsh soap into hard, mild, longer-lasting bars with superior lather.
Defining the Science Behind Soap Curing
While many crafters enjoy the creative aspects of soap making, understanding the science behind curing reveals why this step is vital for quality.
Curing involves several significant chemical processes happening simultaneously.
The first is saponification—the transformation of oils and lye into soap and glycerin—which typically completes within 24-72 hours. Though your soap is technically safe to touch at this point, it's still too harsh for skin use.
During curing, water evaporates, making your bars harder and longer-lasting. Simultaneously, atmospheric carbon dioxide interacts with the soap, reducing its alkalinity through acidification. This natural neutralization creates milder soap that's gentler on skin.
As these processes unfold, soap molecules form more solid crystalline structures, enhancing lather quality and overall performance. The proper full cure results in soap that provides optimal performance with improved lather and moisturizing properties.
Essential Factors That Determine Optimal Cure Times
Five critical factors determine how long your soaps need to cure, with recipe composition being the most influential. Soaps high in olive oil typically need longer curing periods than those with more coconut oil.
Environmental conditions like humidity, temperature, and air circulation considerably impact cure efficiency. You'll find larger bars take longer to dry than smaller ones due to their higher moisture content. Proper curing leads to harder, longer-lasting soap that performs better and feels gentler on the skin.
| Factor | Impact on Cure Time |
|---|---|
| Oil Type | Olive oil: 6+ weeks; Coconut oil: 4+ weeks |
| Humidity | High: extends cure; Low: accelerates cure |
| Size | Larger bars need more time than smaller ones |
| Ventilation | Poor airflow extends cure time considerably |
| Temperature | Warm (65-75°F) conditions optimize curing |
You can test cure readiness through visual inspection, touch tests, lather quality, and tracking weight loss as moisture evaporates.
Setting Up the Perfect Curing Environment
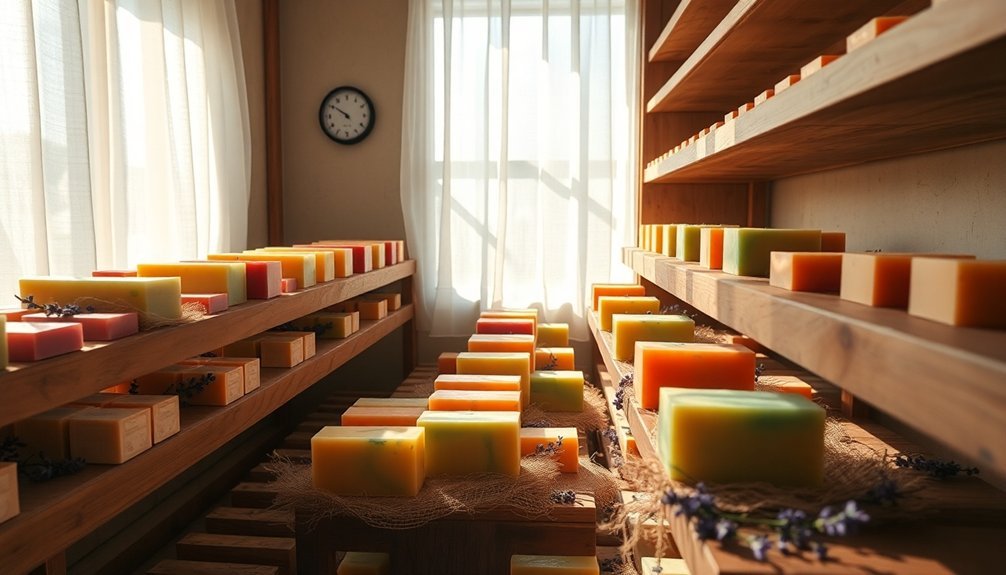
Creating the ideal curing environment for your soap bars requires careful attention to three key elements: temperature, humidity, and airflow.
You'll want to maintain a consistent temperature between 50-60°F to guarantee even moisture retention and control microbial growth.
For humidity management, aim for around 70% humidity levels, though this may vary depending on your soap formulation.
Consider repurposing a refrigerator as a cost-effective curing chamber by adding humidity controls. Regular monitoring with digital loggers will help maintain stability.
Keep your curing space dark and well-insulated to protect against contamination and temperature fluctuations.
Before use, thoroughly clean and sterilize your curing chamber with diluted bleach solution as recommended for meat curing chambers.
Organize your space for easy access, allowing efficient monitoring and maintenance throughout the curing process.
Using Weight Loss Measurements to Track Progress
Tracking your soap's weight loss during curing provides essential data about moisture reduction and overall progress.
You'll need a digital scale to weigh bars consistently at regular intervals, recording the measurements to establish a curing curve specific to your recipe. Similar to body weight measurement, consistency in measurement conditions is crucial for accurate tracking progress over time.
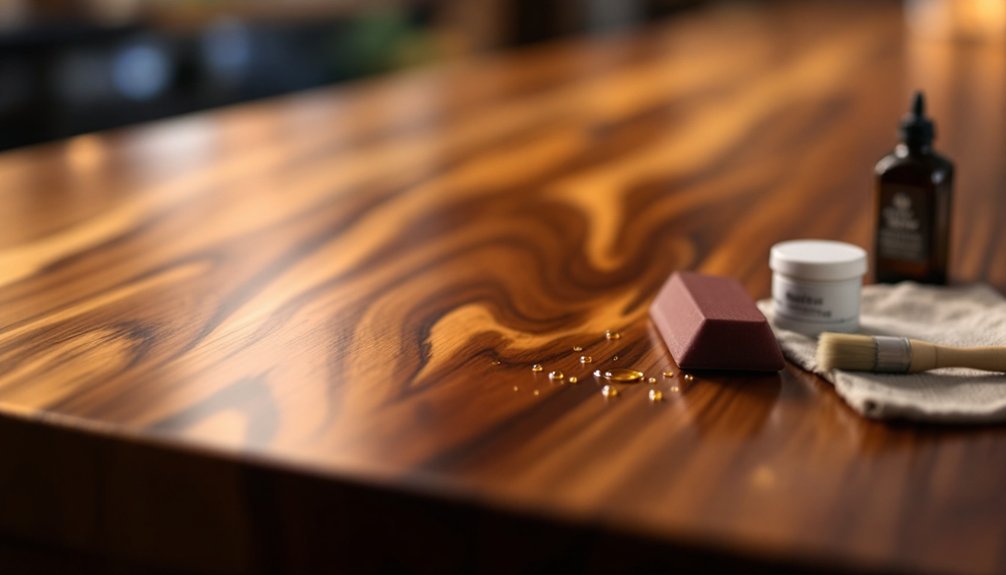
Testing soap firmness with a gentle thumb press complements weight measurements, helping you determine when bars have reached ideal hardness.
Weight Loss Tracking Methods
Effective progress monitoring forms the cornerstone of any successful weight loss journey. Using a multi-method approach provides the most thorough picture of your progress, beyond what your scale alone can tell you.
Take regular body measurements at key areas including bust, waist, hips, thighs, and arms to track compositional changes. While traditional scales monitor overall weight, consider incorporating body fat percentage tools like skin calipers or bioelectrical impedance scales for deeper insights. Measuring at specific anatomical landmarks ensures you're taking consistent measurements each time. For maximum accuracy, DEXA scanning offers gold-standard precision.
Consistency is essential—measure under similar conditions each time.
Combine quantitative data with visual tracking through progress photos. Digital tools and apps can streamline this process, making it easier to maintain your tracking routine. Regular monitoring enhances motivation and helps you make timely adjustments to your weight loss strategy.
Soap Moisture Reduction
Just as tracking weight loss in humans requires systematic measurement, monitoring moisture reduction in soap bars follows similar principles for achieving ideal results.
By weighing your soap bars consistently during the curing process, you'll create a reliable record of moisture evaporation over time.
When you measure your bars weekly, you're gathering concrete evidence of proper curing. Typically, you'll notice rapid weight loss during the first week, followed by a gradual decrease that eventually plateaus. This plateau signals that optimal moisture levels have been reached.
For accuracy, weigh your bars at the same time each week using a digital scale. Record these measurements to establish patterns. Soaps made with water discounting techniques will generally show faster weight stabilization than traditional recipes.
If you notice uneven weight loss or soft spots, improve air circulation around your bars by rotating them and ensuring proper spacing between each one.
Consistency Testing Techniques
While visual inspection provides clues about soap quality, implementing proper consistency testing techniques offers measurable data about your soap's curing progress.
You'll need a precision scale to track weight loss over time, revealing both the initial rapid moisture evaporation and the slower stabilization phase that follows.
- Use graphical representations to identify patterns and detect anomalies in curing
- Compare different batches to establish average weight loss rates for your recipes
- Control your curing environment by maintaining consistent temperature and humidity
- Consider the unique curing profiles of different soap types (Castile vs. glycerin)
- Document batch-to-batch variability to improve your production consistency
This data-driven approach helps you optimize recipes, guarantee regulatory compliance, and predict curing times for future batches—ultimately leading to consistently high-quality soap bars. Regular testing ensures that your soaps maintain proper saponification values, critical for both consumer safety and product performance.
The Zap Test: Verifying Saponification Completion
Once your soap has had time to set, you'll need a reliable method to confirm whether saponification has completed fully. The zap test is the most direct approach, but timing is essential—wait at least 2-5 days after making your soap before testing.
Wait at least 2-5 days before zap testing your soap to ensure accurate results about completed saponification.
To perform the zap test, lightly touch the dampened soap with your tongue while wearing gloves. If you feel a "zap" (anything from mild tingling to an electric shock sensation), your soap still contains active lye. No reaction means it's safe to use.
If your soap zaps, don't panic. Moderate zaps might resolve with additional curing time. While the zap test is criticized by some as unscientific, it has centuries of historical validity. For stronger reactions, consider rebatching.
Always rinse your mouth thoroughly if you experience any unpleasant sensation during testing.
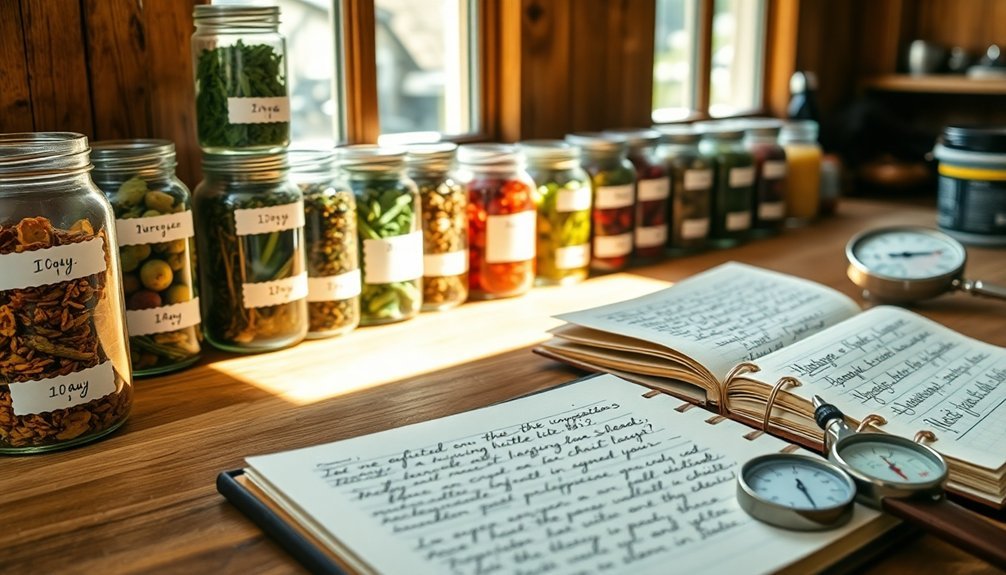
Ph Testing Methods for Determining Soap Maturity
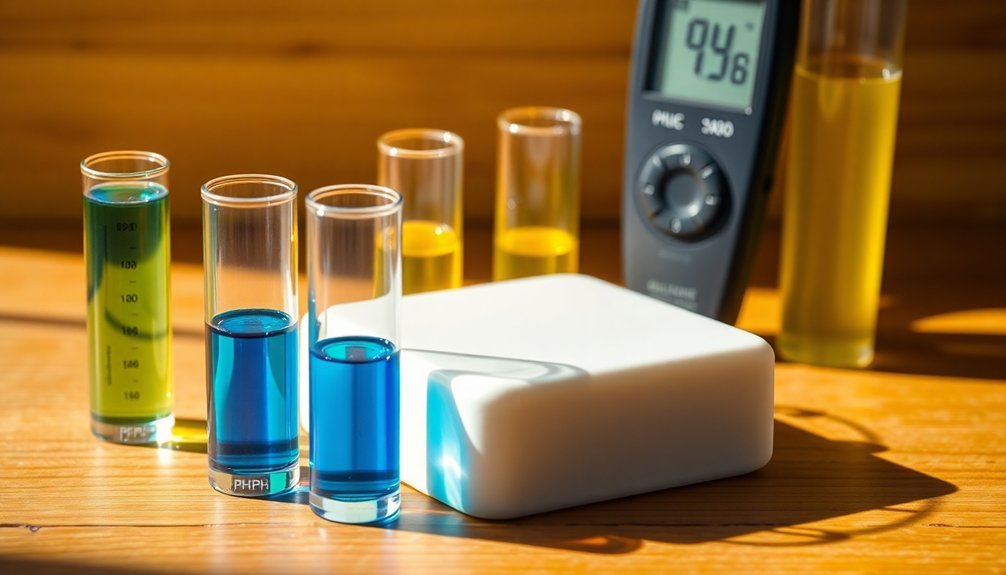
Beyond the zap test, pH testing provides a more measurable way to evaluate your soap's readiness for use. Properly cured soap typically falls between pH 8-10, making it safe for skin while maintaining effective cleansing properties.
You'll need either pH strips or a digital meter for accurate readings.
- Use pH strips on soap lather, matching colors to the provided chart
- For greater precision, invest in a digital pH meter to test diluted soap solution
- Only use distilled water in your testing to avoid contamination affecting results
- Retest your soap after curing for 2-4 weeks to confirm pH stabilization
- Consider natural indicators like red cabbage juice as an alternative testing method
Remember that pH levels typically decrease slightly during curing as excess alkali reacts with environmental CO2. This gradual decrease occurs because the pH scale is logarithmic in nature, meaning even small changes represent significant differences in hydrogen ion concentration.
Evaluating Lather Quality Throughout the Curing Process
You'll notice dramatic changes in your soap's lather as it cures, with freshly made bars producing thin, unstable bubbles that transform into rich, creamy lather over weeks.
Test your soap's progress by comparing lather at different cure stages using consistent water temperature and agitation methods.
The evolution from large, quick-popping bubbles to smaller, densely-packed ones that last longer signals your soap is reaching peak maturity. This improvement in lather quality is directly related to the ongoing crystallization process that continues well beyond the initial curing period.
Lather Evolution Timeline
While newly poured soap bars may seem ready for immediate use, tracking the lather evolution during curing reveals dramatic improvements that justify patience.
Your soap undergoes remarkable transformations as water evaporates and chemical processes stabilize over time.
- Week 1: Initial lather is minimal and quickly dissipates; high moisture content means bars dissolve rapidly.
- Weeks 2-3: Lather begins to build but remains thin; bubbles become slightly more stable.
- Weeks 4-6: Noticeable improvement in lather volume and creaminess as water content decreases.
- Weeks 6-8: Ideal lather typically emerges with balanced bubbles and stability.
- Beyond 8 weeks: Some hard oil soaps continue improving with extended curing, developing luxurious, long-lasting lather. This extended curing period mirrors the labor-intensive process historically used by traditional tanners, who would spend several weeks working on a single piece.
Testing Methods Compared
Tracking your soap's progress through proper testing is essential for determining when bars have reached their ideal quality. While several options exist, pH strips offer beginners an accessible starting point, providing immediate readings when rubbed on lathered soap.
More experienced makers might utilize the tongue test – a quick zap indicates excess lye.
For precision, pH electrodes deliver the most accurate measurements, especially valuable for commercial production. Regardless of method, you're looking for a pH between 7-10, with higher values suggesting continued curing is needed.
Don't overlook practical testing – wash your hands with the soap throughout the curing process. The ideal soap creates easy lather that rinses cleanly while leaving skin smooth rather than irritated or slimy. Experts recommend waiting 24-48 hours after making soap before conducting any pH tests to allow saponification to progress.
Document your observations to refine future batches.
Bubble Size Matters
The evolution of bubble size provides one of the most visible indicators of your soap's curing progress.
As water evaporates and crystallization progresses, you'll notice your lather transforming from sparse bubbles to rich, fluffy clouds that cleanse effectively without stripping moisture. The presence of glycerin in handmade soap significantly contributes to this lather quality improvement throughout the curing process.
- Larger, more stable bubbles signal properly cured soap with superior lather quality
- Fresh soap typically produces fewer, less stable bubbles due to higher water content
- After 4-10 weeks of curing, soap reaches peak lather performance with fluffier bubbles
- Humidity affects curing pace – lower humidity environments accelerate water evaporation
- Visual assessment of bubble size and consistency offers a practical way to evaluate cure status
You'll know your soap has properly cured when it consistently produces abundant, long-lasting bubbles rather than quickly disappearing foam.
Texture and Hardness Assessment Techniques
Accurate assessment of texture and hardness represents a critical component in the quality control process for curing bars.
You'll need to employ both objective instrumental methods and subjective sensory evaluation to guarantee consistent product quality.
Texture Profile Analysis (TPA) offers a reliable approach by mimicking the chewing process through double compression tests. This measures key parameters like hardness, cohesiveness, and springiness.
TPA replicates natural chewing through dual compression, revealing critical texture attributes essential for quality assessment.
For bars with variable textures, cutting and shearing tests using single or multiple blades provide valuable data on firmness and structure integrity.
When working with high-protein nutritional bars, pay special attention to texture stability over time. Different protein formulations considerably impact hardness development during storage.
Using a texture analyzer under consistent testing conditions will help you maintain quality control while reducing costs compared to relying solely on sensory panels. Testing with a lightweight blade at controlled speeds provides repeatable, objective results that can replace subjective visual inspections.
Managing Seasonal Variables That Affect Curing
You'll find winter temperatures slow down the drying and curing process, requiring more patience but often resulting in more complex flavors.
In contrast, summer's higher humidity presents challenges for maintaining optimal 60-70% humidity levels needed for proper curing.
Managing these seasonal extremes requires adjusting your ventilation and perhaps using climate control technologies to maintain the best 50-60°F temperature range regardless of outdoor conditions. This temperature range allows good enzymes to work effectively while preventing the rapid growth of bad bacteria that could spoil your meat products.
Winter's Slower Drying Effects
During winter months, concrete curing becomes considerably more challenging as lower temperatures dramatically slow the chemical reactions necessary for proper hardening.
You'll need to prepare differently and take extra precautions to guarantee your concrete bars cure properly without freezing damage.
- Maintain concrete temperature above 40°F for at least 24 hours after pouring
- Use Type III Portland cement and increase overall cement content in your mix
- Apply insulated blankets or create temporary enclosures to trap heat
- Extend curing periods to 14+ days to compensate for slower hydration
- Monitor temperatures regularly and protect against sudden cooling that causes cracking
Preheating your water and aggregates before mixing will prevent the concrete from freezing too quickly. Consider using electric heaters within enclosures to maintain consistent temperature throughout the curing process.
Remember that high-load structures require even more careful attention to temperature control during these challenging conditions.
Summer Humidity Challenges
While winter presents challenges with cold temperatures, summer's high humidity creates its own set of complex obstacles for properly curing bars. High humidity levels (above 60%) can greatly extend cure times and affect your final product's quality, turning what should be hours into days.
You'll notice humidity's effects most visibly in appearance—cloudy surfaces or sticky "blushing" on epoxy-based bars. Moisture can also compromise mechanical strength and alter chemical reactions in your materials. Tracking humidity levels consistently throughout the entire curing process is essential to identifying potential issues before they become permanent problems.
To combat these issues, maintain indoor humidity between 40-60% using air conditioning systems or dehumidifiers. Control ventilation by minimizing outdoor airflow while ensuring adequate internal circulation. Keep temperatures consistent (70-80°F) to prevent condensation.
Consider using materials less susceptible to humidity or adjusting your production schedule to account for regional weather patterns during particularly humid months.
Troubleshooting Common Curing Challenges
Even the most successful bars face hurdles that can impede their growth and profitability. By identifying these challenges early, you'll position your establishment for sustainable success.
Proactive problem identification separates struggling bars from thriving hotspots with sustainable growth.
From confusing menus to ineffective marketing strategies, these issues can considerably impact your bottom line.
Address these common challenges to optimize your bar's performance:
- Streamline your menu to reflect your brand and offer exceptional quality over quantity
- Implement engaging marketing strategies that foster dialogue with potential customers
- Adopt inventory tracking systems to monitor profitability and reduce waste
- Train staff to prioritize customer satisfaction and create memorable guest experiences
- Develop effective leadership practices that inspire employees and improve operational efficiency
Cultivating a positive work environment through exceptional leadership rather than just bossing will significantly increase staff retention and performance.
Tackling these issues head-on will transform your struggling bar into a thriving establishment that customers repeatedly choose.
Documenting Your Curing Journey: Record-Keeping Systems
Behind every successful bar operation lies a meticulous record-keeping system that transforms chaos into order. By documenting your curing processes, you'll guarantee consistency, save time, and maintain quality control across all your products. Implementing step-by-step instructions will clearly define your curing workflows and eliminate ambiguity for your team members.
| Documentation Type | Primary Benefit | Implementation Tool |
|---|---|---|
| Process Maps | Visual workflow clarity | Lucidchart |
| Standard Operating Procedures | Consistent quality | Digital notebooks |
| Curing Schedules | Time management | Spreadsheet templates |
| Quality Checklists | Error reduction | Mobile apps |
| Safety Protocols | Regulatory compliance | Cloud storage |
Your documentation system doesn't need to be complex—start with basic templates and evolve them as you grow. Regular audits and updates will keep your records relevant, while feedback mechanisms guarantee continuous improvement. Remember, well-documented processes make training new staff easier and provide valuable data for making informed business decisions.
Frequently Asked Questions
Can I Cure Soap in a Refrigerator or Freezer?
No, you shouldn't cure soap in a refrigerator or freezer. They'll cause condensation when removed and trap moisture rather than allowing evaporation. These environments work against the curing process you're trying to achieve.
Does Adding Fragrance Oil Affect Curing Time?
No, adding fragrance oil won't affect your soap's curing time. You'll still need the same duration for water evaporation and saponification to complete, regardless of how much fragrance you've added to your soap.
Can Cured Soap Revert to an Uncured State?
No, your cured soap won't revert to an uncured state. While it can absorb moisture and become soft when wet, the saponification process is permanent. Just keep it in a well-draining soap dish between uses.
Is There a Difference Between Curing Melt-And-Pour Versus Cold-Process Soap?
Yes, there's a significant difference. You don't need to cure melt-and-pour soap as it's pre-saponified and ready after setting (4-6 hours), while cold-process soap requires 4-6 weeks of curing.
How Does Altitude Impact Soap Curing Processes?
At higher altitudes, you'll notice faster soap curing due to lower air pressure enhancing water evaporation. You'll also experience accelerated saponification from better heat dissipation. Consider adjusting your curing times accordingly for superior results.
In Summary
Curing soap isn't just about patience—it's about precision. You'll get the best results when you've mastered the science, created ideal conditions, and used reliable testing methods. Whether you're tracking weight loss, performing zap tests, or evaluating texture changes, documentation is your ally. Remember, seasonal variables will affect your timeline, so stay flexible and troubleshoot as needed. Your perfectly cured bars are worth the wait.


Leave a Reply