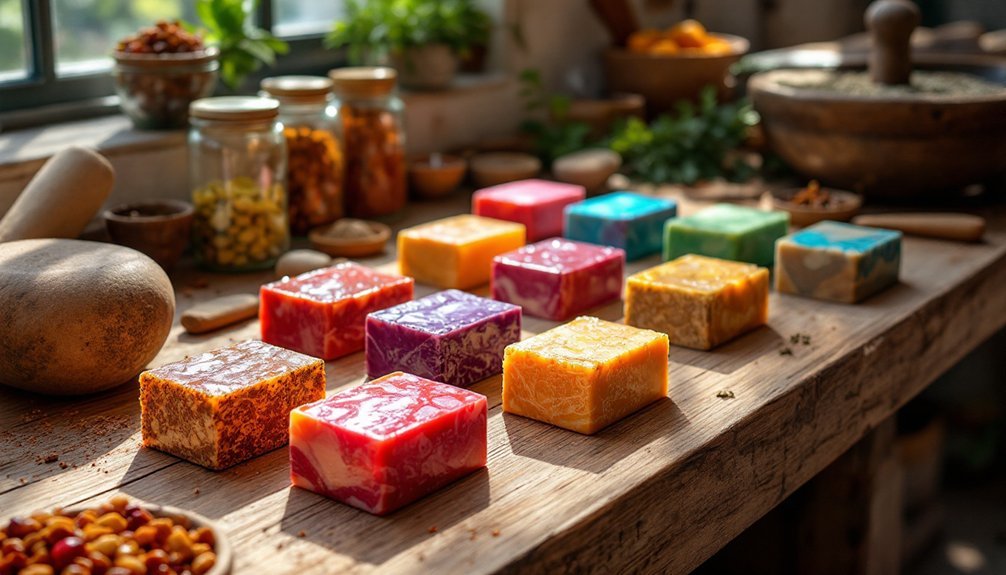
Historical soap makers perfected curing through methods you can still use today: attic drying for heat utilization, barn loft storage for ventilation, chimney-adjacent shelving for warmth, salt block aging for moisture control, window sill placement for gentle light exposure, root cellar storage for temperature stability, cheese cloth wrapping for protection, herb-infused cabinets for aromatic preservation, and seasonal rotation for climate adaptation. These time-tested techniques guarantee your handmade bars develop proper hardness, scent, and longevity – ancient wisdom awaits your modern creations.
Attic Drying: Harnessing Dry Heat and Natural Airflow
While modern soap makers often rely on climate-controlled environments, historical artisans turned to attics as natural curing chambers. These spaces naturally reached temperatures exceeding 120°F—ideal for quickly removing moisture from handmade bars.
You'll find success in attic drying by leveraging key historical techniques. Position your bars off the floor using the "sticker technique," placing small spacers between layers to maximize airflow.
Orient your stacks to catch natural ventilation, and keep them short to guarantee proper air circulation.
The benefits are substantial: you'll enjoy energy efficiency while utilizing natural heat, effective moisture removal, and superior bar quality. This method helps to ensure your soap is thoroughly cured with no residual moisture on the surface.
Harness the sun's free energy while crafting better bars through nature's time-tested drying process.
Remember to check humidity levels regularly and adjust your setup as needed. This method's beauty lies in its simplicity—using what nature provides to perfect your craft.
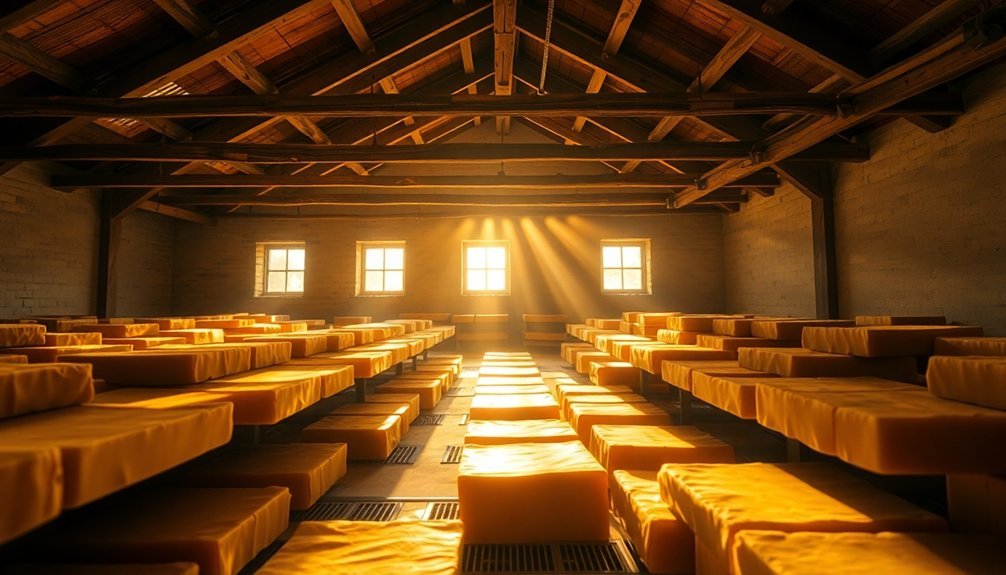
Barn Loft Storage: The Pioneer's Curing Chamber
Pioneering soap makers took their craft beyond the attic and into barn lofts, transforming agricultural spaces into sophisticated curing chambers.
These elevated storage areas offered ideal conditions for curing handmade soap bars, with their excellent ventilation and controlled environment.
When using a barn loft for soap curing, you'll benefit from:
- Natural air circulation that prevents moisture accumulation while allowing soaps to dry evenly
- Vertical organization that maximizes space and keeps bars separated for optimal curing
- Temperature stability from the insulating properties of traditional barn construction
- Protection from pests while maintaining accessibility for checking your bars' progress
The repurposing of these agricultural structures preserved both the historical buildings and traditional soap-making techniques, creating a perfect marriage of form and function. Similar to meat curing chambers, maintaining proper humidity levels is crucial for developing the ideal texture and preventing spoilage during the aging process.
Chimney-Adjacent Shelving: Utilizing Residual Warmth
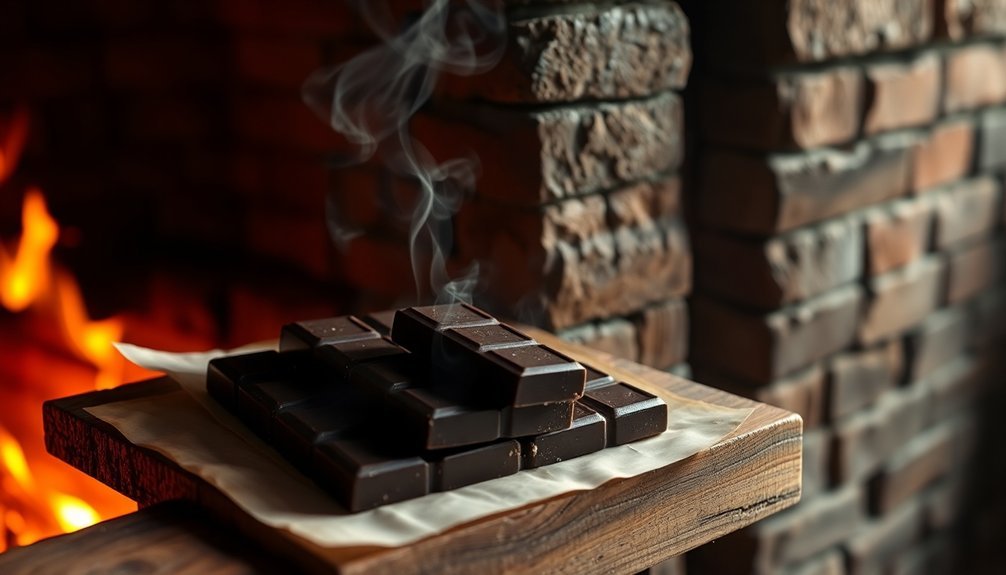
Long before modern temperature-controlled drying racks existed, resourceful soap makers discovered the perfect curing spot right beside their homes' central heating system. The chimney's gentle, consistent warmth provided ideal conditions for soap curing without additional energy costs.
You'll find that placing your soap bars near a chimney offers several advantages. The residual heat accelerates moisture reduction while maintaining proper airflow—crucial for successful curing. Traditional soap makers frequently utilized this method after the lengthy saponification process that could take up to 8 hours of boiling.
Colonial soap makers used this method to speed up drying time while protecting their creations from extreme temperature fluctuations.
When implementing this technique, monitor your soap regularly to prevent over-drying. Use protective mesh coverings to keep dust away while allowing proper ventilation.
Remember that lye-heavy soap remains caustic during early curing stages, so position your shelving away from flammable materials and children's reach.
Cellar Aging on Salt Blocks: Moisture Control Technique
In the cool depths of traditional cellars, artisanal soap makers discovered a remarkable moisture control technique using salt blocks that revolutionized the curing process.
These natural salt blocks, often Himalayan, regulate humidity and prevent both over-humidification and excessive dryness as your bars age to perfection.
For best results when using this historical method, you'll need to:
- Place your handmade bars on salt blocks within a salt tray system to prevent liquid transfer
- Inspect and drain the tray regularly to maintain effectiveness
- Replace salt blocks approximately every two years for consistent quality
- Monitor your cellar's environmental conditions alongside salt block implementation
This technique not only improves flavor profiles and aromas but also reduces spoilage while creating a visually appealing aging environment for your artisanal creations. Salt molecules diffuse with the products during the curing process, significantly enhancing flavor profile similar to how they work in meat aging.
Sun-Dappled Window Sills: Light Exposure Management
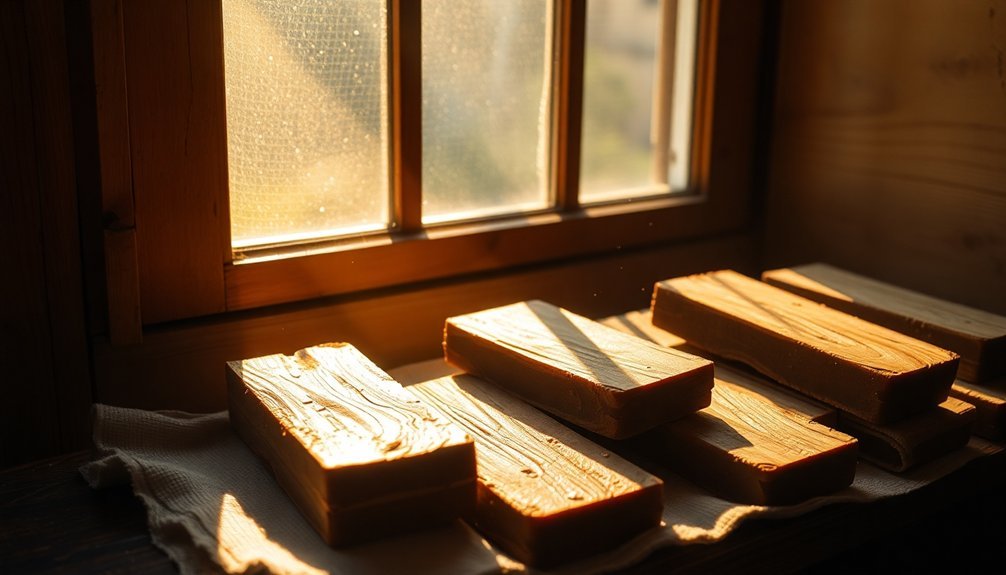
Window sills provided our ancestors with nature's ideal curing environment, where filtered morning light offered gentle drying without harsh UV damage.
You'll need to turn your bars every few hours to guarantee they dry evenly on all sides, preventing the uneven texture that plagued many early craftspeople. Consider installing warm lighting options that can complement the natural light and maintain consistent drying conditions during evening hours.
The type of window screen you use matters greatly, as finer mesh protects against insects while still allowing optimal airflow for the delicate moisture exchange process.
Filtered Morning Light
Throughout history, soapmakers discovered that gentle, filtered morning light provided perfect conditions for curing handmade soap bars.
Traditional methods leveraged sun-dappled window sills where morning rays offered just enough warmth without the harsh effects of direct exposure.
When positioning your soap in filtered morning light, remember these historical techniques:
- Place bars where light is diffused through thin curtains or mesh to prevent uneven drying or cracking.
- Use light-colored cloth coverings that maintain airflow while protecting delicate ingredients from UV damage.
- Rotate bars periodically to guarantee even exposure on all sides.
- Position soap near east-facing windows where morning sun is gentler than afternoon intensity.
This balanced approach to light exposure preserves your soap's natural colors while creating ideal conditions for even moisture evaporation and proper hardening. However, be cautious as direct sunlight can fade both colors and fragrances of your handmade soaps over time.
Turning For Even Drying
Mastering the practice of turning soap bars regularly emerges as one of history's most effective techniques for achieving perfectly cured products.
You'll need to rotate each bar at least once daily, ensuring all sides receive balanced exposure to filtered light.
Position your bars on smooth wooden window sills where morning or afternoon sun gently bathes them without the harsh intensity of midday rays. This rotation prevents uneven drying that could warp your soap's shape or texture. Similar to tuberous begonias, your soap products require filtered light conditions to develop properly without burning or degrading.
For bars containing sensitive ingredients like essential oils or botanicals, more frequent turning might be necessary.
The practice dates back centuries when soap makers noticed that uniform air circulation around all surfaces markedly improved quality.
You'll know you've mastered this technique when your bars develop an even tone and consistent hardness throughout.
Window Screens Matter
When historical soap artisans discovered the impact of light on curing, window screens quickly became essential tools in their craft.
These simple barriers offered precise control over the UV exposure that determined your bars' quality and longevity.
Window screens provide four key benefits for proper soap curing:
- UV Filtering – Screens reduce harsh sunlight while allowing beneficial UV wavelengths to penetrate.
- Consistent Exposure – They eliminate the variability of direct sunlight, ensuring even curing.
- Temperature Regulation – Screens prevent excessive heat buildup that could melt or damage your bars.
- Protection – They keep dust, insects and debris away from your freshly made products.
Modern window tint films can enhance traditional screens by blocking 98% of UV light while still allowing visible light for monitoring your products during curing.
You'll find this historical wisdom remains relevant today—the humble window screen continues to balance natural light benefits with necessary protection.
Mesh-Covered Outdoor Racks: The Mediterranean Method
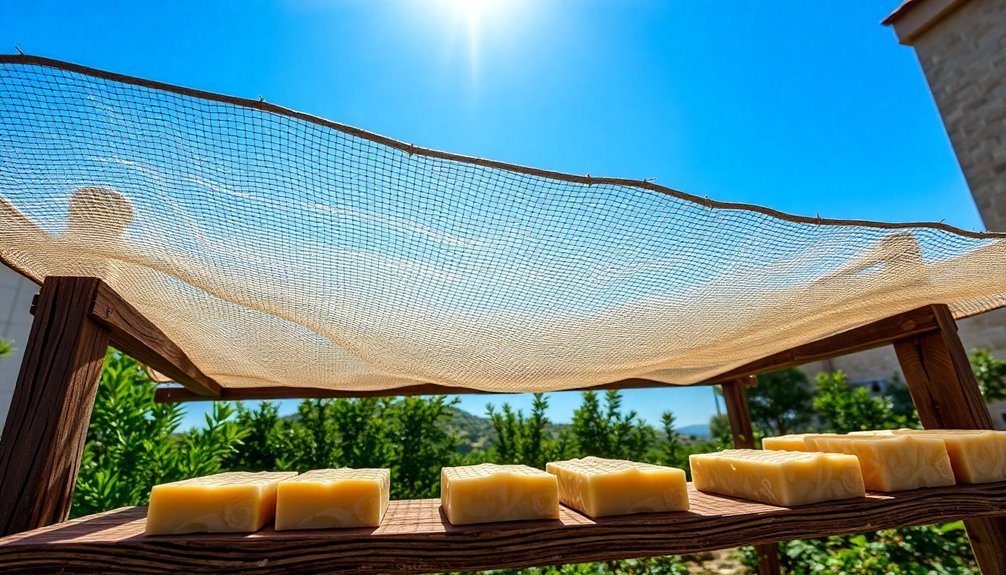
As soap artisans have discovered for centuries, mesh-covered outdoor racks provide an ideal environment for curing handmade soap bars in warm, arid climates.
This traditional Mediterranean technique maximizes airflow while protecting your bars from direct sunlight that can fade colors and overheat your creations.
You'll want to verify your soap has initially hardened for at least 48 hours before transferring to these racks.
Design your setup with breathable mesh that prevents bars from sticking while allowing proper ventilation around each piece.
The dry climate helps extract excess moisture effectively, enhancing your soap's texture and longevity.
If you're in a dustier region, opt for finer mesh to keep contaminants away.
Remember that smaller bars will cure faster, and you'll need to adapt this method based on your local humidity and temperature conditions.
Spanish soapmakers traditionally used recycled olive oil to create Castile soap, demonstrating sustainable practices that we can still learn from today.
Root Cellar Curing: Temperature Stability Approach
Root cellars provide an ideal environment for curing handmade bars with their naturally stable temperatures between 32°F and 40°F.
You'll find these underground spaces were historically valued for preserving bars through seasonal changes, as the earth's insulation protects against temperature fluctuations that could compromise quality. These structures typically have dirt floors that contribute to the temperature stability and natural insulation.
While maintaining the high humidity levels (85-95%) necessary for proper curing, you'll need to carefully monitor and control moisture to prevent mold growth on your bars.
Ideal Underground Conditions
Throughout history, underground storage has provided the perfect environment for curing handmade bars due to its natural temperature stability.
Root cellars maintain ideal conditions between 32°F and 40°F (0°C to 4°C), slowing down decay processes while preserving quality. An ante-chamber serves as a critical buffer zone, creating stable temperature transitions between the outside environment and main storage area.
When creating your own underground curing space, focus on these critical factors:
- Humidity control – Maintain 85-95% humidity to prevent bars from drying out too quickly, using dirt floors or water pans as needed.
- Proper ventilation – Install mesh-covered vents to allow ethylene gas release while keeping pests out.
- Temperature monitoring – Use thermometers to track conditions, avoiding both freezing and warm temperatures that accelerate spoilage.
- Structural integrity – Build with appropriate insulation and drainage systems to maintain consistent conditions year-round.
Historical Preservation Techniques
The ancient practice of root cellar curing emerged long before modern refrigeration, with evidence dating back thousands of years across civilizations from the Near East to China.
These underground spaces leveraged earth's natural insulation to maintain stable temperatures critical for preserving handmade bars.
You'll find this method particularly effective because it relies on consistent cool temperatures (8-10 feet below ground) and controlled darkness to slow chemical reactions that cause spoilage.
Unlike modern techniques, root cellar curing required no electricity while still preserving quality.
The key to success was proper ventilation, which prevented mold growth while maintaining ideal humidity levels.
This balancing act made root cellars essential for survival during harsh winters, demonstrating why these techniques remained unchanged for centuries before modern preservation methods emerged.
European farmers traditionally constructed their root cellars into hillsides to maximize the earth's natural cooling properties.
Moisture Control Challenges
Mastering moisture control presented one of the most critical challenges when curing handmade bars in historical root cellars.
You needed to maintain humidity levels between 80-95% to prevent your products from drying out while ensuring proper temperature conditions of 32-40°F.
To achieve ideal moisture control in your cellar, consider these historical approaches:
- Install dirt floors instead of concrete to naturally regulate humidity levels.
- Use hygrometers at different heights to monitor moisture conditions throughout the space.
- Place pans of water strategically to increase humidity when needed.
- Implement proper ventilation systems to prevent mold formation while maintaining moisture.
These techniques helped historical craftsmen balance the delicate relationship between temperature and humidity, extending the shelf life of their products while preventing both desiccation and rot. This careful balance mirrors the modernist literary concern with food experiences as both cultural markers and emotional anchors in immigrant narratives.
Cheese Cloth Wrapping: The Colonial Protection System
While many modern preservation methods use synthetic materials, cheese cloth wrapping stands as one of the most enduring colonial protection systems for handmade bars. This lightweight, loosely woven cotton fabric creates a breathable barrier that allows air circulation while protecting your bars from dust and environmental contaminants.
Breathable protection meets colonial tradition in cheese cloth's time-tested embrace of handmade craftsmanship.
You'll find cheese cloth particularly effective when layered over oils or waxes, mimicking historical preservation techniques where colonists applied it to maintain freshness and prevent spoilage. For ideal protection, wrap your bars completely, ensuring the cloth makes direct contact with the surface.
The versatility of cheese cloth extends beyond simple wrapping—it aids in moisture control during curing, reduces mold growth, and provides easy handling of otherwise greasy surfaces. The cloth's low lint levels prevent scratches or residue that could damage the surface of your handmade bars during the curing process.
This traditional method continues to prove its worth in artisanal preservation.
Herb-Infused Drying Cabinets: Aromatic Preservation
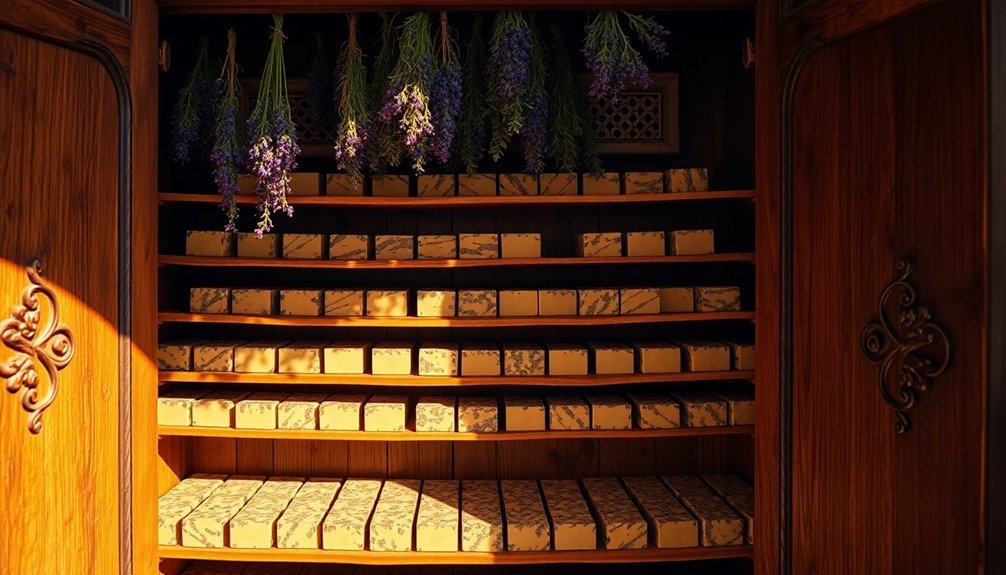
You'll find that traditional herb-infused drying cabinets combined aromatic plants like rosemary, thyme, and lavender to impart subtle scents while preventing spoilage of handmade bars.
These cabinets featured strategic ventilation methods, including slatted sides with adjustable panels that could be opened or closed depending on humidity levels. The optimal drying conditions between 60°F to 70°F with humidity below 60% were carefully maintained to preserve the essential oils of the herbs.
The careful balance between airflow and aromatic preservation meant craftsmen could cure their bars while simultaneously infusing them with beneficial herbal properties.
Ancient Herb Combinations
Throughout the ancient world, artisans developed sophisticated herb combinations that transformed the preservation and curing of handmade bars.
These combinations weren't random—they reflected generations of empirical knowledge passed through regional traditions.
When creating your own herb blends for curing cabinets, consider these time-tested combinations:
- Yarrow and red clover – Creates antiseptic properties that protect bars while adding therapeutic skin benefits.
- Calendula and dandelion – Enhances healing properties for dry skin while extending shelf life.
- Aromatic herbs with fermentable ingredients – Promotes beneficial microorganism growth that improves potency.
- Regional herb pairings – Reflects local flora traditions that optimize preservation while adding cultural significance.
Calendula petals are particularly effective in these combinations as their medicinal benefits have been historically proven for treating minor burns, wounds, and skin conditions.
You'll find these ancient combinations not only preserve your bars effectively but also infuse them with medicinal and aromatic properties that synthetic preservatives simply can't match.
Cabinet Ventilation Methods
The heart of aromatic preservation lies in proper ventilation—a critical element that determines whether your herbs will dry perfectly or develop mold.
Traditional drying cabinets provide an ideal dark environment while allowing moisture to escape.
You'll want to create a system where air circulates freely around your herbs. Try the box lid method with staggered arrangements, allowing vertical stacking while maintaining airflow between layers.
Place herbs in single layers on paper towels within each lid.
For cabinet setups, incorporate perforated paper bags or mesh screens to enhance circulation.
Hanging herbs upside down promotes even drying, while leaving small gaps between stacked crates enables horizontal airflow.
Just as researchers found in the Alpaca evaluation project, collecting structured data on drying performance helps optimize your preservation techniques.
Monitor your herbs regularly to prevent over-drying, and maintain simple humidity controls.
With proper ventilation, you'll preserve the essential oils and fragrances that make your herb-infused bars exceptional.
Seasonal Rotation Methods: Adapting to Climate Changes
Seasonal soap curing methods have evolved throughout history as artisans learned to adapt their practices to ever-changing climate conditions.
Traditional soapmakers developed rotation techniques that maximized natural advantages while minimizing environmental challenges throughout the year.
You'll find historical practices still relevant today when rotating your soaps seasonally:
- Spring/Fall Positioning – Place curing racks near windows for ideal temperature balance and gentle airflow without direct sunlight.
- Summer Adjustments – Move soap to cooler, shaded locations to prevent overheating while maintaining ventilation.
- Winter Adaptations – Relocate to warmer, drier areas of the home to counteract slower evaporation rates.
- Monsoon Strategies – Implement additional ventilation methods like elevated racks and cloth covers to combat humidity while preventing dust accumulation.
Frequently Asked Questions
Did Lunar Cycles Affect Traditional Soap Curing Timelines?
No, lunar cycles don't affect soap curing timelines. While they're incorporated in some traditional crafts like herbalism, soap curing depends on chemical processes, ventilation, and humidity—not the moon's phases.
How Did Early Soapmakers Test for Proper Curing Completion?
Early soapmakers tested curing completion by feeling your soap's hardness, observing its appearance, checking lathering quality, and noting skin reaction. They'd rely on touch, sight, and experience rather than formal scientific methods.
What Safety Precautions Prevented Animal Damage During Outdoor Curing?
You'd have used elevated racks, enclosed mesh structures, or watchful monitoring to prevent animal damage outdoors. Fencing around curing areas and covering soap with breathable cloths also deterred curious wildlife from disturbing your soap.
How Did Wartime Shortages Impact Historical Soap Curing Methods?
During wartime, you'd face longer curing times as fat shortages forced use of inferior alternatives. You couldn't rely on traditional curing spaces, often adapting to smaller batches and indoor locations due to resource constraints.
Were Different Soaps Cured Separately to Prevent Scent Contamination?
Yes, you're right about historical practices! You'd find soap makers curing different scented bars separately to prevent fragrance cross-contamination. They'd use dedicated storage areas or curing racks to maintain each soap's distinct scent profile.
In Summary
You've now explored ten time-tested methods our ancestors used to perfect their handmade soaps. Whether you're utilizing your attic's natural heat, wrapping in cheesecloth, or curing near a chimney, these historical techniques will enhance your bars' quality and longevity. Try incorporating these traditional approaches into your modern soap making practice—you'll appreciate the improved hardness, scent longevity, and overall performance that proper curing delivers.


Leave a Reply