Soap makers test for trace levels to confirm proper emulsification between oils and lye has begun. Testing tells you when the soap batter has reached the right consistency for adding ingredients or pouring into molds. You'll recognize trace when the mixture leaves a visible trail on the surface or holds its shape momentarily. Different trace levels (light, medium, thick) suit different design techniques and additives. Understanding this critical stage transforms your soap-making from guesswork to artistry.
The Science Behind Soap Emulsification
While many soap makers focus on colors and scents, understanding emulsification provides the foundation for successful soap making. Emulsification occurs when two immiscible liquids—like oils and water-based lye solution—blend together into a stable mixture.
Your soap's chemistry relies on two critical elements: the hydrophilic (water-loving) heads and hydrophobic (oil-loving) tails of soap molecules. These molecules arrange themselves into micelles, with tails grabbing oils and heads facing outward toward water. This structure helps suspend oils in water, creating the emulsion.
During soap making, you'll notice surface tension decreasing as these molecules work to bring incompatible ingredients together. The resulting mixture typically appears cloudy in appearance as the oil droplets become suspended throughout the water phase. This process is crucial because proper emulsification guarantees your ingredients mix thoroughly, allowing saponification to occur evenly throughout your batch.
Recognizing Visual Cues of Proper Trace
As you stand over your soap batch with blender in hand, recognizing proper trace becomes the critical skill that separates successful soaps from failures. The visual transformation of your mixture tells you exactly when it's ready for molding. Trace indicates that saponification is progressing and the mixture has properly emulsified, making it safe to pour into your mold.
| Trace Stage | Appearance | Best For |
|---|---|---|
| Very Light | Faint trail when drizzled | Intricate swirls |
| Light | Thin cake batter consistency | Colorants, fragrances |
| Medium | Thin pudding texture | Suspending additives |
| Thick | Pudding-like, holds peaks | Textured tops, layers |
| False Trace | Chunky with oil streaks | Nothing – needs fixing! |
Watch carefully for these indicators as you blend. When drizzled soap leaves a temporary pattern on the surface, you've reached very light trace. As it thickens, the pattern becomes more pronounced and lasting, signaling progression through various trace stages.
Light Trace vs. Medium Trace: When to Use Each
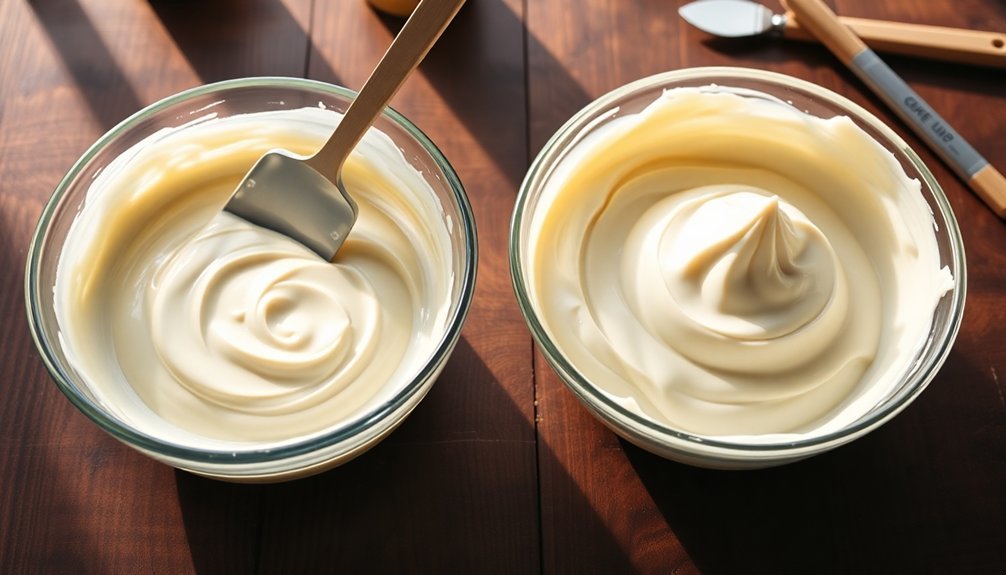
Choosing between light trace determines the success of your specific soap design. Understanding when to use each consistency gives you precise control over your creative process.
Light trace resembles thin cake batter, perfect for delicate swirls and intricate patterns. It's easily achieved in 30-60 seconds of stick blending and allows colorants to mix effortlessly. Many experienced soapmakers stop at the emulsification stage for maximum design flexibility.
Medium trace, reached after 1-2 minutes of blending, has a thicker ketchup-like consistency ideal for structural designs.
- Use light trace for thin, wispy swirls and complex color work
- Choose medium trace when suspending chunky additives like herbs or poppy seeds
- Consider your oils—recipes with higher hard oil percentages reach medium trace faster
- Match fragrance oils to appropriate trace levels, as some accelerate thickening
Why Temperature Matters in Reaching Trace
Temperature plays a powerful role alongside trace in determining your soap's ultimate success. When you work with higher temperatures, you'll notice saponification accelerates, pushing your soap quickly toward medium and thick trace. This can be either an advantage or challenge depending on your design goals.
For intricate swirls and patterns, you'll want to soap at cooler temperatures—ideally room temperature—which gives you more control and working time. Temperatures above 110°F can trigger false trace or uneven saponification, compromising your final product.
Your equipment matters too—an infrared thermometer helps monitor conditions precisely. Using a stick blender rather than hand stirring dramatically reduces the time needed to achieve proper trace, allowing better control when working at various temperatures.
Remember that solid oils below their melting point, water discounting, and additives like clays all interact with temperature to influence how quickly your soap reaches trace.
The Spoon Test: A Traditional Method for Confirming Trace
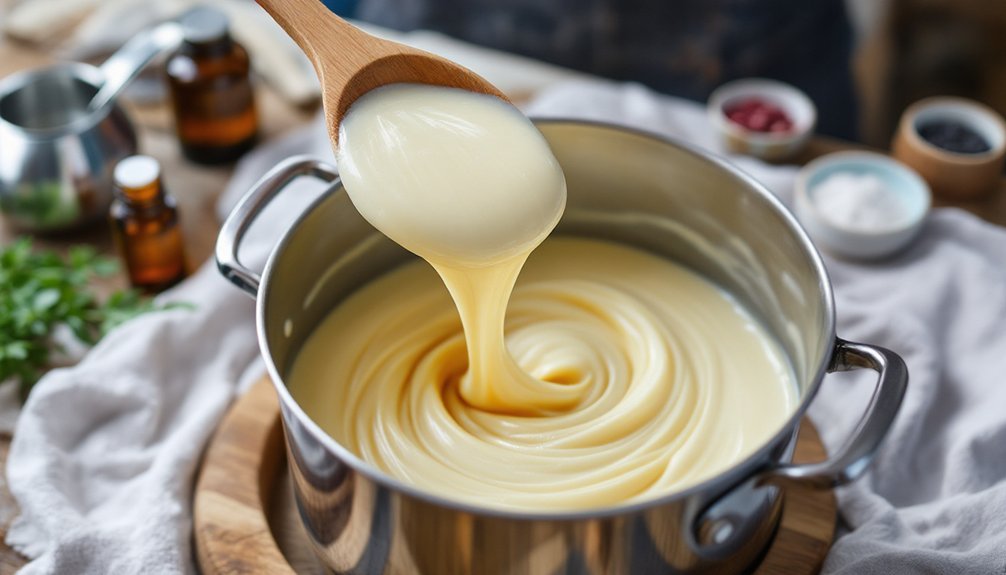
The spoon test reveals trace through the visibility of dribble trails that form when you lift a utensil from your soap batter and let it drip back onto the surface.
This technique has evolved from simple observation to a nuanced skill where experienced soap makers can detect subtle differences in how the mixture falls.
You'll notice that thickness isn't the only indicator—texture matters too, as a properly traced soap batter will show both body and a smooth, homogeneous appearance when drizzled.
When checking for proper trace, many soap makers also look for a stable emulsion that doesn't separate when the mixture sits undisturbed.
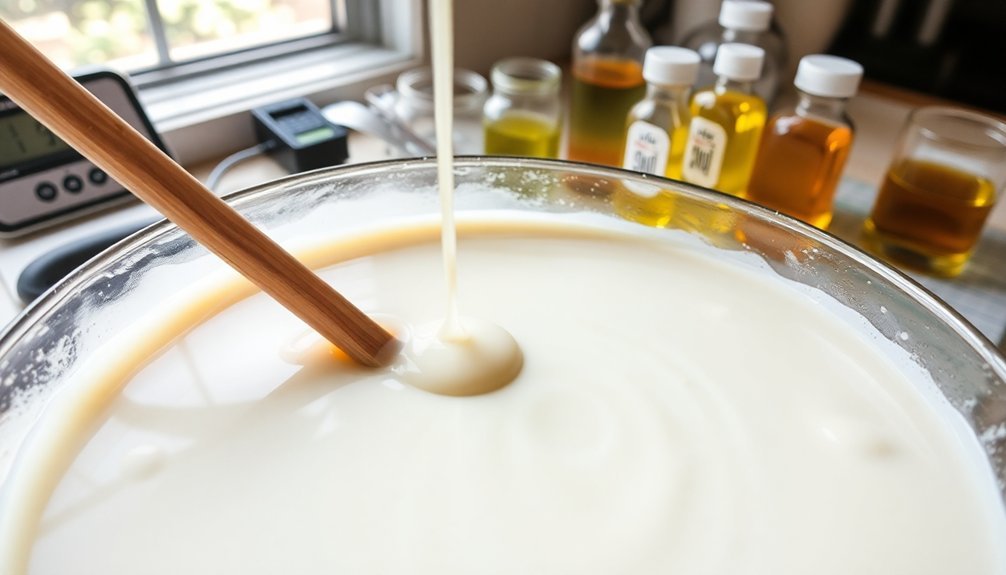
Dribble Trail Visibility
When soap makers talk about "trace," they're referring to the moment when drizzled soap batter leaves visible trails on the surface of your mixture. This visibility indicates that saponification has begun and oils and lye are properly emulsified. Proper blending with a stick blender ensures more efficient emulsification, reducing trace time significantly.
You'll notice different levels of trace as you work:
- Thin trace – barely visible trails, perfect for intricate swirl designs
- Light trace – visible but not raised trails, similar to thin cake batter
- Medium trace – raised trails that hold their shape briefly, ideal for suspending additives
- Thick trace – pudding-like consistency with prominent trails, best for layering
Your ingredients greatly impact trace development—hard oils like coconut accelerate it, while soft oils like olive slow it down.
Temperature, fragrance oils, and water content also influence how quickly visible trails form.
Spoon Technique Evolution
Before electric stick blenders revolutionized soap making, artisans relied exclusively on the humble spoon test to determine trace levels. This historical technique remains valuable today, especially when working with small batches or when you've accidentally overworked your mixture with a stick blender.
The spoon method allows you to observe the gradual shift between trace levels with more control than mechanical mixing. It's particularly effective for achieving thin to medium trace—crucial for creating delicate swirling patterns in your soap designs. Similar to how medical students collaborate on First Aid for USMLE Step 1, soap makers have historically shared their knowledge about testing methods with the community.
While modern tools have streamlined the process, learning the spoon technique offers educational value for beginners. As you lift your spoon through the mixture, watching how it drips and settles teaches you to recognize each stage of emulsification, building foundational knowledge for your soap-making journey.
Thickness Versus Texture
Distinguishing between thickness and texture represents a critical skill for soap makers using the spoon test. When you're evaluating your soap batter, you're not just looking at consistency but also how the mixture behaves when manipulated.
The spoon test reveals different trace stages through distinct behaviors:
- Light trace – Drizzle disappears quickly, perfect for intricate swirl designs requiring fluid batter.
- Medium trace – Drizzle forms a visible line that stays briefly, ideal for adding chunky additives.
- Thick trace – Batter holds its shape completely, excellent for textured tops.
- False trace – Appears thick but results from unmixed oils or butters rather than saponification.
You'll need to match your desired trace level to your design goals while avoiding premature thickening from overuse of your stick blender. Using a mixture with more slower moving oils, like olive oil, can give you extended working time before reaching trace when creating complex designs.
Hard Oils vs. Soft Oils: Impact on Trace Development
Understanding the difference between hard and soft oils is essential for predicting how quickly your soap will reach trace.
Hard oils like cocoa butter and coconut oil remain solid at room temperature and contain high levels of saturated fatty acids. These oils accelerate trace development markedly.
In contrast, soft oils such as olive and avocado oil stay liquid at room temperature and are rich in unsaturated fatty acids. They'll slow down the trace process, giving you more working time for complex designs or swirls.
When formulating recipes, you'll notice soaps with higher percentages of hard oils trace faster and often develop a matte appearance. Lard also contributes to this effect while creating a long-lasting bar with stable, creamy lather.
Meanwhile, soft oils contribute to a silky, glossy finish. Balancing these oil types allows you to control not only trace development but also the final cleansing and moisturizing properties.
Hand Stirring Techniques for Consistent Results
While oil choices determine how quickly your soap reaches trace, your stirring technique plays an equally important role in the process.
Without a stick blender, you'll need patience and proper technique to achieve that perfect consistency.
For consistent results when hand stirring, follow these key steps:
- Use a durable stainless steel whisk or spoon and maintain a steady, continuous stirring motion.
- Warm your oils slightly (within safe temperature ranges) to accelerate the tracing process.
- Watch for visual cues like the disappearance of oil streaks and the formation of a stable emulsion.
- Adjust your stirring pace based on the thickness you need for your intended swirl technique.
Remember that hand stirring takes considerably longer than using a stick blender, but offers greater control over the trace development. For some particularly challenging recipes, be prepared to stir for hours or days until you reach the proper trace.
Avoiding the Pitfalls of False Trace
You'll need to maintain consistent temperatures throughout your soap-making process to prevent false trace caused by prematurely solidifying oils.
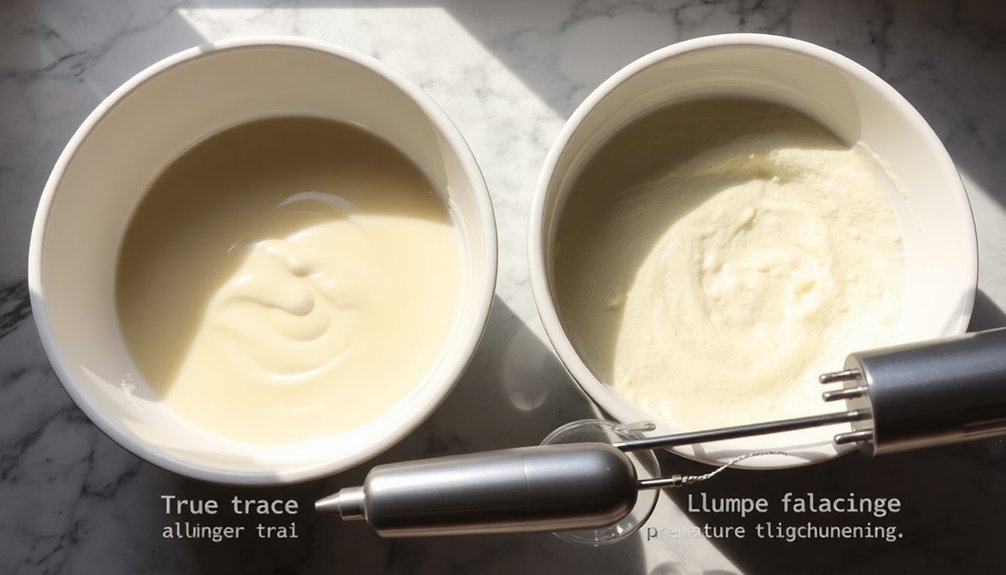
When you're unsure if true trace has been achieved, test your stirring technique by lifting your spatula or stick blender and watching how the batter falls back into the mixture.
These simple checks can save your batch from the common pitfall of mistaking false trace for true emulsification, ensuring your final soap will cure properly.
Using a balanced combination of liquid and solid oils in your soap recipe will significantly reduce the risk of false trace and promote proper saponification.
Temperature Control Matters
When temperatures fall outside ideal ranges, soap makers face one of the most frustrating challenges in the craft: false trace. This deceptive thickening occurs when hard oils solidify rather than saponify, leading to quality issues in your final product.
To maintain best temperature control and prevent false trace:
- Keep your soaping temperatures between 90°F-110°F (32°C-43°C) for balanced trace development.
- Consider using the heat transfer method with high percentages of soft oils for natural warming.
- Invest in a digital laser thermometer for precise, mess-free temperature monitoring.
- Make sure all ingredients, especially cold additives like milk, are preheated to compatible temperatures.
- Remember to keep oils and lye solutions within 10°F of each other to prevent premature solidification of butters and hard oils before proper emulsification occurs.
Stirring Technique Checks
Three key stirring technique checks can help you confidently identify true trace from its deceptive counterpart.
First, observe consistency changes by alternating between stirring and pulsing your stick blender—true trace maintains its thickness, while false trace breaks apart easily.
Second, test for emulsification by drizzling a small amount of batter across the surface. At true trace, it'll leave a visible pattern rather than instantly sinking.
Finally, regularly check texture by lifting your blender or spoon. True trace will show distinctive ribbons that sit momentarily on the surface before melding back.
If you encounter false trace, continue blending while slightly increasing temperature, or add soft oils to your recipe. This guarantees proper saponification and prevents unsaponified pockets that could irritate skin in your finished soap. Without a stick blender, this verification process would be significantly more time-consuming, as hand stirring alone could take hours to achieve proper emulsification.
Troubleshooting Common Trace Problems
Despite your best efforts, achieving the perfect trace in soap making can be elusive. When issues arise, understanding their causes can help you correct them quickly and save your batch.
Common trace problems you'll encounter and how to fix them:
- Soap won't reach trace – Often caused by excessive water or weak lye. Try reducing your water content or check if your lye is fresh.
- Accelerated trace – Hard oils and certain fragrance oils are usually the culprits. Switch to softer oils like olive oil to slow things down. Using short spurts of your stick blender combined with hand stirring can help control the acceleration.
- False trace – Lower temperatures can cause premature thickening that isn't true trace. Warm your oils slightly to remedy this.
- Seizing – When soap becomes too hard to stir, usually from fragrance oils. Pre-blend fragrances with your oils before adding lye.
Historical Methods of Testing Soap Consistency
Before modern soap testing methods evolved, you'd find pre-industrial soap makers relying on simple techniques like the egg float test to determine proper lye concentration.
Artisans would examine how soap dripped from a wooden spoon or formed ribbons when poured—visual indicators that revealed essential information about the mixture's consistency.
This practical knowledge passed between generations of soap crafters, with masters teaching apprentices to recognize subtle changes in texture and appearance that signaled when soap had reached the proper trace. The craft guild system formalized this knowledge transfer in the soap-making profession, particularly after Italian artisans organized themselves in the 7th Century.
Pre-Industrial Trace Techniques
When traditional soap makers observed changes in their mixtures, they relied on highly sensory methods to determine if proper saponification had occurred. Without modern tools or indicators, they developed techniques that depended on careful observation and experience.
Pre-industrial soap makers recognized trace through:
- Feel and consistency – Testing how the mixture dragged across a wooden spoon or stuck to stirring implements.
- Visual inspection – Watching for the formation of a stable emulsion where oils no longer separated from lye.
- Continuous stirring – Noticing resistance changes that indicated thickening as saponification progressed.
- Pattern formation – Looking for ripples or trails that remained visible when drizzling mixture across its surface.
These techniques required patience and expertise, as soap makers would stir for hours while heating over open fires until achieving proper trace.
Spoon and Ribbon Tests
Historical soap makers refined their detection methods beyond basic observations, developing specific techniques to reliably assess trace. The spoon test involves drizzling soap mixture onto the surface—if it briefly floats before sinking, you've reached trace.
Similarly, the ribbon test examines how soap flows from a lifted spatula, with a smooth flow that breaks off indicating proper consistency.
You'll appreciate these methods for their simplicity and immediate feedback. They require no expensive equipment, making them accessible for generations of soap makers.
While modern alternatives like emulsion tests and temperature monitoring exist, these traditional techniques remain valuable in both hot and cold processes.
Artisanal Knowledge Transfer
Across generations of artisanal soap makers, the transfer of knowledge about testing soap consistency relied heavily on oral traditions and practical demonstrations rather than written documentation.
Before modern measurement tools, soap makers developed ingenious methods to guarantee consistent quality.
These traditional testing approaches included:
- The egg float test – suspending an egg in lye solution to determine appropriate concentration by observing whether it floated, sank, or remained suspended.
- The "zap" test – carefully touching the tongue to soap to assess alkalinity levels through a tingling sensation.
- Visual assessment techniques – examining the ribbon-like trail of soap batter when dripped from a spoon.
- Textural evaluations – feeling the thickness and consistency between fingers to determine when trace had been reached.
These methods traveled through time via apprenticeships and community knowledge sharing, preserving this craft across centuries.
Adapting Trace Levels for Different Soap Designs
As soap makers develop their craft, understanding how to manipulate trace levels becomes essential for creating different soap designs.
You'll find that intricate swirls and patterns require a light trace with thin cake batter consistency, allowing colors to flow smoothly together without muddying.
For soaps with texture additives like herbs or embeds, aim for medium trace. This thicker consistency suspends your additions perfectly while still remaining pourable.
When you're creating unique textured tops or sculptural elements, heavy trace becomes your ally, providing a pudding-like consistency that holds its shape.
Your design's complexity dictates how precisely you'll need to control trace.
Remember that oils, temperature, water content, stirring methods, and additives all influence how quickly your soap reaches trace—giving you multiple ways to achieve your artistic vision.
Frequently Asked Questions
Can I Add Colorants at Thick Trace?
You'll find it difficult to add colorants at thick trace. They won't blend evenly into your dense mixture. It's better to add colors at light to medium trace for consistent distribution throughout your soap.
How Does Superfatting Percentage Affect Trace Time?
Higher superfatting percentages slow down your trace time because extra oils hinder saponification. When you increase superfat (typically 3-10%), you'll notice it takes longer for your soap batter to reach trace.
Does Water Hardness Influence Trace Development?
Yes, water hardness does influence trace development. Hard water with calcium and magnesium ions accelerates your soap's trace time because these minerals readily react with fatty acids, causing your soap mixture to thicken more quickly.
Are Trace Levels Different for Hot Process Soap?
Yes, they're different. You'll reach trace faster in hot process soap due to higher temperatures. The process doesn't require precise trace levels for design since you're working with an already gel-like consistency.
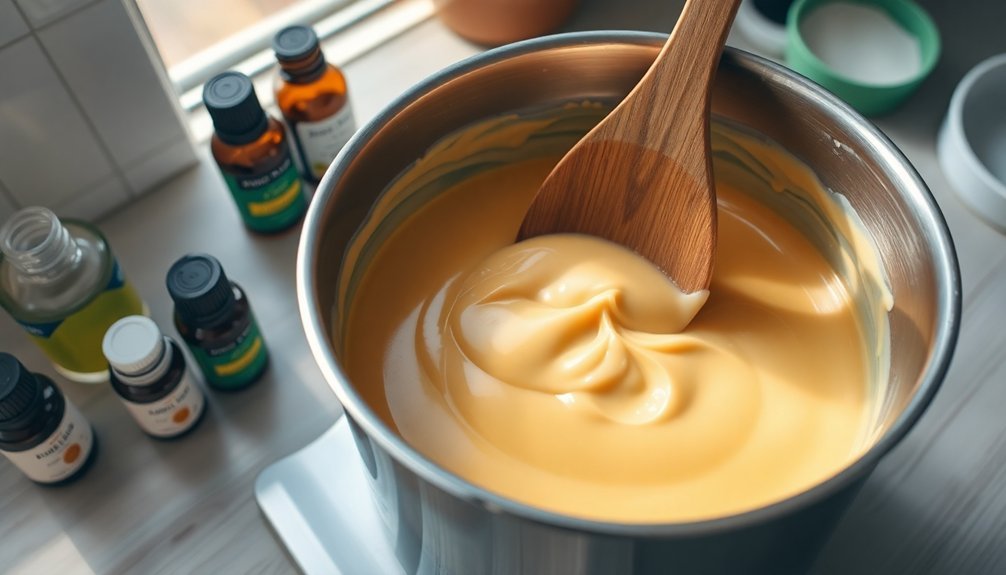
Can Essential Oils Accelerate or Decelerate Trace?
Essential oils themselves don't considerably impact trace, unlike fragrance oils which can accelerate it. You'll want to blend them carefully, using a whisk rather than a stick blender to maintain your desired trace level.
In Summary
Testing for trace levels guarantees you're creating stable, high-quality soap. By mastering this critical skill, you'll know exactly when your oils and lye have properly emulsified. Whether you're making simple bars or complex designs, you'll save time and materials by recognizing the right trace consistency. Don't rush this process—your attention to trace will directly impact your soap's texture, appearance, and overall success.


Leave a Reply