Traditional wood ash lye-making transforms your hardwood fireplace remnants into a powerful cleaning and crafting agent. You'll need dense hardwoods like maple or hickory, burned until white, and basic safety gear including rubber gloves and goggles. Set up a leaching station with stones and straw for filtration, then collect the caustic solution that drips through. This zero-waste method connects you to historical practices while creating sustainable household products. The complete process reveals nature's remarkable chemistry at work.
Essential Safety Protocols and Protective Equipment
When working with wood ash lye, proper safety measures aren't optional – they're absolutely critical.
You'll need to wear protective equipment, including rubber gloves and goggles, along with hard shoes to shield yourself from potential chemical burns and splashes.
Keep your workspace clean and organized, with a bottle of vinegar nearby to neutralize any accidental burns from the highly alkaline solution.
When you handle lye, make certain you're working in an area free from organic materials that could react with the caustic substance.
Always use metal buckets for collecting and storing wood ash, as plastic containers can deteriorate from lye's corrosive nature.
Metal containers are essential for wood ash storage – plastic buckets can't withstand lye's corrosive properties and will break down.
Don't store wood ash indoors, and make sure it's completely cool before you begin working with it to prevent fire hazards.
Historical Origins of Wood Ash Lye Making
You'll find wood ash lye's roots deeply embedded in early Colonial American households, where settlers crafted their own soap and cleaning solutions by leaching hardwood ashes in wooden barrels.
Native American communities had long mastered the use of wood ash for nixtamalization, a process that made corn more nutritious and digestible.
European soap-making guilds brought their centuries-old traditions across the Atlantic, establishing wood ash lye as a cornerstone of early American industry and domestic life.
Colonial Lye Production Methods
Throughout colonial America, the production of wood ash lye emerged as an essential domestic and industrial practice that shaped early American self-sufficiency.
You'd begin by carefully collecting white ashes from burned hardwoods like oak and hickory, which contained high levels of potassium carbonate. After sifting these wood ashes, you'd layer them in a special leaching vessel where rainwater or distilled water would slowly filter through, dissolving the valuable lye compounds.
This versatile substance wasn't just for soap making – you'd find it being used across various applications. From preserving foods like olives and lutefisk to serving as a key ingredient in early baking recipes using pearl ash, lye's caustic properties made it indispensable.
The practice extended beyond households, becoming vital for industrial soap and glass production.
Early Indigenous Ash Uses
The indigenous roots of wood ash lye making stretch back thousands of years before colonial practices took hold. You'll find that early Indigenous peoples mastered the art of creating lye from wood ash through careful observation and generational knowledge. They'd leach ash with water to produce a caustic solution that served multiple purposes in their daily lives.
| Use | Application |
|---|---|
| Cooking | Nixtamalization of corn |
| Hygiene | Soap production |
| Textiles | Fiber processing |
| Storage | Food preservation |
| Cleaning | Household sanitation |
Indigenous communities passed down these sustainable practices, ensuring nothing went to waste. Their methods of making lye from wood ash weren't just practical – they reflected a deep understanding of natural resources and their applications. This traditional knowledge established the foundation for many modern cleaning and food processing techniques we still use today.
European Soap-Making Traditions
While Indigenous peoples developed their own lye-making practices, European soap-making traditions evolved distinctly from the 16th century onward, centering on the careful extraction of lye from hardwood ashes.
You'll find that European soap makers preferred specific hardwoods like oak and beech to create their alkaline solution, as these woods produced superior potassium hydroxide compared to resin-heavy softwoods.
The process involved soaking wood ash in water for several days, allowing the essential compounds to leach out gradually. This wood ash lye became particularly significant in regions with abundant forests, such as Germany and France, where soap making flourished into a refined craft.
What's remarkable is how this traditional method embodied sustainability principles, making full use of wood burning byproducts while eliminating the need for commercial chemicals.
Selecting and Preparing Quality Hardwood Ash
You'll get the best results for lye production by choosing dense hardwoods like ash, hickory, beech, sugar maple, or buckeye, as these yield higher potassium carbonate concentrations.
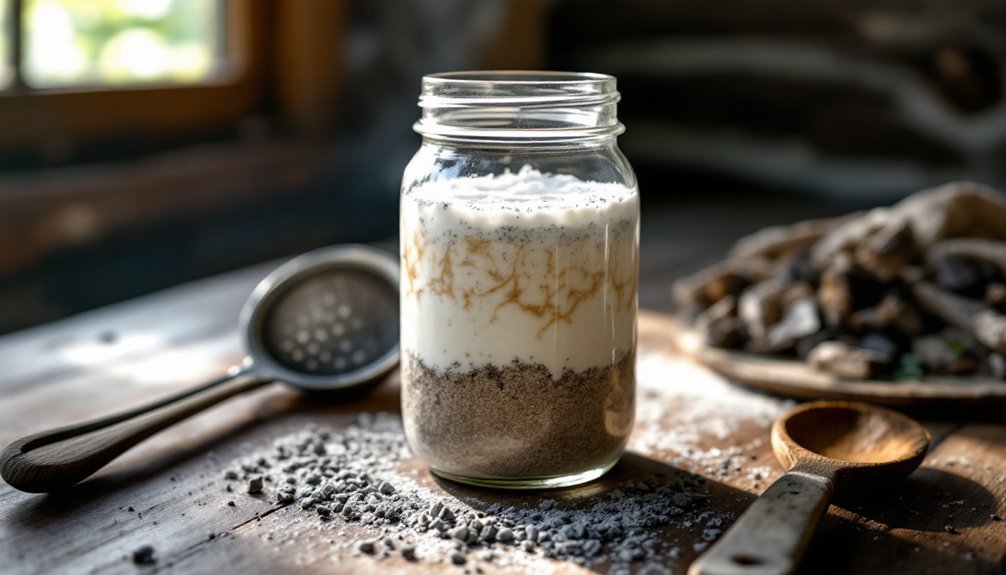
Once you've collected and cooled your wood ashes for several days in metal containers, you'll need to sift them thoroughly using a flour sifter to remove any unburnt chunks.
After sifting, check your ashes for remaining carbon content, as whiter ash indicates better combustion and a superior nutrient profile for your lye solution.
Best Ash Sources
Selecting quality hardwood ash stands as the foundation for making traditional lye. You'll want to focus on hardwoods like ash, hickory, beech, sugar maple, and buckeye for their high potassium carbonate content. These species consistently outperform softwoods when you make lye.
| Wood Type | Potassium Level | Best Use |
|---|---|---|
| Ash | Very High | Lye Making |
| Hickory | High | Lye/Soap |
| Pine | Low | Avoid |
To identify the best ash sources, look for pure white ashes free from unburnt chunks. After burning, let them cool for several days, then sift thoroughly using a flour sifter. Store your processed ash in a metal container, keeping it in a cool, dry place. Remember, moisture exposure can trigger premature lye formation, so proper storage is essential for maintaining ash quality.
Proper Sifting Methods
Once you've gathered your hardwood ash, proper sifting becomes vital for producing high-quality lye. Using a flour sifter, you'll need to separate the white ash from any unburnt wood pieces to guarantee maximum potency in your final lye water solution.
Start by carefully examining your ash for carbon content – darker specks indicate incomplete burning, which will reduce your lye's effectiveness. Pass the ash through your sifter, collecting only the finest particles while removing larger chunks and carbon remnants.
You'll want to store your sifted ash in a five-gallon plastic bucket, avoiding aluminum containers that could react with the alkaline properties. Remember to use only hardwoods like oak, hickory, or sugar maple, as these contain higher concentrations of potassium carbonate, which is essential for creating strong, effective lye water.
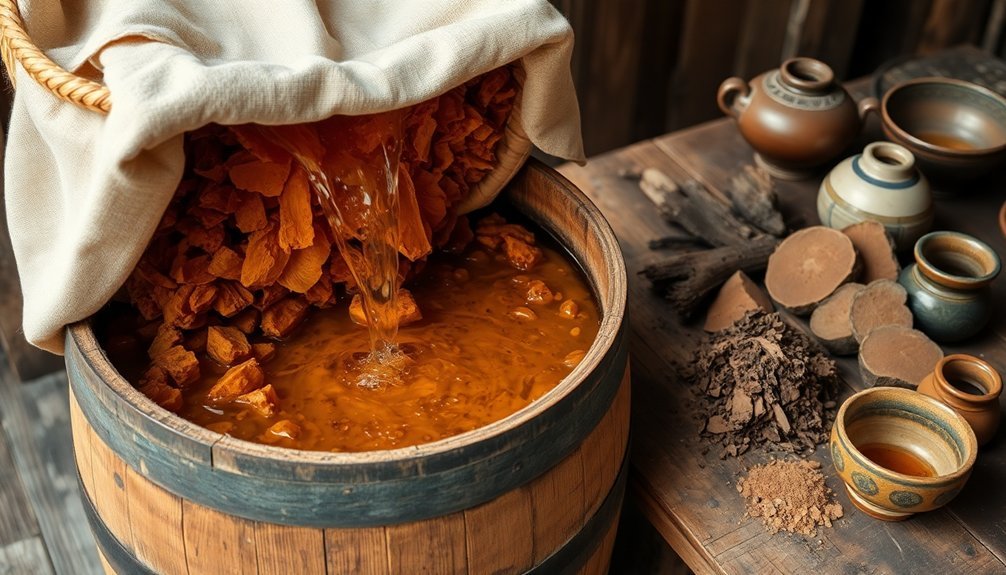
Setting Up Your Leaching Station
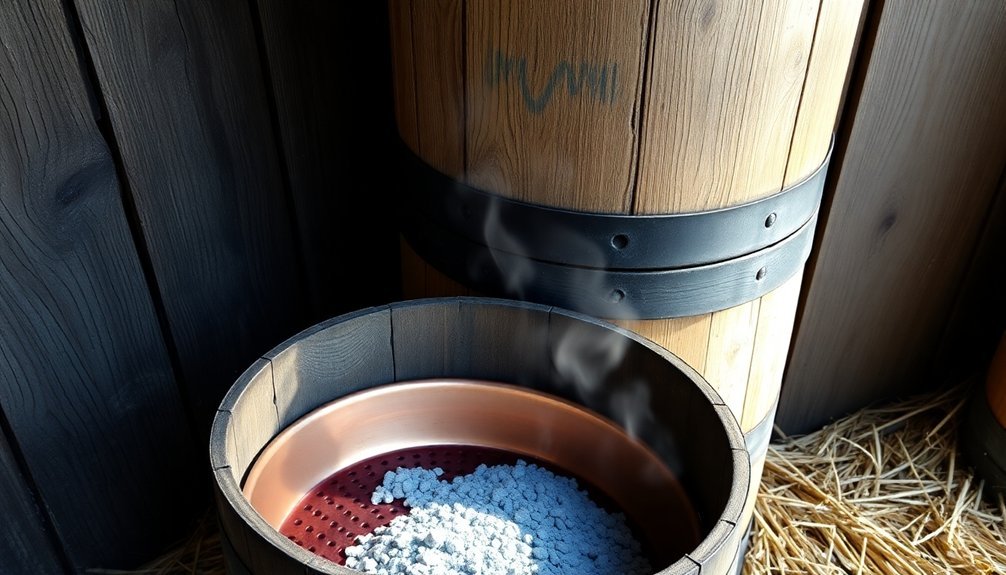
Before creating your leaching station, gather the essential materials: white hardwood ashes, a drilling tool, clean stones, dried straw, and a lye-safe collection bucket.
To begin the leaching process, drill six small holes near the center of your vessel's bottom for proper drainage of the lye solution. Add 1-2 inches of clean stones, followed by a 3-inch layer of dried straw for effective filtration. Fill the vessel with your cooled wood ash, leaving 4 inches at the top for rainwater.
Create drainage holes, layer stones and straw for filtration, then add cooled wood ash while leaving space for rainwater.
- Store ashes in metal containers and let them cool for several days to prevent fire hazards.
- Collect at least 10 pints of filtered rainwater in a separate barrel.
- Position a lye-safe container made of glass, stainless steel, or heavy-duty plastic under the drainage holes.
The Science Behind Ash-to-Lye Conversion
The chemical transformation of wood ash into lye represents one of humanity's oldest chemical processes. When you make lye from wood ash, you're initiating a complex reaction where potassium carbonate interacts with water to create an extremely alkaline solution.
The science behind this process relies heavily on the mineral composition of your wood ash, particularly its calcium and potassium content. You'll get the best results using hardwoods like oak and hickory, as they contain higher concentrations of potassium carbonate than softwoods.
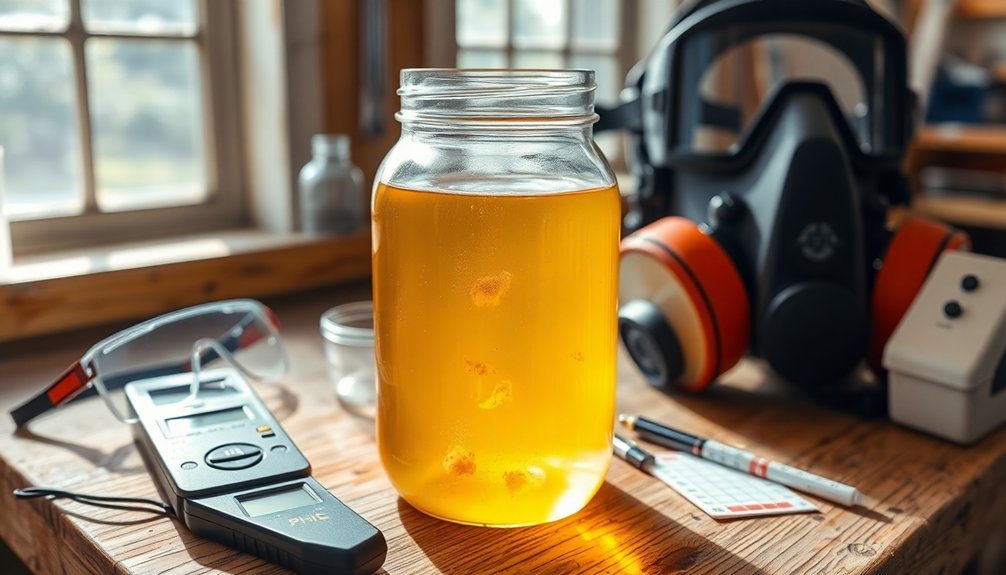
During leaching, water slowly extracts these minerals, creating a solution that can reach a pH of 13. It's essential to understand that you're working with caustic chemistry – the resulting lye can cause severe burns, which is why you must always wear protective gear during the conversion process.
Extracting and Testing Lye Water
Making potent lye water requires a methodical extraction process using a specialized leaching barrel.
You'll need to layer hardwood ash and rainwater, letting them sit for several days while the mixture leaches. Once you've collected the filtered solution through the barrel's drainage holes, it's essential to test the strength before using it for soap making or cleaning.
- Place a potato in the solution – if it floats, your lye water is strong enough for use
- Check the pH level using test strips, aiming for approximately 13 to guarantee the solution is strong enough
- Dip a chicken feather into the mixture – if it stays intact rather than dissolving, you've achieved the right concentration
The filtered lye water can be used immediately once you've confirmed its strength, or stored for future soap-making projects.
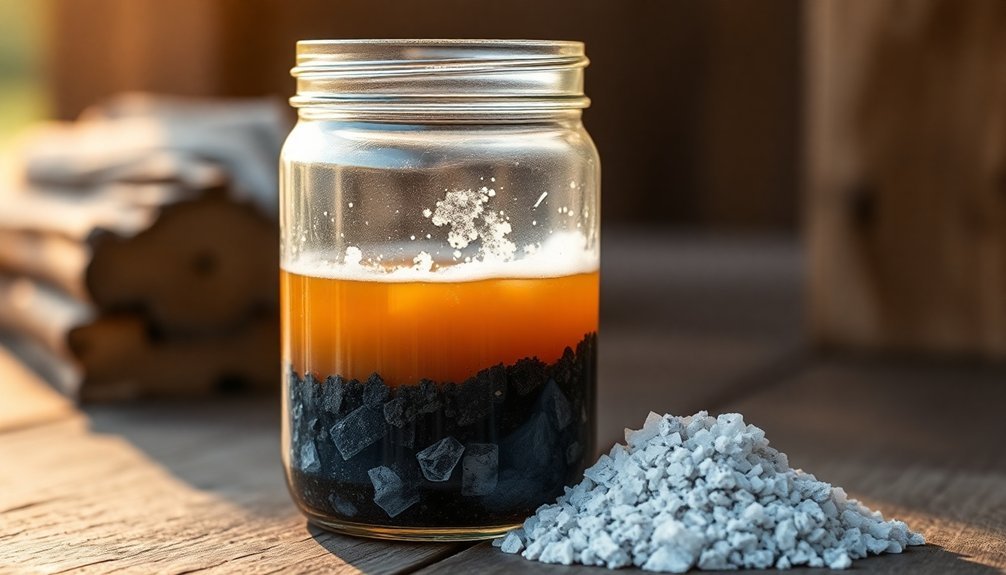
Concentrating and Storing Your Lye
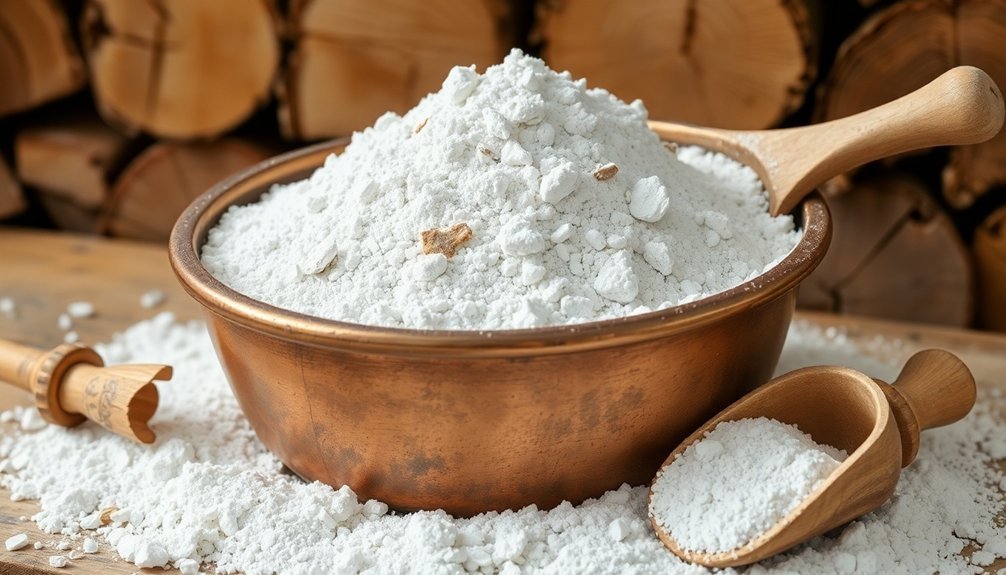
Once you've confirmed your lye water's strength, you can concentrate it into a more stable powder form for long-term storage.
Pour your solution into a shallow frying pan with a large surface area and simmer on low heat until it crystallizes into a fine powder. This concentrated lye is similar to commercial sodium hydroxide in potency.
When storing lye, transfer the crystals to an airtight glass mason jar.
Label the container with the production date and a clear warning about its caustic nature. Keep it in a cool, dry place away from children and pets.
You'll want to wear protective gloves and goggles whenever you handle the concentrated lye, as it can cause severe burns.
When you're ready to use it, you can reconstitute the powder with distilled water according to your needs.
Sustainable Practices and Zero-Waste Benefits
By transforming wood ash into lye, you're embracing a zero-waste approach that aligns perfectly with sustainable living practices.
Making lye from wood ash reduces your environmental impact while providing a versatile resource for your homestead. When you use wood ash to create lye, you're participating in a centuries-old tradition that supports self-sufficiency and environmental stewardship.
Transform wood ash into natural lye to embrace time-tested sustainability while creating a valuable homestead resource that honors our environmental heritage.
- You'll minimize landfill waste by repurposing wood ash that would otherwise be discarded, contributing to a more sustainable lifestyle.
- Your homemade lye can replace chemical-based commercial products for cleaning, soap making, and food preparation.
- The leftover materials from the lye-making process enrich your garden soil with valuable nutrients, creating a closed-loop system that benefits your entire homestead.
This sustainable practice helps you maintain independence while honoring traditional skills and environmental responsibility.
Common Troubleshooting Methods
While sustainable practices set the foundation for traditional lye making, success often depends on your ability to identify and solve common problems. When your lye's too weak, let it sit at the bottom of the barrel, then run it through a second time to achieve the needed pH of 13. You'll know it's ready when a potato floats rather than sinks.
| Problem | Solution |
|---|---|
| Weak Solution | Run through ash barrel multiple times |
| Cloudy Appearance | Filter through cloth until clear |
| Excessive Heat | Add water slowly in small amounts |
| Poor Saponification | Verify lye-to-fat measurements |
For cloudy solutions that can't be used to clean effectively, filter through a clean cloth until the liquid runs clear. When mixing with water, add it gradually to prevent dangerous reactions. If your soap isn't forming properly, double-check your measurements before starting over.
Frequently Asked Questions
How to Make Lye Water From Wood Ash?
You'll need to layer hardwood ash in a drainage barrel, pour rainwater over it, and let it sit for days. Collect the filtered lye water below, but don't forget safety gear—it's highly caustic.
How Do You Leach Wood Ashes With Rainwater?
You'll need to layer gravel in a barrel, add hardwood ashes on top, then slowly pour rainwater over them. Cover the barrel but allow drainage while the water filters through, collecting the lye solution below.
Is Wood Ash Safe for Skin?
You shouldn't directly expose your skin to wood ash. While dry ash might seem harmless, it'll form dangerous lye when mixed with moisture, including sweat. Always wear protective gear to prevent potential chemical burns.
How to Make Wood Ash Solution?
You'll need to collect hardwood ashes, place them in a barrel with stones and straw, pour rainwater over them, let it sit for days, then collect the leached lye water through drainage holes.
In Summary
Making your own wood ash lye lets you embrace a time-tested homesteading skill while reducing waste. You'll transform a common byproduct into a versatile cleaning and crafting resource. When you follow proper safety protocols and maintain patience through the process, you're not just making lye – you're connecting with centuries of traditional knowledge and sustainable practices. Keep experimenting and refining your technique.


Leave a Reply