
Kitchen lard transforms into natural soap through a chemical process called saponification. You'll need to combine the lard with a precise amount of sodium hydroxide (lye) solution at temperatures between 100-110°F. During this reaction, the fats break down and recombine with the lye to create soap and beneficial glycerin. While the basic chemistry is straightforward, you'll need proper safety gear, accurate measurements, and patience for the 4-6 week curing process. The art of successful soapmaking lies in mastering the details.
The Science Behind Lard Saponification
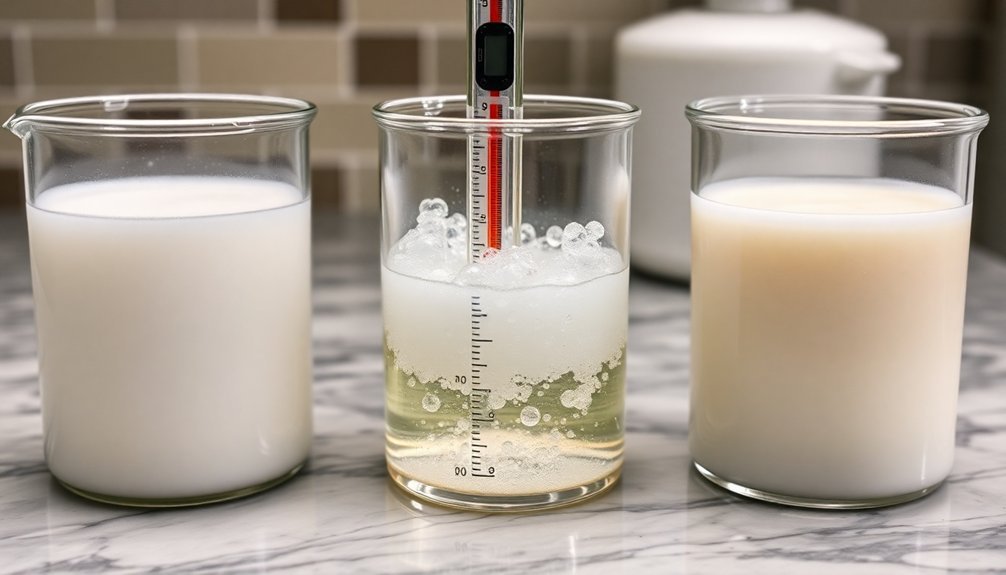
Three key chemical reactions occur when you transform lard into soap through saponification.
First, the triglycerides in your lard break down when they come into contact with sodium hydroxide, splitting into simpler compounds.
Next, these compounds recombine to form fatty acid salts and glycerin at temperatures between 100°F and 110°F, creating the basic structure of your soap.
Finally, the mixture reaches its ideal alkaline state with a pH between 8 and 11, which gives your soap its cleansing power.
You'll need to use a lye calculator to determine the exact amount of sodium hydroxide needed for your lard, ensuring a safe and effective product.
The glycerin that's naturally produced during this process stays in your soap, providing excellent moisturizing benefits for your skin.
Essential Equipment and Safety Measures
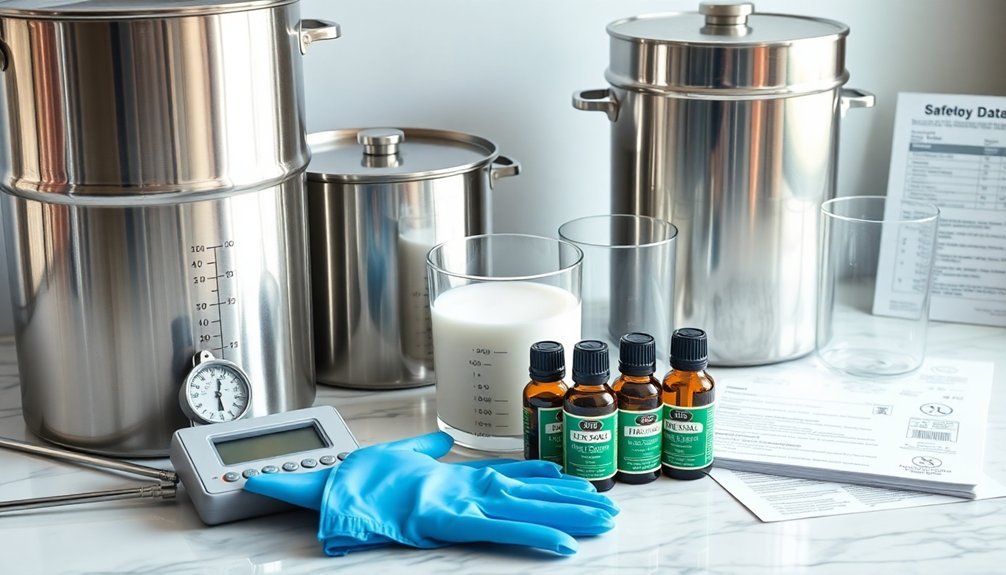
Making lard soap requires two sets of essential tools: basic equipment and safety gear.
You'll need a large non-aluminum pot for melting lard, a digital scale for precise measurements, and a stick blender to mix ingredients until they reach trace.
Don't forget to prepare your molds by greasing them with lard or lining them with baking paper.
Safety measures are non-negotiable when working with lye and water.
Safety is paramount when making soap – there's no room for shortcuts when handling caustic materials like lye.
Always wear protective gloves and goggles, and mix these ingredients outdoors or in a well-ventilated area to avoid inhaling toxic fumes.
Remember to add lye to water – never the reverse – to prevent dangerous reactions.
Keep children and pets away from your workspace throughout the process.
Using a lye calculator will help you determine the exact ratios needed for successful saponification.
Selecting and Preparing Quality Kitchen Lard
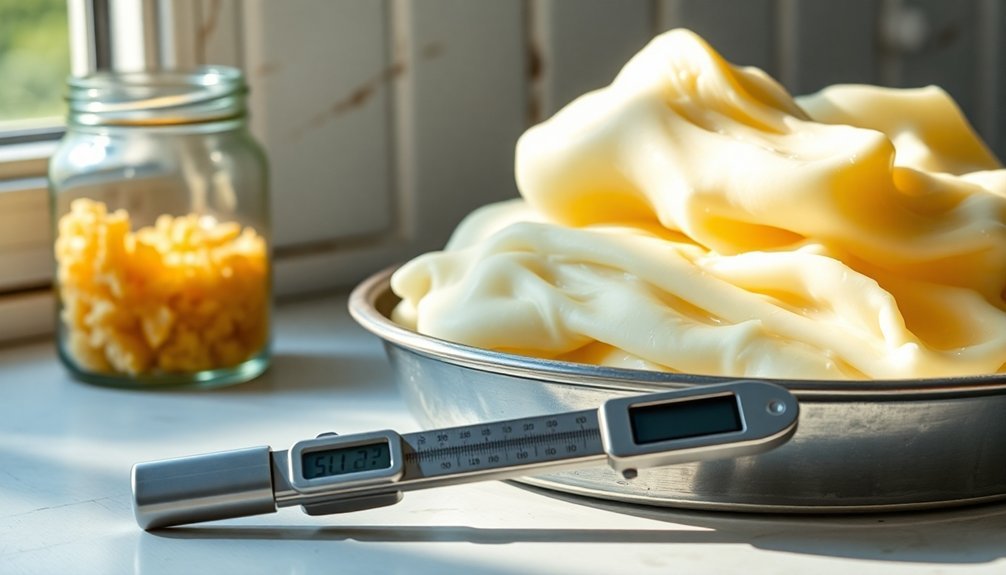
You'll want to start by straining fresh kitchen lard through a fine-mesh sieve to remove any remaining food particles or debris, ensuring a pure base for your soap.
When selecting your lard, check that it's white or light yellow with no off-putting smells, as rancid fats will compromise your final product.
Keep your strained, quality lard in an airtight container away from light and heat, and use it within six months to maintain its soap-making properties.
Straining Fresh Kitchen Fat
Quality soap making starts with properly strained kitchen lard. When preparing your lard soap recipe, you'll need to strain fresh kitchen fat thoroughly to guarantee your soap making supplies remain pristine.
Using a fine mesh sieve or cheesecloth, remove all impurities and food particles that could compromise your final product.
To achieve the best strained lard for your soap:
- Cut the fat into small, uniform chunks to guarantee even melting and efficient rendering.
- Pass the melted lard through your straining material at least once, catching any solid bits.
- Let the filtered lard cool completely before transferring it to a clean storage container.
Store your strained lard in the refrigerator or freezer until you're ready to create your soap. This preserves its quality and extends its shelf life, guaranteeing the best possible foundation for your natural soap.
Clean Vs Rancid Lard
Success in soap making hinges on the distinction between clean and rancid lard.
You'll recognize clean lard by its neutral smell and creamy white color, making it ideal for soap making. In contrast, rancid lard exhibits a yellowish tint and unpleasant odor, which can compromise your final product's quality and shelf life.
To guarantee you're working with clean lard, source your fat from reliable local farms or butchers who don't use additives.
When preparing the lard yourself, heat it slowly and strain out impurities for the best results. After rendering, cool the fat quickly and store it in a cool, dark place to prevent oxidation.
These steps will help maintain the lard's quality until you're ready to transform it into natural soap.
Proper Storage Methods
Selecting and storing lard properly builds on the foundation of using clean, uncontaminated fat. Quality kitchen lard from pasture-raised or organic pigs guarantees you'll have superior soap, but proper storage methods are essential to maintain its integrity.
You'll want to keep your rendered lard in an airtight container, placed in a cool, dark location to prevent oxidation.
For the best results in your soap making journey:
- Render your lard slowly, making sure it's pure white with a neutral scent
- Store portions in freezer-safe containers for long-term preservation
- Check regularly for signs of rancidity or contamination before use
When you're mindful of these storage practices, your lard will remain fresh and ready for soap making.
Consider portioning your rendered fat into recipe-sized amounts for added convenience during your crafting sessions.
Understanding Lye Solutions and Calculations
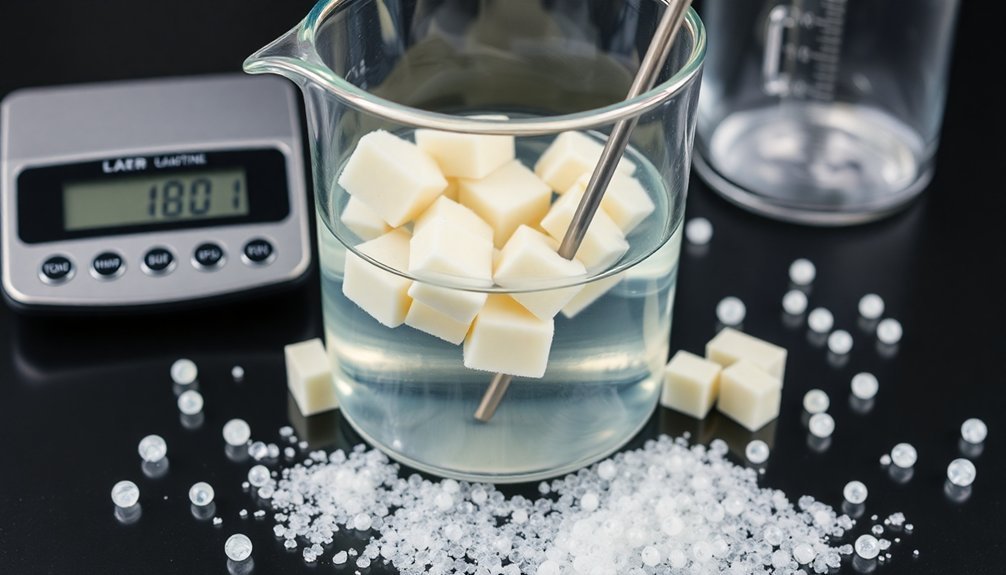
When making soap from kitchen lard, understanding lye calculations can mean the difference between a successful batch and a harsh, unusable product.
You'll need to determine the precise amount of lye needed for proper saponification, which typically requires 13.6 grams of lye for every 100 grams of lard.
To guarantee accuracy, you'll want to use a soap calculator that factors in your desired superfatting level, which can range from 2-8%. This extra fat creates a more moisturizing bar.
When mixing your lye solution, always add the lye to water while wearing protective gear – never the other way around, as this can cause dangerous reactions.
Temperature Control and Mixing Techniques
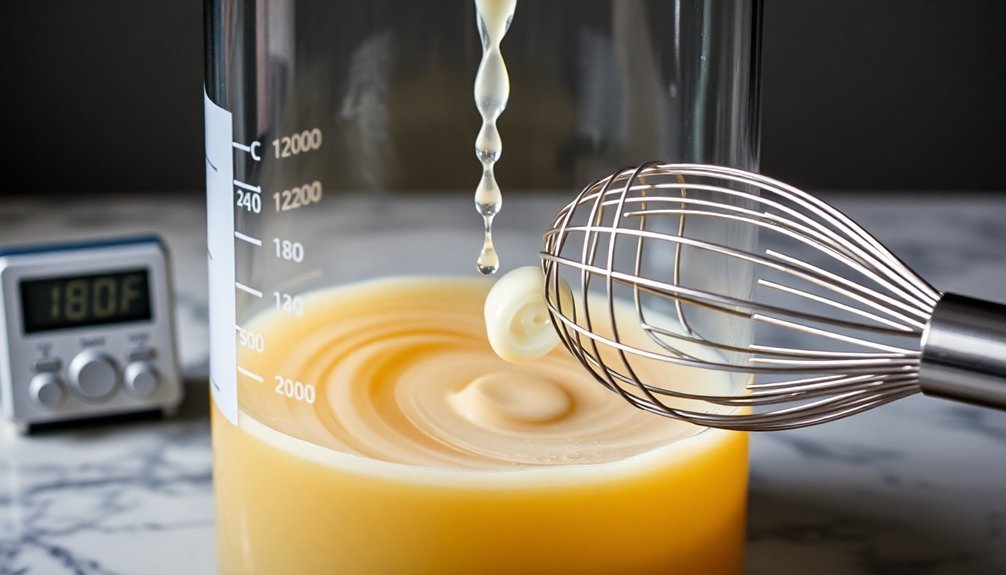
The careful balance of temperature marks the next step in your soap-making journey.
You'll need to monitor both your lye solution (25°C-40°C) and melted lard (35°C-40°C), adjusting them until they're within similar ranges. Proper temperature control guarantees successful saponification when these components meet.
Your mixing techniques will make or break the process. Using a hand blender in short pulses, you'll combine the ingredients until reaching a thin trace – that magical moment when the mixture begins to thicken.
- Feel the excitement as your lye and lard blend into a smooth, creamy consistency
- Watch in anticipation as the mixture leaves delicate trails on its surface
- Experience satisfaction knowing you're mastering this ancient craft
Remember to insulate your poured soap with towels, maintaining the warmth needed for complete saponification.
Molding and Setting Your Lard Soap
Now that you've achieved the perfect trace, proper molding and setting will transform your liquid soap mixture into solid, usable bars. Start by preparing your molds with lard or baking paper for easy removal later. Pour your mixture carefully, scraping every bit from the pot, then gently tap the molds to release trapped air bubbles.
| Step | Duration |
|---|---|
| Prepare molds | Before mixing |
| Pour mixture | Immediately |
| Insulate with towels | 48 hours |
| Cure in dark place | 4-6 weeks |
After pouring, you'll need to insulate your filled molds with towels to maintain the proper temperature for saponification. Let your soap set for 48 hours until it's firm enough to remove. The final step is curing – place your unmolded soap in a cool, dark location for 4-6 weeks to achieve the best quality bars.
Natural Additives and Scent Options
Personalizing your lard soap with natural additives and essential oils transforms basic bars into luxurious skincare products.
Add natural ingredients to elevate simple lard soap into an indulgent skincare experience that pampers and nourishes your skin.
You'll love how oatmeal adds gentle exfoliation while rose clay detoxifies your skin. For fragrance, you can incorporate about 2 teaspoons of essential oils like lavender, eucalyptus, or citrus per batch.
Make your soap bars stand out with these emotionally appealing additions:
- Dried rose petals and calendula flowers for a touch of romance and natural healing
- Activated charcoal or turmeric for stunning colors and skin-purifying benefits
- Natural clay varieties that provide both beautiful hues and detoxifying properties
These natural additives don't just make your soap look beautiful – they'll enhance its skin benefits too.
You're creating a personalized skincare experience that's both effective and aesthetically pleasing.
Curing and Storing Your Finished Soap
Your homemade lard soap requires a dedicated curing environment with good air circulation, where you'll need to place the bars on a cooling rack in a cool, dark space for 4-6 weeks.
You'll want to turn the bars regularly during this time to guarantee even drying and prevent soft spots from developing.
After the curing process is complete, store your soap in a moisture-free container or box away from direct sunlight to maintain its quality for long-term use.
Proper Curing Environment
After completing the initial soap-making process, proper curing conditions will determine the quality of your final product.
You'll need to place your soap bars in a cool, dark, well-ventilated area that allows proper air circulation. The curing process for lard soap takes 4-6 weeks, during which you should turn the bars weekly to guarantee even drying.
For best results, remember these vital steps:
- Place your soap on cooling racks or wax paper to prevent moisture from getting trapped underneath.
- Keep bars separated rather than stacked to allow proper airflow around each piece.
- Monitor the environment to maintain consistent temperature and ventilation throughout the curing period.
These conditions will help your soap develop the ideal hardness and pH balance for safe, effective use on your skin.
Long-Term Storage Solutions
Proper storage techniques guarantee your handmade lard soap maintains its quality long after the curing process ends.
Once you've completed the 4-6 week curing period, you'll need to implement long-term storage solutions to protect your soap bars.
Store your cured soap in a cool, dark, and dry environment to maintain quality and prevent moisture absorption.
You'll want to wrap individual bars in wax paper or place them in airtight containers to shield them from humidity and unwanted odors.
This extra protection helps extend your soap's shelf life and preserves its original properties.
Don't forget to check your stored soap regularly for any signs of deterioration or rancidity.
Since homemade soaps can have varying shelf lives depending on their ingredients, appropriate monitoring guarantees you're using safe, high-quality products.
Frequently Asked Questions
Can You Make Soap From Lard?
Yes, you can make soap from lard! Mix it with lye and water to trigger saponification. You'll create hard, moisturizing soap bars that'll clean effectively. It's a traditional, cost-effective way to make natural soap.
How Do You Turn Fat Into Soap?
You'll need to combine rendered fat with sodium hydroxide (lye) and water, blend until it reaches trace, then pour into molds. Let it set and cure for 4-6 weeks before using.
How Long Does Lard Soap Need to Cure?
You'll need to cure your lard soap for 4-6 weeks in a cool, dark place with good airflow. After unmolding at 48 hours, space the bars apart to guarantee proper drying and improved quality.
Why Do People Use Lard in Soap?
You'll find lard in soap because it's cost-effective, creates hard, long-lasting bars, and it's rich in skin-nourishing nutrients like omega-3s and vitamins. Plus, it produces a gentle, moisturizing lather for your skin.
In Summary
You've learned how kitchen lard transforms into natural soap through saponification – the chemical reaction between lard's fatty acids and lye solution. With proper safety measures, accurate measurements, and temperature control, you can create quality homemade soap bars. Don't forget to let your soap cure for 4-6 weeks before use, and you'll enjoy the satisfaction of making your own natural, sustainable soap from kitchen ingredients.


Leave a Reply