Perfect trace in handmade soap occurs when oils and lye emulsify to a pudding-like consistency that holds its shape momentarily. You'll achieve trace faster with a stick blender (1-2 minutes versus 30+ minutes by hand), proper temperatures (100-130°F), and the right oil balance. Hard oils speed up trace while liquid oils slow it down. Fragrances and additives like clays also accelerate the process. Understanding these factors gives you complete control over your soap's texture and design possibilities.
What Makes Handmade Soap Reach Perfect Trace?

When making handmade soap, achieving perfect trace is often considered the pivotal moment that determines your batch's success.
Perfect trace occurs when your oils and lye solution have fully emulsified, reaching a pudding-like consistency that holds its shape momentarily.
Temperature greatly influences this process—keeping your ingredients between 100-130°F provides ideal conditions. You'll reach trace faster at higher temperatures, while cooler environments give you more working time for detailed designs.
Your choice of oils matters too. Hard oils like coconut and butters accelerate trace, while liquid oils slow it down.
The most efficient tool in your arsenal is the stick blender, which can reduce trace time from 30+ minutes of hand stirring to just 1-2 minutes of pulsing.
Understanding the Chemistry Behind Soap Trace

Although soap-making often feels like an art, the process of reaching trace is pure chemistry in action. When oils and lye meet, they undergo saponification process—the chemical reaction that transforms these ingredients into soap. This transformation becomes visible at soap trace, when your mixture has properly emulsified.
You'll notice different stages during this process: light trace resembles thin batter, while thick trace holds its shape like pudding. The temperature of your ingredients considerably impacts reaction speed—warmer mixtures (100-130°F) reach trace faster than cooler ones.
Be careful to distinguish between true and false trace. False trace occurs when your mixture appears emulsified but hasn't fully undergone saponification. This commonly happens when temperatures drop too quickly or mixing is insufficient, potentially leaving unsaponified lye that can irritate skin.
Recognizing the Different Stages of Trace
How quickly can you identify the perfect trace in your soap mixture? Successful soap making depends on recognizing the stages of trace and knowing when to add ingredients.
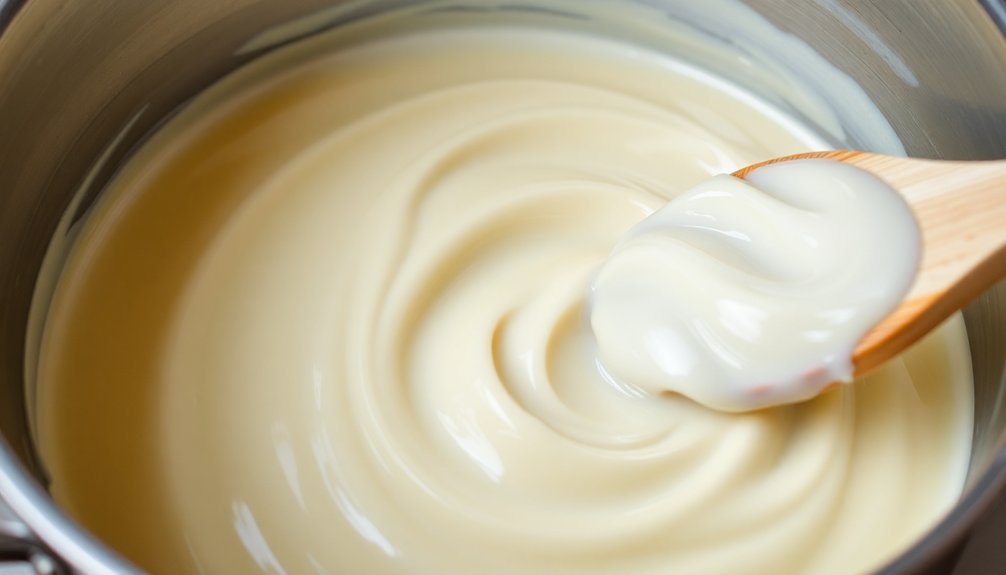
Light trace resembles thin cake batter with a solid color—ideal for adding colorants and fragrances before the mixture thickens.
As your soap progresses to medium trace, it'll look like thin pudding with surface streaks, perfect for suspending embeds and heavier additives.
When you achieve thick trace, your mixture develops a pudding-like consistency that holds its shape, making it excellent for creating layers and detailed textures.
Be cautious of false trace, which occurs when the batter appears emulsified but hasn't fully saponified. This usually results from temperature fluctuations or improper mixing and can cause skin irritation if not corrected.
Essential Equipment for Controlling Trace
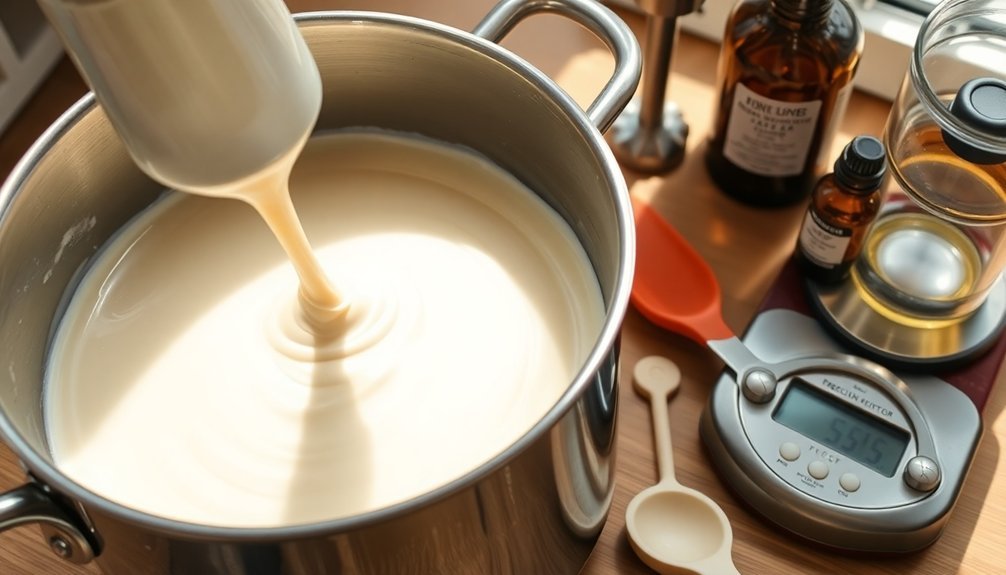
To achieve perfect trace consistently, you'll need to invest in quality soap-making equipment that gives you precise control over the process.
A stick blender is non-negotiable, reducing emulsification time from hours of hand stirring to just 1-2 minutes. Pair this with accurate digital scales for precisely measuring oils and lye—incorrect measurements often lead to false trace or failed batches.
Use non-reactive metal pots to guarantee safe chemical reactions and maintain ideal temperatures between 100-130°F during the soap making process. Quality thermometers help you monitor these temperatures for best saponification and trace development.
Finally, silicone molds prove invaluable for even filling and easy removal after your soap sets, preventing issues with tracking trace throughout the curing process.
The Role of Oil Types in Trace Development
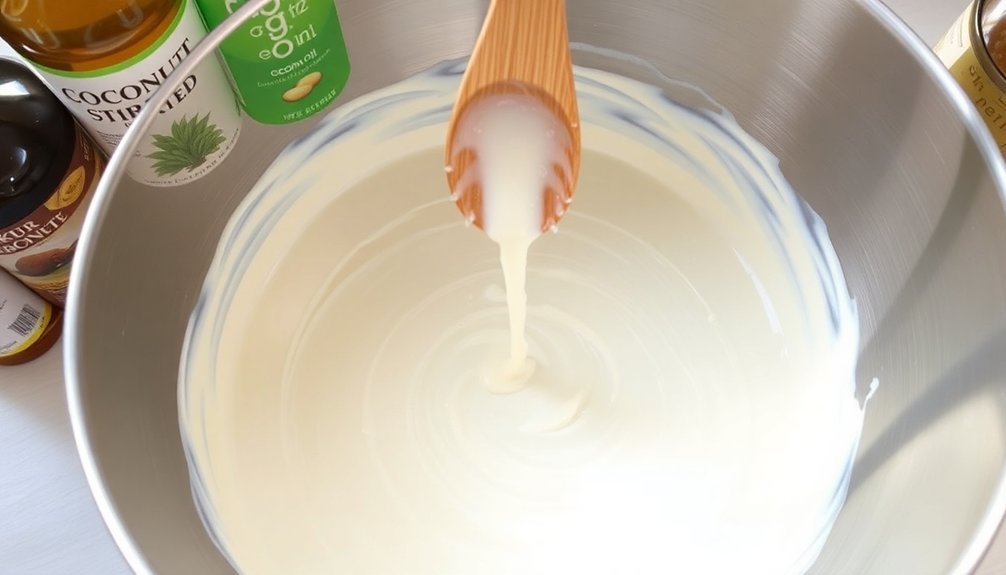
With the right equipment ready, understanding the oils in your recipe becomes the foundation of trace control. Different oil types dramatically affect how quickly your soap reaches trace and its final texture.
Hard oils like coconut oil accelerate emulsification due to their high saturated fat content, while liquid oils like olive oil slow the process down.
For beginners, aim for a 75% liquid to 25% solid oil ratio in your soap recipe. This balance creates a manageable trace while still allowing time for creative designs.
Oils rich in stearic acid (such as cocoa butter) thicken your mixture rapidly, while those high in linoleic acid (like sunflower) produce lighter trace.
You'll achieve excellent results by strategically combining oils—leveraging both quick-tracing ingredients for stability and slower ones for workability.
How Temperature Influences Trace Speed
Temperature plays an essential role in your soap's trace development, with heat acting as a natural accelerator for the emulsification process.
You'll find that working at 100-110°F gives you more control and design time, while temperatures closer to 130°F will quickly push your batch toward medium or thick trace.
Be careful with cold-temperature soaping, as it can lead to false trace—a temporary thickening that fools you into thinking your soap has emulsified when it hasn't fully combined.
Heat Accelerates Emulsification
When crafting handmade soap, heat plays a critical role in determining how quickly your mixture reaches trace. Temperatures between 100-130°F notably accelerate the emulsification process, speeding up the chemical reactions between your oils and lye solution.
This faster reaction time not only helps you reach trace more quickly but also guarantees complete saponification.
- Higher temperatures guarantee solid oils fully melt, preventing false trace
- Warmer mixtures react more vigorously, forming soap faster
- Cooling oils below melting points causes white spots and uneven texture
- Using a water discount with higher temperatures creates harder soap bars
- Proper temperature management reduces overall cure time
You'll notice that as you increase heat, the emulsification process becomes more efficient.
This temperature control is especially important when working with harder oils that require complete melting for successful saponification.
Cold-Temperature False Trace
While high temperatures accelerate emulsification, cold temperatures can create a deceptive phenomenon known as false trace. This occurs when your soap mixture appears to thicken but hasn't actually reached proper saponification.
When you blend below 100°F, solid oils may cool below their melting points, creating a thickening appearance without true emulsification. Your soap might look thick, but it's not fully combined and will likely separate later.
To avoid this frustrating issue, keep your lye and oils within the ideal temperature range of 100-130°F during your soap-making process. Always verify all oils and butters are completely melted before combining with lye.
Carefully monitor temperature throughout blending, especially when working in cooler environments. This vigilance helps distinguish between genuine trace and the misleading false trace caused by inadequate heat.
Water Discount Techniques for Trace Management
Mastering the perfect trace begins with understanding water discounting—a powerful technique that gives you greater control over your soap's consistency. By reducing water content by 20-30%, you'll achieve faster trace and harder bars while maintaining proper saponification.
Calculate your water discount using a soap calculator to guarantee appropriate lye concentration.
When you apply water discounting strategically, you'll notice:
- Quicker trace development without rushing the process
- More predictable trace consistency for easier incorporation of colorants and additives
- Reduced cure time due to higher lye concentrations
- Firmer bars that unmold more easily
- Better control over the entire soaping process
Remember that precise measurements are essential—too much water reduction can cause ricing or separation.
Balance your water discount with your recipe's specific ingredients for ideal trace management.
Fragrance and Essential Oil Effects on Trace
Now that you've refined your water ratio, it's time to address another major factor affecting trace—your fragrance choices. Certain fragrance oils and essential oils, particularly florals and spices, dramatically accelerate trace, causing your soap batter to thicken before you're ready.
To extend your working time, mix fragrance oils with your melted oils before adding the lye solution. Be wary of ingredients containing vanillin, which not only causes discoloration but can affect trace consistency.
Watch for ricing—those unwanted lumps that form when certain fragrances react with your oils—which may require careful stick blending without excessive thickening.
Always research your oils before soap making. Check reviews from other soapers to identify problematic fragrances that accelerate trace too quickly. This simple preparation step can save your batch from premature thickening and preserve your creative design time.
Common Additives That Accelerate or Slow Trace
Beyond fragrances, many common additives can greatly impact how quickly your soap reaches trace. Understanding these effects helps you control your soaping process better.
- Clay and natural colorants absorb water and accelerate trace—pre-mix with distilled water first.
- Floral and spice fragrance oils markedly speed up trace, so test before using in complex designs.
- Hard oils and butters at high percentages quicken trace due to their faster solidification.
- Sugar additives like honey enhance lather but accelerate trace—measure carefully.
- Milk and cream slow down trace thanks to their fat content, giving you more working time.
When formulating recipes, balance accelerating additives with trace-slowing ingredients.
You'll achieve better control if you add water-absorbing components early and save fragrance oils for last—especially those known to accelerate trace.
Troubleshooting False Trace and Separation
When making soap, you'll need to distinguish between true trace and false trace, which occurs when oils solidify before properly emulsifying with lye.
If you notice your soap mixture separating during the process, quickly reach for your stick blender to re-emulsify while ensuring proper temperature management.
You can prevent these issues by thoroughly melting all oils, maintaining consistent temperatures, and possibly reducing water content in your recipe.
Identifying False Trace
Despite appearing thick and well-emulsified, false trace can deceive even experienced soapmakers into thinking they've reached proper saponification when they haven't. This frustrating phenomenon occurs when your oils begin to solidify before being fully saponified with the lye solution, typically due to temperature fluctuations.
You'll know you're dealing with false trace when:
- Your mixture thickens rapidly but then separates or pools oil on top
- Solid oils appear to have cooled below their melting point
- The batter feels grainy rather than smooth
- Visible streaks or oil slicks appear on the surface
- The mixture lacks the pudding-like consistency of true trace
Always check that your oils and lye solution are at compatible temperatures before mixing.
If you suspect false trace, immediately reheat gently and continue blending with your stick blender until proper emulsification occurs.
Fixing Separation Issues
False trace can quickly escalate into full separation if not addressed promptly.
When you notice your soap mixture separating, first check that all oils are completely melted before combining with your lye solution. Temperature discrepancies are often the culprit—ensure both your oils and lye are within the recommended range to promote proper emulsification.
If you've already poured your soap and notice separation occurring, you can still troubleshoot the issue. Remove the mixture from the mold and re-mix using your stick blender on short pulses to help re-emulsify the separated components.
Be careful not to over-blend, as this can cause the mixture to thicken too quickly.
For severe separation with oily pockets, consider re-batching your soap rather than trying to salvage it directly.
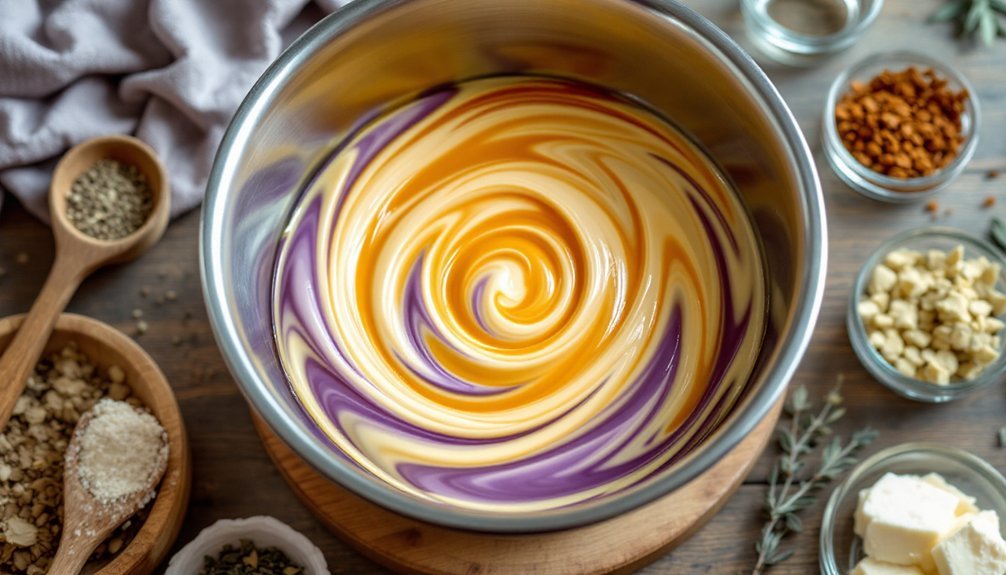
Achieving the Perfect Light Trace for Swirls
The perfect light trace forms the foundation of successful soap swirls, appearing as thin cake batter after about 3-5 minutes of mixing with a stick blender.
You'll want to keep your oils and lye mixture at 100-110°F to achieve peak emulsification—cooler temperatures slow the process, while higher ones rush past light trace too quickly.
When you're ready to make swirled designs, watch for these key indicators:
- Drizzled batter leaving momentary trails on the surface
- Mixture becoming opaque but still easily pourable
- Colorants distributing evenly without sinking
- Temperature remaining consistent throughout the process
- Oils with lower hard fat content (olive, sunflower) extending your working time
Using these techniques, you'll achieve the ideal light trace that gives you ample time to create stunning swirl patterns.
Mastering Medium Trace for Textured Designs
Moving beyond light trace, medium trace offers exciting possibilities for soapmakers looking to create textured designs with more dimension.
When making soap with textured tops, you'll need to achieve a pudding-like consistency where your soap mixture can support additives without letting them sink.
To promote proper emulsification, keep your temperatures between 100-130°F—warmer oils accelerate the process naturally.
During the soap-making process, use your stick blender in short, controlled bursts to manage how quickly medium trace develops.
Watch your batch carefully; you've reached medium trace when trails remain visible on the surface.
At this stage, you can confidently add colorants and herbs that will stay suspended.
Remember to avoid adding fragrances too early, as they can unexpectedly speed up trace before you're ready for that perfect textured finish.
Working With Thick Trace for Sculptural Elements
Thick trace offers you the perfect consistency for creating dramatic sculptural elements in your handmade soaps.
You'll find that manipulating these stiff mixtures requires confident, quick movements with your spatula or spoon to shape defined features before the soap sets completely.
The textured peaks technique works particularly well at this stage—simply tap the surface of your soap with the back of a spoon and then quickly pull upward to create distinctive spikes that hold their shape beautifully.
Manipulating Stiff Mixtures
While many soap artists fear thick trace, mastering this consistency opens up a world of sculptural possibilities.
You'll need a pudding-like consistency that holds its shape without collapsing. Increasing hard oils and butters in your recipe accelerates trace, making sculptural work easier. Use your stick blender in short bursts to manage the thickness without over-blending, which can create unworkable batter.
To successfully manipulate stiff mixtures:
- Meticulously time your additions before the soap sets prematurely
- Add clay or use a lower water discount to achieve ideal thickness
- Work quickly once you've reached thick trace
- Keep tools ready before you begin blending
- Practice dividing your batch if creating multiple design elements
With these techniques, you'll transform challenging thick trace into your artistic advantage.
Textured Peaks Technique
One of the most eye-catching decorative methods in soapmaking emerges when you embrace thick trace instead of fighting it.
To achieve stunning textured peaks, wait until your batter reaches pudding-like consistency, which provides structural integrity for your design.
When your soap reaches this thick trace, grab a spatula and confidently manipulate the surface into artistic peaks and swirls. You'll need to work quickly as the mixture can set rapidly.
For best results, maintain your batter's temperature around 100-110°F to control the setting process.
Adding a small amount of hard oils like cocoa butter to your recipe can help you achieve the perfect thick trace more easily.
If your mixture isn't thickening fast enough, a brief pulse with your stick blender can accelerate the process for those beautiful sculptural elements.
Frequently Asked Questions
Why Is My Soap Not Reaching a Trace?
Your soap isn't reaching trace because you're likely hand-stirring instead of using a stick blender, measuring ingredients incorrectly, using too much liquid, soaping at low temperatures, or experiencing false trace with cooled oils.
What Oils Accelerate Trace?
Oils high in saturated fats like coconut and palm oil accelerate trace because they're solid at room temperature. You'll also find that hard butters such as shea and cocoa butter speed up emulsification in your soap batter.
How to Know When Soap Has Reached Trace?
You'll know your soap has reached trace when it thickens to a pudding-like consistency. Drizzle a small amount over the surface—if it leaves a visible trail that doesn't immediately disappear, you've achieved trace.
What Causes False Traces in Soap Making?
You'll get false trace when your oils solidify prematurely due to temperature drops, when you haven't fully melted all oils before mixing, or when you overuse your stick blender creating the illusion of emulsification.
In Summary
You'll find that perfecting trace is a journey of practice and observation. By understanding the chemistry, choosing appropriate oils, and using the right equipment, you'll gain control over this essential soapmaking stage. Remember, different designs require different trace levels—light for swirls, medium for textures, and thick for sculptural work. Trust your instincts, stay patient, and soon you'll intuitively recognize when your soap has reached the perfect trace.


Leave a Reply