Testing soap pH multiple times is essential because soap undergoes significant chemical changes during curing. Your initial pH reading won't reflect the final product as saponification continues for weeks, gradually lowering alkalinity. Environmental factors like temperature and humidity also affect pH stability, while additives can cause unexpected shifts. Multiple tests (after unmolding, mid-cure, and post-cure) help you identify problems, adjust formulations, and guarantee your soap is skin-safe. The difference between skin irritation and a gentle cleansing experience lies in these vital measurements.
11 Second-Level Headings for "Why Test Soap Ph More Than Once?"
While many soapmakers test pH only at the end of the curing process, testing multiple times provides essential insights that a single measurement simply can't deliver.
You'll gain a thorough understanding of how your soap's chemistry evolves throughout saponification.
By conducting pH testing at regular intervals, you can track the neutralization of excess lye and identify potential problems before your soap reaches customers.
This proactive approach helps you maintain consistent quality despite environmental variables like humidity and temperature that might affect your batch.
Multiple tests also reveal how your formula responds to ingredient changes, allowing you to make data-driven adjustments.
Rather than guessing whether your soap is ready, you'll have documented pH levels throughout the curing process that confirm when your product has reached the ideal 8-10 range for safe, effective use.
Understanding the Chemical Evolution of Soap During Curing
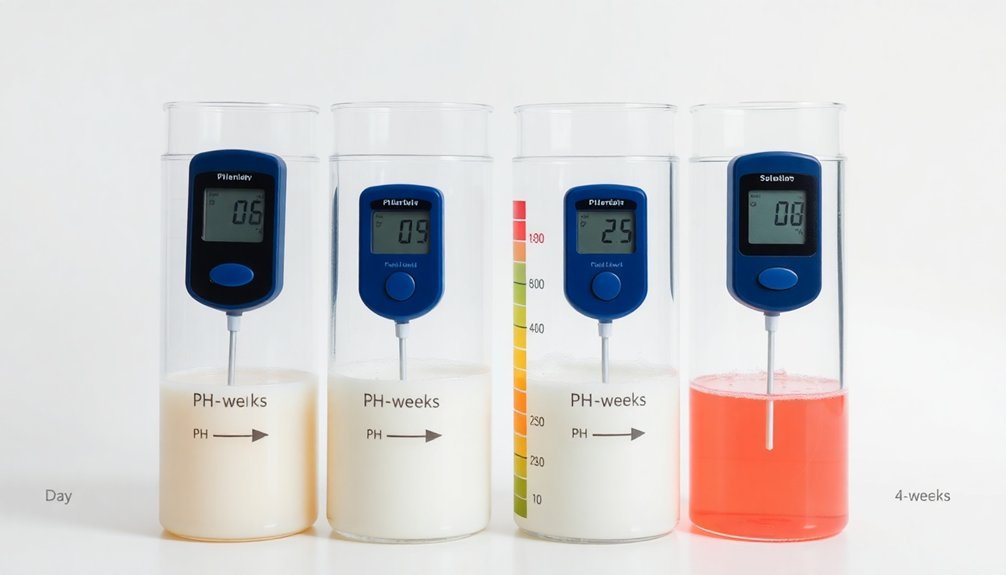
The curing process transforms your freshly-cut soap from a caustic, high-pH substance into a mild, skin-safe product through a fascinating chemical journey. During this time, continued saponification neutralizes excess lye, gradually lowering the pH level.
| Time Period | Chemical Changes |
|---|---|
| Week 1 | Saponification continues, pH begins to decrease |
| Week 2-3 | Water evaporation concentrates ingredients |
| Week 4 | pH stabilizes toward safe levels (8-10) |
| Week 6 | Environmental factors impact final balance |
| Week 8 | Soap reaches ideal mildness for skin |
You'll notice significant pH changes if you conduct regular pH tests throughout curing. Temperature and humidity act as environmental factors that can accelerate or slow this evolution. Monitoring these changes helps guarantee your final product won't cause skin irritation when used, confirming when your soap has fully matured.
Critical Ph Benchmarks for Different Soap Types
Safety standards for soap production depend heavily on achieving proper pH levels for each soap type.
When making cold process soap, you'll want to aim for a pH range of 9 to 10 after curing to guarantee skin safety.
Hot process soap typically exhibits a slightly lower pH, usually between 8 and 9, due to its accelerated saponification and shorter curing time.
Liquid soap formulations require extra vigilance, as their pH can range from 9 to 11 depending on your oil choices.
Similarly, traditional Castile soap made primarily with olive oil falls within a 9.0 to 11.0 pH range.
Testing soap pH throughout the curing process is essential for identifying any deviations from these critical benchmarks, helping you maintain consistent quality and guarantee your finished products meet established safety standards.
How Environmental Factors Affect Soap Ph Stability
Beyond meeting standard pH benchmarks, you'll need to contemplate how your soap's environment affects its pH stability throughout its lifecycle.
During the curing process, humidity levels can markedly impact how your soap's pH evolves, potentially causing unexpected variations if not properly monitored.
Your soap-making process is vulnerable to several environmental factors:
- Water quality used in production introduces minerals that may alter your soap's alkalinity, especially if you're using hard water.
- Temperature fluctuations can disrupt the saponification reaction, leading to inconsistent final pH readings.
- Carbon dioxide exposure during curing can react with your soap, particularly when combined with heat and sunlight that accelerate evaporation.
Understanding these environmental influences helps explain why testing pH multiple times during curing yields more reliable results.
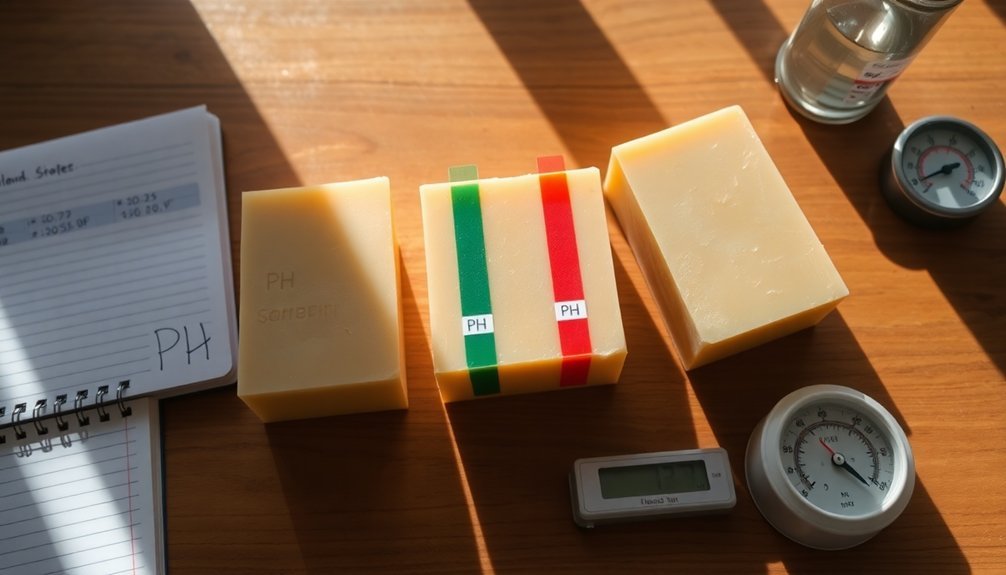
Timing Your Ph Tests Throughout the Soap Making Process
Strategic timing of pH tests reveals critical information about your soap's development and safety profile. Testing immediately after pouring helps identify excess lye issues, while subsequent tests track saponification progress during the curing period.
| Testing Stage | When to Test | Expected pH Reading |
|---|---|---|
| Initial Pour | 24-48 hours after making | 10-13 |
| Mid-Cure | 1-2 weeks into curing | 9-11 |
| Final Product | After 4-6 weeks | 8-10 |
For effective quality control, you'll want to test the pH at least three times throughout the process. This methodical approach guarantees your soap properly completes saponification before use. After the full 4-6 week curing period, your final pH reading should fall within 8-10, confirming your product is ready for safe skin use.
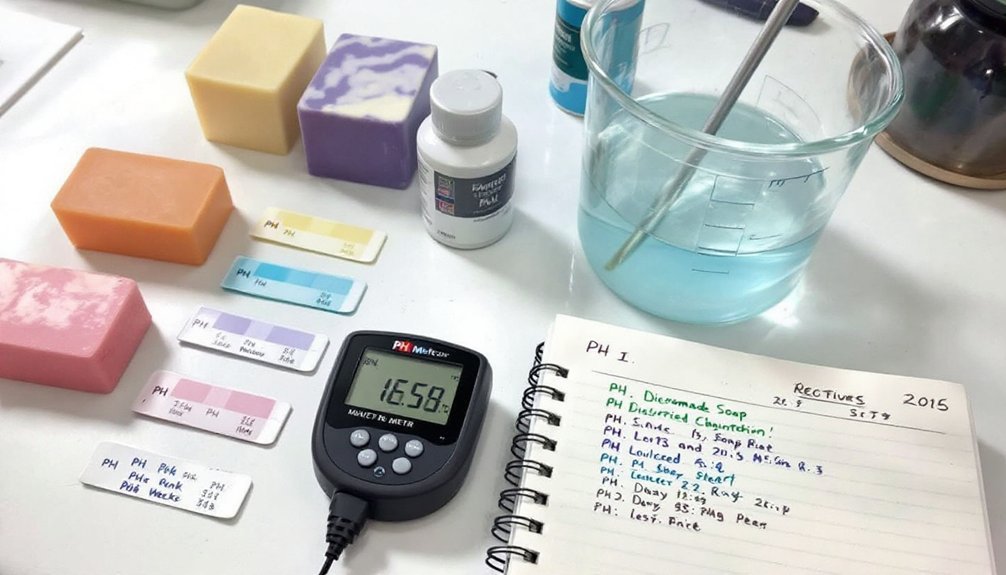
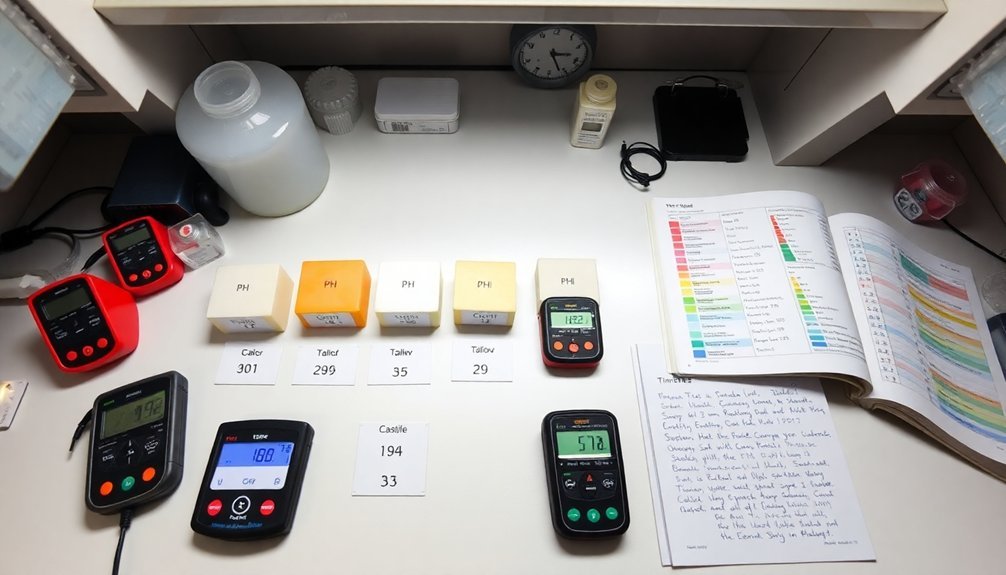
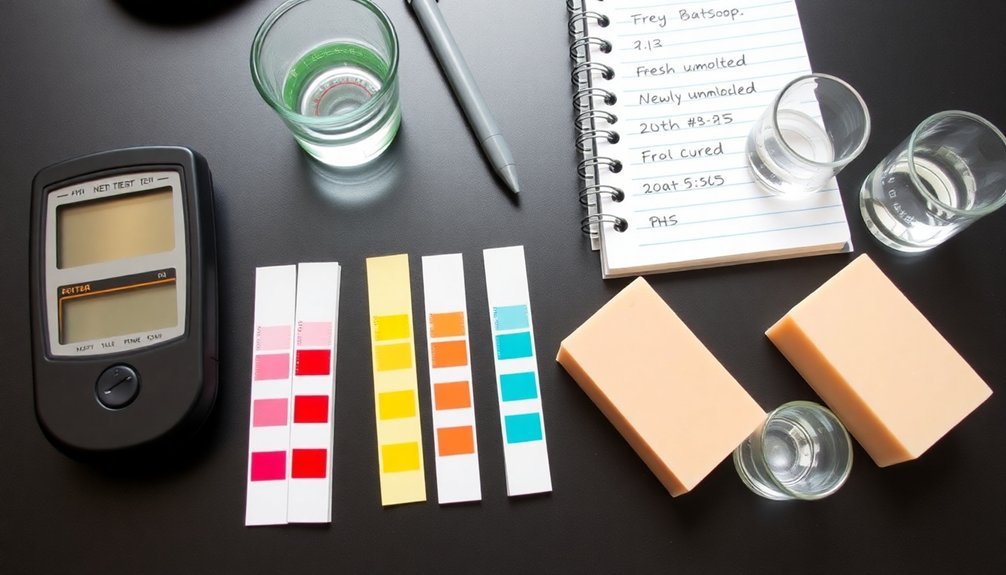
Equipment Comparison: Ph Strips vs. Digital Meters for Multiple Testing
When conducting multiple pH tests throughout your soap-making journey, choosing the right testing equipment becomes essential for consistent, reliable results.
Digital pH meters offer decimal point accuracy that pH strips simply can't match, especially when you're tracking subtle pH changes across multiple tests.
While pH strips are convenient, they present several limitations when testing soap pH repeatedly:
- Consistency issues – Strips provide one-time use readings that can be affected by soap's consistency, while digital pH meters maintain accuracy through proper calibration.
- Precision limitations – Digital meters detect minute pH changes vital for quality control across batches.
- Efficiency factors – Meters allow quick, repeated testing without preparing new strips each time.
For serious soapmakers conducting multiple tests, digital pH meters deliver the accurate readings necessary for consistent quality.
Troubleshooting Unexpected Ph Shifts Between Tests
Even with reliable equipment, you'll likely encounter pH fluctuations that might seem puzzling at first.
These shifts often stem from ongoing saponification processes as your soap continues to cure. The chemical reactions gradually neutralize remaining lye, potentially lowering the pH value over time.
Environmental factors like humidity and temperature can greatly impact your testing pH results between measurements.
If you're seeing inconsistent readings, check whether the soap was exposed to different conditions between tests.
Unexpected high pH product readings might indicate incomplete saponification or measurement errors during formulation.
For reliable results, test multiple soap areas and repeat measurements over several weeks of curing.
Remember that troubleshooting these fluctuations in pH isn't just about consistency—it's vital for ensuring skin safety in your final product, which should ideally fall between pH 8-10.
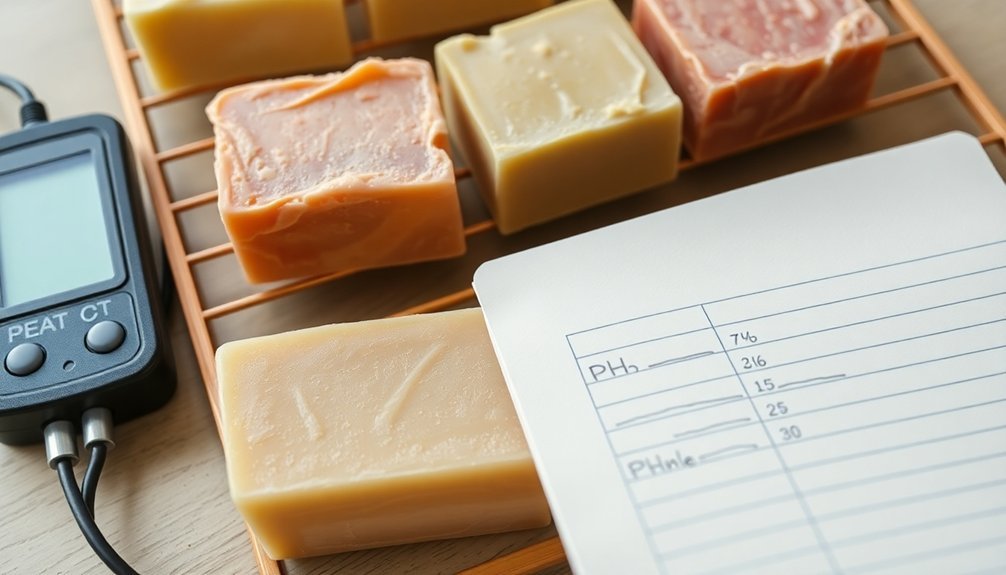
Documenting Ph Changes: Creating an Effective Testing Log
To create an effective pH testing log for your soap, you'll need to establish baseline values immediately after unmolding and throughout the curing process.
Record each measurement with its corresponding date, testing method, and specific conditions to identify patterns and anomalies as your soap matures.
Your documentation will reveal valuable curing patterns that help predict when batches reach ideal pH levels, ultimately improving your formulations and quality control procedures.
SUBHEADING DISCUSSION POINTS
Successful soapmakers understand that documenting pH changes throughout the curing process provides valuable insights into saponification effectiveness.
When you create a thorough testing log, you're establishing a reference guide that helps guarantee consistent soap quality with each batch. Your records should track pH readings from the moment you pour your soap through the entire curing process.
An effective testing log should include:
- Initial readings – Document the starting pH immediately after making your handmade soap.
- Milestone measurements – Record readings at specific intervals (24 hours, 1 week, 2 weeks, 4 weeks).
- Environmental notes – Track humidity, temperature, and storage conditions alongside pH values.
Record Baseline Values
The foundation of any effective pH testing program begins with accurate baseline pH values taken immediately after your soap is made. By establishing these initial measurements, you'll create a reference point that lets you track your soap's journey through the saponification process.
| Testing Stage | Expected pH Range | What It Tells You |
|---|---|---|
| Fresh Soap | 9.5-10.5 | Starting point |
| 1 Week Cure | 9.0-10.0 | Initial reactions |
| 2 Week Cure | 8.5-9.5 | Active processing |
| 4 Week Cure | 8.0-9.0 | Stabilization |
| Final Product | 7.5-8.5 | Product safety |
Recording these values helps you identify pH fluctuations that might indicate problems with your formula or process. As a soapmaker, your testing log becomes an invaluable tool for troubleshooting issues and improving your craft. Diligent documentation guarantees consistency across batches and enhances your understanding of how ingredients affect your final product.
Track Curing Patterns
While your soap undergoes the fascinating transformation from raw ingredients to finished product, methodically tracking its pH changes reveals critical insights about your formulation's success.
Creating a thorough testing log helps you monitor saponification progress and predict when your soap will be ready for use.
Your testing log should include:
- Date and pH readings at consistent intervals throughout the curing process
- Environmental conditions like temperature and humidity that might affect curing
- Observations about texture, scent, and appearance changes as pH stabilizes
This documentation establishes patterns specific to your recipes, helping you refine future batches for consistency.
More importantly, it guarantees your final product falls within the ideal pH range of 8-10, preventing potential skin irritation while confirming complete saponification has occurred.
Adjusting Formulations Based on Multiple Ph Test Results
Armed with consistent pH test results from your curing soaps, you'll gain valuable insights that can transform your soap-making process entirely.
When you notice pH levels trending higher than the ideal 8-10 range, you can adjust your formulations by reducing lye concentration or increasing superfat percentages in future batches.
Regular pH testing reveals how different oil combinations affect saponification rates.
You'll discover which formulations cure faster and which create milder products.
If you detect inconsistencies between batches with identical recipes, you can troubleshoot measurement errors or environmental factors affecting product quality.
The Impact of Additives on Long-Term Ph Stability
Although pure soap formulations tend to maintain consistent pH levels, introducing additives greatly complicates your soap's long-term stability profile.
Essential oils and fragrances can gradually alter your soap's pH as they interact with other ingredients during curing. Natural colorants may similarly trigger chemical reactions that shift pH values over weeks or months.
When you incorporate botanical elements and preservatives into your formulation, you're creating a complex chemical composition that continues to evolve.
This dynamic interplay affects pH stability in three significant ways:
- Exfoliants and botanical additives can release compounds that gradually modify your soap's pH.
- Preservatives may interact with other ingredients, causing incremental pH shifts.
- Essential oils can oxidize over time, potentially creating acidic byproducts.
Regular pH testing throughout the curing process helps you identify these changes before they become problematic.
Customer Safety: Why Consistent Ph Monitoring Matters
Monitoring your soap's pH isn't just good practice—it directly protects your customers from skin irritation caused by excessively alkaline products.
Your consistent testing helps identify potentially dangerous pH spikes that could trigger allergic reactions or sensitivity in users with compromised skin barriers.
Skin Irritation Prevention
Because your skin maintains a delicate acid mantle with an average pH of 5.5, consistent pH testing of soaps isn't just good practice—it's crucial for preventing irritation.
While handmade soaps typically range between pH 8-10, regular testing guarantees they don't creep toward the danger zone of pH 11 or higher, which can seriously damage your skin barrier.
When you monitor soap pH throughout the curing process, you're actively protecting against:
- Excessive dryness – High pH soaps strip natural oils, leaving skin parched and uncomfortable.
- Barrier disruption – Prolonged exposure to alkaline products compromises your skin's protective function.
- Long-term sensitivity – Repeated use of high pH soap can lead to chronic irritation and reactivity.
Testing multiple times helps identify problematic batches before they reach your customers' sensitive skin.
Allergy Risk Reduction
While many crafters focus on fragrance and color choices when considering allergies, consistent pH testing plays an equally critical role in reducing allergy risks for your customers.
Soaps with excessively high pH levels—particularly above 11—can damage your customers' acid mantle, creating the perfect conditions for allergic reactions and skin irritation.
By monitoring pH throughout the curing process, you'll guarantee your soap remains within the safe 8-10 range. This vigilance allows you to adjust your soap formulation promptly when readings indicate potential issues with excess lye.
Your attention to these details considerably improves product quality and customer safety.
Remember that each pH test provides valuable data that protects sensitive individuals from adverse reactions while building consumer confidence in your products—ultimately reducing your liability risks.
Frequently Asked Questions
When Should I Test the Ph of My Soap?
You should test your soap's pH after 24 hours, again at one week, and finally at four to six weeks during curing. This guarantees proper saponification and confirms it's safe for skin use.
Why Can You Only Use One Ph Test Strip per Solution?
You can only use one pH test strip per solution because it chemically reacts with the liquid during testing. Reusing gives inaccurate readings as the strip's reactive chemicals are already saturated from the first use.
Why Is Ph Level Important in Soap?
You'll want proper pH in soap to protect your skin's natural barrier. High pH (above 11) can cause irritation and dryness, while an ideal range (8-10) guarantees effective cleansing without disrupting your skin's health.
Why Is It Important to Test the Alkalinity of Soap?
You'll need to test soap's alkalinity to verify it's within the safe 8-10 pH range. This confirms proper saponification, prevents skin irritation, and guarantees your product meets safety regulations while delivering effective cleansing properties.
In Summary
By testing your soap's pH multiple times, you'll guarantee product safety, quality, and consistency throughout the curing process. You've learned that pH changes over time and with environmental conditions, requiring regular monitoring to confirm it's stabilized within appropriate ranges. Continue documenting these changes, adjusting formulations as needed, and you'll create safer products while developing a deeper understanding of your specific soap chemistry.


Leave a Reply