Your handmade soap bars need proper curing space to transform from soft, moisture-rich blocks into hard, long-lasting products. During the 4-6 week curing process, you'll want to maintain temperatures between 60-80°F with good air circulation and low humidity. Adequate spacing between bars on wire racks prevents moisture buildup and mold growth. Getting your curing environment right makes the difference between mediocre and exceptional soap bars – discover the key techniques to perfect yours.
Essential Elements of a Proper Curing Environment
When setting up your soap curing space, creating the right environment is essential for producing high-quality bars. Your proper curing environment needs well-ventilated conditions to promote air circulation, which helps moisture evaporate effectively from your soap.
Keep your curing space at a temperature between 60°F to 80°F, and maintain low humidity levels to prevent mold growth and guarantee optimal drying.
Control your soap room's temperature and humidity carefully – cold soap won't cure properly, while excess moisture breeds mold.
You'll want to arrange your bars on a curing rack with adequate spacing between them to avoid moisture buildup.
Don't place your curing rack in direct sunlight, as this can fade your soap's colors and diminish its fragrance.
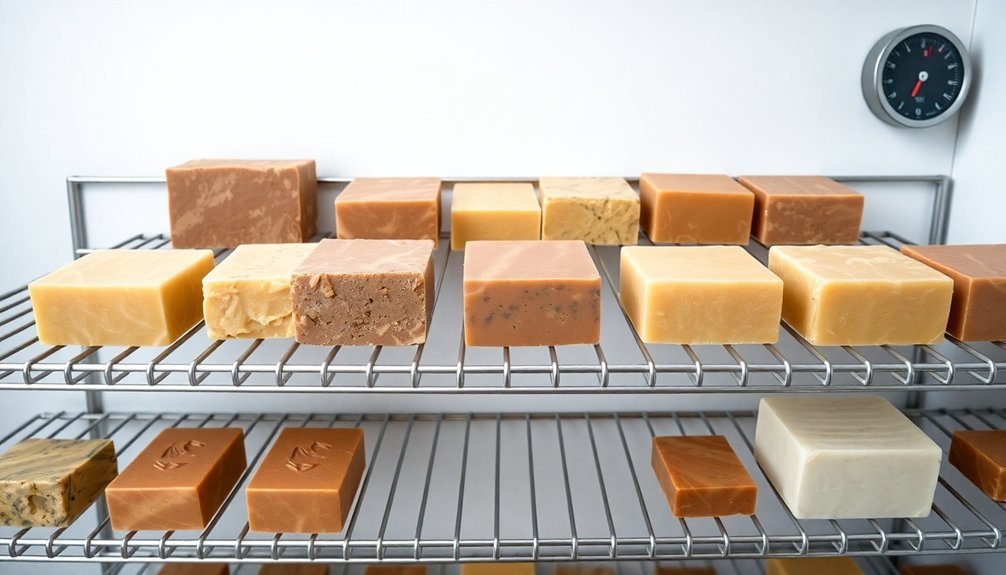
Optimal Spacing Requirements for Soap Bars
Three critical spacing rules govern the proper arrangement of your handmade soap bars during curing.
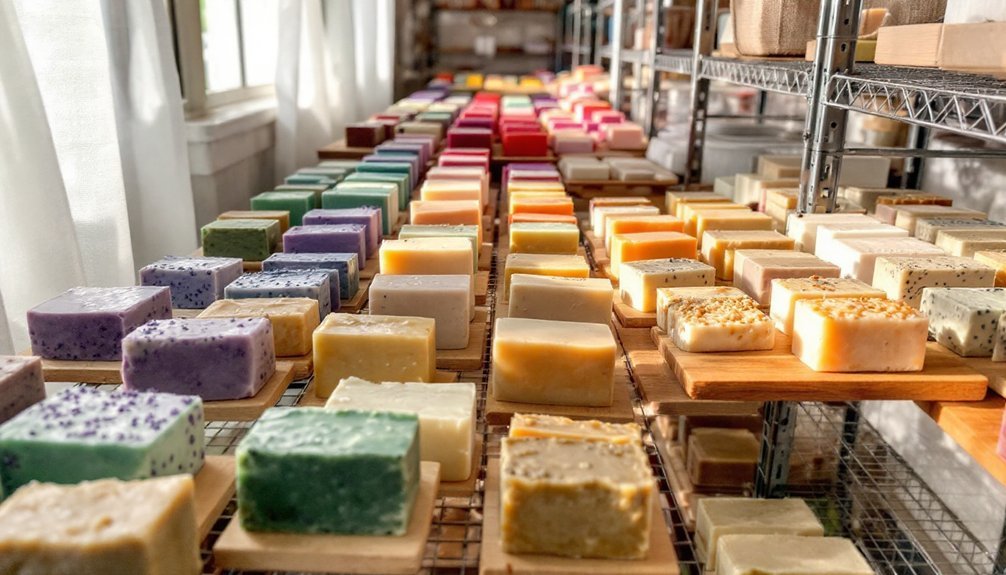
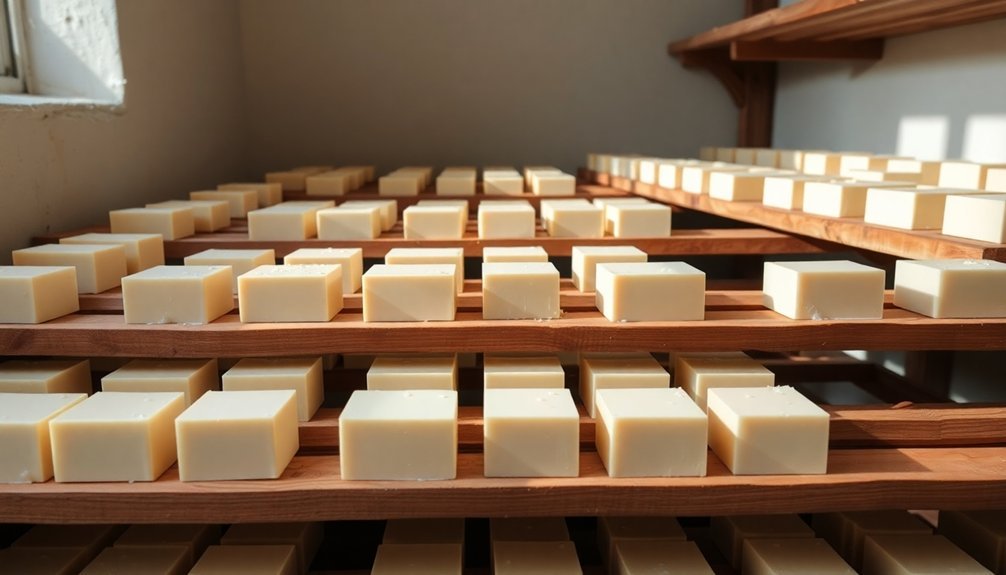
First, you'll need to position each bar at least an inch apart to prevent contact between them, ensuring ideal spacing that promotes adequate airflow and even drying.
Second, arrange your soap bars in a single layer on a wire rack, which allows air to circulate freely around all sides of the bars during the curing process.
Finally, you'll want to avoid overcrowding your curing area, as this can considerably impede airflow and extend drying times.
Remember to place your racks in a location that's protected from both direct sunlight and humidity, as these elements can compromise your soap's quality.
Following these spacing requirements will help you achieve properly cured, high-performing bars.
Temperature and Humidity Control Methods

Beyond proper spacing, controlling temperature and humidity plays a key role in successful soap curing.
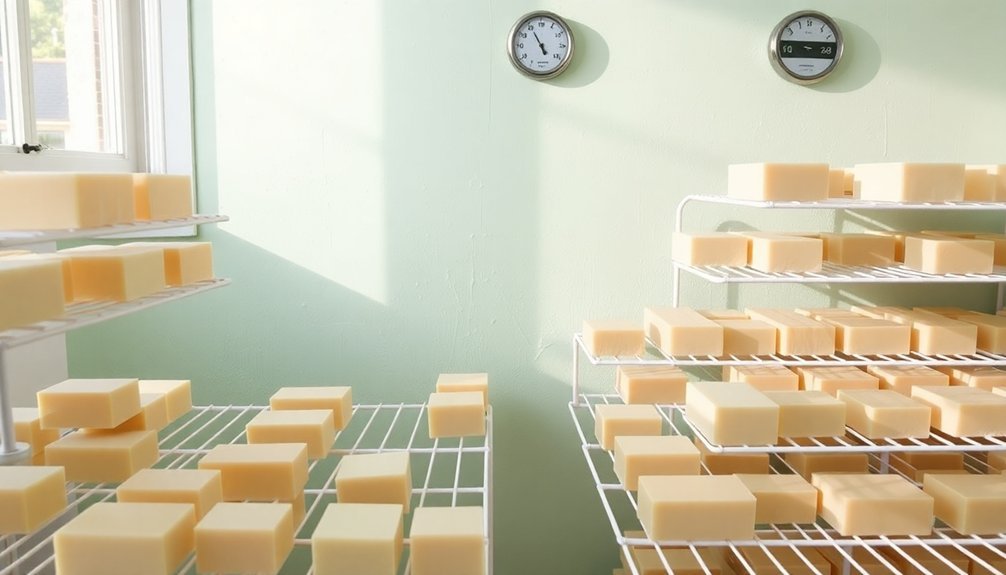
You'll want to maintain temperatures between 60°F to 80°F to guarantee optimal moisture evaporation and soap quality. If you're dealing with high humidity, consider using a dehumidifier to prevent your bars from becoming too soft during the curing process.
Set up your curing space to maximize air circulation by using wire racks and keeping adequate space between soap bars.
It's smart to monitor your environment with a hygrometer, which lets you track humidity levels and make necessary adjustments. Choose a cooling location away from direct sunlight and confirm it stays dry.
Air Circulation Techniques for Even Drying
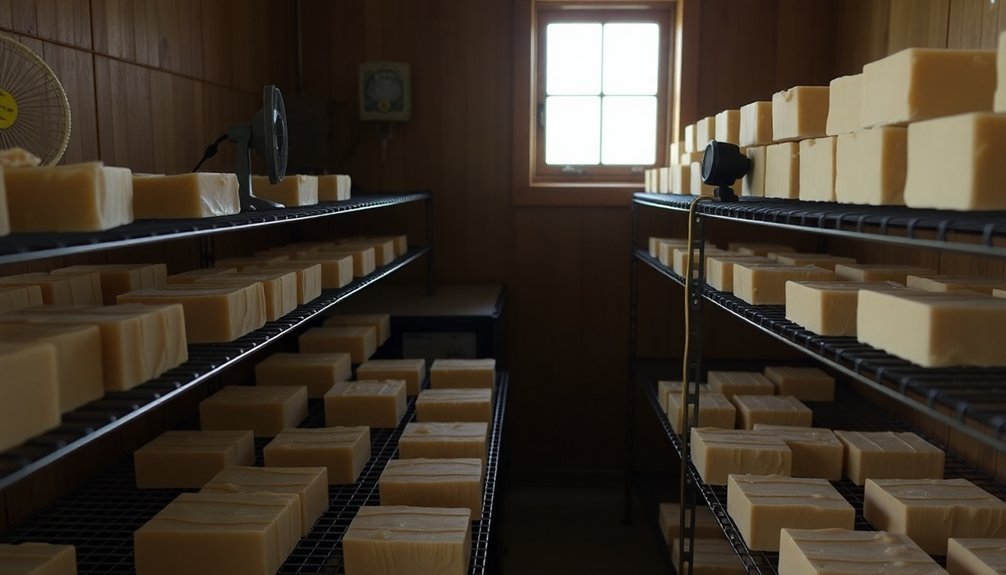
Position your curing racks near windows or doorways to take advantage of natural airflow, while ensuring they're elevated enough to allow air movement underneath the bars.
You'll want to arrange multiple racks in a staggered formation rather than directly aligned, which creates ideal pathways for air to move freely throughout the room.
If you're working with limited space, consider using portable fans strategically placed at different heights to promote cross-ventilation between your curing racks.
Strategic Rack Placement Tips
When setting up your soap curing space, strategic rack placement plays an essential role in achieving consistently dried, high-quality bars.
You'll want to position your wire rack or tray in a cool, dry area that allows air to circulate around each soap bar freely. Maintain proper spacing between bars to prevent moisture buildup and promote maximum air circulation.
Set up your curing space near a fan or in a room with open windows to guarantee good ventilation.
Don't place your racks in direct sunlight or humid areas, as these conditions can slow down the curing process and affect your soap's hardness.
Remember to rotate the soap bars every few days, ensuring all sides get equal air exposure.
Maximizing Cross-Room Ventilation
Creating ideal cross-room ventilation requires a systematic approach to air circulation throughout your curing space.
Position your soap bars on wire racks with adequate spacing between each bar to promote even drying and prevent moisture buildup. You'll want to maintain temperatures between 60°F and 80°F for optimal drying conditions.
To enhance air circulation in your curing area, install fans strategically and keep windows open to create a consistent draft. You can also use exhaust fans to manage humidity levels effectively.
Don't overcrowd your racks – proper spacing between soap bars is essential for allowing air to flow freely around each bar.
This systematic approach to ventilation will help prevent damp spots and potential mold growth while ensuring your handmade soaps cure evenly and efficiently.
Rack and Shelf Setup Guidelines
Proper rack and shelf arrangement forms the foundation of successful soap curing. You'll need to position your bars in a single layer on wire racks or shelves, ensuring there's adequate space between each piece. This setup maximizes air circulation and drying efficiency throughout the curing process.
Position soap bars on wire racks with adequate spacing between each piece to ensure proper air circulation and optimal curing results.
When arranging your curing space, choose a well-ventilated area with temperatures between 60°F and 80°F. Don't crowd your bars together – they need breathing room to prevent sticking and maintain ideal curing conditions.
You'll want to flip the soap bars every few days to promote even drying on all sides. Remember to monitor your setup regularly and adjust the spacing if needed.
A properly organized rack system helps prevent moisture buildup and protects your handmade soaps from developing quality issues during the curing phase.
Common Curing Space Mistakes to Avoid
Despite the care taken in making handmade soap, several common mistakes during the curing phase can compromise your final product.
When you overcrowd your soap bars, you'll restrict air circulation, preventing proper saponification and risking mold growth.
Don't place your soaps in humid areas, as this slows the curing process and results in soft, quick-dissolving bars.
You'll want to protect your curing soap from direct sunlight to prevent color fading and fragrance degradation.
Never wrap your bars in non-breathable materials like plastic – instead, use breathable options such as muslin or parchment paper.
Remember to flip your soap bars regularly during the cure to guarantee even moisture distribution and peak hardness.
These simple adjustments will help you achieve consistently high-quality results in your soap making.
Monitoring Tools and Equipment
To maintain the professional quality of your handmade soap, monitoring tools provide valuable data throughout the curing phase.
You'll need a hygrometer to track humidity levels and thermometers to guarantee temperatures stay between 60°F to 80°F in your curing space.
Set up proper curing racks to elevate your soap bars, enabling essential air circulation that prevents moisture from becoming trapped underneath.
Keep detailed records using curing cards, where you'll note important information like start dates, end dates, and any observations during the process.
Don't forget to regularly check your soap's hardness and moisture levels with a scale – this helps you determine when your bars have reached their best curing point.
These monitoring tools work together to create the ideal environment for producing perfectly cured soap.
Seasonal Adjustments for Curing Areas
As seasons change throughout the year, you'll need to adapt your soap curing area to maintain ideal conditions.
Seasonal humidity levels can greatly impact your curing process, requiring you to make specific adjustments for best drying conditions.
During humid summer months, you'll want to use a dehumidifier to control excess moisture that could slow down curing.
In contrast, winter's temperature fluctuations might require heating elements to keep your space between 60°F and 80°F, helping your soap cure effectively.
Cooler temperatures often demand extended curing periods, while warmer weather can speed up initial hardening.
To guarantee consistent quality year-round, make monitoring environmental conditions part of your routine.
Regular checks and adjustments will help you maintain proper curing conditions regardless of seasonal challenges.
Space-Saving Solutions for Multiple Batches
Transform your limited curing area into an efficient workspace by installing vertical drying rack systems that let you stack multiple soap batches while maintaining proper airflow.
You'll maximize your available square footage with multi-tier storage solutions that keep batches organized and easily accessible for regular monitoring.
A compact curing cart with adjustable shelves offers flexibility to accommodate varying batch sizes while allowing you to move soaps to ideal curing locations as needed.
Vertical Drying Rack Systems
Space-conscious soap makers understand the value of vertical drying rack systems for curing multiple batches efficiently.
You'll maximize your available space by utilizing height rather than floor area, while ensuring peak airflow around each bar of soap.
These versatile systems feature adjustable shelves that accommodate different soap sizes, making them perfect for diverse production needs.
The thoughtful design promotes proper air circulation, preventing unwanted moisture buildup that could compromise your product's quality.
When you place your vertical drying rack in a well-ventilated area, you'll enhance the curing process considerably.
You can trust these sturdy racks to support heavy loads without risking damage to your soap bars.
Multi-Tier Storage Solutions
When managing multiple soap batches, multi-tier storage solutions offer you an ingenious way to maximize your curing space while maintaining ideal airflow.
By arranging wire racks vertically, you'll create excellent conditions for your soap bars to cure evenly while preventing unwanted moisture buildup.
You'll find these systems particularly valuable when working with different recipes simultaneously. The tiered setup lets you effectively organize and label each batch, making it simple to track curing times and monitor progress.
You'll appreciate the easy access and visibility to all your soaps, allowing you to rotate bars as needed for superior quality.
Whether you're a small-batch producer or scaling up your production, multi-tier storage solutions provide the flexibility and efficiency you need to maintain professional standards throughout the curing process.
Compact Curing Cart Design
Designing a compact curing cart revolutionizes how you'll manage multiple soap batches in limited spaces. You'll maximize vertical storage while ensuring proper air circulation through adjustable shelves and breathable materials like wire racks.
This efficient design prevents overcrowding and maintains favorable curing conditions for your handmade bars. The cart's mobility lets you easily move your soap batches to areas with better ventilation or away from direct sunlight.
You'll appreciate the built-in humidity monitor that helps you track environmental conditions, ensuring your soap cures properly. The compact design features multiple tiers that accommodate different batch sizes without sacrificing floor space.
Professional Storage Systems and Materials
Professional storage systems play an essential role in maintaining your handmade soap's quality throughout the curing process.
Wire racks and trays create ideal airflow, effectively preventing moisture buildup that could compromise your soap's integrity.
When it's time to store your soap, choose breathable packaging materials like muslin, parchment paper, or cardboard boxes.
These options protect your products from dust while allowing proper air circulation.
Don't use plastic wrap, as it traps moisture and risks mold growth.
Keep your cured soap in a cool, dry space away from direct sunlight and heat to preserve its fragrance and prevent degradation.
Implement a rotation system for your stored batches, ensuring you sell older soaps first.
This practice guarantees your customers receive the freshest products while maintaining consistent quality standards.
Quality Control Indicators During Curing
Monitoring your soap's progress during curing helps confirm a high-quality final product. As you cure your soap, you'll want to check several key indicators to verify saponification is complete.
Your bars should feel hard and firm to the touch, with no sticky residue or excess moisture on the surface.
A well-cured soap bar should have a solid, firm texture without any tackiness or dampness remaining on its exterior.
Make sure you've flipped every few days to promote even drying and prevent potential mold growth.
You'll notice the quality of soap improves dramatically during the curing process, especially in its lather production. When fully cured, your bars will create abundant creamy lather instead of the weak suds typical of fresh soap.
Watch for color changes too – as your soap cures, it may develop deeper, richer hues. These visual and tactile changes are reliable signs that your bars are properly maturing.
Frequently Asked Questions
Why Does Homemade Soap Need to Cure?
Your homemade soap needs to cure so excess water can evaporate, making bars harder and longer-lasting. It'll also complete saponification, balance pH levels, and improve lather quality while ensuring it's safe for your skin.
Why Is Slab Curing Important?
Slab curing's important because it'll help your handmade soap bars harden properly, improve lather quality, and guarantee safe pH levels. You'll get better air circulation, which prevents mold and helps water evaporate effectively.
Where Is the Best Place to Cure Soap?
You'll get the best soap curing results in a cool, dry, well-ventilated space between 60-80°F. Place your bars on wire racks, away from direct sunlight and humidity, ensuring they're spaced apart for proper airflow.
How to Store Handmade Soap After Curing?
Store your cured soap in a cool, dry area using breathable containers like paper boxes or cloth bags. You'll want to keep them away from sunlight and rotate your stock to maintain freshness.
In Summary
You'll find that proper curing space makes the difference between mediocre and exceptional handmade soap bars. By maintaining ideal temperature, humidity, and airflow while giving each bar adequate room to breathe, you're ensuring the best possible outcome. Don't skimp on your curing setup – your soap's quality, longevity, and performance depend on these vital final weeks of development.


Leave a Reply