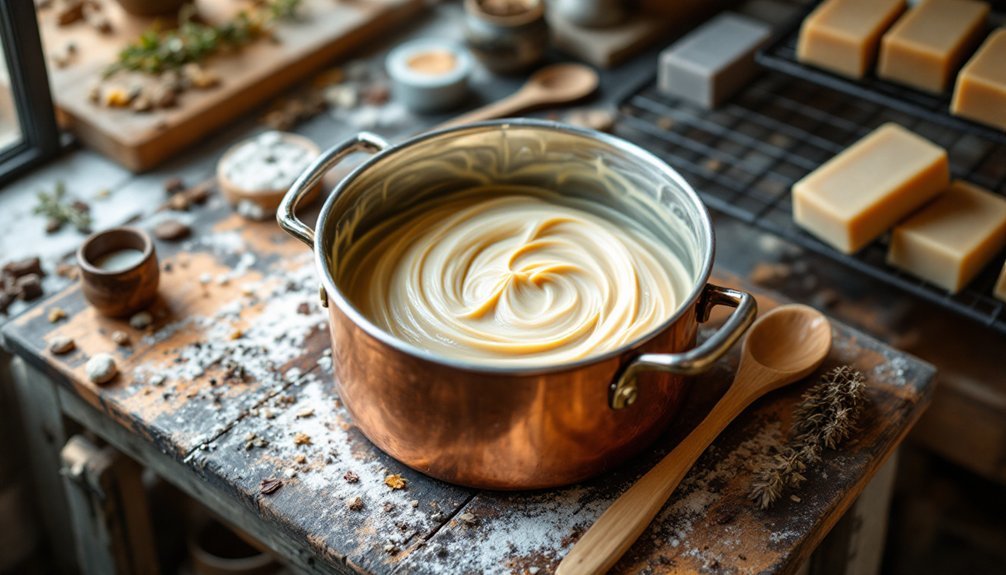
Hand-stirred cold process soap making connects you to ancient traditions dating back to Babylonian times. You'll need dedicated tools like wooden spoons or whisks and must master figure-eight movements for consistent emulsification. Keep temperatures between 100-130°F for better control, and work slowly to achieve intricate swirls and textures. Safety remains paramount—always wear protective gear and guarantee proper ventilation. These foundational techniques open the door to creating unique, artisanal soaps with your personal touch.
The History and Heritage of Hand-Stirred Soap Techniques

While modern soap production relies heavily on machinery and industrial processes, the ancient art of hand-stirred soap making traces its roots back thousands of years to early civilizations.
Evidence shows Babylonians first developed these techniques, with Egyptians and Greeks later adopting similar methods using fats and ashes.
During the Middle Ages, soap making evolved from a household necessity to a respected craft, with dedicated guilds forming to preserve and share specialized knowledge. The scientific work of Michel Chevreul later enabled artisans to create soaps with more consistent qualities.
The discovery of new alkalis, particularly sodium hydroxide (lye) and potassium hydroxide (potash), revolutionized the practice. These chemical advancements allowed artisans to create harder, longer-lasting soaps through the cold process method you'll learn about.
Though industrialization transformed soap into a mass-produced commodity by the 20th century, traditional hand-stirring techniques remain alive through artisanal preservation.
Essential Tools for Traditional Hand-Stirring Methods
You'll find whisks create faster emulsification while wooden spoons offer greater control during the critical trace phase of soap making.
Silicone spatulas excel at scraping every bit of soap batter from your mixing bowl, preventing waste and ensuring consistent batches.
Choosing the right stirring tool for your specific recipe can greatly impact both your mixing experience and the final quality of your hand-crafted soap.
Always remember that any equipment used for soap making, including stirring tools, should be dedicated to soapmaking and never returned to food preparation purposes.
Whisks vs. Wooden Spoons
When selecting tools for traditional cold process mixing, the choice between whisks and wooden spoons can greatly impact your results. Whisks excel at incorporating air, making them perfect for creating light, fluffy textures, while wooden spoons shine when handling delicate ingredients that shouldn't be bruised. Wooden spoons are also prized for being non-reactive with acidic ingredients throughout the mixing process.
| Feature | Whisks | Wooden Spoons |
|---|---|---|
| Heat Handling | Conducts heat | Poor conductor, stays cool |
| Surface Compatibility | May scratch non-stick | Safe for all surfaces |
| Primary Function | Aeration and blending | Gentle stirring and folding |
| Durability | Varies by material | Can last generations with care |
You'll find wooden spoons offer thermal insulation that prevents temperature changes in your mixture, while their ergonomic design reduces hand fatigue during extended stirring sessions. For non-stick cookware, wooden utensils are your safest bet to avoid damaging expensive surfaces.
Silicone Spatula Benefits
Silicone spatulas represent the unsung heroes of hand-stirred cold process mixing, combining flexibility and durability in one essential tool. They withstand extreme temperatures (-40°F to 446°F), making them perfect for both hot and cold process methods.
You'll appreciate their flexible edges that scrape every bit of soap batter from containers, minimizing waste and ensuring thorough mixing. Unlike wooden tools that absorb oils and fragrances, silicone prevents cross-contamination between batches.
When creating intricate designs like layered or swirled soaps, these spatulas offer precise control with their non-stick surfaces. They're ideal for techniques like spoon plop and pour-over methods, helping you achieve professional-looking results.
For mixing colorants and fragrances, silicone tools distribute ingredients evenly without incorporating unwanted air pockets—a vital advantage when aiming for smooth, consistent soap. As recommended by experts, always use separate tools for soap making and food preparation to prevent potential contamination with lye or other soap ingredients.
Selecting Ingredients That Complement Manual Mixing
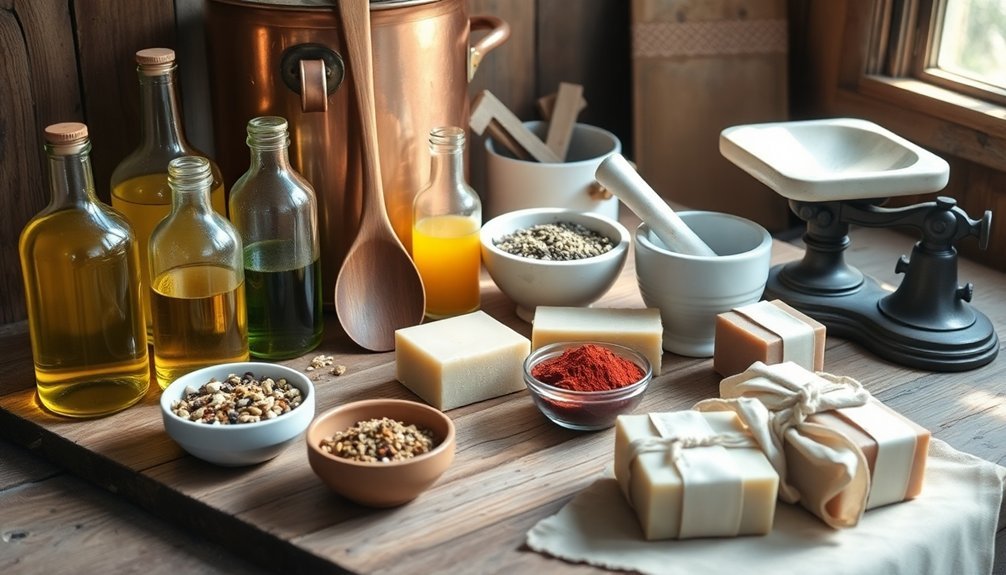
When selecting ingredients for hand-stirred soap, you'll want to balance fast-tracing oils like coconut with slower-moving olive oil to maintain a workable consistency.
Butters like shea can contribute to manual mixing success when used in small amounts and properly melted before combining with other oils.
Consider incorporating trace-friendly additives such as castor oil and sodium lactate, which enhance your soap's quality without accelerating trace beyond what's manageable for hand-stirring.
For beginners, the simple combination of just two oils – coconut and olive – produces an excellent hard bar with good lather while keeping the process straightforward and manageable.
Fast-Tracing Oil Combinations
Selecting the right combination of oils is essential for successful hand-stirred cold process soap making, especially when you're working without the mechanical advantage of a stick blender.
For faster trace by hand, incorporate coconut oil as your primary accelerant due to its high exothermic reaction. Balance it with olive oil, which traces more slowly, to achieve manageable working times.
Consider adding small amounts of castor oil to maintain a reasonable pace while enhancing soap qualities. You'll find that temperature considerably impacts your trace speed—warmer temperatures expedite the process. A 10-degree difference can significantly change how quickly your soap reaches trace when working with manual methods.
Be strategic with additives; honey, clove essential oil, and milk contain sugars that generate heat and accelerate trace.
When hand-stirring, a 70/30 blend of slower oils to faster ones creates an ideal balance that reaches trace without excessive fatigue.
Butters for Manual Success
Choosing the right butters for your cold process soap can considerably impact your success with hand-stirring techniques.
Butters provide exceptional moisturizing benefits while influencing your soap's trace time and consistency. When working with manual methods, select butters that complement slower mixing speeds.
Three excellent butter options for hand-stirred soaps:
- Shea butter – Offers a soft consistency that's easily incorporated by hand while providing rich moisturization.
- Mango butter – Balances softness with firmness, creating stable bars without requiring excessive stirring.
- Sal butter – Known for stability and relatively easy blending characteristics.
For ideal results, maintain oil temperatures between 135-145°F and use stainless steel whisks. Integrating butters with saturated fats like palm oil or coconut oil can significantly accelerate trace when hand stirring.
Balance your recipe with appropriate proportions of butters to achieve the perfect consistency and avoid overmixing, which can trap air bubbles.
Trace-Friendly Additives
Successful hand-stirred soap making relies heavily on additives that won't accelerate trace or complicate your manual process.
Olive oil should form the foundation of your recipe due to its slow-tracing nature, giving you ample working time when mixing by hand.
Avoid additives known to accelerate trace, such as certain essential oils and fragrances that act as catalysts.
If you're using clays or other water-absorbent materials, pre-mix them with water to prevent rapid thickening.
Keep temperatures below 110°F to maintain control throughout the process.
Consider using a higher lye solution percentage between 25% to 33% to allow more time for incorporating additives and achieving intricate designs without rushing.
Add colorants and fragrances at light trace for even distribution, while saving textural elements for medium trace when you need suspension.
Remember that cold additives like milk can dramatically speed up thickening when added late in the process, so plan accordingly.
Temperature Management During Hand-Stirring
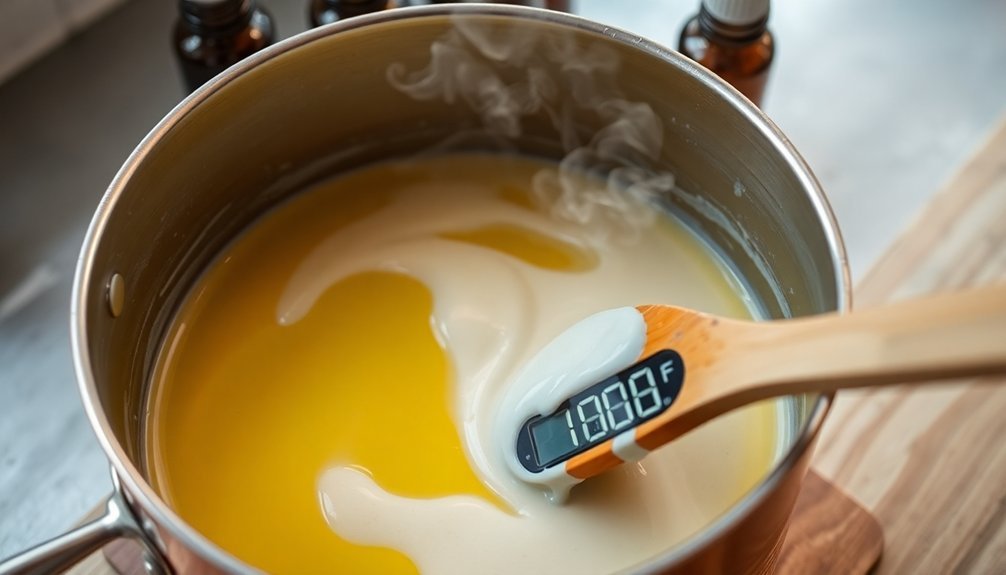
When you're hand-stirring cold process soap, proper temperature management becomes essential to achieving successful saponification. Without mechanical mixers generating heat, you'll need to be even more precise with your initial temperatures.
For hand-stirring success, aim for these temperature guidelines:
- Keep lye and oils within 5-10°F of each other, typically between 120-130°F for standard recipes.
- Lower temperatures to 100-110°F when working with milk or other heat-sensitive additives.
- Consider using the heat transfer method, allowing the hot lye solution to melt solid oils directly.
Remember that cooler temperatures extend stirring time but provide better control, while warmer temperatures speed trace but risk acceleration. Hand-stirring at appropriate temperatures helps prevent false trace issues when oils aren't properly melted.
Always use a reliable thermometer and keep your workspace at a consistent temperature to prevent unwanted fluctuations during mixing.
The Rhythm and Technique of Effective Stirring
Your stirring pattern greatly impacts both the time to trace and the quality of your soap, so aim for fluid, figure-eight movements that maintain constant soap contact.
When your arms tire during longer hand-stirring sessions, implement a rest-and-resume strategy by briefly pausing every few minutes to shake out your wrists.
You'll find this rhythm not only prevents fatigue but also lets you monitor trace development more effectively as the soap mixture gradually thickens.
This hand-stirring technique resembles the methodical and dedicated approach that allows the Portal to Texas History to digitally preserve over two million historical items that researchers access worldwide.
Stirring Patterns Matter
The artistry of cold process soap making extends beyond ingredients to the very movements of your hands. Your stirring pattern directly impacts soap texture, emulsification, and design possibilities. Hand-stirring creates unique character that machine mixing simply can't replicate.
When developing your technique, remember these key elements:
- Direction matters – Consistent circular motions guarantee even lye distribution while reducing air incorporation that could weaken your final bar.
- Rhythm affects trace – Steady, deliberate stirring at lower temperatures (80-90°F) extends your working time for intricate designs.
- Adapt for design – For swirls, slow your stirring after color addition, while textured tops require faster movements at medium trace.
Your stirring pattern becomes your signature, transforming simple ingredients into personalized artisanal soap through mindful, intentional movement. When working without electricity, be prepared that hand-stirred batches typically require longer cure times to achieve proper hardness.
Rest-and-Resume Strategy
Three essential elements define the rest-and-resume technique in hand-stirred soap making: timing, observation, and adaptation.
You'll need to implement strategic pauses during your mixing process to maintain control over both temperature and consistency.
When your mixture reaches 90°F to 120°F, monitor it carefully while alternating between stirring and resting. This prevents overheating and gives you time to assess the developing trace.
During rest periods, check your soap's texture—it should gradually thicken to resemble cake batter or pudding. Unlike hot process soap which speeds up saponification through additional heat, cold process relies solely on your careful stirring technique.
For larger batches, extend your rest intervals to manage the increased heat from saponification.
Always keep your thermometer handy for regular temperature checks.
Recognizing Trace Stages Without Mechanical Tools

While most modern soap makers rely on stick blenders, mastering hand-stirred cold process soap requires recognizing trace stages through visual and tactile indicators alone.
You'll need to develop a keen eye for the subtle changes that occur as oils and lye emulsify without mechanical assistance.
Watch for these key shifts as you stir:
- Initial trace – Mixture turns slightly cloudy with a thin, milky consistency that leaves temporary impressions when drizzled.
- Medium trace – Develops pudding-like thickness with streaks that remain visible longer, similar to cake batter.
- Thick trace – Achieves a mashed potato consistency that holds its shape, perfect for textured designs.
Remember that hand-stirred batches develop much more slowly—what takes minutes with a blender may require an hour by hand. Be especially vigilant about distinguishing between true emulsification and false trace which can occur when temperatures fluctuate.
Troubleshooting Common Hand-Stirring Challenges
Many soap makers encounter frustrating obstacles when shifting to hand-stirred methods, but knowing how to identify and solve these issues transforms the experience.
When your soap batter separates, insufficient stirring is often the culprit, while certain fragrance oils can accelerate separation. Combat this by stirring more thoroughly or applying hot process techniques to salvage your batch.
Temperature plays a critical role—low temperatures cause butter solidification resulting in coarse texture, while excessive heat speeds saponification and can create cracks. Aim for consistent room temperatures and use a thermometer to monitor your mix.
Remember that high olive oil content slows trace, while coconut and palm oils accelerate it. Consider stirring in 5-10 second bursts when using a stick blender to maintain better control over the process.
If you notice hard spots or uneven texture, you've likely experienced incomplete mixing or overheating. Adjust your technique accordingly to achieve smooth, consistent results.
Decorative Techniques Unique to Slow-Stirred Soaps
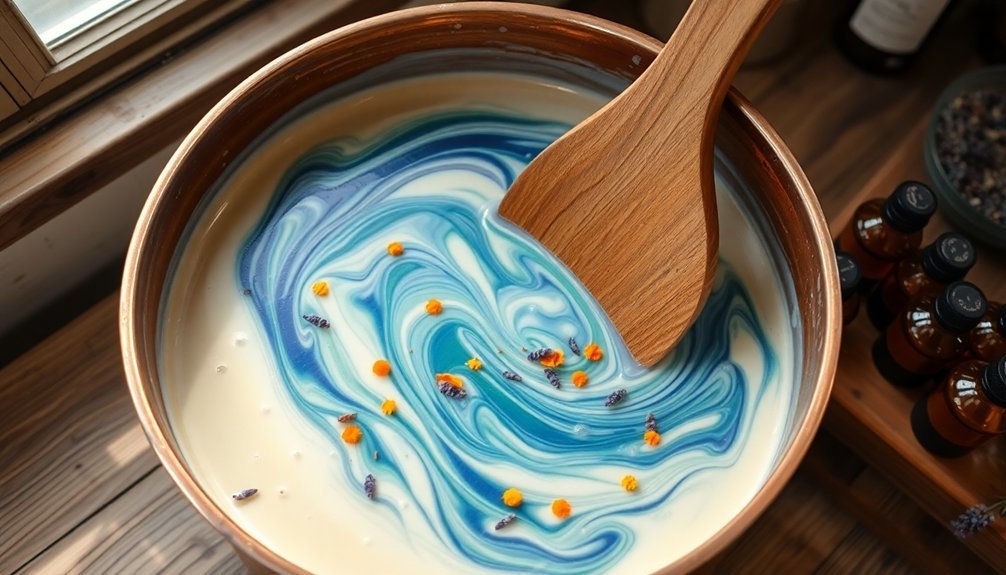
Artistry in cold process soap making reaches new heights through hand-stirring methods, enabling decorative techniques that machine mixers simply can't match.
The slow-stirring approach gives you extended working time with your soap batter, allowing for intricate designs and visual effects that require precision and patience.
Your slow-stirred soaps can showcase signature decorative elements through these techniques:
- Layered swirls – Create distinct color separations by folding the soap mixture onto itself or dropping colored portions from various heights for dynamic patterns.
- Textured embellishments – Incorporate exfoliants, herbs, and clays for both aesthetic appeal and functional benefits. Just as JSON format data provides structured representation for evaluation, these embellishments offer organized visual elements that enhance your soap's appeal.
- Detailed molding – Utilize the thicker, more manageable batter to fill intricate molds that capture fine details other mixing methods can't preserve.
Safety Protocols for Extended Mixing Sessions
Because hand-stirred cold process soap making extends your exposure to potentially hazardous materials, proper safety protocols become even more critical than with quick-mix methods.
When you're committing to hand-stirring for 30+ minutes, plan for enhanced ventilation by positioning yourself near an open window with a fan directing fumes outward.
During extended sessions, you'll need to maintain constant vigilance with your protective gear. Check for glove deterioration periodically, and take scheduled breaks to step away from the mixing area to breathe fresh air.
Keep water within arm's reach for immediate flushing if needed.
Prepare your workspace to accommodate longer standing times—use anti-fatigue mats and position equipment at ergonomic heights to prevent fatigue-related accidents.
Never compromise safety for artistic processes, no matter how tedious the mixing becomes.
Time Management Strategies for Hand-Stirred Batches
Successful hand-stirred cold process soap making hinges on effective time management strategies that accommodate the prolonged nature of manual mixing. When working without a stick blender, you'll need to allocate considerably more time while maintaining optimal conditions for proper saponification.
For maximum efficiency with hand-stirred batches:
- Prepare thoroughly – Measure and organize all ingredients, tools, and molds before beginning to eliminate interruptions during the critical mixing phase.
- Enhance your recipe – Incorporate higher percentages of saturated fats and castor oil to achieve faster trace times without compromising design possibilities.
- Maintain ideal temperatures – Work between 135-145°F to accelerate the trace process naturally, always using a thermometer to monitor and avoid scorching.
Consider splitting larger batches into manageable portions when creating complex designs requiring precise timing between layers.
Enhancing Your Soaps: Additives in Hand-Stirred Methods
While hand-stirred cold process soap making requires more patience than using stick blenders, it offers unique advantages when incorporating additives. The slower process gives you greater control over when to add delicate ingredients like essential oils and botanicals.
Hand-stirring allows you to gently fold in exfoliating materials such as oatmeal or coffee grounds without breaking them down. You'll also have more time to work with natural colorants and clays before trace occurs.
This methodical approach is particularly beneficial when incorporating honey, shea butter, or other luxurious ingredients that might accelerate saponification.
When adding fragrances, you'll find the gradual incorporation prevents essential oils from evaporating as quickly. Remember that citric acid, scent fixatives, and certain preservatives can be integrated more evenly with this deliberate stirring technique.
Frequently Asked Questions
Can Hand-Stirred Soap Be Made Without Using Any Lye?
No, you can't make hand-stirred soap without lye. While you'll avoid handling lye directly with melt-and-pour bases, traditional cold process soap always requires lye for the saponification reaction that creates true soap.
How Long Does Hand-Stirred Soap Need to Cure?
Your hand-stirred soap needs 4-6 weeks to cure properly. If it contains high olive oil content, especially castile soap, you'll want to extend curing up to six months for best quality and mildness.
Does Hand-Stirring Produce More Natural Soap Than Machine Mixing?
Hand-stirring doesn't inherently make soap more "natural" than machine mixing. You'll find the naturalness depends on your ingredients, not your mixing method. However, you'll have more control over texture and consistency when hand-stirring.
Can I Substitute Coconut Oil With Another Oil?
Yes, you can substitute coconut oil with babassu oil, palm kernel flakes, or tallow. For best results, recalculate your recipe with a soap calculator since different oils require different amounts of lye.
Will Hand-Stirring Affect the Final Scent of Soap?
Hand-stirring won't directly affect your soap's final scent. It's more about fragrance quality, recipe ingredients, and proper curing. You'll notice texture differences with hand-stirring, but the scent depends on your selected fragrance oils.
In Summary
You've now grasped the fundamentals of hand-stirred cold process soap making. It's not just about creating soap—it's about connecting with tradition while crafting something uniquely yours. As you continue experimenting with rhythms, temperatures, and ingredients, you'll develop your signature style. Remember, hand-stirring isn't merely a technique; it's a mindful practice that yields beautiful, quality soaps worth the extra time you've invested.


Leave a Reply