
Suet soap starts with raw fat from around cattle kidneys that you'll need to render into tallow. To render suet, chop it into small pieces, heat it slowly with water at 200°F for about 12 hours, then strain through cheesecloth to remove impurities. You can add salt to help purify the mixture. Once rendered, combine your tallow with coconut oil, olive oil, and lye using proper measurements for soap making. There's much more to creating the perfect bar than meets the eye.
Understanding Raw Suet: From Farm to Soap

While many soap makers are familiar with common ingredients like olive oil and coconut oil, suet offers unique properties that make it an exceptional choice for soap making. You'll find this raw fat around the kidneys and loins of cattle, where it naturally accumulates in its purest form.
Before you can use suet in soap making, you'll need to convert it into rendered tallow through a specific process. This transformation begins with carefully selecting high-quality suet that's free from tissue and impurities.
High-quality suet must be rendered into tallow before use in soapmaking, requiring careful selection and processing of pure, tissue-free fat.
The rendering tallow process involves melting the fat under controlled temperatures while separating unwanted materials. When you're working with suet, remember that cleaner raw materials will yield better results and help prevent your final product from turning rancid.
The high melting point of rendered tallow makes it particularly valuable for creating long-lasting, hard bars of soap.
Essential Tools and Equipment for Rendering
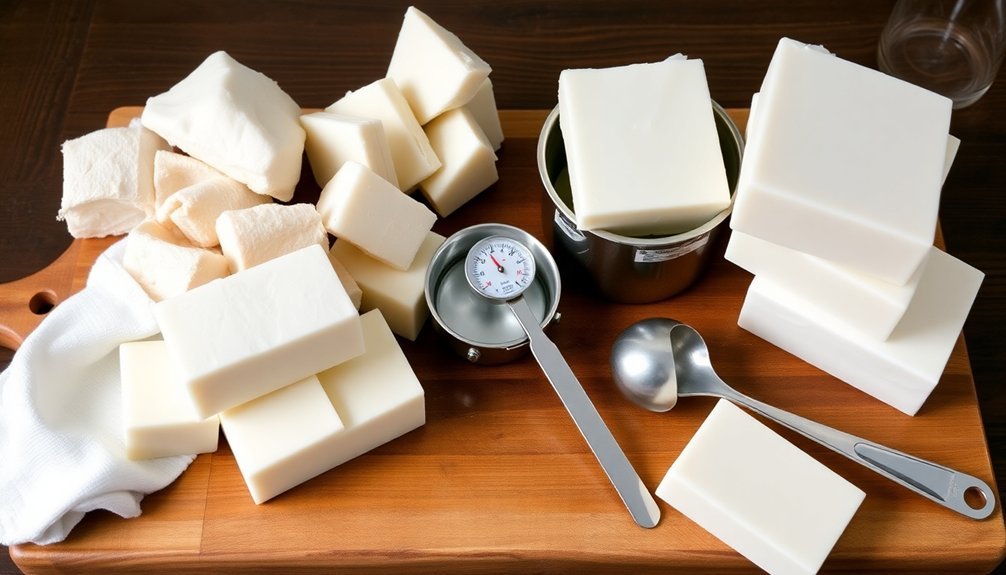
You'll need several basic kitchen tools to successfully render suet into tallow, including a sharp knife for chopping, a large stockpot for heating, and a reliable thermometer to maintain the ideal 200°F temperature.
For safe and effective straining, you'll want either cheesecloth or a fine mesh strainer to remove impurities from your melted fat.
A kitchen scale helps you measure precise amounts when adding salt for purification, while proper storage containers like Ready Tainer freezer containers guarantee your rendered tallow stays fresh.
Basic Kitchen Equipment Required
Before beginning your suet rendering journey, gathering the right kitchen equipment guarantees a smooth and successful process.
You'll need a stockpot or roaster oven to heat the fat evenly, along with a kitchen scale to measure your suet accurately. A reliable thermometer is essential to maintain the ideal temperature of 200°F during rendering.
Don't forget to have a fine mesh strainer or cheesecloth ready for filtering out impurities from your melted suet.
If you're planning to make soap, an immersion blender will help create consistent mixtures.
For storage, you'll want appropriate containers – opt for freezer-safe jars or Ready Tainer storage containers. Choose dark glass or opaque storage containers to protect your rendered tallow from light exposure, which helps maintain its quality over time.
Safe Straining Tools Needed
Proper straining tools stand at the heart of successful suet rendering. To render beef suet effectively, you'll need a fine mesh strainer or cheesecloth as your primary safe straining tools. These essential tools help remove impurities and unwanted particles from your melted fat, ensuring a clean final product.
When you're setting up your straining station, position a large pot beneath your strainer to catch the filtered tallow. The cheesecloth should be sturdy enough to withstand hot temperatures around 200°F without deteriorating.
If you're planning to make soap later, you'll want your straining setup to be particularly thorough, as clean tallow is vital for successful soap making. Once strained, transfer your rendered tallow directly into Ready Tainer freezer containers for ideal storage and preservation.
Step-by-Step Rendering Process

The rendering process begins with coarsely chopping suet into manageable pieces, which helps speed up the melting time.
Start by roughly chopping the suet before rendering – smaller pieces will melt faster and more efficiently.
You'll want to place these pieces in a stockpot with water and let them render on low heat for at least 12 hours, or alternatively, in a 200°F oven.
After your first batch has melted, strain the liquid through cheesecloth or a fine mesh strainer to remove any impurities.
For cleaner tallow, you can reboil the rendered fat with fresh water for about 10 minutes, then strain again.
Once complete, pour the tallow into storage containers, making sure it's completely free of moisture.
You can keep it at room temperature for short-term use or freeze it in ice cube trays for convenience.
Don't forget to date your containers to track freshness.
Purification and Cleaning Methods
Once you've rendered your tallow, purification becomes essential for achieving a clean, stable soap-making ingredient.
You'll need to boil your rendered fat with fresh water, which helps remove unwanted impurities that settle at the bottom of your pot.
To enhance the purification process, add 1-4 tablespoons of salt per pound of suet. This simple step helps draw out impurities and reduces any unpleasant odors that might remain.
After the initial render, you might want to reboil the tallow with fresh water for even better results.
Don't forget to strain the melted fat through cheesecloth or a fine mesh strainer to remove any remaining chunks.
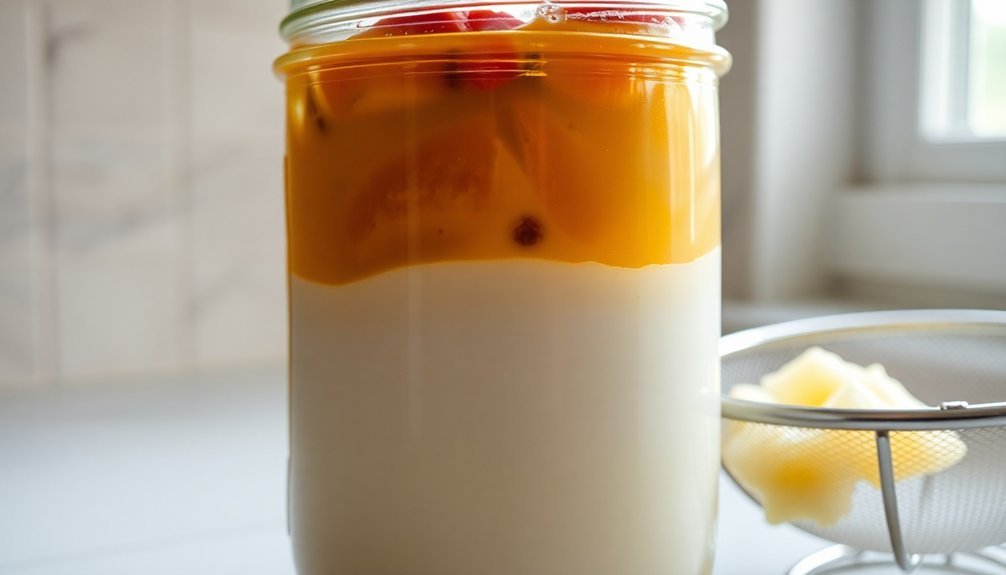
You'll know your purification is successful when your tallow becomes a white, thick paste with minimal odor.
Quality Testing Your Rendered Suet
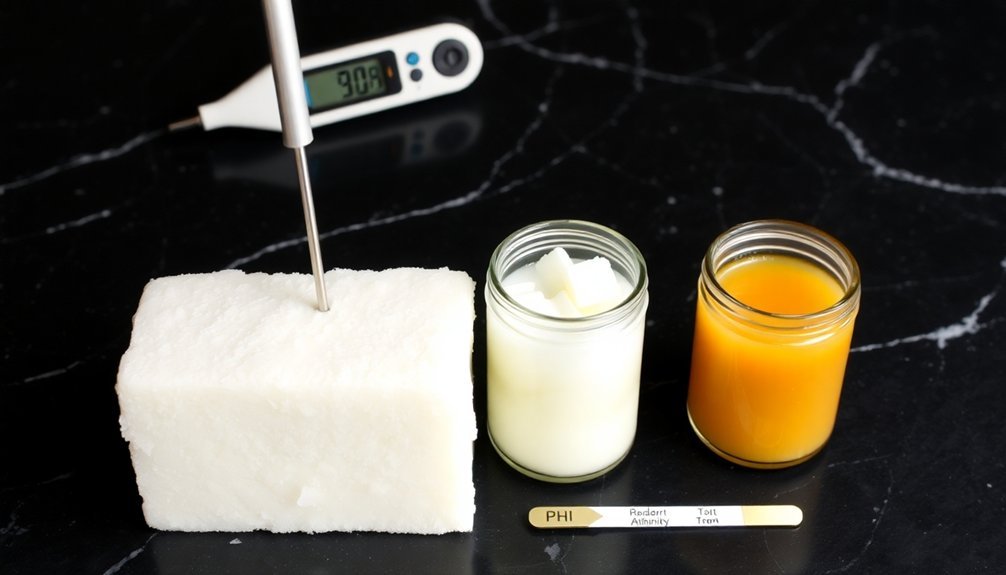
Testing your rendered suet involves four key quality indicators that ascertain it's ready for soap making. Let's explore how you can perform quality testing to confirm your rendered suet meets the necessary standards.
| Test Type | What to Look For |
|---|---|
| Visual Check | White, thick paste consistency |
| Cooling Test | No cloudiness or particles |
| Aroma Test | Neutral smell, no strong beef odor |
First, let it cool completely and check its appearance – you want a firm, white paste. Next, smell a bit of the tallow; it should have a neutral scent without any strong beef notes. If you notice cloudiness or particles after cooling, you'll need to reboil with fresh water. Finally, perform a small taste test to detect any off-flavors that might indicate poor rendering. The texture should be firm, not greasy, signifying proper water removal.
Storage and Preservation Techniques
You'll get the best results storing your rendered suet in freezer-safe containers, where it can stay fresh for up to a year when properly sealed and labeled with the date.
For room temperature storage, choose clean, dry glass jars with tight-fitting lids, though you'll need to use this suet within a few weeks to prevent rancidity.
Remember to boil out any moisture before storage, as water content can greatly reduce shelf life regardless of your chosen storage method.
Freezer Storage Best Practices
Proper freezer storage guarantees your rendered tallow stays fresh and usable for extended periods. To maintain ideal quality, store your freshly rendered tallow in Ready Tainer freezer containers that are clean and completely dry.
You'll want to keep most of your tallow in the freezer for long-term storage, while only storing small portions in the fridge for immediate use.
Don't forget to label each container with the rendering date using masking tape and a Sharpie – this helps you track how long it's been stored.
Make it a habit to inspect your stored tallow regularly for any unusual odors or color changes. If you notice anything off, it's best to discard it immediately.
This systematic storage approach guarantees your rendered tallow maintains its quality and extends its shelf life considerably.
Room Temperature Container Options
While freezer storage offers maximum longevity, room temperature storage remains practical for daily use when done correctly. Choose glass jars or freezer-safe containers with tight-fitting lids to protect your rendered tallow from air and moisture exposure.
You'll want to store these containers in a cool, dark spot away from direct sunlight and heat sources.
For ideal preservation at room temperature, consider these essential tips:
- Use smaller containers to minimize air exposure each time you open them
- Label each storage container with the rendering date to track freshness
- Consider Mylar bags with oxygen absorbers for extended shelf life
Remember that proper container selection plays a significant role in maintaining your tallow's quality.
Whether you're using traditional glass jars or modern storage solutions, ensuring an airtight seal will help prevent rancidity and extend your tallow's usability.
Common Mistakes and Troubleshooting
Making suet soap doesn't have to be complicated, but several common pitfalls can affect your final product's quality. When you render suet, make certain to chop it into small pieces for even melting.
Don't skip the vital step of straining through cheesecloth to remove impurities, as they can cause your soap to develop unpleasant odors.
Keep a close eye on the temperature during rendering to prevent burning, and always maintain a low, steady heat. You'll need to reboil the tallow with fresh water after initial rendering to guarantee a cleaner final product.
Pay attention to storage conditions, too – proper sealing and moisture control are essential. Store your rendered tallow in a cool, dry place to prevent rancidity and extend its shelf life.
Recipes and Measurements for Soap Making
Now that you understand how to avoid common mistakes, let's focus on the exact measurements needed for successful suet soap.
Creating the perfect batch requires precise measurements using a kitchen scale. You'll need equal parts of your main ingredients:
Precision is paramount – grab your kitchen scale and measure carefully. Equal proportions will make or break your homemade soap batch.
- 1 pound tallow (your rendered suet)
- 1 pound coconut oil
- 1 pound olive oil
For this recipe, you'll also need 4.5 ounces of lye per pound of oil mixture.
Always dissolve the lye in water before combining it with your oils. Using an immersion blender, mix everything until you reach "trace" – this typically takes 3-6 minutes.
Once poured into molds, your soap needs 4-6 weeks to cure properly. During this time, the lye fully saponifies, ensuring your final product is safe and effective.
Frequently Asked Questions
How Do You Render Suet?
You'll need to chop suet into small pieces, then melt it over low heat for 12 hours in water or at 200°F without water. Strain through cheesecloth, reboil with fresh water, and store in moisture-free containers.
Does Suet Need to Be Rendered?
Yes, you'll need to render suet before using it in soap making. It's crucial to remove impurities, enhance stability, and eliminate unwanted odors. Without rendering, your soap won't have the right quality or consistency.
How to Render Fat for Soap Making?
You'll need to chop the fat into small pieces, heat it slowly in a pot or 200°F oven for 12+ hours, strain through cheesecloth, and reboil with fresh water before storing in clean jars.
What Are the Disadvantages of Tallow Soap?
You'll find tallow soap can have a strong beef smell, requires time-consuming rendering, feels greasier than other soaps, may spoil faster if not properly rendered, and isn't suitable for vegans or those with dietary restrictions.
In Summary
Making suet soap isn't as complicated as you might think. With proper rendering techniques and the right tools, you'll be able to transform raw suet into high-quality soap base. Remember to store your rendered suet properly and always test for quality before using it in your recipes. Don't let common mistakes discourage you – keep practicing, and you'll soon master this traditional soap-making skill.


Leave a Reply