To turn raw tallow into soap, you'll need to render your fat by heating and straining it, then calculate precise lye measurements for your recipe. Mix your lye solution carefully while wearing safety gear, and combine it with the melted tallow when both reach about 110°F. Blend until you achieve "trace," pour into molds, and let it set for 24 hours. Your soap won't be ready to use until it cures for 3-4 weeks – let's explore why this process matters.
Essential Equipment and Safety Measures
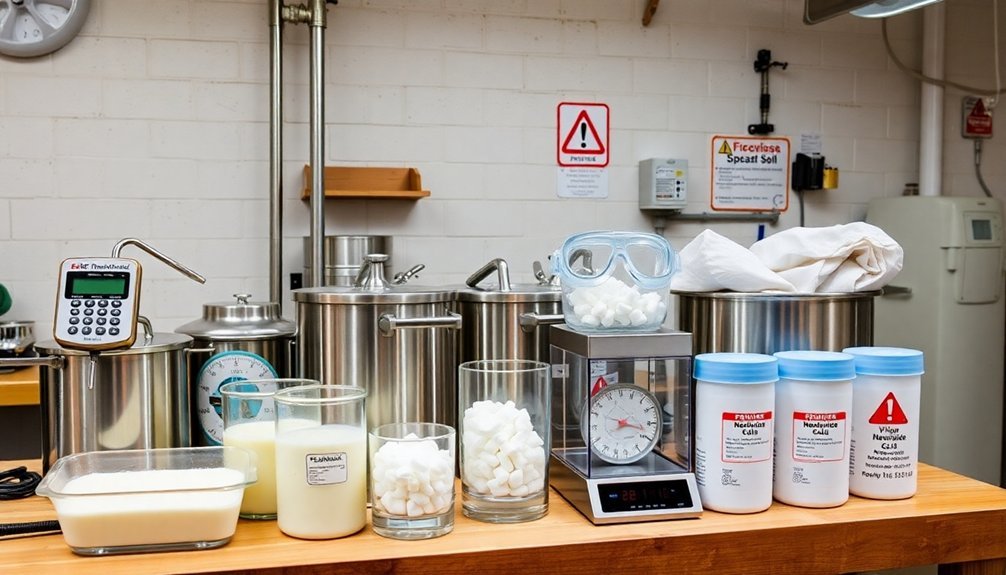
Three critical elements must be in place before you begin making tallow soap: proper equipment, safety gear, and a suitable workspace.
First, gather your essential equipment: a digital scale for precise measurements, stainless steel pots for melting fats, silicone molds for shaping, and a thermometer to monitor temperatures. You'll need the thermometer to guarantee both your lye solution and tallow reach approximately 125°F for proper mixing.
For safety measures, always wear goggles and gloves, closed-toe shoes, and long sleeves when handling lye. Work in a well-ventilated area to avoid inhaling harmful fumes created during the mixing process.
Set up your workspace where you can easily clean spills and have room to organize your pre-measured ingredients. This preparation guarantees a smooth, safe soap-making process from start to finish.
Raw Tallow Selection and Preparation
Quality tallow sourcing marks the first essential step in soap making.
You'll want to select high-quality tallow from a reputable butcher, preferably from grass-fed animals, to guarantee superior soap quality and health benefits. Raw tallow selection requires careful examination to avoid impurities that could affect your final product.
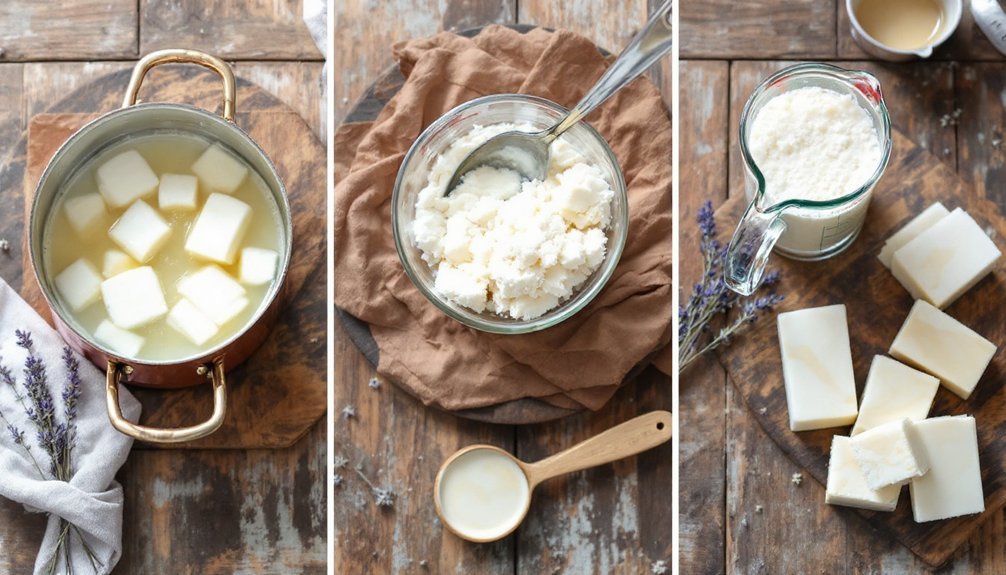
Before rendering, you'll need to trim all connective tissue from the raw tallow and cut it into uniform pieces. This preparation guarantees even melting during the rendering process.
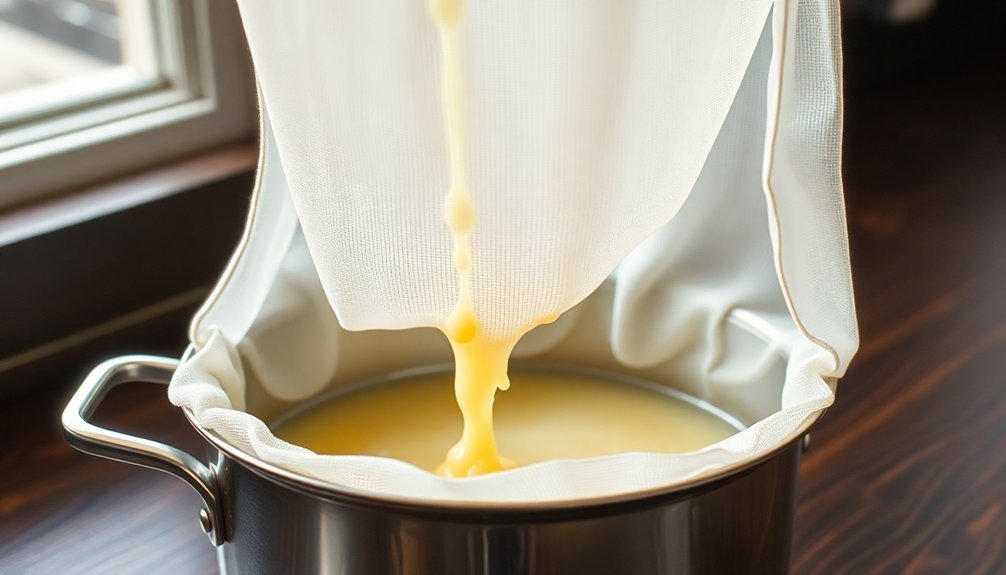
Next, render tallow through slow heating in a pot or slow cooker, allowing the fat to separate from solids. Once fully melted, strain the tallow through a fine mesh sieve or cheesecloth to remove any remaining solids.
Let it cool and solidify for soap making. This careful preparation process ensures clean, ready-to-use tallow for your soap.
Rendering and Purifying the Tallow
You'll start the rendering process by cutting your raw tallow into small pieces and heating them slowly over low heat until the fat melts completely.
Next, strain the melted tallow through a fine mesh strainer or cheesecloth multiple times to remove all impurities and achieve the highest quality for soap making.
Once your tallow is thoroughly purified, transfer it to an airtight container and store in a cool, dark place until you're ready to make soap.
Clean Tallow Through Heating
The first essential step in making tallow soap is rendering your raw fat through a slow heating process. You'll need to maintain temperatures between 130°F and 160°F while removing any meat or connective tissue that could affect your final product's quality. Once your melted fat is ready, strain it through cheesecloth to remove solid impurities.
| Step | Action |
|---|---|
| Heat | Keep raw fat at low heat (130-160°F) |
| Clean | Remove remaining meat and tissue |
| Strain | Filter through fine mesh or cheesecloth |
| Store | Cool in dark place for solidification |
Your properly rendered and strained liquid tallow will solidify into a hard, white substance that's perfect for soap making. When stored correctly in a cool, dark place, your tallow will maintain its quality for soap production for months or even years.
Strain Impurities Multiple Times
For ideal soap-making results, straining your melted tallow multiple times will eliminate unwanted particles and guarantee a pure final product.
You'll need a fine mesh sieve or cheesecloth to filter out solid impurities like meat remnants and connective tissues from your melted fat.
As you strain the lye-ready tallow, you'll notice various impurities being caught in your straining tool.
Don't skip the second round of straining after the tallow has cooled slightly – this extra step assures you've filtered out any remaining particles you might've missed the first time.
Once you've completed the straining process, let your tallow completely cool in a container.
The purified tallow will solidify into a pale yellow or white fat that's perfect for soap making.
Store For Later Use
Once you've successfully rendered and purified your tallow, proper storage becomes essential for maintaining its quality and extending its shelf life. For the best soap making results, store your rendered tallow in airtight containers and keep them in a cool, dark place or refrigerator. You'll find that properly stored tallow can last up to two years, giving you plenty of time to perfect your process soap recipe.
| Storage Method | Environment | Duration |
|---|---|---|
| Refrigerator | Cold/Dark | 2 years |
| Cool Pantry | Dark/Dry | 1 year |
| Room Temp | Protected | 6 months |
| Warm Area | Sealed | 3 months |
| Direct Light | Any | Not recommended |
Remember that starting with high-quality fat from grass-fed animals will give you the best results when it's time to melt your purified tallow for soap making.
Calculating Lye and Oil Ratios

Determining precise ratios of lye to tallow stands as one of the most critical steps in soap making, since incorrect measurements can ruin your entire batch.
Precise measurement of lye-to-tallow ratios is essential – one small miscalculation can destroy your entire soap-making effort.
You'll need to calculate lye amounts using a soap calculator, which factors in the specific saponification value of your chosen tallow type.
For beef tallow soap, you'll use approximately 0.137 ounces of lye per ounce of tallow. If you're working with other varieties like goat tallow, you'll need to adjust these oil ratios accordingly.
Always use weight measurements rather than volume to guarantee accuracy. Remember to include a 5% superfat percentage in your calculations, which means you'll calculate the lye amount based on 95% of your total fat weight.
This extra fat guarantees your soap retains moisturizing properties.
Mixing and Achieving Proper Trace
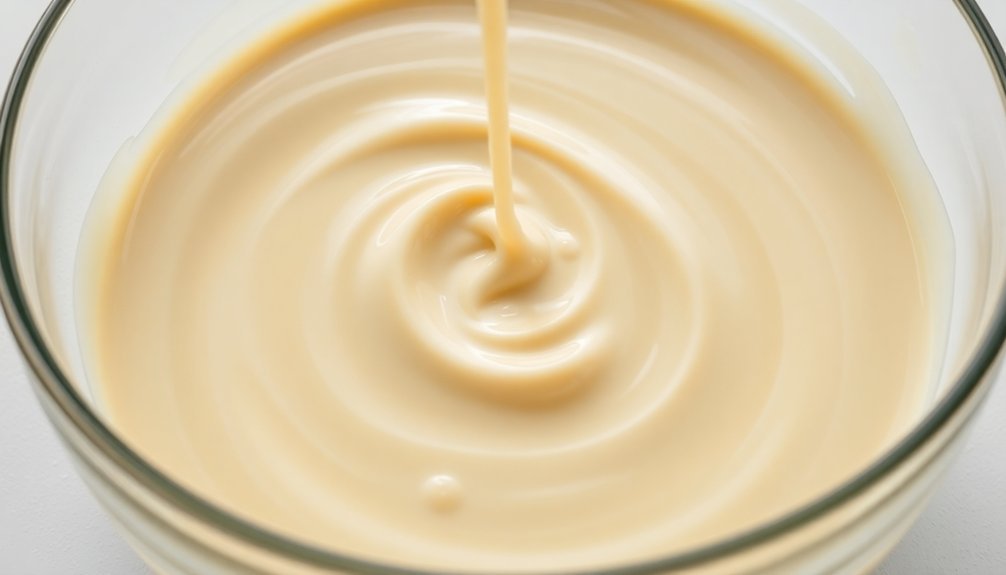
After melting your tallow to 90°F, you'll need to carefully combine it with the lye solution to begin the saponification process.
When preparing your lye solution, remember to add lye to water – never the reverse – to prevent dangerous reactions.
Wait for both your melted tallow and lye solution to reach temperatures between 105-110°F before combining them. This temperature range guarantees proper emulsification of your soap mixture.
Use an immersion blender to mix the ingredients until you achieve "trace" – the point where the mixture thickens and leaves a visible trail when drizzled across the surface.
You'll want a light trace if you're going straight to soap molds, but aim for a thicker consistency if you're planning to incorporate additives or colorants into your soap.
Molding and Curing Process
Pour your traced tallow soap mixture into prepared molds immediately, tapping them gently against the counter to remove air bubbles, before covering with plastic wrap.
You'll need to wait approximately 24 hours until the soap hardens enough to be safely removed from the molds.
Place your unmolded soap in a cool, dry location for 3-4 weeks to cure properly, which will yield 8-10 finished bars that are ready for use.
Proper Mold Preparation Steps
Proper mold preparation represents three critical stages in your soap-making process: setup, pouring, and curing. Before you begin, verify your mold is clean and dry to prevent contamination.
After pouring your tallow soap mixture, you'll need to follow these essential steps:
- Bang the filled mold gently on your counter to remove air bubbles
- Cover the mold with plastic wrap to maintain warmth during the initial hardening process
- Let the soap set for 24 hours before attempting to unmold
- Check that the soap has hardened completely to prevent crumbling
- Cure the soap bars in a cool, dry place for 3-4 weeks
This careful attention to the molding process will help excess moisture evaporate and enhance longevity.
Your patience during curing guarantees high-quality, long-lasting soap bars.
Setting Time Requirements
The molding and curing timeline stands as one of the most significant factors in creating quality tallow soap.
Once you've poured your tallow soap recipes into soap molds, you'll need to follow specific setting time requirements for ideal results. The initial hardening process takes about 24 hours, during which you should cover the molds with plastic wrap to maintain proper conditions for the chemical reaction.
After 24 hours, you can remove your soap from silicone molds, though wooden molds might need extra time.
The vital curing time comes next – you'll need to let your soap cure for 3-4 weeks to guarantee the saponification process completes fully. This waiting period is essential for safe, usable soap.
Your final yield will typically be 8-10 bars, depending on your mold sizes.
Soap Curing Guidelines
Successful soap curing begins right after you've mixed your tallow solution, requiring careful attention to the molding process.
Smart soap makers know that proper measurements for molds and careful pouring techniques guarantee the best results.
- Pour your tallow soap mixture into silicone molds for easy removal
- Tap molds firmly on the counter to release trapped air bubbles
- Cover with plastic wrap to maintain heat during the hardening process
- Remove hardened soap after 24 hours
- Store bars in a well-ventilated area for 3-4 weeks of curing
The extended curing process is essential for developing superior soap qualities.
During this time, excess moisture evaporates, transforming your tallow creation into a harder, longer-lasting bar.
You'll notice improved lather and enhanced skin benefits once your soap has completed its full curing cycle.
Frequently Asked Questions
What Are the Disadvantages of Tallow Soap?
You'll find tallow soap can have a strong smell, produces a harder bar with less creamy lather, and may dry your skin. It's also tougher to source and render than vegetable oils.
How Much Essential Oils to Add to Tallow Soap?
You'll want to add 1 ounce of essential oils per 12 bars of tallow soap. Add them at trace for best results, and remember that citrus oils fade faster, so pair them with longer-lasting scents.
Does Tallow Soap Clog Drains?
You don't need to worry about tallow soap clogging your drains. It's biodegradable and breaks down easily with water. Just use it in moderation and rinse with hot water to prevent any buildup.
How Do You Render Fat to Make Soap?
Cut raw tallow into small pieces, then melt it slowly in a heavy pot over low heat. Stir occasionally, strain out impurities through cheesecloth, and let it cool completely before storing for soap making.
In Summary
You've now learned the complete process of turning raw tallow into handmade soap. From selecting quality fat and safely rendering it, to measuring precise lye ratios and achieving trace, you're equipped to create your own tallow-based soap. Remember to let your soap properly cure for 4-6 weeks. With these steps mastered, you'll be crafting quality, natural soap bars from raw tallow.


Leave a Reply