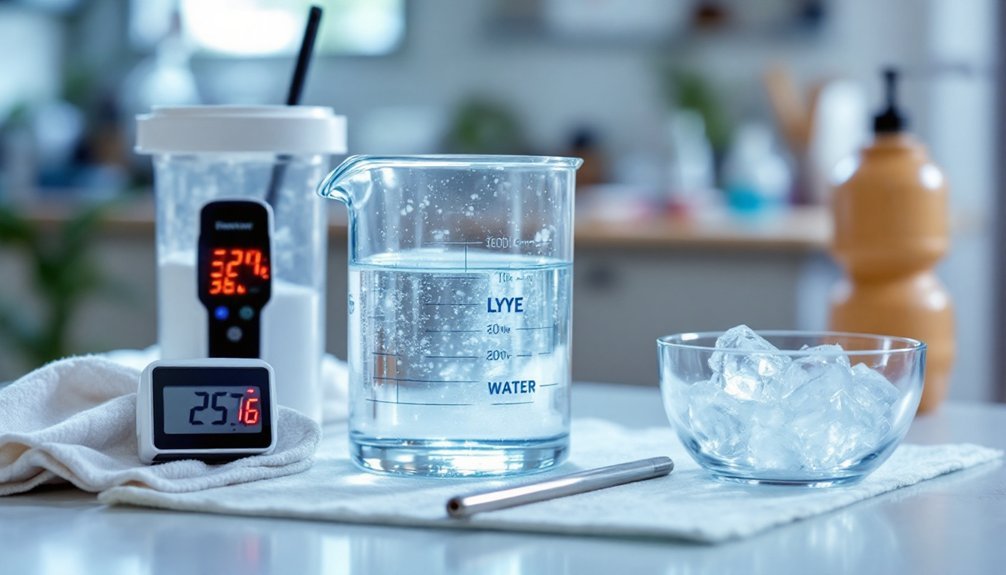
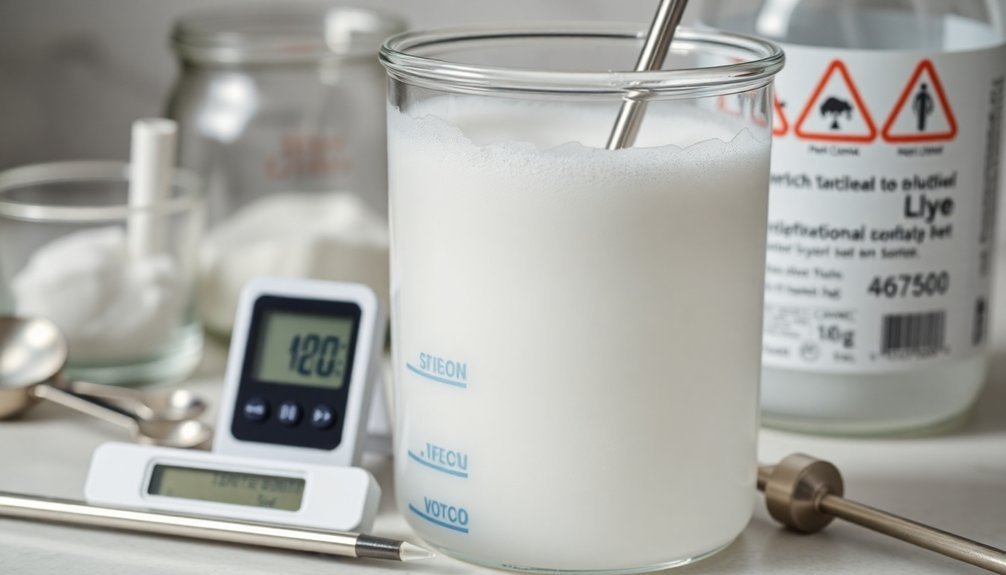
Always add lye to water, never the reverse, while wearing full protective gear including goggles, gloves, and long sleeves. Use stainless steel or #5 plastic containers (never aluminum), mix in a well-ventilated area, and stir gently until completely clear with no visible crystals. Keep white vinegar nearby to neutralize spills. The solution should reach 32-43°C for ideal dissolution. Following these critical safety steps will protect you from potentially devastating chemical burns.
Proper Equipment for Safe Lye Handling
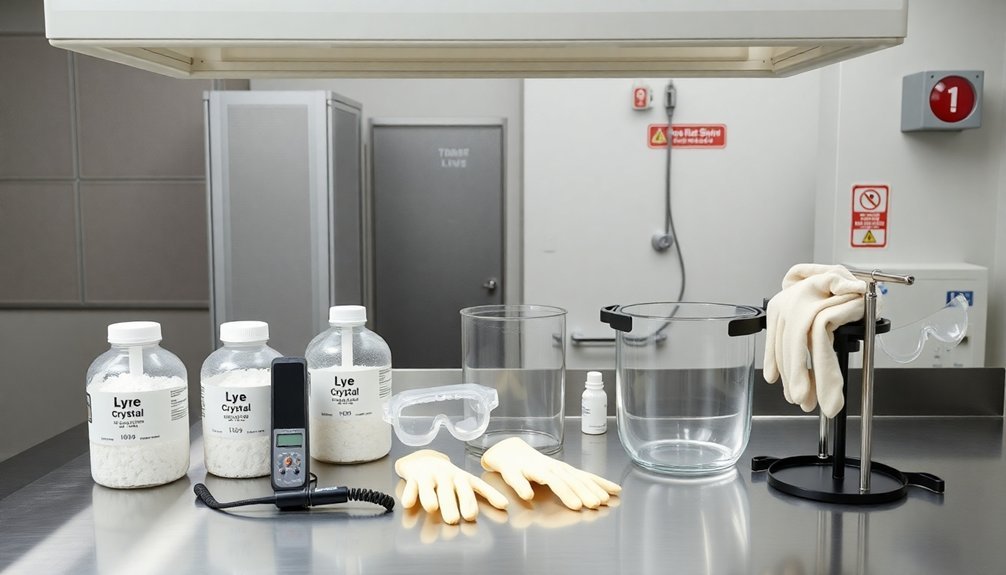
When working with lye, proper safety equipment isn't optional—it's essential.
You'll need thick, durable gloves that extend up your arms to protect your hands and wrists from potential splashes. Always wear goggles that fully cover your eyes, as regular glasses won't provide adequate protection.
Dress in long sleeves and pants to shield your skin, and wear closed-toe shoes to prevent foot exposure in case of spills. A mask can help prevent inhalation of fumes, though proper ventilation is more critical.
For mixing containers, use sturdy heat-resistant glass like Pyrex or stainless steel vessels. Some heat-resistant plastics work too, but never use aluminum or tin as lye can cause harmful reactions with these metals.
Choose containers with ample room to prevent splashing during the mixing process.
Understanding the Chemical Properties of Lye
To fully understand how to handle lye safely, you'll need to grasp its fundamental chemical properties. Sodium hydroxide (NaOH) is a highly reactive, corrosive substance that forms the basis of lye.
It's extremely hygroscopic, meaning it rapidly absorbs moisture from the air, which affects both storage and handling. It also absorbs carbon dioxide from the air when exposed.
- Exothermic reaction – When dissolved in water, lye releases significant heat that can cause solutions to boil violently if mixed incorrectly.
- Corrosivity – Lye rapidly breaks down organic materials including skin and tissue, which is why protective gear is vital.
- Chemical instability – Lye reacts with metals (particularly aluminum) to produce potentially explosive hydrogen gas and deteriorates when exposed to air.
Always respect lye's chemical nature to guarantee your safety during soap-making or cleaning applications.
Selecting the Correct Mixing Containers
Selecting a proper container for mixing lye isn't just a matter of convenience—it's a safety requirement that directly builds on your understanding of lye's chemical properties.
You'll need containers that can withstand lye's corrosive nature and the heat generated during mixing. Your best options include stainless steel or heat-resistant plastics marked with #5 (polypropylene) or #2 (HDPE).
Never use aluminum or tin containers as they'll react with lye. While Pyrex glass might seem sturdy, it can etch or even shatter from temperature changes. Glass containers may pose explosion risks when used with lye solutions that reach temperatures exceeding 160 degrees Fahrenheit.
For smaller batches, plastic measuring cups or paint mixing containers work well.
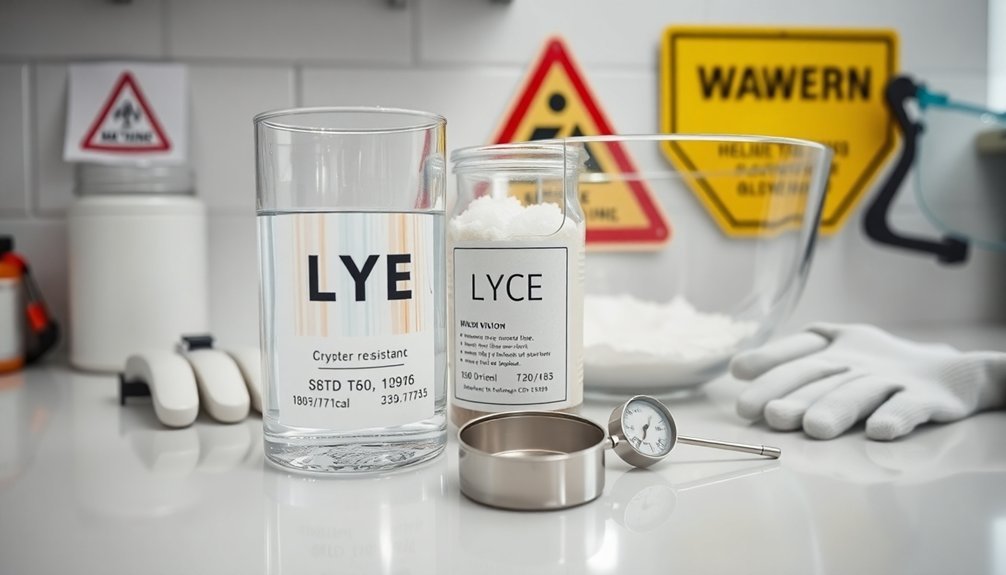
Always label your containers clearly with "LYE" or "POISON," keep them separate from other kitchenware, and store them away from children and pets.
The "Lye to Water" Golden Rule Explained
Perhaps the most critical safety rule in soapmaking is the "lye to water" golden rule: always add lye to water, never water to lye. This isn't just tradition—it's chemistry.
When lye meets water, it creates an exothermic reaction that releases significant heat and caustic fumes. Adding lye to water helps distribute this reaction safely, while the reverse can cause dangerous volcanic-like eruptions. Water discounting can lead to a hotter lye solution which makes following this golden rule even more important.
For safe lye mixing, remember:
- Use a ratio of at least 2:1 water-to-lye for beginners to guarantee proper dissolution and temperature control
- Pour lye slowly into water in a well-ventilated area while wearing proper protective gear
- Keep white vinegar nearby to neutralize any accidental spills on your skin
Achieving the Perfect Stirring Technique

When stirring lye into water, maintain a gentle circular motion to guarantee thorough dissolution while preventing dangerous splashing.
You'll achieve the best results using non-metal tools like a silicone spatula, wooden spoon, or heat-resistant whisk that won't react with the caustic solution.
Keep your movements slow and deliberate, working in a tall container that provides adequate space to contain the mixture as it heats up to temperatures as high as 200°F. Remember the safety mantra: add lye to water to prevent hazardous eruptions that could cause severe burns.
Gentle Circular Motion
During the lye-mixing process, a gentle circular motion forms the cornerstone of a safe and effective technique.
You'll want to maintain a relaxed, consistent stirring pattern that allows the lye crystals to dissolve evenly without splashing. This methodical approach guarantees complete dissolution while minimizing the risk of caustic solution contacting your skin.
- Use a wooden spoon in a slow, deliberate circular pattern until the solution becomes clear and no particles remain visible at the bottom.
- Keep your movements smooth and controlled to prevent unnecessary foam or bubbles from forming.
- Continue the gentle stirring motion until you've confirmed all lye has dissolved, avoiding any tendency to rush this critical safety step.
Remember that safety protocol dictates adding lye to water, never the reverse, to prevent dangerous chemical reactions.
Avoid Vigorous Splashing
While gentle circular motion provides the foundation for proper lye mixing, equally important is your ability to avoid vigorous splashing throughout the process.
Add lye to water slowly and steadily, maintaining control to prevent dangerous splatter that can cause chemical burns.
Choose containers that can withstand the intense heat generated by this exothermic reaction. The temperature can rise dramatically, so never use plastic that might melt or warp.
Always mix in a well-ventilated area to avoid inhaling harmful fumes. Remember to wear safety goggles to protect your eyes from potential splashes during the mixing process.
Keep your movements calm and deliberate. Sudden jerks or overly aggressive stirring can send caustic droplets airborne.
For reduced fumes and safer handling, consider using ice in your water. This slows the reaction and gives you more control while minimizing vapor emissions.
Tools For Success
The perfect stirring technique begins with selecting the right tools for your lye-mixing arsenal.
You'll need stainless steel or high-density polyethylene containers that can withstand the heat generated during mixing. Always mix lye in the sink to contain potential spills and make cleanup easier if accidents occur.
Never use aluminum or glass containers as they'll react with lye or potentially shatter.
For effective lye dissolution, follow these essential practices:
- Gradual addition – Add lye to water slowly while gently stirring to prevent excessive heat buildup and guarantee complete dissolution.
- Temperature control – Use ice baths or cold water to maintain safe temperatures, and confirm your lye solution and oils reach similar temperatures before combining.
- Proper verification – Always strain your lye solution to catch any undissolved particles before proceeding with your soap recipe.
Always work in a well-ventilated area wearing proper protective gear.
Preventing Splashes and Burns During Mixing
Mixing lye safely requires vigilant attention to prevent potentially serious burns and injuries.
Always add lye to water slowly—never the reverse—while stirring gently with a heat-resistant utensil. This controls the chemical reaction and reduces the risk of dangerous splashing.
Keep your workspace well-ventilated by opening windows or using fans to dissipate fumes. Use proper containers made of high density polyethylene or polypropylene (recycling codes #2 and #5) to prevent chemical reactions with unsuitable materials. You'll want to maintain distance between yourself and the container during mixing, avoiding the temptation to peer over the solution.
Wearing proper safety gear is non-negotiable: gloves, long sleeves, pants, closed-toe shoes, and protective goggles shield your body from accidental contact.
If you experience a splash, immediately rinse the affected area with cool running water—not vinegar—and seek medical attention for burns or eye exposure.
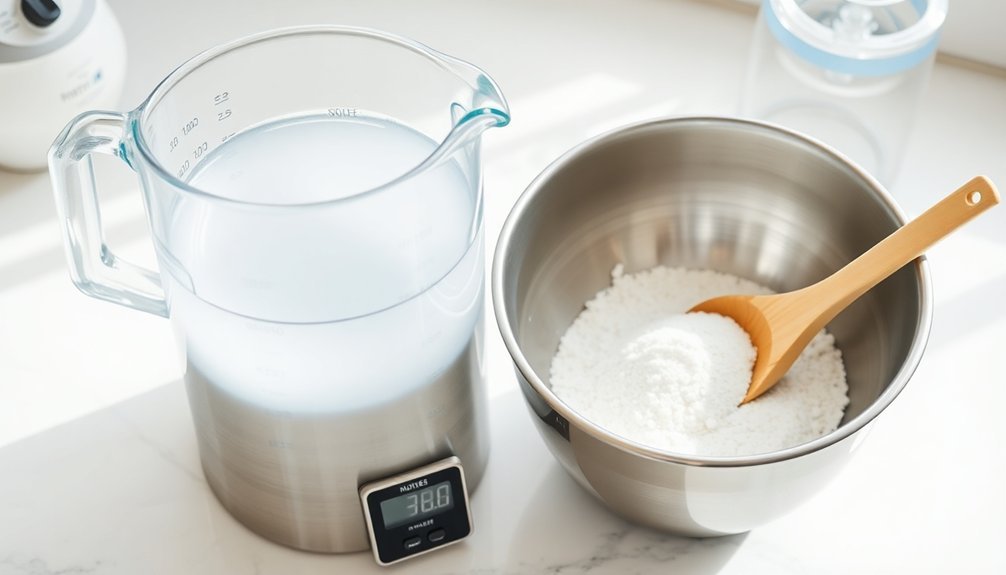
Temperature Control in Lye Solutions
Controlling your lye solution's temperature requires understanding both cooling and heating methods to achieve ideal conditions.
You'll need to utilize cooling baths with ice water when lye temperatures rise too high after mixing, typically aiming for 110°F (43.3°C) for beginners or lower temperatures around 80°F (26.7°C) for decorative designs.
Maintaining proper solution temperatures prevents false trace, guarantees consistent saponification, and ultimately determines the working time you'll have with your soap batter. For larger batches, using a stainless steel tank with proper heating elements ensures consistent temperature every time while reducing harmful fumes during preparation.
Cooling Bath Methods
When creating lye solutions for soap making, you'll need effective cooling methods to manage the exothermic reaction that occurs. Cold water baths are particularly effective – simply place your lye container in a basin of cold water to rapidly reduce temperature.
For more control, you can use ice baths when working with delicate recipes that require precise temperature management. Adding salt to your ice bath can achieve temperatures as low as -20°C with a proper sodium chloride to ice ratio.
- Passive cooling – Allow your solution to cool naturally in a well-ventilated area; this takes longer but requires no additional equipment.
- Cold water immersion – Submerge the bottom portion of your container in cold water for faster cooling while monitoring the temperature.
- Ice bath method – Use for rapid cooling when necessary, especially helpful during hot weather or when making temperature-sensitive formulations.
Never cool too rapidly, as this can affect saponification quality later in your process.
Ideal Solution Temperatures
The ideal temperature for your lye solution plays an essential role in determining the success of your soap-making process. Generally, aim for a temperature between 32°C (90°F) and 43°C (110°F) for both your oils and lye solution, with 38°C (100°F) being a sweet spot that helps prevent false trace.
If you're creating intricate designs, consider working at slightly cooler temperatures (29-35°C) to slow saponification and give yourself more working time. Never exceed 49°C (120°F) to avoid overheating issues like cracking or brittleness.
Temperature control is vital because it affects how quickly your soap batter thickens, influences ingredient melting points, and impacts your final soap quality. For recipes with high coconut oil content, lower temperatures are recommended as coconut oil saponifies quickly at higher temperatures.
Using a digital thermometer will help you maintain the precise control needed for consistent results.
Recognizing When Your Lye Solution Is Ready
How can you be certain your lye solution is properly prepared for soap making? Your solution should be completely clear and free of any undissolved crystals or lumps. A properly mixed solution will appear transparent and colorless, indicating complete dissolution.
- Visible inspection – Hold your container up to the light and look for any remaining particles at the bottom. If you see white specks, continue stirring until they disappear.
- Cooling verification – Allow the solution to cool sufficiently before use. The exothermic reaction will naturally subside over time.
- Safe storage check – Once cooled and verified clear, transfer to a properly labeled, non-leaking container with a secure lid, keeping it away from children and pets. Always remember that improper citation of information sources in chemistry procedures could constitute plagiarism and potentially lead to unsafe practices.
Common Mistakes to Avoid When Mixing Lye
Safely working with lye requires careful attention to detail, as even experienced soap makers can make dangerous mistakes during the mixing process.
Adding water to lye instead of lye to water can cause dangerous eruptions. Never use aluminum or tin containers, as lye will react with these metals and produce hazardous gases.
Avoid measuring inaccurately, which compromises both safety and soap quality. Don't work in poorly ventilated areas where you might inhale fumes, and never mix lye near children, pets, or distractions that could lead to spills.
Don't be overconfident—always wear proper protective gear regardless of your experience level. To protect your eyes, always wear protective goggles since regular glasses provide insufficient protection against lye splashes.
Remember to prepare for emergencies by keeping running water accessible for washing away splashes.
Finally, never leave your lye solution unlabeled or stored where it could be mistaken for something else.
Storage Solutions for Mixed Lye
Properly storing mixed lye solutions requires just as much caution as the mixing process itself.
Select containers made of heat-resistant plastics or glass that can be sealed tightly to prevent evaporation and contamination. Avoid aluminum or tin containers as they'll react dangerously with lye.
Store your solutions in a cool, dry environment with good ventilation, keeping them clearly labeled and out of reach from children and pets. The hygroscopic nature of lye means it will continue to draw moisture even after mixing, potentially affecting potency over time.
For larger operations, consider investing in stainless steel tanks with proper seals to reduce fumes.
- Test plastic containers with boiling water before use to verify they can withstand heat
- Implement a labeling system that includes dates and hazard warnings
- Create a dedicated storage area with limited access that complies with local regulations
Essential Safety Protocols for Lye Handlers
Working with lye demands unwavering attention to safety protocols that can mean the difference between a successful project and a dangerous accident. You'll need extensive physical protection, including long sleeves, long pants, closed-toe shoes, and heat-resistant gloves. Always remember to wear proper eye protection—regular glasses aren't sufficient.
| Equipment | Purpose | Importance |
|---|---|---|
| Heat-resistant gloves | Prevent skin contact | Critical |
| Full goggles | Protect eyes from splashes | Mandatory |
| Ventilation | Minimize fume inhalation | Essential |
Always add lye to water—never the reverse. Use a spoon to slowly incorporate lye into water in a glass, stainless steel, or heat-resistant plastic container. If accidental contact occurs, immediately rinse with plenty of water for at least 15 minutes and seek medical attention if necessary.
Troubleshooting Lye Mixing Problems
You'll encounter various challenges when mixing lye, from undissolved crystals forming dangerous rings at the bottom of your container to unexpectedly fast reactions that accelerate trace.
If your lye solution looks cloudy or contains white deposits after mixing, you've likely experienced incomplete dissolution requiring additional stirring or slightly warmer water to correct.
When troubleshooting post-mixing issues, check for container corrosion, excessive heat development, or premature solidification that might indicate incorrect proportions or contamination.
When Lye Doesn't Dissolve
Despite your best efforts, lye sometimes refuses to dissolve completely, creating frustrating challenges for soap makers. You'll typically notice a troublesome ring of undissolved lye at the bottom of your container or grainy textures in your finished soap.
To resolve undissolved lye issues:
- Break up any visible lye crusts with a spoon and add warm (not hot) water gradually to help the dissolution process.
- Check your lye quality – old or improperly stored lye may resist dissolving properly.
- Preheat your mixing container to prevent temperature drops that inhibit dissolution.
Remember to always add lye to water (never reverse), stir thoroughly until clear, and maintain appropriate temperatures throughout the process.
Wearing protective gear remains essential, even when troubleshooting, as undissolved lye is particularly dangerous if it comes into contact with skin.
Handling Unexpected Reactions
Even with careful preparation, lye mixing can sometimes produce unexpected reactions that challenge even experienced soap makers.
If your soap suddenly begins to thicken rapidly, reduce your stick blender use to short bursts and lower the temperature immediately.
For lye solution crusts, use a tool to break up the formation and add warm water to dissolve completely.
Always strain if necessary to remove undissolved particles.
Watch for separation or ricing, which often results from fragrance oil reactions or temperature differentials between your lye solution and oils.
Maintain both solutions at similar temperatures (38-45°C) to prevent seizing.
If you notice textural problems, quickly remix with your stick blender.
Remember that honey, sugar, and certain fragrance oils can accelerate thickening, so add these ingredients last or in smaller quantities.
Post-Mixing Solution Issues
Troubleshooting common problems after mixing lye solution can save your soap batch from failure. One frequent issue is undissolved lye crust forming at the bottom of your container. Break up this crust with a spoon and add warm water to dissolve it completely.
To prevent this problem, stir slowly but thoroughly until the solution becomes clear and transparent.
- Check for proper dissolution – Hold your container up to the light to verify no solid lye particles remain
- Monitor temperature gradients – Uneven temperature can cause incomplete dissolution
- Use appropriate containers – Heat-resistant glass or certain plastics prevent container damage and potential leaks
If you notice a white film forming on top of your cooled solution, don't panic—it's likely sodium carbonate forming from air exposure and won't affect your soap.
Frequently Asked Questions
Can I Use the Same Lye Mixture for Different Soap Recipes?
No, you can't use the same lye mixture for different soap recipes. Each recipe requires specific lye concentrations based on oil types and quantities. Using incorrect mixtures will produce soap that's too harsh or ineffective.
How Long Can I Store Mixed Lye Solution Before Using?
You can store mixed lye solution for several weeks to a few months in a properly sealed HDPE container. Keep it in a cool, ventilated area away from sunlight, children, and pets. Check regularly for degradation.
Is Rainwater Better Than Tap Water for Mixing Lye?
While rainwater has fewer minerals than tap water, it can contain unpredictable pollutants. You'll get more consistent results using distilled water for your lye solution, avoiding potential issues with soap quality and lather.
Can I Neutralize a Lye-Heavy Soap That's Already Cured?
Yes, you can neutralize lye-heavy cured soap through rebatching. Grate the soap, melt it slowly with water, add oils incrementally, and stir thoroughly. Test the pH until it reaches 8-9 before remolding it.
What Environmental Impact Does Disposing Lye Solution Have?
Disposing of lye solutions can harm aquatic life, damage wastewater systems, and violate environmental laws. You'll need to neutralize it first with an acid like vinegar before diluting and disposing through proper hazardous waste channels.
In Summary
Mixing lye safely isn't optional—it's essential. Always remember: lye goes into water (never water into lye), wear your protective gear, and use proper containers. You'll need patience during the cooling process and careful measurement for accurate results. With these practices in place, you've greatly reduced your risk of injury and set yourself up for successful soap making or other lye-based projects.


Leave a Reply