
Pioneer soap making relied on two key ingredients: wood ash for homemade lye and animal fat. You'll need hardwoods like hickory or ash for quality lye, which you can test using the floating egg method. Render your fats carefully, strain thoroughly, and maintain proper ratios for successful saponification. Stir consistently with wooden paddles and allow weeks for proper curing. These time-tested methods transformed everyday waste into essential household items that sustained generations through self-sufficiency.
The Forgotten Wisdom of Pioneer Soap Crafting

While modern consumers typically reach for mass-produced soap bars at the grocery store, our ancestors relied on a practical chemistry that transformed household waste into essential cleaning products.
You'd begin by collecting wood ash—a byproduct of heating and cooking—then leach it through straw-lined barrels using rainwater to extract potash. This caustic liquid became your homemade lye. Many pioneers preferred to use clean rainwater for the extraction process, as it yielded better results than other water sources. Testing its strength required simple household items: a chicken feather that dissolved indicated sufficient potency.
Next, you'd combine this lye with rendered animal fat from butchering, typically tallow or lard. The mixture would be boiled in cast iron until it thickened.
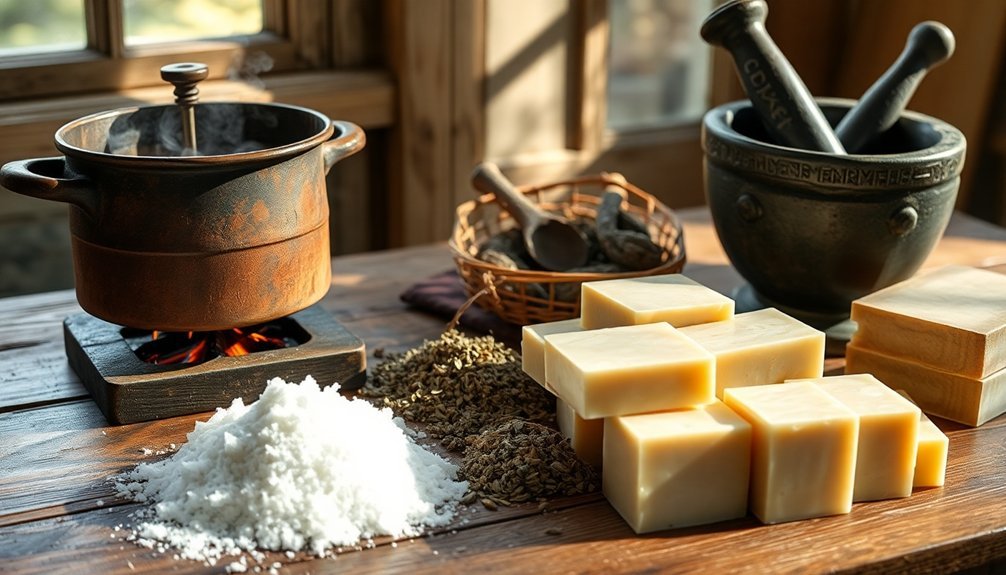
In pioneer kitchens, lye met animal fat in bubbling cauldrons, transforming butchering leftovers into essential cleansers through patient boiling.
This process, called saponification, turned waste products into valuable soap—a demonstration of pioneer resourcefulness and self-sufficiency that sustained families through challenging frontier life.
Gathering Wood Ash: The Foundation of Lye
To create effective pioneer soap, you'll need to gather ash from hardwoods like hickory, ash, or beech rather than resinous softwoods such as pine or spruce.
Your hardwood ash should be completely cool before collection and stored in a dry, covered container to prevent moisture absorption.
Keep your ash supply separate from other materials and away from children and pets, as it's the essential foundation for making the lye needed in your soap-making process.
The chemical difference between hardwood and softwood ash is significant, as hardwood ash results in firmer soap while softwood creates a softer consistency.
Hardwood vs. Softwood Selection
The critical difference between hardwood and softwood ash lies in their potassium content, which directly affects your soap quality.
When making pioneer-style lye soap, your wood choice matters greatly. Hardwoods like oak, maple, and hickory yield more ash by weight and contain higher potassium levels, producing a stronger lye that creates firmer soap.
You'll want to burn your wood completely to a white ash, removing any charcoal or unburned bits that could contaminate your lye.
Avoid softwoods when possible – their lower potassium content results in weaker lye and softer soap. If you're seeking even firmer results, consider using marine or seacoast plant ash, which contains more sodium.
For the best traditional soap, always select thoroughly burned hardwood ash free of impurities. Under controlled conditions, expect to harvest approximately 0.5% to 1.5% ash by weight from hardwoods, though typical woodstove burning may yield considerably more.
Ash Storage Methods
Proper storage of your wood ash fundamentally determines the potency of your lye and ultimately your soap's quality. You'll need to keep your ash in dry, airtight containers that resist alkali. Sift out unburnt chunks before storage to guarantee better clarification when making lye. Colonists would collect ashes from their home fireplaces, creating a sustainable cycle of wood ash gathering.
| Storage Method | Benefits | Cautions |
|---|---|---|
| Ash Hopper | Allows continuous production | Must be protected from rain |
| Wooden Barrel | Portable and traditional | Confirm it's lined to prevent leaching |
| Ceramic Container | Excellent alkali resistance | Keep tightly sealed to prevent moisture |
| Metal Bucket | Durable and accessible | Avoid aluminum (reacts with lye) |
Always store your ash away from outdoor elements, particularly rain. White ash from hardwoods yields the most alkaline solution. Remember to handle stored ash with care—it's caustic and requires proper protective equipment when processing.
Creating Homemade Lye From Scratch
Pioneer settlers, faced with limited access to commercial products, developed ingenious methods for creating essential household items from scratch. Lye production was a vital skill, requiring hardwood ashes, water, and careful technique.
You'd start by preparing a bottomless barrel with straw and sticks layered at the bottom. After filling it with hardwood ashes, you'd slowly pour water over the top in a shaded area to prevent evaporation. This leaching process could take several hours as water filtered through, extracting potassium compounds.
Unlike today's standardized sodium hydroxide, your homemade lye would vary in strength. You'd need to use it promptly to prevent degradation. The process demanded respect—burns and eye damage were real risks without proper precautions. This is why pioneers always wore protective gear when handling lye, just as modern soapmakers use safety glasses and rubber gloves.
Despite its inconsistency, this caustic liquid was essential for transforming animal fat into usable soap.
Testing Lye Strength With the Floating Egg Method
Once homemade lye was produced, settlers faced another challenge—determining its strength. The floating egg method became their ingenious solution.
You'll need a fresh egg as your primitive measuring tool. First, calibrate it by floating it in a solution of 5 grams salt to 95 grams water, marking two lines on the exposed shell. When testing your lye, these marks indicate if it's too strong or too weak.
The science is simple: denser lye solutions make the egg float higher. If it rises above your top mark, add water to dilute. If it doesn't reach the bottom mark, your lye is too weak.
While modern soap makers use hydrometers for precision, the egg method remains a demonstration of pioneer resourcefulness—effective with minimal equipment. The process mirrors advanced model evaluation methods used in current AI development, which also rely on calibration against known standards.
Selecting and Rendering Animal Fats for Soap

You'll need to carefully select your animal fats, looking for clean white tallow or lard with minimal impurities for the highest quality soap.
When rendering, slowly heat your raw fat in a large pot over low heat, occasionally stirring until it melts completely and the cracklings separate from the clear liquid fat.
Both lard and tallow contribute to creating soaps with creamy, stable lather that pioneers valued for their cleansing properties.
Store your rendered fat in cool, dark places in sealed containers, where it'll remain usable for months without developing rancidity that would ruin your soap.
Tallow Rendering Techniques
The cornerstone of pioneer soap making, animal fat rendering transforms raw tallow into a usable soap ingredient through careful processing.
You'll need to select your preferred fat—beef creates hard bars, while deer tallow produces even firmer soap.
Begin by grinding your fat to expedite melting. Heat it slowly in a large stockpot, skimming off impurities as they rise to the surface. For effective deodorizing, try adding potato chunks or sea salt during cooking.
Once fully melted, strain the liquid through cheesecloth to remove debris. Allow it to cool and solidify in plastic containers. For particularly strong-smelling fats, consider multiple cookings with fresh water.
Tallow creates a hard bar of soap that won't become goopy when exposed to moisture, making it ideal for long-term use.
Always maintain low heat throughout the process and guarantee good ventilation. Properly rendered and stored tallow will maintain its quality for your soap-making projects.
Lard Quality Assessment
Understanding lard quality lies at the heart of successful soap making, as this versatile pig fat creates distinctly mild and moisturizing bars.
You'll want to seek out high-quality lard without preservatives like BHA and BHT for your pioneer soaps. For the best results, use lard from kidney areas (leaf fat), which contains higher saturated fat content – perfect for creating firm, long-lasting bars.
When selecting store-bought options, check labels carefully for unwanted additives that might compromise your soap's natural properties. Better yet, render your own lard by slowly heating pork fat, then straining thoroughly to remove impurities.
This gives you complete control over quality while ensuring a smooth, clear fat that transforms into creamy soap. Remember that lard soap benefits from companion oils like coconut to boost lathering properties. The traditional practice of lard soap making exemplifies sustainable homesteading by utilizing the whole animal and minimizing waste.
Fat Storage Methods
Proper storage of rendered fat determines whether your soap-making endeavors succeed or fail over time. After rendering, you'll need to completely cool your clean, strained fat before transferring it to air-tight containers.
Glass jars work best, as they don't absorb odors and allow you to easily monitor quality. Store your rendered fats in the refrigerator for up to six months or freeze them for longer preservation—up to a year.
Label each container with the fat type and rendering date. This organization proves invaluable when blending different fats to achieve your desired soap properties. For soap making, you'll want fats at their freshest, as rancid fats produce inferior soap with unpleasant odors.
Remember that beef tallow tends to store longer than pork lard due to its higher saturated fat content. Using a combination of tallow and lard creates a balanced soap with optimal cleaning properties.
Balancing Ingredients: The Perfect Fat-to-Lye Ratio

Crafting successful pioneer soap hinges on three vital elements: proper fat selection, accurate lye measurement, and precise ratio calculation. Unlike today's digital scales, pioneers relied on experience to determine the proper fat-to-lye balance.
You'll need to adjust your lye amount based on your chosen fats—coconut oil demands more lye than lanolin. Traditional soap makers created lye from wood ashes, often approximating quantities through trial and error.
For skin-friendly soap, consider "superfatting" by adding extra oil beyond what's needed for saponification. This technique provides a safety margin in your lye calculations while making the final product gentler on skin.
Water plays a significant role too, with ratios typically ranging from 2.5:1 to 1:1 water-to-lye. Remember to add lye to water—never the reverse—to prevent dangerous splashing.
Precise measurements of all ingredients guarantee your soap will cleanse effectively without harshness.
The Moon's Influence on Traditional Soap Making
While we've explored the science of fat-to-lye ratios, traditional soap makers often looked to the heavens for guidance.
Your ancestors likely timed their soap making with lunar phases, believing this influenced the final product's quality and energy.
During the waxing moon, they'd craft soaps meant to attract good fortune. Full moon soap making was reserved for luxury batches, when lunar energy was thought to be at its peak. For cleansing or purifying soaps, the waning moon was preferred. These specialized soaps were designed to decrease unwanted energies around the user.
These practices weren't merely superstition but part of a holistic approach that connected soap making to natural cycles.
Even today, artisanal soap makers honor these traditions, creating moon-shaped designs and timing their production with lunar phases—a practice that resonates with customers seeking products with spiritual significance.
Stirring Techniques From the Frontier Kitchen

When making pioneer soap, you'll need to maintain a steady rhythm while stirring continuously in one direction to guarantee proper saponification.
Your wooden paddle or sassafras stick should move gently through the thickening mixture, avoiding aluminum tools that would react with the caustic lye.
Keep your stirring motion consistent for hours, as this patient technique prevents dangerous hot spots and creates the uniform texture that frontier families depended on for their cleaning needs.
The process ultimately transforms the lye and oils into soap through the chemical reaction that pioneers relied on, just as modern soap makers do today.
Hand-Stirring Rhythmic Patterns
The steady cadence of spoon against pot defined the frontier soapmaker's craft.
You'll want to establish a consistent stirring rhythm with your thick-handled stainless steel spoon or whisk, maintaining a steady pace to properly incorporate your ingredients.
For best results, vary your technique by changing direction occasionally to prevent air pockets. When using higher-tracing recipes with palm oil, coconut oil, and castor oil, you'll reach trace faster than with olive oil-heavy blends. Hand-stirred soap may require hours or days to reach proper trace depending on your recipe composition.
Start with warmer temperatures (135-145°F) to speed up the process, but never exceed 180°F to avoid soap volcanoes.
Your stirring environment matters too—ensure good ventilation and wear protective gloves and goggles.
Wooden Paddle Techniques
Three distinct paddle motions formed the cornerstone of frontier soap making: the fold, the sweep, and the figure-eight.
You'd use the fold motion to incorporate tallow into the lye mixture, pressing down and folding the contents like kneading bread. The sweep involved circular strokes along the kettle's perimeter, preventing scorching against the hot cast iron. The mixture required constant stirring as tallow and lye were boiled together to form the soap base.
For thick mixtures, you'd employ the figure-eight pattern, creating consistent circulation that guaranteed uniform consistency.
Your paddle—typically crafted from hardwood to resist the caustic lye—needed to be long enough to keep your hands safely away from splashes and steam. As you worked, you'd develop a rhythm that not only blended ingredients efficiently but also served as a tactile test of your soap's readiness, revealing when the mixture had reached proper thickness.
Molding and Curing Your Handcrafted Soap
After completing the soap-making process, you'll need to carefully consider how to mold and cure your creation. Pioneer soap makers typically used wooden molds, though stone, clay, or metal containers worked well too.
For simplicity, shape your soap into basic bars or logs, or try free-forming by hand for a rustic appearance.
Once molded, proper curing is crucial. Place your soap on wooden racks in an area with good air circulation and low humidity. This curing stage, similar to techniques used in the cottage industry of artisan soapmaking today, ensures quality and durability. Wrap freshly poured soap in burlap to maintain warmth and promote even hardening. Keep your soap away from direct sunlight to preserve its color.
The curing process requires patience—expect to wait several weeks or even months. Check your soap regularly to verify it's hardening evenly throughout the curing period.
Troubleshooting Common Pioneer Soap Problems
Even well-practiced pioneer soap makers occasionally encountered challenges that affected their final product.
The key to success was understanding how to identify and resolve these issues quickly.
If your soap develops cracks, it's likely overheating during saponification.
Move your molds to a cooler, well-ventilated area or place cooling packs nearby to manage temperature.
For separation problems, verify thorough mixing and maintain oils and lye at 100-120°F before combining. Using a stick blender until trace is reached will prevent separation and ensure proper emulsification.
When troubleshooting soft or sticky soap:
- Extend curing time to at least 4-6 weeks in a dry environment
- Reduce water content in your next batch by 5-10%
- Balance soft oils like olive with harder ones like coconut (aim for 30-40% hard oils)
Most pioneer soap problems can be corrected with simple adjustments to your process.
Seasonal Variations in Historical Soap Recipes
While troubleshooting helped pioneers perfect their soap-making craft, the changing seasons directly influenced their recipes and methods throughout the year.
Fall became prime soap-making time as animal slaughtering provided fresh fats, while spring offered abundant wood ash collected from winter hearth fires.
You'd find European settlers using the boiling kettle method with animal fats, while indigenous communities incorporated seasonal plants like yucca.
In New England, maple ash and deer tallow might dominate winter recipes, whereas southwestern regions relied on native plant saponins during drier months.
Women typically led these seasonal soap-making efforts, often gathering the family or entire community for the task. The growing industrial revolution in the mid-19th century gradually changed traditional soapmaking practices as manufactured soaps became more widely available.
The clever pioneers adapted their techniques based on available resources, creating regionally distinct recipes that reflected both cultural influences and environmental conditions.
From Basic Cleansing to Medicinal Remedies
Pioneer soap-making evolved far beyond basic cleansing as families discovered the therapeutic potential in their homemade creations.
You'd find herbs and flower petals mixed into soap batches not just for pleasant scents, but for specific healing properties. Rose petals soothed irritated skin, while certain herbs provided antibacterial benefits that commercial soaps couldn't match. Just as the textbook Write Now emphasizes thoughtful decision-making regarding priorities, pioneer families carefully selected ingredients based on their healing properties.
Your ancestors knew that adding natural ingredients created gentler soap for sensitive skin without harsh chemicals. These medicinal additions transformed everyday hygiene into treatment:
- Lavender-infused bars to calm skin conditions and provide relaxing aromatherapy
- Pine tar soap for treating psoriasis, eczema, and stubborn rashes
- Chamomile-enriched recipes to reduce inflammation and promote healing
The knowledge of medicinal soap-making passed through generations, preserving valuable wellness traditions that many are rediscovering today.
Preserving Grandma's Soap Making Legacy Today
Though modern convenience has given us aisles of factory-produced soaps, many families are reclaiming their heritage by preserving grandmother's soap making techniques. This movement isn't just about nostalgia—it's a sustainable choice with environmental benefits.
You can start by documenting traditional methods through videos or written recipes. Consider hosting workshops where elders share their knowledge with younger generations. The lye-water preparation, with its egg-float test, and the careful curing process deserve preservation. Using hardwood tree ashes yields the best quality lye water for authentic traditional soap.
Today's artisanal soap makers are finding economic opportunities by combining traditional techniques with modern marketing. By storing properly cured soaps in cool, dry places and using quality ingredients, you'll extend their longevity.
This revival honors cultural heritage while meeting growing consumer demand for authentic, eco-friendly products.
Frequently Asked Questions
How Did Pioneers Test Soap Quality Without Modern Equipment?
You'd test soap quality by checking its lathering ability, texture, longevity, color, smell, and appearance. You'd rely on user feedback and simple observation rather than scientific measurements like pH or TFM testing.
Did Pioneer Children Participate in Soap Making Activities?
Yes, you'll find that pioneer children actively participated in soap making, helping collect ingredients like lard, stirring mixtures, and learning this essential skill as part of their household chores based on their age and gender.
How Long Did Homemade Pioneer Soap Typically Last?
Your homemade pioneer soap would typically last 6-12 months if stored properly in cool, dry conditions. You'd notice it hardened with age, making it more durable but eventually developing a rancid smell when spoiling.
What Containers Were Used for Storing Finished Soap?
You'd store your finished soap in wooden crates, metal tins, or clay pots. If soap was for household use, you'd need food-grade materials. These containers protected soap from moisture while maximizing storage space.
Were There Specific Soap Making Traditions Among Different Cultural Groups?
Yes, you'll find distinct soap traditions across cultures. Indigenous peoples used saponin-rich plants like yucca, Palestinians created olive oil-based Nabulsi soap, and European settlers relied on animal fat and wood ash lye combinations.
In Summary
You've now opened the timeless art of pioneer soap making. By creating your own lye, rendering fats, and understanding the seasonal variations, you're not just making soap—you're preserving history. When you encounter problems, remember grandma's troubleshooting wisdom. As you craft these traditional cleansers and remedies, you're connecting generations through your hands. Take pride in continuing this essential homesteading skill for years to come.


Leave a Reply