
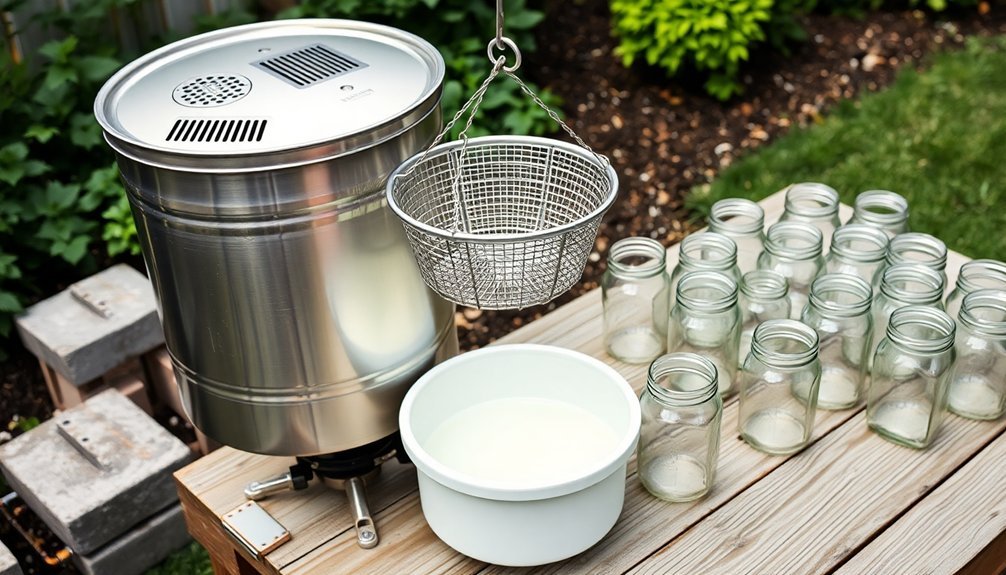
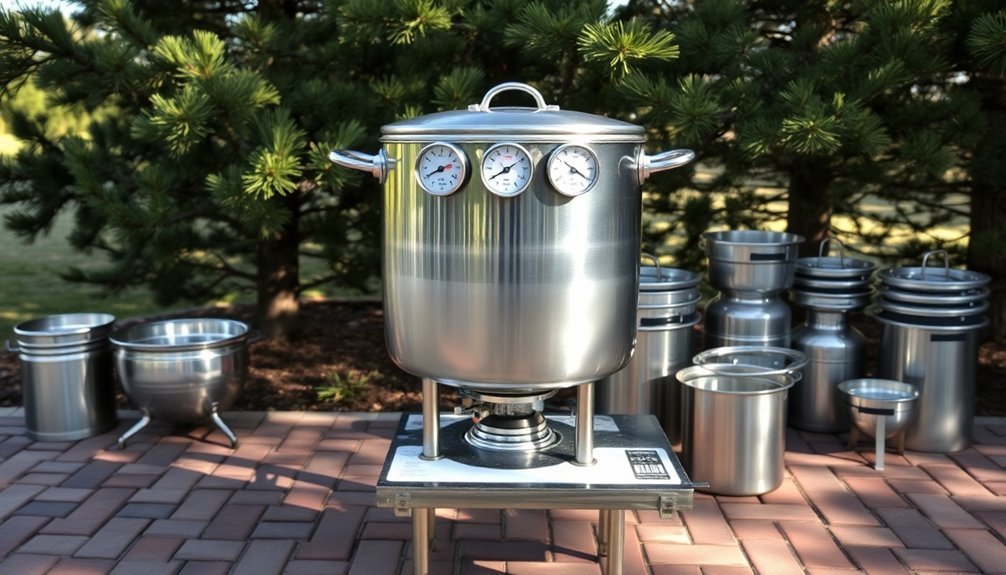
You'll need a heavy-bottomed pot or dedicated outdoor fryer, reliable thermometer, and fine mesh strainer to set up an effective backyard fat rendering system. Place your setup in a well-ventilated area on a stable surface, protected from wind and rain. Use a propane burner or charcoal grill for consistent heat, and keep safety equipment nearby. With proper equipment and technique, you can transform raw animal fats into high-quality rendered fats for cooking or soap-making. Let's explore the essential steps to get started.
Essential Equipment for Outdoor Fat Rendering
When setting up your backyard fat rendering system, you'll need specific equipment to guarantee a safe and efficient process.
Start with a heavy-bottomed pot or dedicated outdoor fryer that can withstand intense heat without scorching your fat. A reliable thermometer is essential to monitor temperatures and prevent your fat from degrading or burning during rendering.
Choose heavy-duty equipment and proper temperature monitoring to ensure your rendered fats stay pure and unburned during processing.
You'll also need a fine mesh strainer or cheesecloth to remove unwanted solids and impurities from your rendered fat. For storage, prepare clean mason jars or other heat-resistant containers that won't crack under high temperatures.
Finally, make certain you have a sturdy heat source, like a propane burner or charcoal grill, to maintain consistent heat throughout the rendering process. This setup will help you achieve clean, pure rendered fat every time.
Choosing the Right Heat Source
The selection of an appropriate heat source stands as a crucial decision for successful fat rendering. You'll find several effective options, each with distinct advantages for your backyard setup.
A slow cooker offers the most reliable solution, providing steady, low heat that prevents scorching and delivers superior results.
If you prefer more hands-on temperature control, consider using a heavy-bottomed pot on your stovetop, though you'll need to monitor it continuously.
For larger batches, an outdoor propane burner can handle the volume, but you'll want to watch carefully for flare-ups.
Electric pressure cookers present a versatile alternative, accommodating both wet and dry rendering fat methods in a controlled environment.
Safety Protocols and Setup Location
Because fat rendering involves high temperatures and flammable materials, establishing proper safety measures and choosing an ideal location becomes paramount to your success.
Select a well-ventilated outdoor area away from structures and flammable materials to minimize fire risks and strong odors during the rendering process.
Your safety protocols should include wearing appropriate protective gear like heat-resistant gloves and safety goggles to prevent burns from hot splatters.
Keep a fire extinguisher within reach and maintain constant supervision of your rendering setup.
You'll need a clean workspace free from contaminants and a heavy-bottomed pot or dedicated slow cooker to prevent scorching.
Position your equipment on a stable surface and guarantee you've got enough space to work safely while maintaining a safe distance from the heat source.
Raw Fat Selection and Preparation
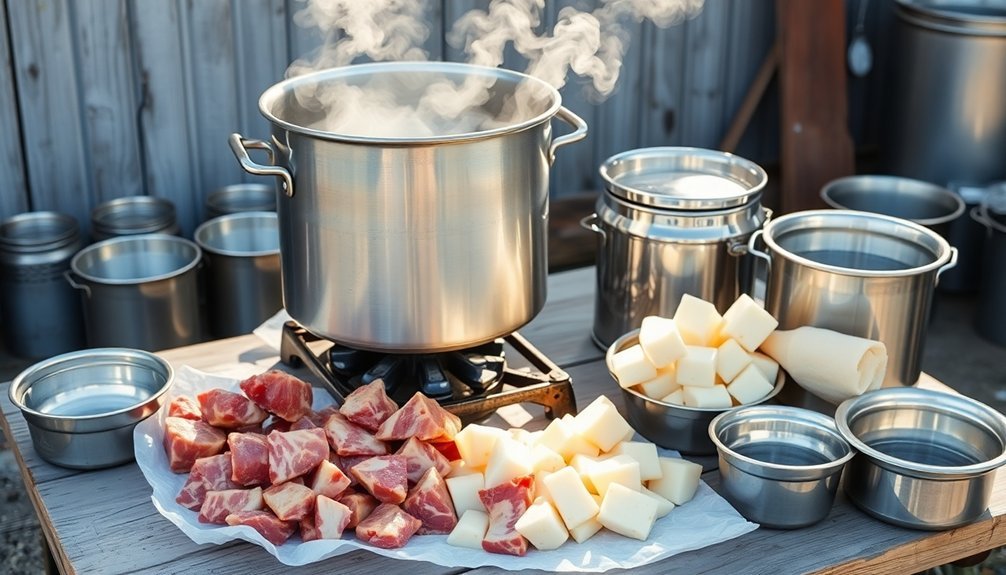
Selecting high-quality raw fat marks the crucial first step in successful fat rendering. You'll want to source your fat from pasture-raised or organic animals, focusing on leaf lard, back fat, or suet to guarantee minimal toxins and ideal nutrition.
Before rendering lard to use, prepare your raw fat selection by getting it very cold – partially freezing it makes handling easier and safer. Trim away any meat, blood, or gristle that could affect the final flavor.
You'll need to cut or grind the fat into small pieces to maximize surface area for better rendering. Using a food processor, grind the fat until it resembles ground beef texture. This consistent size guarantees even melting and produces a purer end product when you begin the rendering process.
Dry vs. Wet Rendering Methods Outdoors
Once you've prepared your raw fat pieces, you'll need to choose between two distinct rendering approaches for your outdoor setup: dry or wet methods. Each technique offers unique advantages for your backyard rendering system, with temperature control being essential for both.
- Dry rendering produces robust flavors but requires constant monitoring to prevent burning.
- Wet rendering's added water acts as a safety buffer, making it beginner-friendly.
- Using a slow cooker for dry rendering helps maintain steady heat outdoors.
- Wet rendering starts with water in the pot, protecting against outdoor temperature fluctuations.
- You'll get different end products: dry rendering creates stronger-tasting fat, while wet rendering yields milder results.
Consider your experience level and intended use when choosing your method. Wet rendering offers more forgiveness in outdoor conditions, while dry rendering delivers more intense flavors if you're confident in your heat management skills.
Temperature Control Techniques
The key to successful fat rendering lies in maintaining precise temperature control throughout the process. You'll want to keep your rendered fats between 200°F and 250°F to prevent burning and guarantee a clean final product.
Careful temperature management between 200°F and 250°F ensures perfectly rendered fat without scorching or impurities.
Among effective temperature control techniques, using a slow cooker stands out as it provides steady, reliable heat distribution. Add a small amount of water at the start to help regulate temperature during the initial melting phase.
Don't forget to stir your fat every 30 minutes to prevent hotspots and guarantee even heating.
For precise monitoring, use a reliable thermometer to track your fat's temperature. This simple tool makes a significant difference in achieving the perfect clarity and purity in your rendered fats.
Proper Ventilation Requirements
Since fat rendering produces strong odors and smoke, establishing proper ventilation in your workspace is vital for both comfort and safety.
When rendering fat outdoors or in your backyard setup, you'll need to guarantee adequate air circulation to prevent smoke buildup and maintain a safe environment.
- Position your rendering station away from buildings and flammable materials
- Open windows and doors to create cross-ventilation if working near enclosed spaces
- Use exhaust fans to direct smoke and fumes away from your workspace
- Consider adding a portable fan to improve airflow around your rendering area
- Install an air purifier nearby to help filter out lingering odors
These ventilation measures will help you maintain a comfortable workspace while rendering fat and prevent respiratory irritation from smoke exposure.
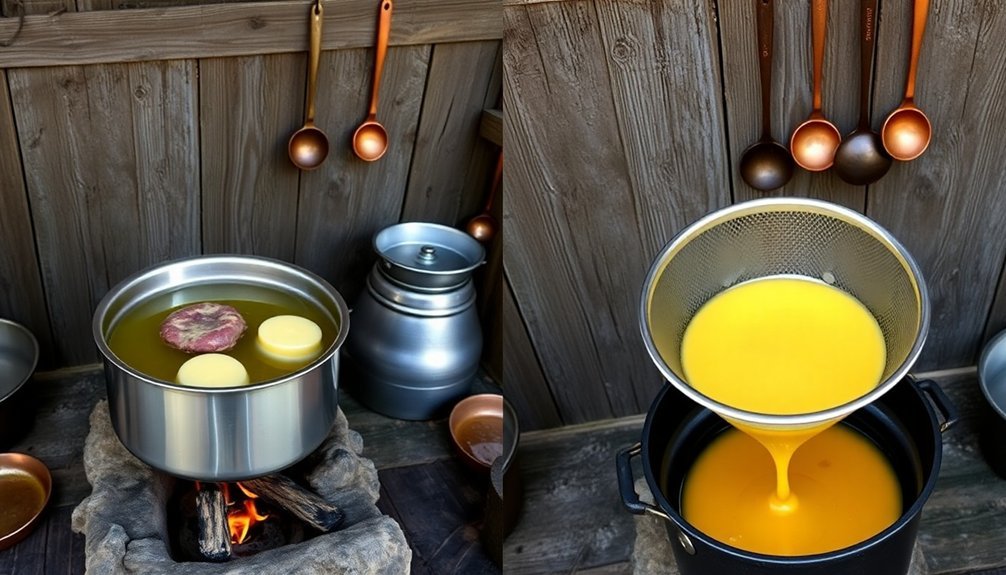
Straining and Filtering Systems
You'll need to choose between mesh strainers and cheesecloth for your fat rendering setup, with mesh offering durability and cloth providing finer filtration capabilities.
While both options work well, a two-stage system using both types can give you the cleanest rendered fat possible.
Keep your rendered fat warm (but not hot) during the straining process, as this will help it flow more easily through your chosen filter while preventing dangerous splashes and burns.
Mesh vs. Cloth Filters
When choosing a filtering system for your backyard fat rendering setup, understanding the differences between mesh and cloth filters will help you achieve ideal results. Each type offers distinct advantages that can impact your final product's quality.
- Mesh filters provide durability and quick straining, making them ideal if you're rendering fat frequently.
- Cloth filters, especially cheesecloth, capture finer particles for a purer end product.
- You'll find mesh filters easier to maintain since they're simple to rinse and reuse.
- Double-layering cloth filters produces clearer rendered fat but slows down the process.
- Your choice should align with whether you prioritize speed (mesh) or purity (cloth).
Consider your specific needs and workflow when deciding between these options. If you're processing large quantities, mesh filters' reusability might be more valuable than the superior filtration of cloth.
Temperature Control While Straining
Maintaining perfect temperature during the straining process makes the difference between smooth, pure rendered fat and a clogged, frustrating mess.
You'll want to keep your rendered fat between 130-150°F while straining to prevent re-solidification and guarantee effective impurity removal.
For ideal temperature control, use a thermometer to monitor your fat's warmth as you strain it through a metal strainer lined with cheesecloth.
You'll find that warm fat flows more easily through your filtration system, reducing clogs and making the process more efficient.
If you're aiming for extra-pure results, you can add a secondary filtration stage using coffee filters or additional cheesecloth layers.
Just remember to maintain consistent warmth throughout the straining process – this prevents scorching while guaranteeing all impurities are effectively captured in your filters.
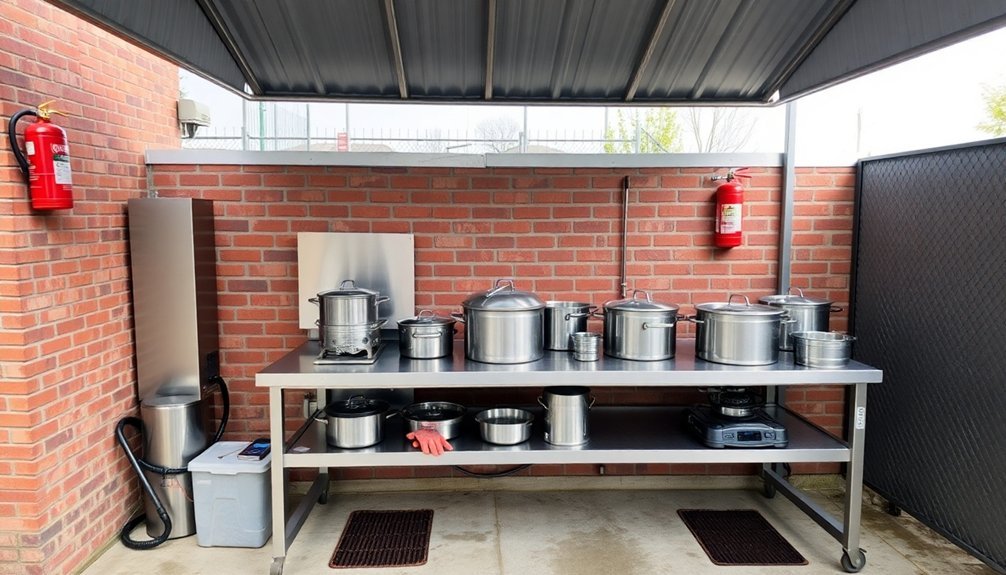
Outdoor Cleanup and Maintenance
Proper cleanup and maintenance of your outdoor fat rendering area guarantees a safe, sanitary operation while preventing unwanted odors and messes.
Set up your outdoor area on a concrete surface that you can easily clean, and keep essential cleaning equipment nearby, including a dedicated hose for immediate spill management. You'll also need a container for collecting cracklings and impurities as you work.
- Designate specific pots and slow cookers exclusively for fat rendering
- Install your station away from high-traffic areas to contain odors
- Keep cleaning supplies within arm's reach for quick response to spills
- Check equipment regularly for wear and buildup
- Clean your rendering area thoroughly after each use
Remember to maintain your tools and space consistently to guarantee efficiency and prevent cross-contamination in future rendering sessions.
Weather Considerations and Protection
You'll want to set up your fat rendering operation in a sheltered spot that protects against wind, rain, and direct sunlight, such as under a canopy or in a garage with proper ventilation.
It's essential to maintain consistent temperatures during the rendering process, as extreme weather conditions can affect both the quality and efficiency of your operation.
Using windbreaks and temperature controls will help you achieve ideal results while keeping your rendered fat protected from moisture and environmental contaminants.
Shelter From Elements
While fat rendering can be done outdoors, protecting your setup from the elements is crucial for consistent, high-quality results.
You'll need a sheltered area that shields your operation from rain, snow, and temperature extremes. A well-ventilated shelter, like a garage or shed, helps maintain consistent temperatures and prevents your rendered fat from spoiling.
- Use a portable canopy or tarp for flexibility in relocating your setup
- Choose a shaded space during hot weather to prevent rapid oxidation
- Set up in a garage or shed to control temperature fluctuations
- Add insulation in cold climates to keep fat from solidifying too quickly
- Guarantee proper ventilation to prevent overheating during the rendering process
These protective measures will help you achieve clean, high-quality rendered fat regardless of weather conditions.
Temperature Control Essentials
Successful fat rendering depends heavily on maintaining precise temperature control, regardless of outdoor weather conditions. For ideal results, you'll want to keep your rendering pot at a steady 200-250°F (93-121°C), using a reliable thermometer to monitor the temperature throughout the process.
In cold weather, start by pre-warming your rendering pot and fat to guarantee stable temperatures. Using a slow cooker or crockpot with adjustable settings gives you better control over the heat.
Keep the lid on initially to trap warmth, but remember to crack it later to release steam.
During hot weather, you'll need to be extra vigilant about temperature control. Your rendering pot can heat up faster than expected, potentially scorching the fat.
A controlled heat source becomes even more essential in these conditions.
Scaling Your Rendering Operation
Taking your backyard fat rendering operation to the next level requires strategic planning and systematic improvements.
To scale your rendering operation effectively, you'll need to focus on expanding both your equipment capacity and workflow efficiency. Consider investing in multiple slow cookers or larger rendering vessels to process more rendered lard at once.
- Partner with local farmers and CSAs to secure a reliable supply of quality raw fats
- Organize your workspace with dedicated zones for preparation, rendering, and storage
- Monitor temperatures carefully across all rendering units to maintain product quality
- Experiment with different kinds of fats like tallow, leaf lard, and schmaltz
- Maximize efficiency by implementing a systematic production schedule
Storage Solutions for Rendered Fats
You'll need a variety of clean mason jars and shallow glass containers to properly store your rendered fats, with mason jars being ideal for soft fats like lard and shallow containers working best for hard fats like tallow.
To maximize shelf life, you can store your rendered fats at room temperature for 4-6 months, in the refrigerator for up to a year, or in the freezer indefinitely.
When storing at room temperature, keep your containers in a cool, dark place and monitor the temperature to prevent premature spoilage.
Long-Term Container Options
Proper storage containers play an essential role in preserving your rendered fats for long-term storage.
You'll want to choose the right vessels to maintain freshness and prevent contamination. Glass mason jars are your best option, as they can be vacuum sealed while hot.
- Use shallow glass containers for tallow to make scooping easier
- Select wide-mouth jars for softer fats like lard
- Store rendered fats in airtight containers at room temperature for up to 6 months
- Extend shelf life to 12 months by refrigerating
- Freeze in well-sealed containers for indefinite storage
Before storing your rendered fats, verify they're completely free of moisture and impurities.
This vital step will greatly impact their shelf life and safety.
Temperature Control Methods
Managing temperature is essential for maximizing the shelf life of your rendered fats. You'll need to implement specific temperature control methods depending on your storage timeline.
For short-term storage of 4-6 months, keep your rendered fats in a cool, dark cupboard. If you're planning for up to a year, refrigeration is your best option.
For indefinite storage quality, utilize your freezer, which completely halts oxidation. Before implementing any temperature control methods, verify your rendered fats are fully cooled to prevent condensation in your storage containers.
Once you've opened a jar, move it to the refrigerator and use it within two weeks. Always monitor your stored fats for signs of spoilage, regardless of storage temperature.
If you're storing cracklings, keep them in the freezer to maintain their quality.
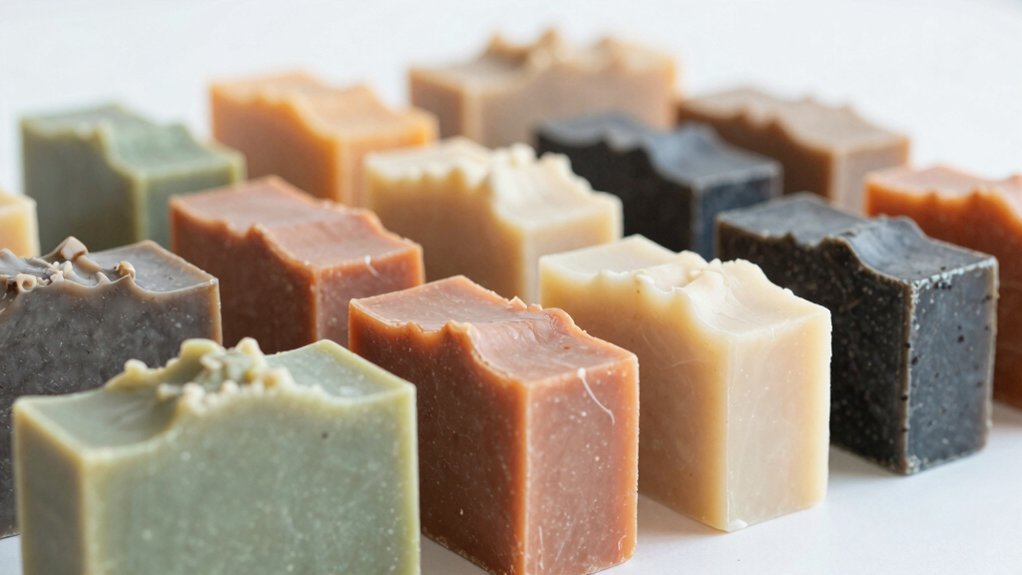
Transitioning Rendered Fat to Soap Making
Once you've successfully rendered and clarified your fat, transforming it into homemade soap opens up an exciting new chapter in your backyard production system.
Rendered fat, particularly lard and tallow, creates luxurious soap with excellent conditioning properties and creamy lather.
To guarantee success in soap making, you'll need to follow these essential steps:
- Cool and clarify your rendered fat completely, removing any remaining impurities
- Calculate precise measurements of lye and water using a soap calculator specific to your fat type
- Mix your lye solution with the prepared fat at the correct temperature
- Add your chosen essential oils or natural fragrances after achieving proper trace
- Pour into molds and allow 4-6 weeks curing time for the saponification process to complete
This methodical approach will help you create high-quality, skin-safe soap from your rendered fats.
Frequently Asked Questions
What Is the Difference Between Tallow and Rendered Fat?
You'll find that tallow is specifically rendered fat from cattle or sheep, while rendered fat can come from any animal. Tallow has a higher melting point and distinctive beefy flavor compared to other rendered fats.
How Long Will Rendered Fat Keep?
You'll get 4-6 months at room temperature with your rendered fat, 12 months in the fridge, or keep it forever in the freezer. Make sure it's pure and sealed properly for maximum shelf life.
How Much Tallow Does 1 Pound of Beef Fat Make?
You'll get approximately 0.5 to 0.75 pounds of tallow from 1 pound of beef fat. Your yield depends on the fat's quality, moisture content, and rendering method. Higher-quality grass-fed beef fat produces better results.
Is It Better to Render Tallow Wet or Dry?
You'll find wet rendering is better, especially if you're new to tallow making. It's safer, prevents burning, and produces cleaner results. Use a slow cooker with water for the most foolproof method.
In Summary
You'll find that outdoor fat rendering becomes second nature once you've mastered your setup. Remember to prioritize safety, maintain proper ventilation, and keep your equipment clean. Whether you're using a simple propane burner or a custom-built system, your rendered fats will reward your efforts. Store your finished product properly, and you'll have quality fat ready for soap making or cooking all year round.


Leave a Reply