
Tallow soap making follows your grandmother's wisdom with simple ingredients: quality beef tallow, coconut oil, olive oil, and lye. You'll need stainless steel bowls, digital scales, thermometers, and protective gear. Melt tallow to 100°F, mix lye with water, combine both solutions, and pour into molds. Let it harden for 24 hours, then cure for 4-6 weeks on racks. This time-tested method produces bars that nourish skin rather than strip moisture—just like grandma intended.
Why Tallow Soap Has Stood the Test of Time
While modern skincare products come and go with passing trends, tallow soap has remained a steadfast companion in human hygiene for thousands of years. From ancient Romans to Egyptians and Babylonians, civilizations recognized the value of animal fats in cleansing rituals.
What makes tallow soap endure? It's packed with essential fatty acids and vitamins A, D, E, K, and B12 that nourish rather than strip your skin. Unlike commercial soaps filled with synthetic chemicals, tallow's bioavailable nutrients penetrate deeply, providing lasting hydration while balancing all skin types. The remarkable similarity to our natural skin oils enhances its exceptional ability to support the skin's barrier function.
For those with sensitive skin or conditions like eczema, tallow soap offers gentle cleansing without harsh additives. Its simple, time-tested formulation explains why many people are returning to this traditional craft—seeking the same benefits our ancestors valued centuries ago.
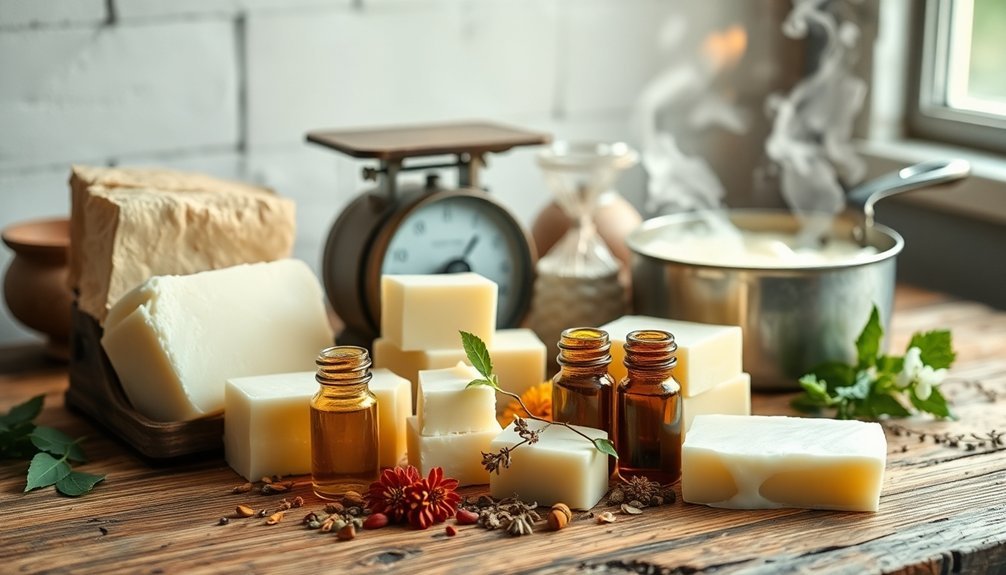
Essential Ingredients for Grandma's Tallow Soap Recipe
To create authentic tallow soap like your grandmother made, you'll need precise measurements of each ingredient on a digital scale.
Your choice of high-quality fats matters considerably, with rendered beef tallow forming the foundation of a long-lasting, creamy bar.
You'll also want to select complementary oils thoughtfully—coconut for cleansing properties, olive for moisturizing benefits, and perhaps castor oil for a luxurious lather.
Remember that grass-fed tallow provides exceptional skin benefits that commercial soaps simply cannot match.
Measuring Key Components
Every successful tallow soap begins with precisely measured ingredients. You'll need a digital scale to weigh your tallow (the main fat component), additional oils like coconut and olive, and the critical lye that transforms these fats into soap.
The saponification process requires exact proportions—even small measurement errors can ruin your batch. Calculate your oil-to-lye ratio using a soap calculator, aiming for a 5-8% superfat percentage for moisture.
Temperature matters too; use your thermometer to verify both lye water and melted tallow reach the same range (usually 100-110°F) before combining. For optimal results, aim to keep both the lye solution and oils at 105 degrees before mixing.
Don't forget safety measurements: always wear gloves and goggles when handling lye, work in a well-ventilated area, and keep white vinegar nearby to neutralize potential spills.
Quality Oil Selection
With your measurements ready, let's turn our attention to what you'll actually be measuring—the oils that form the foundation of your tallow soap.
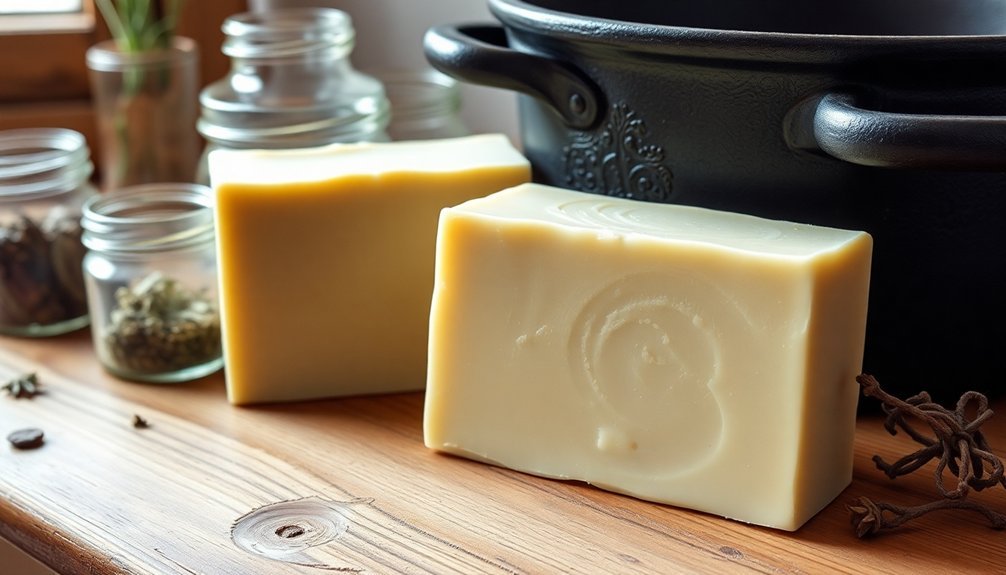
Tallow serves as your primary ingredient, creating a hard bar with creamy lather while utilizing a sustainable resource that might otherwise go to waste. You'll find it's not only economical but rich in skin-nourishing nutrients. Tallow is especially valuable because it creates a hard bar that won't become goopy in your soap dish.
Consider adding coconut oil to enhance lather and hardness, or olive oil for extra moisturizing benefits if you have sensitive skin. These combinations create versatile bars tailored to different needs—tallow with coconut for balanced cleansing, or tallow with olive for gentle washing.
For fragrance, select essential oils thoughtfully, favoring base notes like sandalwood or cedarwood for lasting scent. Aim for about 3% of your recipe's weight in essential oils.
Required Tools and Equipment for Traditional Soap Making
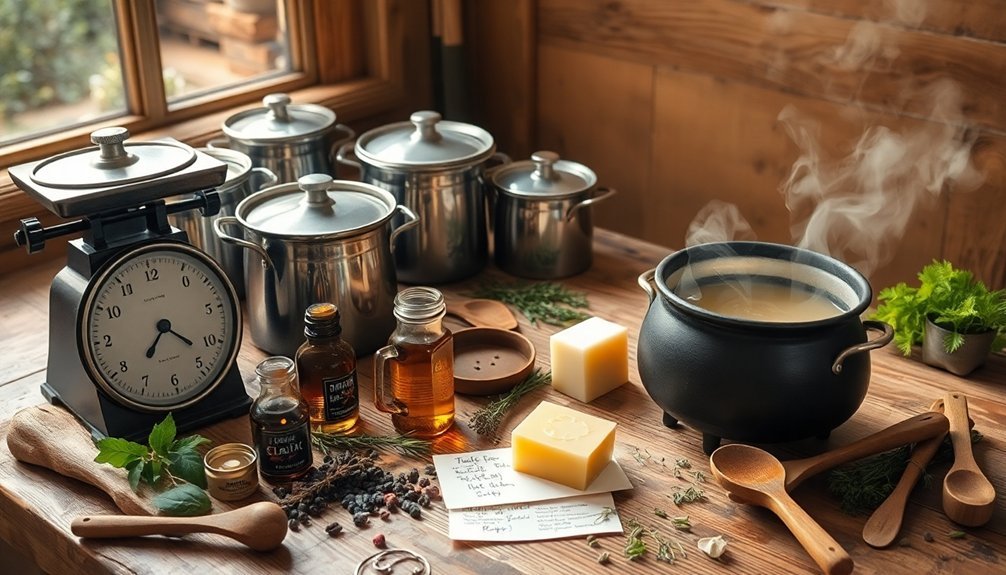
You'll need reliable mixing vessels like stainless steel bowls to safely combine your tallow with lye solution.
Precision tools such as digital scales and thermometers guarantee your soap recipe maintains the correct ratios and temperatures.
Don't forget silicone or wooden molds for shaping your soap and breathable racks for the vital 4-6 week curing period.
Always wear appropriate protective equipment including rubber gloves that reach your elbows, safety goggles, and full-coverage clothing to safeguard against lye's corrosive nature.
Essential Mixing Vessels
Selecting the right mixing vessels stands as a fundamental step in traditional soap making, particularly when working with potentially dangerous ingredients like lye. You'll need containers that can withstand both heat and the caustic nature of lye solution. When dissolving sodium hydroxide flakes, use a container that is both large and deep enough to provide adequate safety margin.
| Vessel Type | Benefits | Safety Notes |
|---|---|---|
| Stainless Steel | Durable, heat-resistant | Never use aluminum alternatives |
| Heat-Resistant Plastic (#5) | Lightweight, won't break | Check for proper rating |
| Deep Soap Pots | Prevents splashing | Must be lye-resistant |
| Double Boiler | Controls temperature | Ideal for melting tallow |
Remember to keep a dedicated deep pot specifically for soap making to prevent cross-contamination with food preparation. Avoid aluminum, Teflon, or other reactive materials that can create dangerous chemical reactions when exposed to lye.
Precision Measuring Tools
Accuracy forms the backbone of successful soap making, particularly when working with tallow and lye. You'll need a digital scale with at least 1g accuracy to guarantee proper lye-to-oil ratios—this isn't just about consistency but safety.
Never substitute volume measurements, as densities vary considerably between ingredients. Your scale should feature a tare function for zeroing out container weights and display options in grams.
Pair it with a digital thermometer to monitor temperatures throughout the process. For calculating precise recipes, use a lye calculator to determine exact measurements based on your chosen oils and desired superfat percentage.
Remember to maintain your measuring tools by cleaning them regularly and storing them properly. Incorrect ingredient amounts can lead to ruined batches or create serious safety issues when working with caustic materials like lye. These precision instruments are your most important safeguard against batch failures and potential safety hazards.
Molds and Curing Racks
Once your recipe is precisely measured, the next step involves proper containment and finishing tools.
You'll need appropriate molds to shape your soap – bread pans, flexible silicone molds or parchment-lined cardboard boxes work well. For experimental batches, repurpose ice cube trays or Pringles cans as inexpensive alternatives.
After pouring, your soap needs proper curing.
Set up a well-ventilated rack in a low-humidity area, using wire racks or wooden dowels as your base. Space bars about an inch apart and stand them on end to maximize air exposure. This careful arrangement guarantees thorough drying and prevents moisture retention. Allow soap to cure for at least 24 hours before cutting into bars.
Don't forget essential equipment like thermometers for monitoring temperatures, protective gear (gloves, eyewear), and mixing tools like immersion blenders.
A double boiler helps manage heat during the soap-making process.
Step-by-Step Tallow Soap Making Process
Making homemade tallow soap requires five main steps that transform raw ingredients into luxurious, skin-nourishing bars.
Begin by melting your tallow and additional oils (like coconut and olive) in a crockpot until they reach approximately 100°F.
While oils are melting, carefully prepare your lye solution by adding sodium hydroxide to distilled water—never the reverse.
Let both mixtures cool until they're within 10°F of each other.
Slowly pour the lye solution into your oils while stirring continuously. Use an immersion blender until the mixture reaches "trace" consistency, similar to pudding.
Add essential oils for fragrance at this stage.
Pour into your prepared molds and allow to harden for 24 hours before unmolding and cutting.
Finally, cure your soap bars for 4 weeks in a well-ventilated area. This curing process ensures your soap will be long-lasting and firm, unlike some other handmade varieties.
Safety Measures When Working With Lye
While tallow soap making can be rewarding, working with lye demands serious safety precautions to prevent painful chemical burns and other injuries.
Always wear proper protective gear: safety goggles (not just glasses), long sleeves, gloves, long pants, and closed-toe shoes.
Set up your workspace in a well-ventilated area free from distractions, children, and pets.
Always add lye to water—never reverse this order—and use heat-resistant glass, plastic, or stainless steel containers for mixing. The mixture will create an exothermic reaction that can heat up to 200°F.
If lye contacts your skin or eyes, immediately rinse with water for at least 15 minutes. For severe exposure, seek medical attention right away.
Store lye in clearly labeled containers marked "POISON" in a cool, dry place inaccessible to children.
Keep safety gear on during cleanup to avoid residual lye exposure.
The Art of Curing Your Homemade Tallow Soap
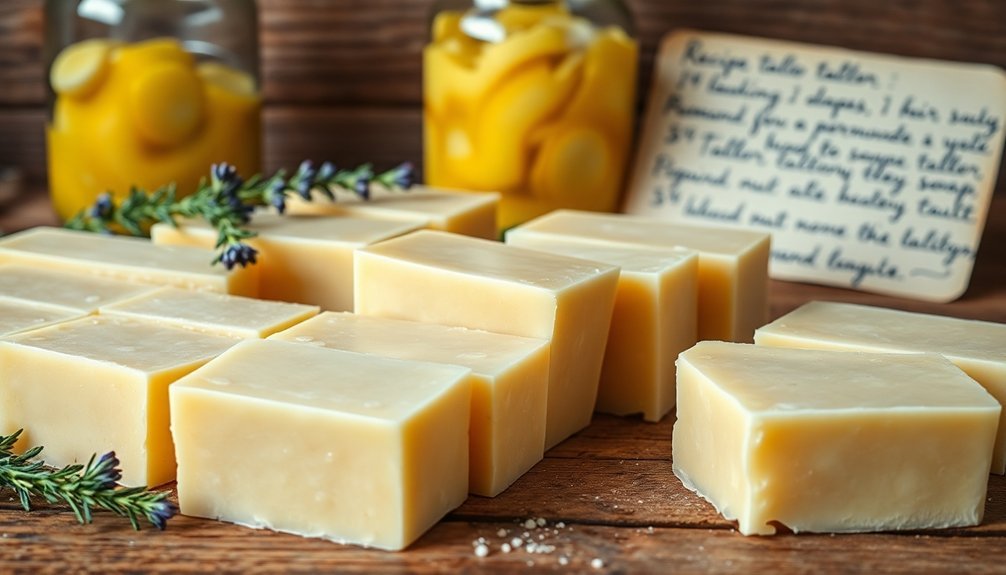
After successfully crafting your tallow soap, you've only completed half the journey. Within 24-48 hours, unmold your soap when it's firm but slightly soft, and cut it into bars. Place them on a rack to begin curing.
Set up your curing area in a cool, dry, well-ventilated space away from direct sunlight and curious pets. Wire racks are ideal for ensuring airflow around each bar. Using a digital thermometer, occasionally monitor the ambient temperature of your curing space to ensure optimal conditions.
Create a sanctuary for your soap—cool, dry, and ventilated, where both sunshine and furry friends cannot disturb the transformation.
You'll need patience—tallow soap requires 4-6 weeks minimum curing time, though longer periods yield milder, harder bars.
During curing, excess water evaporates, the soap becomes gentler as saponification completes, and you might notice harmless soda ash forming.
The reward? Your properly cured tallow soap will produce richer lather, last longer, and offer superior moisturizing properties.
Customizing Your Tallow Soap With Natural Additives
The real magic of tallow soap-making emerges when you begin to personalize your creations with natural additives.
Essential oils like lavender and peppermint not only provide delightful scents but also offer skin benefits when used at about 3% by weight of your soap recipe.
For color, experiment with clays and botanicals—try one teaspoon of clay per pound of oils for consistent results, or turmeric for natural yellow hues.
Add texture with ground oats or coffee grounds to create an exfoliating experience.
Don't forget decorative elements like dried flowers on top of your soap, or incorporate skin-nurturing additives like honey for moisture or bentonite clay for oil absorption. While some citrus essential oils may not scent soap effectively, you can still achieve wonderful results with popular essential oils like peppermint, lavender, and lemongrass.
Packaging and Storing Your Heritage Soap Bars
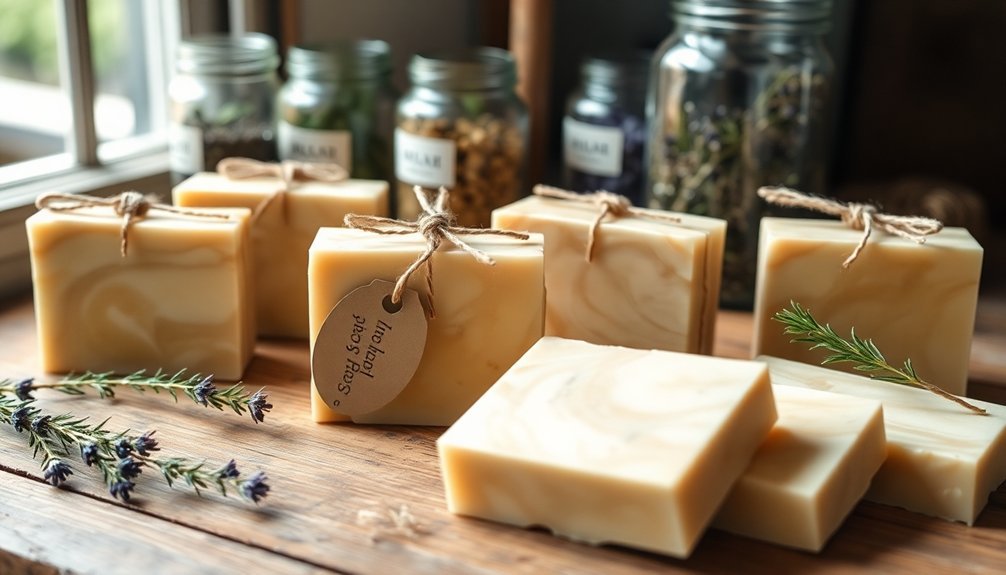
Once your beautiful tallow soap bars have fully cured, proper packaging and storage become essential to preserving their quality and extending their lifespan. Opt for breathable materials like paper or cloth wraps instead of plastic to allow moisture to evaporate naturally. Adding your homemade bars to your collection provides you with hard bar soap that typically lasts longer than commercial alternatives.
| Storage Condition | Benefits | Best Practices |
|---|---|---|
| Cool, Dark Place | Prevents discoloration and extends shelf life | Keep soap in cabinets away from windows |
| Low Humidity | Maintains bar hardness and quality | Use dehumidifiers in bathroom storage areas |
| Good Air Flow | Completes curing process and improves lather | Space bars on racks with room between each |
For eco-friendly options, consider upcycled containers, compostable wraps, or reusable cloth bags. With proper storage, your heritage tallow soap can maintain its quality for up to two years.
Frequently Asked Questions
How Does Tallow Soap Affect Eczema or Psoriasis Conditions?
Tallow soap can help your eczema or psoriasis by reducing inflammation, deeply moisturizing, and repairing your skin barrier. Its vitamins and fatty acids soothe irritation while providing long-term hydration to problematic areas.
Can I Use Tallow From Different Animal Sources?
Yes, you can use various animal tallows for soap making. Beef is most common, but lamb provides gentler bars. You'll find duck fat, goat, and bison tallow all work well with different properties and benefits.
How Long Does Homemade Tallow Soap Typically Last?
Your homemade tallow soap typically lasts 1-2 years in storage and 3-6 months with regular use. You'll extend its life by keeping it dry between uses and storing in cool, dry places.
Does Tallow Soap Work Well in Hard Water?
Tallow soap doesn't work particularly well in hard water. You'll notice less lather and more soap scum. Consider adding coconut oil or chelating agents like citric acid to improve its performance in your hard water conditions.
Is Tallow Soap Eco-Friendly Compared to Commercial Alternatives?
Yes, tallow soap is more eco-friendly than commercial options. You're using animal byproducts that would otherwise be wasted, and it's biodegradable without the harmful synthetic chemicals found in many commercial soaps.
In Summary
You've now mastered Grandma's tallow soap recipe, connecting with a tradition that spans generations. By following these time-tested methods, you're creating something special that's gentle on your skin and the environment. Whether you've kept it simple or added your own personal touches, you'll enjoy these natural soap bars for months to come. Don't forget to share your handmade creations with those you love!


Leave a Reply