
You'll need to cure your handmade soap bars for 4-6 weeks in a cool, dry space with good airflow. During this time, place them on wire racks between 60-80°F and away from direct sunlight. Once cured, store your bars in breathable containers like cardboard boxes with loose-fitting lids, avoiding plastic wrap or airtight packaging. Proper curing and storage techniques release your soap's full potential for rich lather and lasting quality.
Understanding the Essential Curing Timeline

While making handmade soap is a rewarding craft, understanding the curing timeline is essential for achieving the best results. Your cold process soap needs to cure for 4-6 weeks to reach its ideal quality.
During this cure time, the curing process allows excess moisture to evaporate while completing saponification, ensuring your bars are safe to use.
Proper curing of handmade soap removes moisture and completes saponification, making each bar safe and ready for use.
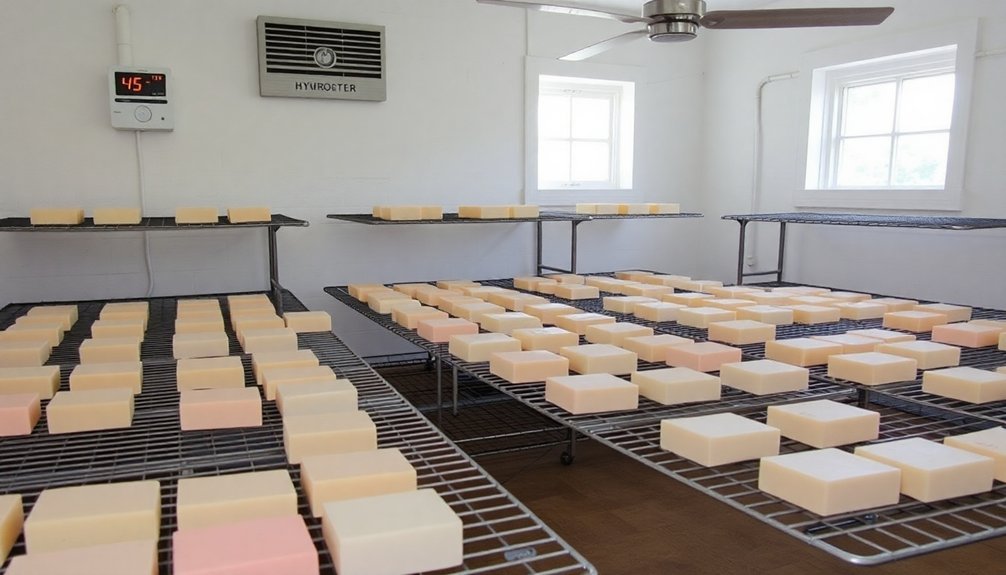
To properly store your soap, place it in a location with good air circulation where temperatures stay between 60°F and 80°F.
You'll know you've got fully cured soap when the bars feel hard and firm to the touch. While it's possible to use soap after shorter curing periods, allowing the full recommended time will reward you with harder bars that last longer and produce richer lather.
The fragrance often becomes more refined during this waiting period.
Optimal Storage Conditions for Fresh Bars

Since proper storage greatly impacts the quality of your handmade soap, choosing the right environment is vital for successful curing.
You'll want to store your soap bars in a cool place between 60°F to 80°F, away from direct sunlight and excess humidity. Good air circulation is essential for proper curing, so consider these key storage conditions:
- Use wire racks or trays to promote airflow around your soap bars
- Choose a dry area with moderate temperature to prevent moisture-related issues
- Store cured soap in breathable cardboard boxes for long-term preservation
- Keep bars away from windows and heat sources to protect color and fragrance
Remember that proper ventilation helps prevent common problems like glycerin dew and dreaded orange spots, ensuring your handmade soap maintains its quality throughout the curing process.
Signs of Properly Cured Products

Recognizing properly cured soap bars requires attention to several key indicators. You'll know your bars are fully dry when they feel firm to the touch with no excess moisture or sticky residue on the surface. A properly cured bar should be hard and solid, indicating it's ready for use or storage.
Watch for subtle color changes in your soap as it cures – this natural transformation reflects the ingredients' maturation process.
Color shifts during soap curing are nature's way of signaling your ingredients are reaching their perfect, harmonious state.
When you test the soap, it should create a rich and creamy lather, which shows it'll enhance performance during use. You might also notice that the fragrance becomes more distinct over time, a positive sign of properly cured products.
These characteristics work together to confirm your handmade soap has completed its curing journey and is ready to provide an ideal bathing experience.
Managing Temperature and Humidity Control
Because temperature and humidity directly impact soap curing, you'll need to maintain precise environmental conditions for optimal outcomes.
Keep your curing space between 60°F to 80°F to promote proper hardening and moisture evaporation. For best results in humid areas, use a dehumidifier to prevent mold growth and guarantee thorough curing.
Essential steps for controlling your soap's environment:
- Place soaps on wire racks to maximize air circulation and promote even drying
- Store bars in a cool, dry location away from direct sunlight to prevent melting
- Turn soap bars periodically to guarantee uniform moisture loss
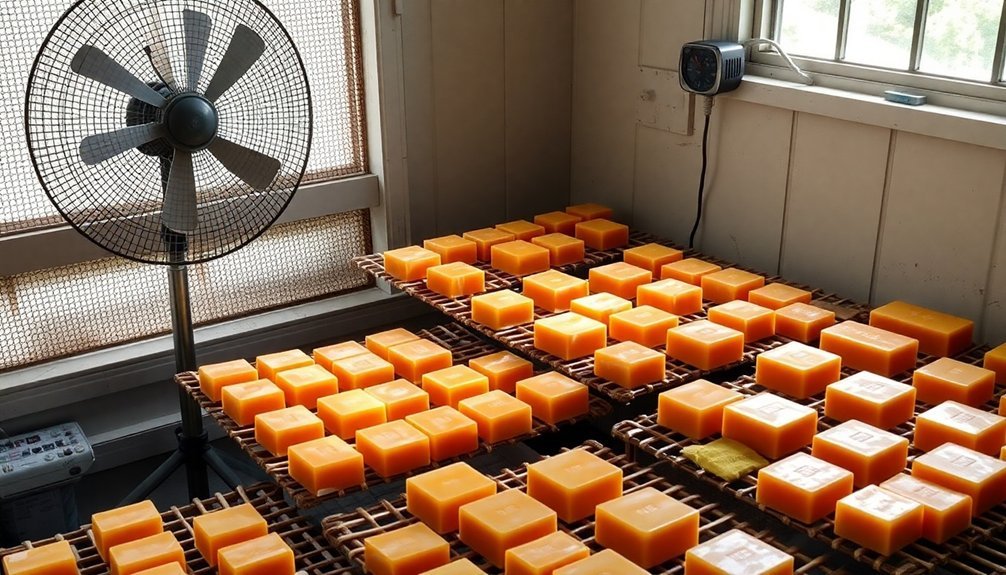
- Monitor humidity levels and use fans when needed to maintain a dry atmosphere
Air Circulation Requirements During Preservation
You'll need to set up proper ventilation by placing your handmade soap bars on wire racks or trays that allow air to flow freely around each piece.
Position the bars with small gaps between them, never letting them touch, to guarantee air reaches all surfaces during the curing process.
Regular rotation of your soap bars every few days will promote even drying and prevent any spots from developing where moisture might get trapped.
Optimal Ventilation Setup Methods
Setting up proper ventilation for your handmade soap requires three essential elements: wire racks, consistent airflow, and adequate spacing.
To achieve the best airflow during the curing process, you'll need a well-ventilated, cool dry place where temperatures stay between 60°F to 80°F.
Position your wire racks strategically to maximize air circulation around each bar.
- Place soap bars side by side with sufficient space between them, never stacking them directly on top of each other.
- Rotate your bars every few days to guarantee even moisture evaporation and prevent warping.
- Install fans in high humidity environments to promote better airflow and enhance drying.
- Set up your curing area away from direct sunlight and moisture sources, such as bathrooms or kitchens.
Remember to maintain these conditions throughout the entire curing period to achieve the best quality in your finished soap bars.
Spacing Between Soap Bars
Proper spacing between soap bars plays a key role in successful preservation and curing. You'll need to maintain at least an inch of space between each bar to guarantee peak airflow and prevent moisture buildup that can lead to mold growth.
Place your bars on a wire rack with adequate spacing between them, allowing air to circulate freely around each piece.
Don't stack bars directly on top of one another, as this traps moisture and interferes with the curing process. Instead, arrange them side by side without touching.
Remember to turn your bars every few days during the drying period to promote even curing and prevent warping.
Testing Methods for Cure Completion
Determining when your handmade soap has fully cured requires several reliable testing methods.
You'll need to monitor several indicators throughout the curing period to guarantee your cold process soap is safe to use.
Here are the essential tests for checking cure completion:
- Perform the zap test by gently touching your tongue to the soap – if there's no zap after 24 hours of gelling, it's a good sign
- Use pH testing strips or a meter to verify the soap's safety, though meters provide more accurate readings
- Check the hardness of the bars regularly – properly cured soap should feel firm without residual moisture
- Monitor weight loss during the 4-6 week curing period, as this indicates water evaporation
Remember that rushing the curing process can compromise your soap's quality and safety, so patience is crucial.
Best Practices for Long-Term Storage
Once your handmade soap bars have fully cured, storing them correctly becomes crucial for maintaining their quality and extending their shelf life.
Choose a cool, dry storage space with proper airflow to prevent moisture accumulation that can lead to spoilage. Don't use airtight containers; instead, opt for cardboard boxes or bins with loose-fitting lids.
Keep your soap away from direct sunlight, which can fade colors and diminish essential oil fragrances.
Monitor your stored bars regularly, making sure they remain hard and free from stickiness or discoloration. If you live in a humid climate, consider using a dehumidifier to protect your soap from excess moisture that could cause dreaded orange spots.
Common Preservation Mistakes to Avoid
When making handmade bath products, even small preservation mistakes can greatly impact their quality and longevity.
Don't try to cure faster by wrapping your soaps too early, as trapped moisture from the air can lead to Dreaded Orange Spots. Instead, allow the bars to cure naturally for 4-6 weeks before packaging.
Here are key mistakes you'll want to avoid:
- Don't store melt and pour soap in refrigerators or freezers, which can make them brittle.
- Never package bath bombs before they're completely dry, or they'll fizz prematurely.
- Avoid wrapping cold process soap until it has fully cured.
- Keep all bath products away from high humidity environments.
Remember to use appropriate preservatives in water-based products to prevent mold and bacteria growth, especially when working with perishable ingredients like milk.
Natural Preservation Enhancement Techniques
Beyond avoiding preservation mistakes, you can actively enhance your handmade soaps' longevity through natural methods.
Start by incorporating natural preservatives like vitamin E oil and rosemary extract, which act as antioxidants to extend shelf life.
Add essential oils such as tea tree or lavender, which provide antimicrobial benefits while improving your soap's aromatic profile.
Consider including honey in your formulations, as it's both a natural preservative and a moisturizing agent.
Guarantee proper storage conditions by maintaining low humidity levels and good airflow during the curing time.
Keep your soaps in a cool, dry place to prevent moisture accumulation.
You'll also want to increase the oil content in your recipes, as this creates a more stable product that's less likely to deteriorate over time.
Packaging Solutions for Cured Bars
Proper packaging plays a critical role in preserving your handmade soap's quality after curing.
You'll want to choose breathable materials that protect your soap bars while allowing adequate airflow to prevent moisture buildup and humidity issues.
Here's what you need to know about packaging your cured soap bars:
- Use muslin or parchment paper wrapping to maintain proper airflow while protecting from contaminants.
- Store your wrapped soaps in open cardboard boxes or bins with loose-fitting lids.
- Avoid plastic wrap for long-term storage as it traps moisture and can cause orange spots.
- Consider organza bags or decorative ribbon for gift presentation, ensuring the packaging remains breathable.
For shipping purposes only, you can temporarily wrap soaps in plastic wrap or tissue paper, but always use sturdy packaging to prevent damage during transit.
Frequently Asked Questions
How Do You Store Homemade Soap After Curing?
Store your cured soap in a cool, dry place using breathable materials like muslin or parchment paper. Keep it away from sunlight, and use open containers that allow airflow to prevent moisture buildup.
How Long Do You Let Homemade Soap Cure?
You'll need to cure your homemade soap for 4-6 weeks in a cool, dry place with good air circulation. While it's safe to use after 48 hours, longer curing creates harder, better-performing bars.
How Long Does a Bar of Handmade Soap Last?
You'll get about 40 washes from a 4-ounce bar of handmade soap, lasting considerably longer than commercial soaps. If you store it properly in a cool, dry place, it'll maintain quality for months.
How to Know if Soap Is Fully Cured?
You'll know your soap is fully cured when it's hard to touch, doesn't feel sticky, creates rich lather, has a strong fragrance, and passes the tongue test without zapping you after 4 days.
In Summary
Pay attention to your handmade bars' curing and storage requirements to guarantee their longevity. You'll need 4-6 weeks of curing time in a well-ventilated space, maintaining temperatures between 60-80°F with moderate humidity. Store your fully cured bars in airtight containers away from direct sunlight. Don't rush the process – proper curing and storage will reward you with higher-quality products that last longer.


Leave a Reply