For cold process soap making, you'll get the best results maintaining temperatures between 16-24°C (60-75°F) during curing. Keep your oils and lye solution between 100-120°F during mixing. Humidity below 50% promotes ideal hardening, while temperature fluctuations can cause defects like soda ash. Use digital thermometers for accurate monitoring, and consider seasonal adjustments as weather changes affect curing times. The perfect environment guarantees your soap develops optimal texture and lather quality.
Optimal Temperature Ranges for Cold Process Soap Curing
While the initial mixing temperature is critical for successful saponification, maintaining proper conditions during curing is equally important for producing high-quality soap.
You'll want to cure your soap in a space with temperatures between 16-24°C (60-75°F) and moderate humidity.
During the first 24-48 hours after pouring, insulation can help control the internal temperature, preventing both overheating and cooling too rapidly. This initial period affects whether your soap undergoes gel phase, which enhances color vibrancy but isn't necessary for soap quality. Using a digital laser thermometer to regularly check the ambient temperature can help ensure optimal curing conditions.
For the following 4-6 weeks of curing, consistent ambient conditions prevent aesthetic issues like soda ash formation and glycerin rivers.
How Weather Conditions Affect Soap Hardening Times
Weather conditions dramatically influence your soap's hardening timeline, with seasonal changes requiring different approaches throughout the year.
High humidity slows down water evaporation, causing longer unmolding times and potentially extending the curing process by weeks.
Temperature extremes can either accelerate hardening too quickly in hot weather or greatly delay it during cold spells, making climate control essential for consistent results. Although soap cures at the same rate regardless of temperature, cold conditions can significantly slow down the initial soap hardening process.
Seasons Impact Curing Speed
Seasons play an essential role in determining how quickly your cold process soap will harden and cure.
Summer's higher temperatures and humidity can extend curing times while making soap handling more challenging. You'll need to monitor your soaps closely during hot weather to prevent overheating.
Winter brings drier conditions that may accelerate curing, but you'll need to watch for over-drying.
Spring and autumn offer moderate conditions that minimize temperature extremes, making them ideal soap-making seasons. For complex soap designs, these seasons provide optimal conditions to maintain the ideal working temperature of 29 to 35°C without extra effort.
Your local climate patterns will greatly affect your annual soap-making schedule.
Consider adapting your techniques seasonally—increase insulation during colder months and reduce it during warmer periods.
Remember that high-olive oil recipes require longer curing regardless of season, typically exceeding six weeks.
With thoughtful seasonal adjustments, you'll maintain consistent soap quality year-round.
Humidity's Hardening Effect
Humidity levels in your soap-making environment directly impact how quickly your bars harden and cure. During summer months, high humidity can extend unmolding time from days to over a week as moisture evaporation slows greatly.
You'll need to adapt your process when humidity rises. Consider using sodium lactate or reducing water in your recipes to promote faster hardening. Water discounting techniques can significantly reduce curing time when dealing with high humidity conditions.
Maintaining good ventilation prevents moisture buildup around your soap, while fans and dehumidifiers can greatly accelerate the drying process.
Watch for glycerin dew, which appears as droplets on soap surfaces when humidity is high. This occurs when glycerin naturally attracts moisture from the air.
For melt and pour soaps, immediate wrapping after hardening prevents this issue. For cold process soap, storing in dry environments minimizes unwanted moisture accumulation.
Temperature Extremes Matter
While you carefully measure ingredients and mix your oils and lye, the ambient temperature around your soap workspace silently influences your final product's quality.
Weather conditions dramatically impact soap hardening times and overall texture.
Temperature extremes affect your soap in several key ways:
- Hot environments accelerate saponification, potentially causing overheating, glycerin rivers, or soda ash formation.
- Cold conditions slow down the hardening process without affecting the final cure time.
- Temperature fluctuations can alter texture and appearance, requiring adjustments to your technique.
- Exothermic reactions generate additional heat during saponification, compounding effects of ambient temperature.
You'll need different strategies based on your climate—insulation in cold weather to promote gel phase, or cooling techniques in hot conditions to prevent overheating and preserve complex designs. In some cases, increasing the lye concentration can help reach sufficient temperatures for gel phase when working in colder environments.
Setting Up Your Soap Curing Environment
Your ideal soap curing space needs a consistent temperature between 65°F and 70°F with low to moderate humidity levels.
Set up open shelving or racks that allow air to flow freely around and beneath your soap bars to prevent moisture buildup. During the curing process, proper trace is essential for ensuring your soap solidifies correctly and develops the right texture.
You'll want to position your curing area away from direct sunlight and extreme temperatures, which can affect the quality of your finished soap.
Ideal Curing Space Conditions
Setting up a proper curing environment can make or break your cold process soap's final quality.
You'll want to maintain temperatures between 60°F-80°F (15°C-27°C) for balanced evaporation, while keeping your soaps away from direct sunlight to prevent uneven curing.
For best results, focus on these four essential conditions:
- Humidity control – Keep relative humidity below 50%, using a dehumidifier if needed to accelerate water evaporation.
- Consistent ventilation – Guarantee good airflow around each bar without drafts.
- Limited light exposure – Cure in dark or dimly lit areas to prevent color fading.
- Proper spacing – Arrange bars on stackable racks with adequate space between them for even air circulation.
Monitor soap weight regularly to track moisture loss and determine when curing is complete. While curing multiple soap varieties together, you typically won't experience scent contamination between different fragranced batches.
Air Circulation Essentials
Proper air circulation stands as the cornerstone of successful soap curing, allowing moisture to evaporate evenly from all surfaces.
Space your bars at least an inch apart on mesh racks to guarantee airflow reaches all sides, including the bottom.
For best results, position your curing area where cross-ventilation occurs naturally, or use a small fan on low setting to create gentle air movement.
You'll want to turn your soaps regularly—every few days during the first week, then weekly thereafter—to promote uniform drying.
Storing soaps in closed containers will significantly impede the essential water evaporation process during curing.
In humid environments, consider using a dehumidifier to maintain balanced moisture levels and prevent glycerin rivers or soft spots.
Remember that proper airflow not only reduces cure time but also enhances the development of a solid crystalline structure, resulting in harder, more durable bars.
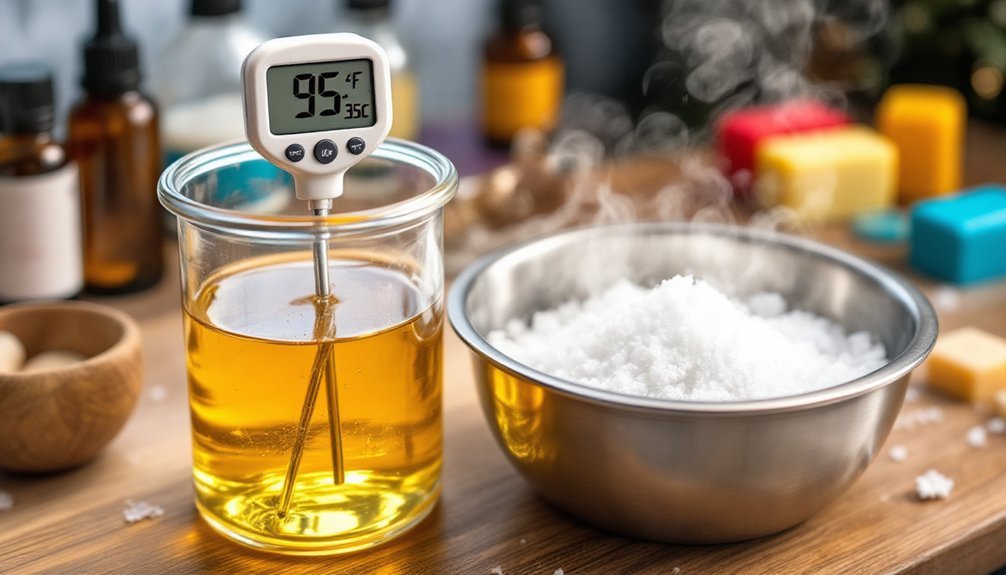
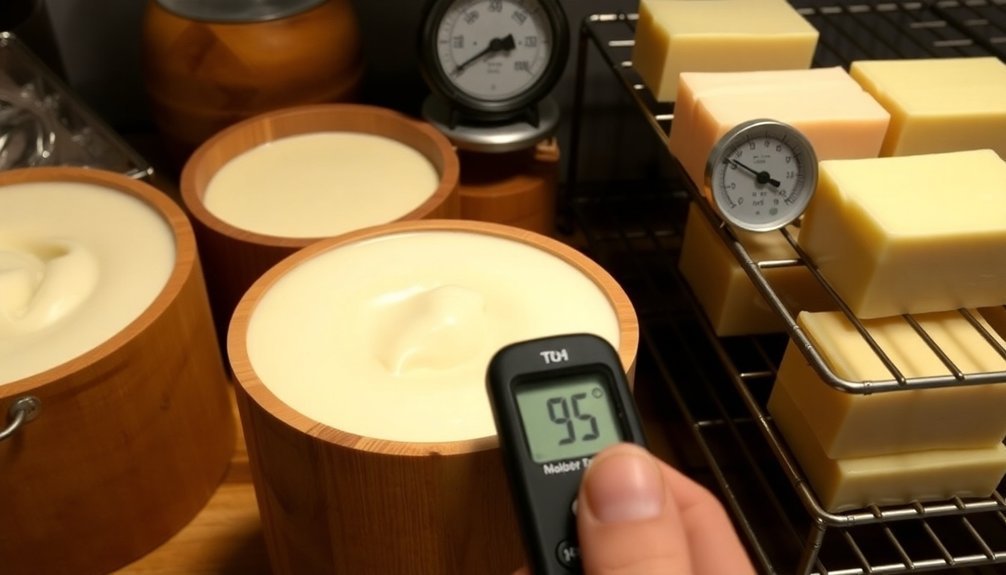
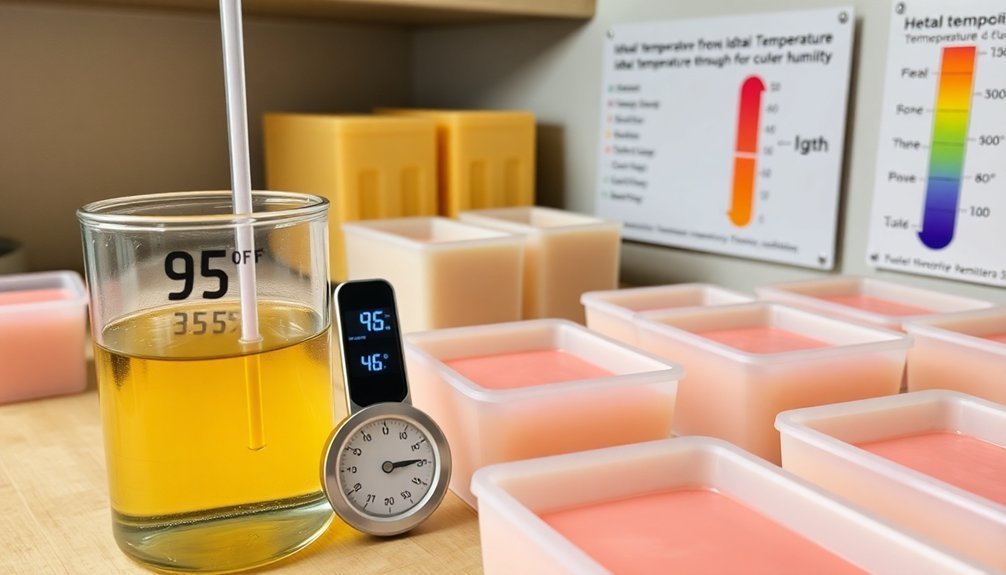
Temperature Monitoring Tools for Soap Makers
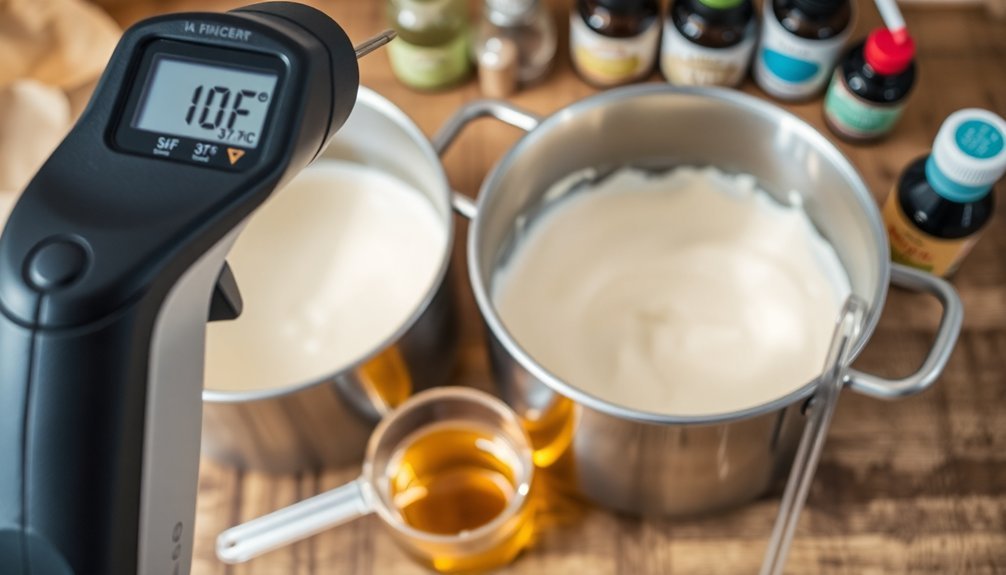
Successful soap makers rely on accurate temperature readings throughout the soap-making process. Investing in quality temperature monitoring tools guarantees your oils and lye solution remain within the ideal 100°F-120°F range, preventing issues like false trace and soap volcanoes.
Infrared thermometers have become indispensable in modern soap making because they:
- Provide instant readings in under a second
- Offer hands-free operation, reducing contamination risks
- Include helpful features like temperature alarms
- Measure a wide temperature range (-58°F to 716°F)
The eT650D infrared thermometer is particularly effective since its non-contact design allows soap makers to maintain safety while monitoring potentially dangerous lye solutions.
While infrared thermometers are convenient, digital kitchen thermometers also deliver precise measurements.
For best results, verify your lye and oils are within 10°F of each other before combining, and adjust your approach based on your specific recipe's ingredients.
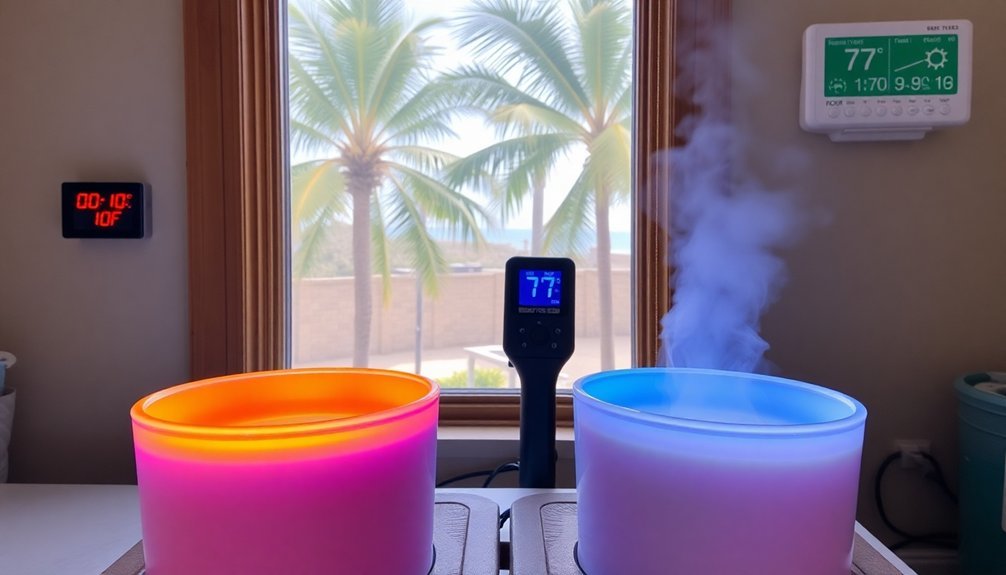
Seasonal Adjustments for Soap Curing Spaces
While the soap-making process itself requires specific temperature considerations, the curing environment demands equal attention as seasons change throughout the year.
Your soaps will cure faster during spring and summer when air is warmer and drier, typically between 60°F and 80°F.
In winter, you'll face longer curing times due to cooler temperatures and potentially higher humidity.
To counteract these seasonal challenges, maintain proper air circulation in your curing space year-round. Consider using a dehumidifier during humid periods to accelerate water evaporation from your soaps.
Always aim for consistent conditions with low humidity and steady temperatures to guarantee predictable curing times.
You can also adjust your recipes seasonally—using less water in humid environments or specific oil blends that perform better under your current conditions.
Remember that proper curing is crucial as uncured soap contains free caustic soda which can be harmful to skin if used prematurely.
Preventing Temperature Fluctuations During Curing
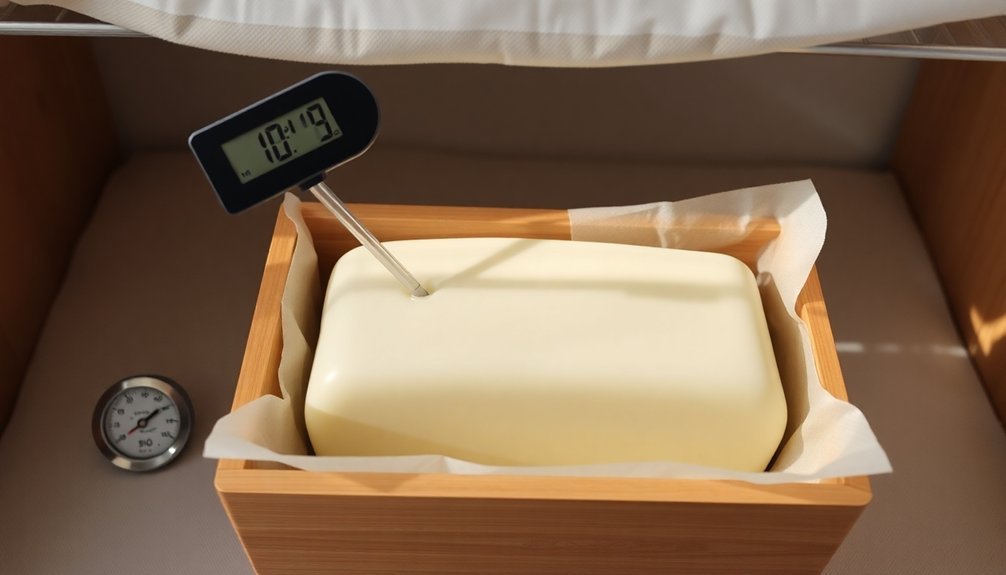
Once your soap enters the curing stage, temperature stability becomes critical for ensuring consistent results and preventing common defects. Fluctuating conditions can lead to soda ash formation, uneven curing, or even discoloration in your finished bars.
To maintain ideal temperature stability during the curing process:
- Choose a dedicated curing space away from doors, windows, and heating/cooling vents that cause sudden temperature changes.
- Use fans or dehumidifiers to control both heat and humidity levels, especially during seasonal changes.
- Consider insulation techniques for your curing racks, adjusting based on your ambient room conditions.
- Monitor your curing environment with a thermometer, aiming for a consistent temperature between 65-75°F (18-24°C) throughout the curing period. Maintaining this range helps prevent the development of soda ash, which can obscure designs and alter the texture of your finished soap.
Signs Your Soap Curing Temperature Is Incorrect
Even with a carefully controlled curing environment, you'll need to recognize when something isn't right with your soap's temperature conditions.
Watch for excessive moisture—soft, soggy bars, water droplets, mold growth, or unpleasant odors all indicate poor ventilation or high humidity.
Visual defects like uneven coloration, irregular shapes, glycerin rivers, or discoloration from sunlight exposure suggest temperature problems.
You'll notice performance issues too—poor lathering, overly soft bars that dissolve quickly, or brittle soap with cracks.
Chemically, incorrect temperatures disrupt saponification, resulting in variable pH levels that might irritate skin. If your soap appears grainy and thickens prematurely, you might be experiencing false trace due to oils solidifying at cooler temperatures.
Test with pH strips if you're concerned.
To rectify these issues, maintain temperatures between 50°F-70°F, guarantee good ventilation, avoid fluctuations, and use fans to accelerate moisture evaporation if needed.
Humidity and Temperature Relationship in Soap Curing
Understanding the delicate interplay between humidity and temperature is essential for successful soap curing. When these factors work against each other, your soap's drying time and quality can be greatly affected.
High humidity slows water evaporation, requiring longer curing periods, while temperature impacts saponification and initial moisture content. Experiments show that soap bars undergo significant physical changes throughout the curing cycle, with hardness and lather quality improving dramatically between 24 hours and 30 days.
For ideal soap curing results:
- Monitor humidity levels closely – soap may actually gain weight in extremely humid environments as it absorbs moisture.
- Use curing racks to promote air circulation on all sides of your soap bars.
- Consider a dehumidifier in high-humidity locations to maintain consistent curing conditions.
- Adjust your curing time expectations based on your climate – warmer, drier conditions accelerate water loss, while cool, humid environments require patience.
Accelerating Curing Through Temperature Control
You'll find that temperature-controlled rest chambers offer a systematic approach to accelerating the curing process while maintaining soap quality.
These specialized environments let you balance humidity and heat precisely, preventing excess moisture while promoting saponification completion. The CP/OP method demonstrates how controlled heat between 175-200°F significantly reduces traditional cure times while maintaining quality.
When properly configured, these chambers can reduce your curing time by up to 50% compared to traditional air-drying methods.
Temperature-Controlled Rest Chambers
While the traditional soap curing process typically takes 4-6 weeks, recent experimentation with temperature-controlled rest chambers offers intriguing possibilities for accelerating this timeline.
Though specific data linking these chambers to faster curing remains limited, soapmakers are exploring their potential.
Your considerations when experimenting with rest chambers should include:
- Consistent environment – Maintaining uniform temperature helps guarantee even curing across batches.
- Humidity control – This factor may be as important as temperature in affecting water evaporation.
- Temperature range – Testing between 20-25°C (68-77°F) provides a stable curing environment.
- Monitoring system – Regular tracking helps identify ideal conditions for your specific recipes.
Remember that while technology might help streamline curing, careful experimentation and documentation are essential before adopting any accelerated methods permanently. The heat transfer method used in cold process soap making demonstrates how temperature control can significantly impact the soap-making process from start to finish.
Humidity and Heat Balance
The delicate interplay between humidity and temperature creates an essential balance for successful cold process soap curing. While your soap initially needs consistent temperatures for proper saponification, the curing environment requires careful attention to both heat and humidity levels.
High humidity can greatly impede your soap's moisture evaporation, extending curing time and potentially compromising hardness. You'll want to maintain moderate room temperatures (around 21°C) with controlled humidity for best results.
Though research specifically targeting humidity control for accelerated curing is limited, experienced soapmakers find that a stable environment enhances the 4-6 week curing process.
Remember that faster saponification doesn't necessarily mean faster curing—these are distinct processes. Your goal is consistent conditions where moisture can gradually escape while your soap develops its final characteristics and longevity.
Regional Climate Considerations for Soap Makers
Successful soap makers must adapt their techniques to the specific climate conditions of their region, as temperature and humidity greatly impact the soap-making process.
In warmer climates, keep temperatures closer to 100°F (38°C) to prevent accelerated saponification, while colder regions may require insulation during curing.
- Humidity control – Use dehumidifiers in moist environments to prevent excess moisture absorption and adjust recipes accordingly.
- Temperature adjustments – Modify your base temperature range (90-110°F) depending on local climate extremes.
- Ingredient adaptation – Select oils appropriate for your climate; harder oils need warmer temperatures to stay melted.
- Curing modifications – Extend curing times in humid regions and protect soap from excessive dryness in arid climates.
Creating Micro-Environments for Perfect Soap Curing
Creating an ideal micro-environment for soap curing stands as one of the most critical factors in producing high-quality cold process soap.
You'll need to establish proper ventilation while maintaining stable temperature and humidity levels.
Set up your curing area with elevated mesh racks that allow air to circulate freely around each bar.
Space your soaps adequately to prevent moisture transfer between them, and cover with breathable materials that protect from dust without restricting airflow.
Monitor conditions regularly using digital thermometers and hygrometers, making adjustments as needed.
Keep your curing space clean, away from direct sunlight, and inaccessible to pets.
Track your soap's weight to determine when curing is complete, and maintain detailed records to refine your process over time.
Temperature Impact on Soap Qualities and Characteristics
When it comes to cold process soap making, temperature plays a pivotal role in determining your final product's qualities and characteristics.
The temperatures at which you combine your oils and lye solution directly affect your soap's appearance, texture, and performance.
Your temperature choices influence:
- Color vibrancy – Higher temperatures promote gel phase, enhancing the intensity of colorants
- Texture development – Cooler temperatures create smoother, more workable soap batter for intricate designs
- Lather quality – Proper temperature management guarantees complete saponification for ideal lather properties
- Soda ash formation – Warmer processes tend to reduce the white ash that can form on soap surfaces
Frequently Asked Questions
Can I Use a Microwave to Reach Ideal Temperatures?
You can use a microwave but it's risky due to uneven heating. You'll face potential hot spots and splattering. Consider safer alternatives like a double boiler for more controlled, even temperature management.
Does Water Discount Affect Optimal Temperature Ranges?
Yes, water discounts affect ideal temperatures. You'll need slightly cooler temps when using less water since your soap will trace faster and saponify quicker. Consider lowering by 2-3°C to maintain control over your design.
How Do Essential Oils Impact Temperature Requirements?
Essential oils don't directly affect temperature requirements, but you'll want to add them below their flashpoints (typically 118-120°F) to prevent evaporation. Lower temps can help preserve their scent during saponification.
Should Fragrance Oils Be Added at Specific Temperatures?
Yes, you should add fragrance oils at cooler temperatures (30-35°C) after reaching light trace. This prevents scent loss and minimizes acceleration of saponification while giving you more working time for designs.
Do Colorants Perform Differently at Various Temperatures?
Colorants generally perform consistently across typical soaping temperatures, but you'll get better blending at ideal temperatures. Higher temperatures during gel phase can enhance color vibrancy, while improper temperatures might cause uneven distribution regardless of colorant type.
In Summary
You'll find that maintaining your soap curing area between 65-75°F (18-24°C) offers the best balance for proper saponification and water evaporation. Don't stress over perfect conditions—soap is forgiving. Instead, focus on consistency and make seasonal adjustments as needed. With the right temperature control, you'll produce harder, longer-lasting bars with better scent retention and a more luxurious feel.


Leave a Reply