To properly store homemade soap, keep it in a cool, dry place away from direct sunlight. Use ventilated containers like cardboard boxes with holes or wooden crates to promote airflow. Space bars apart, maintain 60-80°F temperatures, and aim for 45-55% humidity. Label batches clearly, organize by fragrance family to prevent scent cross-contamination, and implement a dating system. Rotate stock regularly, placing newer soaps at the back. These simple practices will preserve your soap's quality, appearance, and fragrance for months to come.
10 Best Ways to Store Homemade Soap
When it comes to preserving your handcrafted soap, proper storage makes all the difference in maintaining quality and extending shelf life. Your soap needs a cool, dry environment away from direct sunlight and heat sources.
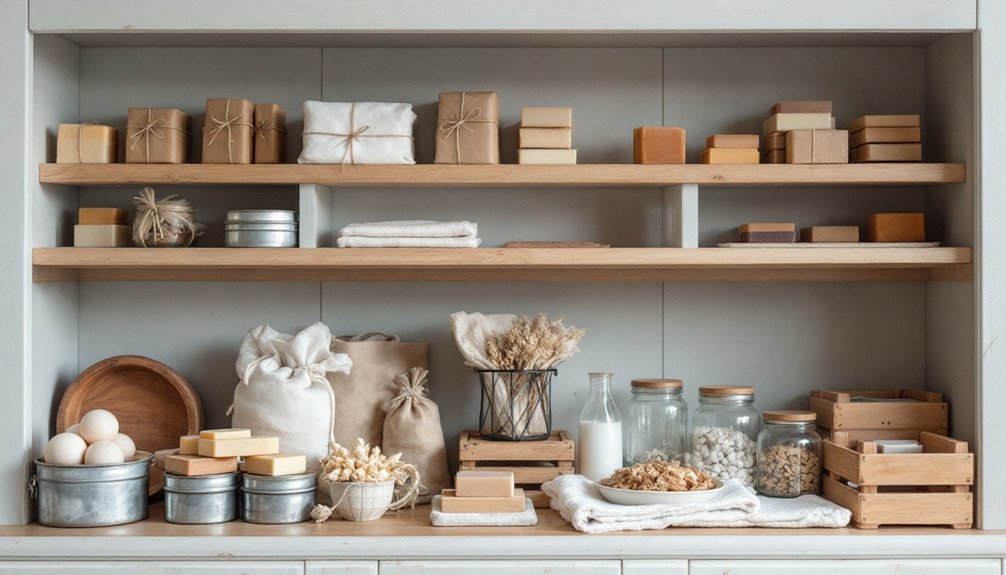
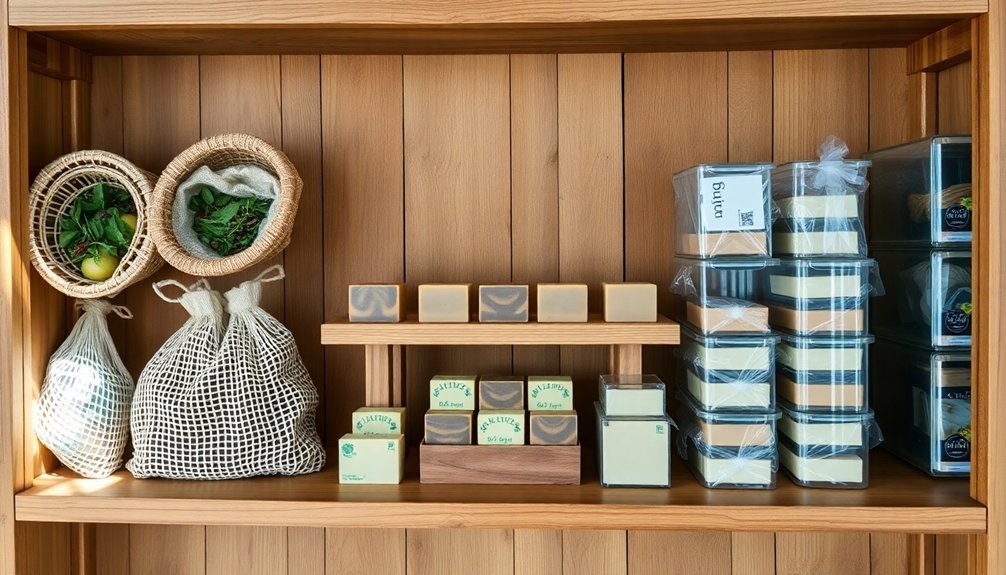
Cardboard boxes with ventilation holes offer a simple, cost-effective storage solution. Wooden crates and open shelving units are excellent alternatives, providing natural airflow that prevents moisture buildup. Large bakers racks are particularly effective for promoting airflow during the curing process.
Avoid storing soap in bathrooms or kitchens where humidity levels are high. If you live in a humid climate, consider using a dehumidifier.
Keep differently scented soaps separate to prevent fragrance cross-contamination. Label your batches clearly for easy identification.
With proper storage, your homemade soap can last at least a year without developing mold, rancidity, or those dreaded orange spots.
Ensuring Proper Air Circulation for Different Soap Types
Depending on the type of soap you've crafted, air circulation requirements can vary dramatically from extensive exposure to immediate wrapping.
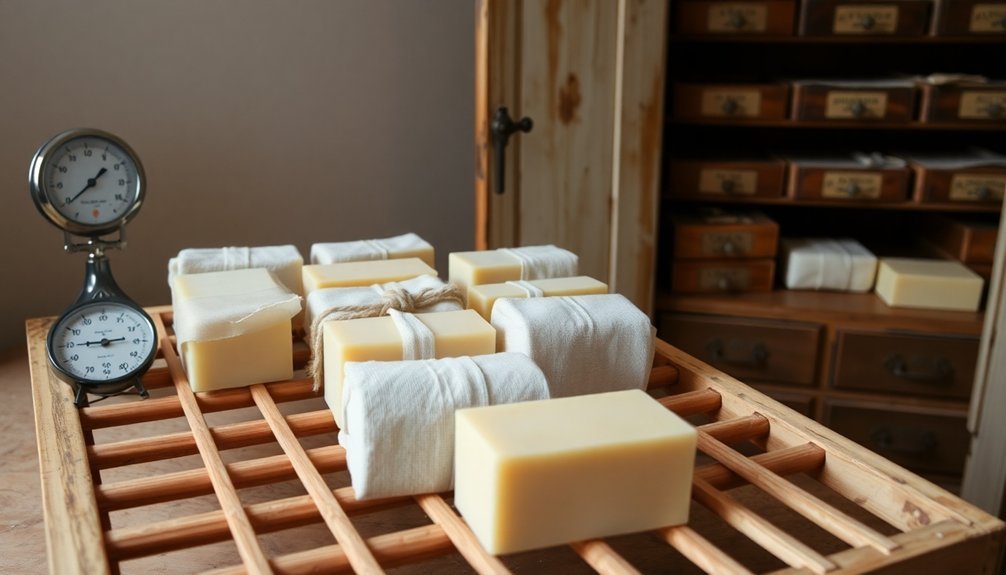
Cold process soaps need abundant airflow to cure properly—baker's racks or ventilated trays work perfectly for this. Place each bar with space between them to allow air to circulate from all sides.
For melt and pour soaps, you'll need the opposite approach. Wrap these immediately after setting to prevent glycerin dew caused by humidity exposure.
If you're in a humid climate, consider using a dehumidifier or fan to enhance airflow and prevent moisture-related problems like DOS (Dreaded Orange Spots) or rancidity. In subtropical environments, you'll need to be especially vigilant during humid summers when moisture levels can compromise soap quality.
Plastic storage baskets with openings or wooden crates offer excellent solutions for maintaining proper ventilation while keeping your soaps organized.
Temperature Control: Finding the Sweet Spot for Soap Storage
Temperature plays an essential role in preserving your handmade soap's quality and extending its shelf life. Your homemade creations thrive in consistently cool environments, away from direct heat sources that can soften or melt them.
Basements and garages typically provide perfect storage conditions, offering stable temperatures that help maintain your soap's texture, color, and scent. In warmer climates, you'll want to take into account using dehumidifiers to create ideal conditions.
Different soap types have specific needs – cold process soaps require proper curing in cool, ventilated areas, while melt and pour varieties should be wrapped quickly after hardening. Properly stored homemade soap can maintain its quality for at least one year, though this varies based on the specific ingredients used.
Remember that excessive heat risks softening your soap, fading colors, altering textures, and potentially causing oils to turn rancid, greatly reducing shelf life.
Humidity Management: Keeping Your Soap Dry and Fresh
Humidity poses as much of a threat to your handmade soap as improper temperature control, requiring careful management to preserve your creations. Aim for 45-55% humidity levels to prevent soap sweating and premature degradation.
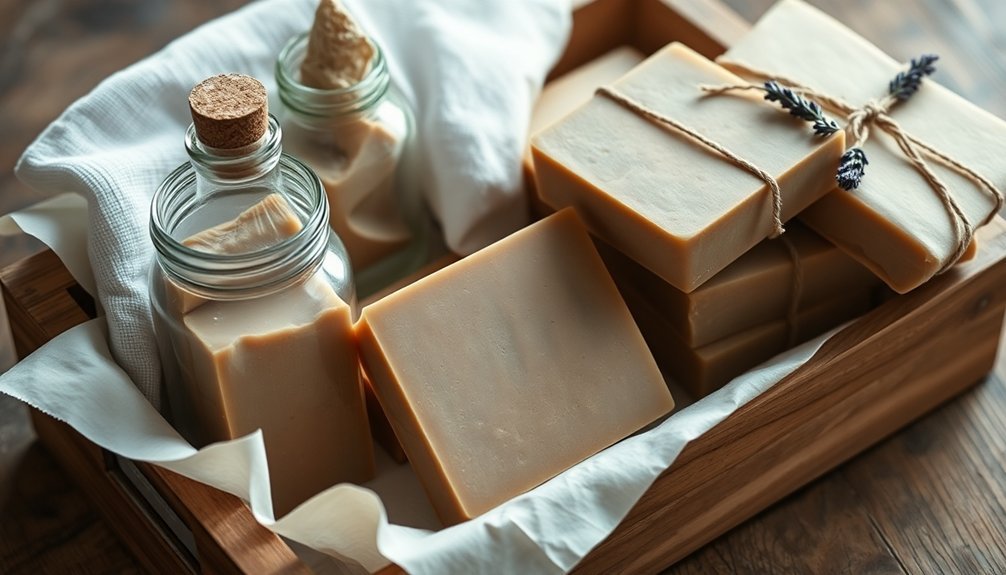
Ensure your soap is fully cured before storage to minimize internal moisture. Store bars in well-ventilated areas using breathable materials like cheesecloth or linen rather than sealed plastic containers that trap moisture.
Uncovered cardboard boxes offer protection while allowing airflow. For bathroom-stored soap, use soap dishes with drainage to keep bars dry between uses. Using a soap saver can significantly extend your handmade soap's lifespan by promoting proper drying between uses.
Consider placing desiccants in storage areas with naturally high humidity. You'll also want to rotate your inventory regularly and avoid stacking bars directly on each other.
Remember that proper humidity control extends your soap's shelf life and preserves its scent profile.
Light Protection: Preventing Color Fading and Oxidation
Light exposure presents a considerable challenge for soap preservation, as both natural and artificial sources can trigger color fading and oxidation in your handmade creations.
To protect your soap, store it away from windows and direct sunlight, using UV-resistant packaging when possible.
Position your soap bars upright to minimize surface contact and consider using wooden crates or shelving with linen covers that allow airflow while blocking light.
If you're storing soap in warmer areas, be extra vigilant about light protection since heat accelerates oxidation.
Adding antioxidants to your soap recipes provides additional protection.
Regularly rotate your bars and check for signs of color change or rancidity.
Remember that proper light management isn't just about aesthetics—it considerably extends your soap's shelf life and maintains its quality.
For long-term storage, keep your handmade soap in cool, dry environments to prevent deterioration caused by excessive moisture or temperature fluctuations.
DIY Soap Racks and Shelving Solutions
With proper light protection strategies in place, you'll also need practical storage systems that keep your soap organized while it cures.
Consider retrofitting old furniture like wardrobes or cabinets by adding shelves spaced 6-8 inches apart for maximum airflow.
Choose coated metal or plastic materials to prevent rust that could damage your soap, especially in humid environments.
Vertical storage maximizes capacity in small spaces, making it perfect for high-production setups. For budget-friendly options, repurpose cafeteria trays or baking racks. Installing durable black finish brackets can provide long-lasting support for your shelving system.
Your storage solution should be accessible for regular inspections and portable enough to relocate near fans or ventilation when needed.
In subtropical regions, place racks in air-conditioned spaces or use dehumidifiers to maintain ideal curing conditions.
Foldable designs offer convenience when not in use.
Natural vs. Synthetic Materials for Soap Storage Containers
Choosing between natural and synthetic materials for soap storage represents one of the most important decisions for soap makers. Each option offers distinct advantages worth considering for your soap's longevity and environmental impact.
Natural materials like bamboo and wood provide excellent breathability, preventing moisture buildup that can soften your soap. They're also compostable and odor-neutral, ensuring your soap maintains its fragrance. Some eco-friendly options include containers made from compostable corn starch that naturally degrade within two years when buried.
However, you'll pay more for these benefits, and they may deteriorate faster when exposed to constant moisture.
Synthetic containers offer superior durability, moisture resistance, and easy cleaning at a lower cost. They're lightweight and practical for travel, but they lack breathability and contribute to environmental waste.
Consider your priorities—whether sustainability, cost-effectiveness, or aesthetics—when selecting the perfect storage solution for your handcrafted soaps.
Organizing Your Soap Collection by Age and Fragrance
Implement a clear dating system for your soaps, using labels with creation dates and expected cure completion to track aging properly.
Keep fragrances separate by storing different scent families in designated boxes or on different shelves to prevent unwanted scent transfer. Using open-air storage for hot and cold process soaps is essential for proper curing and prevents moisture issues.
Rotate your collection regularly, placing newer soaps at the back and older ones at the front, ensuring you'll use the fully cured bars before they lose potency.
Dating System Strategies
How effectively do you track your homemade soap's age? Implementing a clear dating system is essential for maintaining quality and tracking freshness.
Use colored stickers or labels to mark each soap's creation date, enabling you to prioritize older bars first. Consider developing a seasonal coding system that combines age with fragrance type—perhaps blue tags for winter soaps or yellow for summer blends. Organizing your collection by fragrance family allows for easier identification and enhances your soap-making experience.
Create a simple spreadsheet or logbook that records creation dates, fragrance details, and expected use-by timelines. For efficiency, divide your collection into "newer" and "older" sections, establishing a rotating inventory system.
Set calendar reminders for when certain batches should be used or discarded. Regular audits will help you maintain accurate records and guarantee you're using your soap collection efficiently before fragrances fade or textures change.
Fragrance Separation Techniques
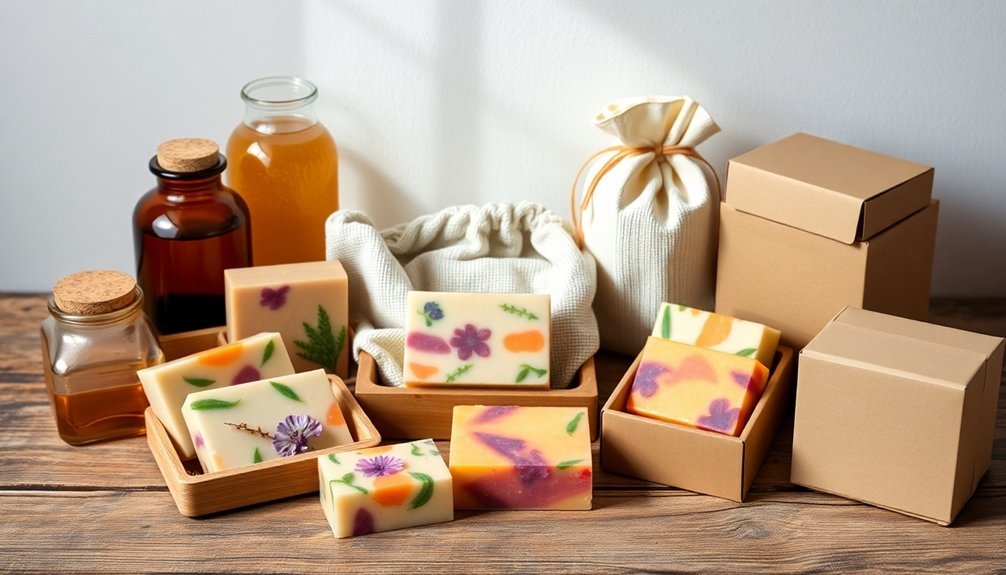
When you've built up a substantial collection of handmade soaps, strategic fragrance separation becomes crucial to preserve each bar's unique scent profile. Organize your soaps by fragrance family—floral, citrus, earthy, or sweet—to prevent scent cross-contamination and maintain distinct aromas.
Consider implementing a drawer system or color-coded labels for different fragrance types. This approach simplifies your organization while protecting sensitive scents.
Remember that citrus and floral top notes fade faster, so you'll want to prioritize using these soaps first.
For maximum scent preservation, guarantee proper airflow around each bar and store them away from direct sunlight. In humid environments, use dehumidifiers to maintain ideal conditions.
When storing essential oil-scented soaps, keep them separate from fragrance oil varieties to maintain their pure, natural character. Cold process soaps should be stored separately from hot process varieties since they have different fragrance retention properties.
Rotation For Freshness
Three simple rotation strategies can transform how you manage your homemade soap collection, extending its lifespan and preserving fragrance quality. Implement a First-In-First-Out (FIFO) system by labeling each batch with its production date and using older soaps first. A quality label maker can significantly streamline this organizational process, making it easier to track your inventory over time.
Store your collection in containers that promote air circulation—plastic baskets, wooden crates, or modified plastic boxes with ventilation holes work excellently. Keep space between bars to prevent moisture buildup.
| Storage Method | Climate Consideration |
|---|---|
| Plastic Baskets | Ideal for humid areas |
| Wooden Crates | Best in dry climates |
| Ventilated Boxes | Good for temperature fluctuations |
| Stackable Containers | Space-saving for all climates |
Remember to adjust your storage based on seasonal changes. Keep soap away from direct sunlight and high humidity areas like bathrooms and kitchens for maximum freshness.
Seasonal Adjustments for Optimal Soap Storage
As seasons change throughout the year, your homemade soap storage needs will vary considerably.
During summer months, keep soap in the coolest part of your home to prevent melting, and far from direct sunlight which can fade fragrances and colors.
In humid seasons, dehumidifiers become essential tools for preserving your soap's quality.
Consider rotating your soap stock between locations based on seasonal humidity levels—moving them to drier areas during rainy periods.
For winter, stable temperature conditions are vital.
Avoid storing soap near heaters or in rooms with fluctuating temperatures.
You'll find that dry winter climates require less humidity control, allowing you to focus on temperature consistency instead.
Always maintain good air circulation around your soap regardless of season, ensuring proper ventilation through breathable containers or open shelving.
Monitoring and Preventing Common Soap Storage Problems
You'll need to regularly check your soap for telltale signs of spoilage including orange spots, mold growth, and unusual odors that indicate rancidity.
Controlling humidity is your best defense against common soap storage problems, so consider using dehumidifiers, desiccants, or silica gel packets in your storage area. The ideal temperature range of 60°F to 80°F helps prevent quality issues during long-term storage.
Maintain proper air circulation by storing soap on open shelving or in containers with ventilation holes to prevent moisture buildup.
Spotting Spoilage Signs
Monitoring your homemade soap regularly will help you catch deterioration before it renders your creations unusable. Look for discoloration, which often signals ingredient breakdown, and watch for orange spots that indicate rancid oils.
Your nose is a powerful detection tool—any foul or dramatically changed scent suggests spoilage. Pay attention to texture changes; sliminess or excessive softening means your soap has absorbed too much moisture. If you spot any mold growth, discard the soap immediately.
Over time, you'll notice natural aging signs like fading fragrance, gradual color shifts, and harder texture. A significant reduction in lathering ability indicates your soap is losing effectiveness. While experts suggest using handmade soaps within a 12-month timeframe, proper storage can extend this period.
Don't ignore unexpected skin irritation after using older soaps—this could mean structural changes have occurred that make the soap unsuitable for use.
Humidity Control Techniques
Maintaining proper humidity control stands at the forefront of successful soap storage, especially since handmade soaps readily absorb moisture from their surroundings.
Using dehumidifiers or air conditioners in your storage area effectively reduces ambient moisture that can cause soap to become soggy or develop mold.
For ideal preservation, keep your soap in cool, dry spaces away from naturally humid areas like bathrooms and kitchens.
Install a hygrometer to monitor humidity levels, ensuring they remain below the threshold that causes problems.
Consider your local climate when selecting appropriate storage methods, and adjust your approach with seasonal changes.
Improve air circulation by using fans and open shelving units that allow airflow around each bar.
For areas with persistent humidity issues, try storing soap in heavy paper bags or consider using biolefin wrap for protection.
This "sweating" occurs because the glycerin in soap naturally draws moisture from the air, which is especially problematic during rainy seasons.
Frequently Asked Questions
Can I Freeze Soap for Long-Term Storage?
You shouldn't freeze soap for long-term storage. It's not recommended as freezing may trap moisture and affect ingredients. Instead, store your soap in a cool, dry place with good air circulation.
How Do Cured Soaps Differ From Fresh Ones in Storage Needs?
Cured soaps need less air circulation than fresh ones, aren't as humidity-sensitive, and are more durable. You'll find they're easier to handle and won't soften as easily when stored properly.
Will Essential Oil Scents Last Longer Than Fragrance Oils?
No, essential oil scents won't last as long as fragrance oils in your soaps. Fragrance oils are specifically designed for longevity, while essential oils evaporate more quickly due to their natural, volatile properties.
Can I Store Different Soap Types Together?
You can store different soap types together, but be mindful of fragrance transfer, moisture needs, and ventilation requirements. Use separate compartments and guarantee proper airflow, especially for melt and pour versus cold process soaps.
Does Adding Preservatives Affect Storage Requirements?
Preservatives don't change your soap's storage needs. You'll still need to keep it in a cool, dry, well-ventilated area. However, preservatives are more essential for water-based products like lotions or scrubs than for soap itself.
In Summary
By following these storage methods, you'll extend your handmade soap's life considerably. Remember, it's not just about keeping soap—it's about preserving your creativity and hard work. Adjust your storage strategy with the seasons, monitor regularly for issues, and you'll enjoy beautiful, fragrant bars whenever you need them. Your soap deserves this attention to detail, and you'll appreciate the results every time you lather up.


Leave a Reply