Oil infusions can transform your natural soap colorants into vibrant, stable hues that distribute evenly throughout your batches. You'll get the best results using olive oil as your base, with two main infusion methods available: cold (2-6 weeks) or hot (2-6 hours). Start with one tablespoon of colorant per 5 ounces of oil, adjusting for desired intensity. Store your infused oils in dark glass containers at 55-65°F for ideal preservation. Understanding proper techniques will reveal countless color possibilities for your soap creations.
Understanding Oil Infusion Basics for Soap Making

The art of oil infusion opens up a world of natural coloring possibilities in soap making. When you're working with natural colorants, you'll find that infused oils provide a more uniform color distribution compared to adding powders directly to your soap mixture.
Natural oil infusions create beautifully even colors in soap making, surpassing the results of direct powder application.
You'll achieve the best results using olive oil as your base because it has a long shelf life and effectively showcases herb and spice colors.
To create your infused oils, you can choose between two methods: cold infusion, where you'll steep herbs for 2-6 weeks, or heat infusion, which takes just 2-6 hours with gentle heating.
For ideal color extraction, use 1 tablespoon of colorant per 5 ounces of oil. Remember that you can adjust this ratio depending on your desired color intensity and the specific natural colorants you're using.
Essential Equipment and Materials for Oil Infusion

You'll need specific tools to create successful oil infusions for soap coloring, including measuring spoons for precise ratios, heat-safe glass jars, and either a slow cooker or double boiler for controlled heating.
To store your infusions properly, select high-quality glass containers with tight-fitting lids that protect the oils from light and air exposure.
Heat-sealable tea bags offer a practical solution for containing herbs and spices during the infusion process, making it easier to achieve clean, residue-free colored oils.
Basic Tools Needed
Successful oil infusion requires five essential tools to achieve vibrant soap colors.
You'll need glass jars for storing your infused oils and containing the infusion process. A thermometer helps you monitor oil temperatures during heat infusion, preventing overheating that could affect your final soap colors.
Keep measuring spoons and cups handy to maintain precise ratios between your oils and colorants. When it's time to separate the infused oil from herbs or spices, you'll use a fine mesh strainer or cheesecloth to remove any solid particles.
Don't forget to apply labels to your jars, marking both contents and dates to track your color results and guarantee freshness. For containing powdered ingredients during infusion, heat-sealable tea bags offer a convenient solution that makes the straining process easier.
Storage Container Options
Selecting proper storage containers stands as a critical first step in the oil infusion process. Glass jars are your best choice, as they're non-reactive and let you monitor your infusion's progress easily.
Make sure you choose jars with tight-fitting lids to protect your infused oils from air exposure and potential contamination.
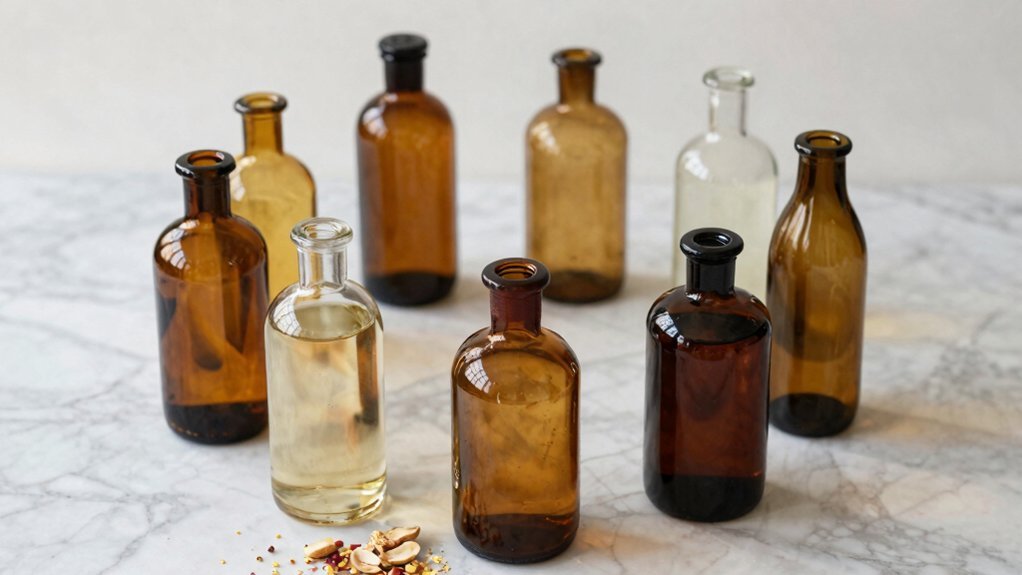
For enhanced preservation of your oils, opt for dark-colored glass containers, which shield your infusions from light damage and help maintain their vibrant colors longer.
When working with herbs and spices, you'll find heat-sealable tea bags particularly useful – they contain your botanicals neatly within the jar while allowing for effective infusion.
If you're planning larger batches, quart-sized jars provide ample space for both your oil and colorants while ensuring proper infusion results.
Cold vs. Hot Infusion Methods

Your choice between cold and hot infusion methods will greatly affect how plant pigments transfer into your oils, with cold infusion preserving sensitive botanical properties while hot infusion delivers faster, often more intense colors.
You'll notice that cold infusion requires 2-6 weeks of patience but yields gentle, stable hues, while hot infusion can produce rich colors in just 2-6 hours through careful heat application.
When working with hot infusion, you'll need to monitor temperature closely to prevent pigment damage and consider immediate use of fresh herb infusions to avoid spoilage risks.
Temperature Impact On Pigments
When creating naturally colored soaps, the temperature of your oil infusion plays a pivotal role in determining the final color intensity.
You'll find that higher temperatures during hot infusion accelerate pigment extraction, resulting in more vibrant colors within 2-6 hours. However, you'll need to carefully monitor the temperature to prevent degrading the natural colorants.
If you're aiming for subtler, more nuanced colors, cold infusion might be your better choice. While it takes 2-6 weeks, cold-infused oils preserve more of the herbs' original properties and scents.
The lower temperature affects pigment solubility, leading to gentler color extraction. You'll notice that each method offers distinct advantages – hot infusion delivers deeper, more immediate results, while cold infusion maintains the integrity of temperature-sensitive ingredients and natural fragrances.
Duration And Color Intensity
The duration of your chosen infusion method directly influences the final color intensity of your soap.
You'll notice significant timing differences between cold and hot infusion approaches. While cold infusion takes 2-6 weeks to achieve desired color strength, hot infusion can produce vibrant results in just 2-6 hours using a crock pot.
Your ratio of oil to colorant plays an essential role in color development, with a 3:1 proportion typically yielding effective results.
When you're working with hot infusion methods, you'll often get more potent and clearer colors in your final soap.
After completing your oil infusion, assess the color once it's cooled – some herbs might need additional processing time or heat to reach ideal color extraction levels.
Safety Considerations For Methods
Since both cold and hot infusion methods present distinct safety challenges, understanding proper handling procedures is essential for each approach.
When you're working with hot infusion, you'll need to use fresh herbs immediately to prevent mold and bacteria growth. While this method offers quick color results, it can lead to cloudy oils due to sediment.
For cold infusion safety considerations, you'll find that using dried herbs provides better storage stability and clearer results when properly strained.
Before starting any oil infusion process, it's vital to research your chosen herbs and spices thoroughly. Some materials can cause unexpected reactions or unwanted scents in your soap.
You'll achieve the best results by using 2 tablespoons of powdered spices per 5 oz of oil for cold infusions, which helps prevent grainy textures in your final product.
Selecting the Right Base Oils for Infusion

Choosing an appropriate base oil for infusion can make or break your soap's final color intensity. When selecting base oils for your infused natural colorants, you'll find that olive oil stands out as a top performer. It not only offers extended shelf life but also provides excellent visibility for your colorants.
While you might consider Sweet Almond Oil, it's not your best choice for color vibrancy, as it tends to dilute the intensity of herbal colorants. Instead, try working with coconut or sunflower oil, which can enhance your soap's visual appeal.
For ideal results, start with the standard ratio of 1 tablespoon herbal colorant to 5 ounces of oil. Remember that darker base oils will typically yield more intense colors in your final product, so consider this when planning your oil infusion process.
Natural Colorants and Their Oil Compatibility

When selecting natural colorants for oil infusion, you'll discover that certain plant-based materials pair exceptionally well with specific carrier oils. For vibrant, lasting colors in soap making, you'll want to evaluate the compatibility between your natural colorants and base oils, particularly olive oil, which serves as an excellent infusion medium.
Key considerations for successful colorant-oil pairings:
- Choose your infusion method based on timing – cold infusion takes 2-6 weeks, while heat infusion delivers results in 2-6 hours.
- Adjust your oil-to-colorant ratio between 3:1 and 9:1, depending on desired color intensity.
- Account for potential scent interactions, especially when using aromatic colorants like spirulina.
Combining infused oils with lye water during saponification can further enhance your soap's color vibrancy, creating more dynamic end results.
Timing and Temperature Control in Oil Infusion
Successful oil infusion demands precise timing and temperature control to extract vibrant, lasting colors from natural materials. You'll need to carefully monitor your infusion process to achieve the best color outcomes.
| Method | Duration | Temperature |
|---|---|---|
| Cold Infusion | 2-6 weeks | Room temp |
| Heat Infusion | 2-6 hours | 100-140°F |
| Crock Pot | 2-4 hours | "Warm" setting |
When working with herbs and natural colorants, you'll want to maintain consistent temperatures throughout the process. Using a crock pot on the warm setting provides excellent temperature control for heat-infused oils. After infusion, let your oils cool naturally, away from drafts, to prevent jar breakage. If you're not satisfied with the color intensity, you can extend the infusion time or apply additional gentle heat to achieve your desired results.
Color Intensity and Infusion Ratios
The right ratio of oils to natural colorants determines the vibrancy and longevity of your soap's final color. Finding the perfect balance between oil infusion and colorant concentration can be essential for achieving your desired results.
Success in natural soap coloring hinges on precise ratios between oils and colorants, ensuring both vibrant hues and lasting pigmentation.
While some soapmakers prefer a 9:1 ratio, others opt for a stronger 3:1 blend for more intense colors.
For ideal color intensity when working with natural colorants, consider these key factors:
- Start with one teaspoon of ground herb per pound of soap, adjusting based on your color preferences.
- Monitor infusion ratios carefully, as darker herbs like alkanet may require longer infusion times.
- Add infused oils at trace strategically, separating portions for different color combinations.
Remember that natural colorants can fade over time, so you'll want to regularly test and adjust your infusion ratios to maintain consistent results in your soap making process.
Preserving and Storing Infused Oils
You'll need to store your infused oils at temperatures between 55-65°F (13-18°C) to maintain their vibrant colors and prevent premature degradation.
Keep your oils in amber or cobalt glass containers with airtight seals to protect against UV damage and minimize oxidation that can alter your soap's final color results.
To prevent contamination, always use clean, dry utensils when handling your infused oils and regularly check for any signs of spoilage, such as unusual odors or color changes.
Storage Temperature Guidelines
Maintaining proper storage temperature is essential for preserving the quality and color of infused oils used in soap making.
You'll want to store your oils below 70°F (21°C) in a cool, dark location to protect their color integrity and prevent degradation. Using airtight containers will help shield your oils from moisture and air exposure that can lead to contamination.
For ideal storage conditions:
- Monitor your storage area's temperature regularly, as heat can speed up oxidation and affect your oil's quality.
- Check your infused oils frequently for signs of rancidity or color changes.
- Consider refrigeration for extended shelf life, but remember to bring oils to room temperature before use to prevent condensation.
These temperature guidelines will help guarantee your infused oils maintain their vibrancy and effectiveness in soap making.
Contamination Prevention Methods
Beyond proper temperature control, preventing contamination requires specific storage and handling practices for infused oils.
You'll need to start with impeccably clean equipment and completely dry herbs or spices to create safe infusions. Store your oils in dark glass containers to shield them from light exposure that can compromise their quality.
Always label your infused oils with both the infusion date and contents to track their shelf life, which typically spans 6-12 months.
For better preservation, you can refrigerate your infusions, particularly those containing fresh herbs, as this helps prevent bacterial growth.
Don't forget to check your oils regularly for signs of spoilage like unusual odors or cloudy appearance. If you notice any of these warning signs, discard the oil immediately to protect your soap batches from contamination.
Troubleshooting Common Infusion Issues
When creating oil infusions for soap coloring, several common issues can affect the final result. If you're not achieving the desired color intensity, you'll need to extend the infusion time or apply gentle heat for better extraction.
Watch for floating tea bags during the oil infusion process, as this signals poor penetration of your natural colorants.
Here are key troubleshooting steps to improve your results:
- Adjust your oil-to-colorant ratios between 3:1 and 15:1, testing small batches to find the best balance.
- Strain cloudy infused oils, particularly when using fine powders like cinnamon, to guarantee clarity in your final soap.
- Store your infusions away from light to prevent color fading, and document color changes to refine future batches.
Blending Multiple Infused Oils for Custom Colors
Blending multiple infused oils opens up a spectrum of creative possibilities for your soap colors.
You'll find that combining different infused oils allows you to create unique custom colors by leveraging each oil's distinct properties. Start with a 1:1 ratio when mixing your oils, then adjust based on your desired color intensity.
When you're experimenting with blends, pay attention to how different infusions interact. For instance, you can brighten a subtle alkanet infusion by adding turmeric-infused oil.
Keep detailed notes of your ratios and results to maintain consistency in future batches. If you need deeper colors, try adding a small amount of the same infused oil after your initial blend.
This technique helps you achieve richer, more vibrant hues in your finished soap.
Best Practices for Testing Infused Oils in Soap
Testing your infused oils in small batches guarantees successful color outcomes before you commit to larger soap productions.
When experimenting with oil infusion, start with different ratios to determine the ideal color intensity. You'll want to track how each infused oil behaves during saponification, as some colorants may change dramatically throughout the process.
Follow these essential testing steps:
- Begin with a 3:1 ratio of carrier oil to colorant, adjusting as needed for deeper hues.
- Test your infused oils at various stages of soap making, including at trace and in lye water.
- Keep detailed records of infusion temperatures, duration, and final color results.
Frequently Asked Questions
Do Essential Oils Discolor Soap?
Yes, your soap can discolor when you use essential oils. You'll notice some oils, especially citrus ones, will cause browning or darkening. It's natural and varies depending on which oils you choose.
How Does Oil Affect Soap?
You'll find that oils directly affect your soap's hardness, lather quality, and cleansing properties. They'll also impact the color, conditioning benefits, and overall texture of your final product when saponified with lye.
Why Did My Homemade Soap Change Color?
Your homemade soap's color change likely occurred because natural colorants fade over time, or your oils reacted during saponification. Temperature, light exposure, and the type of oils you've used also affect final colors.
What Happens if You Put Too Much Oil in Soap?
If you've added too much oil, your soap will become greasy and won't harden properly. You'll notice it's slimy to touch, doesn't lather well, and can't maintain its shape during use.
In Summary
You'll find that mastering oil infusions opens up endless possibilities for naturally coloring your soaps. Whether you've chosen cold or hot infusion methods, remember to test your infused oils before full batch production. Keep detailed notes of your successes and challenges, and don't be afraid to experiment with different combinations. With proper storage and careful attention to ratios, you'll create beautifully colored soaps using nature's palette.


Leave a Reply