Emulsion in soapmaking is the initial uniform mixture when oils and lye combine, appearing opaque but still fluid. Trace follows emulsion, showing thicker consistency where the mixture can hold patterns when drizzled. You'll recognize emulsion by its creamy appearance without oil streaks, while trace lets you see ripples that remain on the surface. Temperature, mixing method, and oil choices affect how quickly your soap moves from emulsion to trace. Understanding these stages reveals your design possibilities.
What Makes Emulsion Different From Trace in Soapmaking?
When you're making soap, understanding the distinction between emulsion and trace can greatly impact your final product.
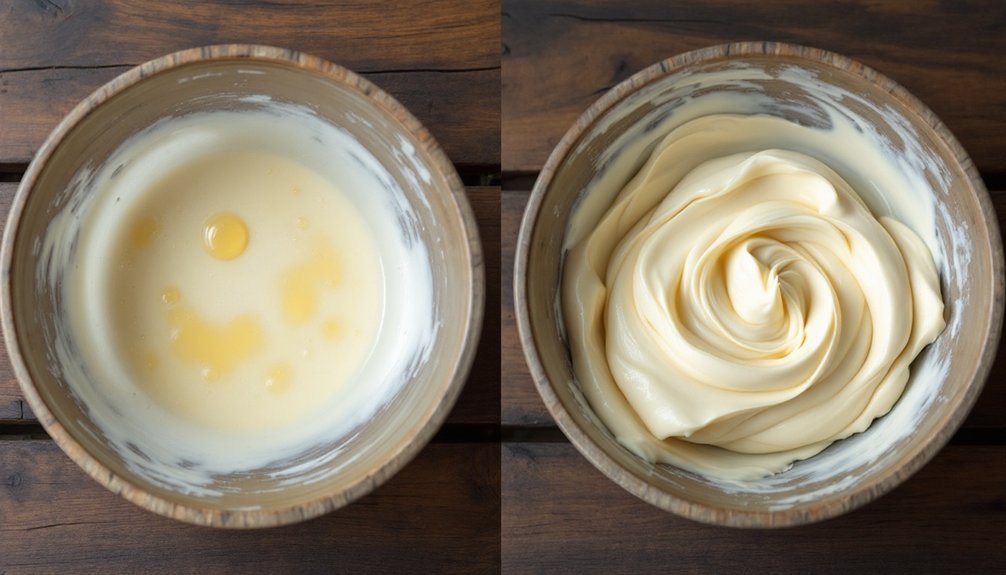
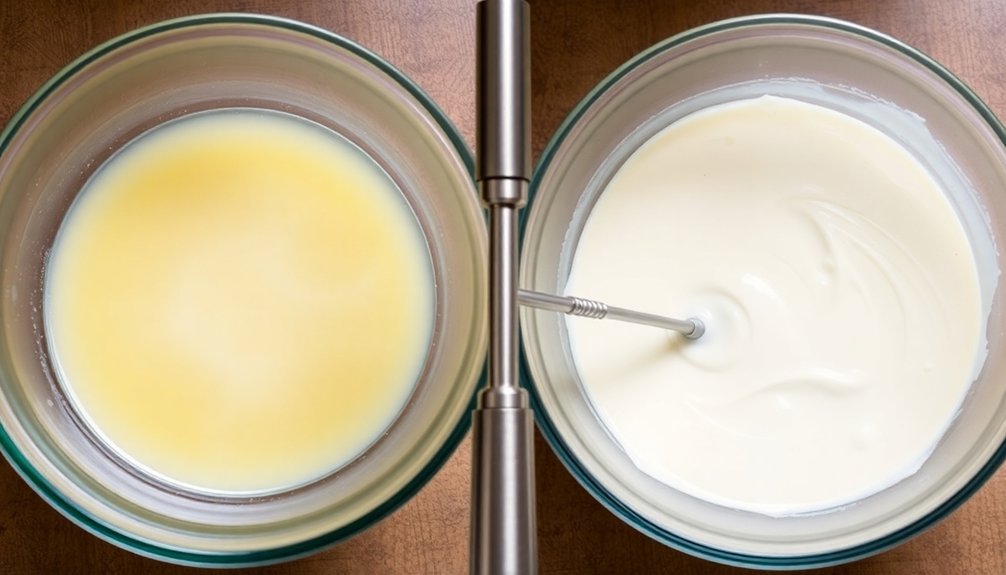
Emulsion occurs first in the saponification process, when oils and lye combine into a uniform, opaque mixture with no visible oil floating on top. You'll notice this stable emulsion forms quickly, often within a minute of using your stick blender.
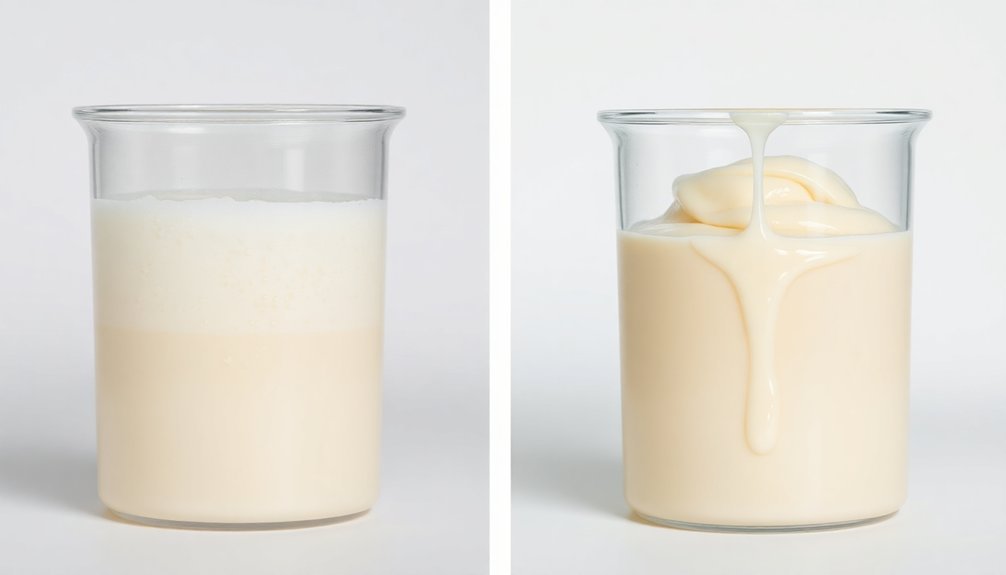
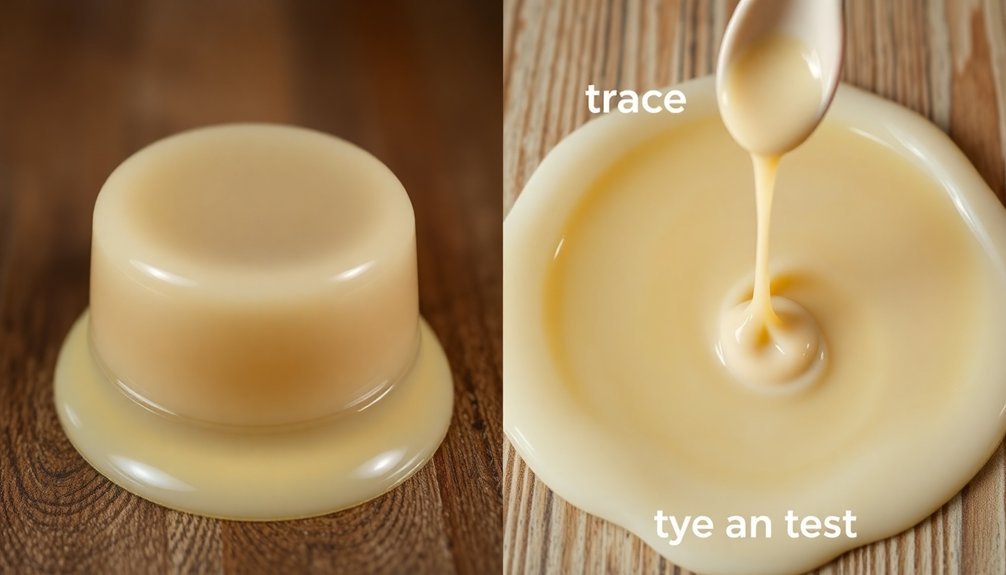
Trace, however, is the next stage when your soap batter begins to thicken. This indicates saponification is underway. To test for visual trace, drizzle some mixture onto the surface—it should leave a trail rather than disappearing immediately.
While emulsion gives you maximum working time for intricate designs, trace signals your soap is ready to pour. Recognizing these different stages helps you control the timing and success of your soapmaking.
The Science Behind Emulsion in Soapmaking
Understanding the science behind emulsion reveals why this stage is so critical in successful soapmaking. When oils and lye are thoroughly mixed, they form a uniform mixture where tiny oil droplets become suspended in the water-based lye solution—this is emulsion.
| Process Element | At Emulsion Stage |
|---|---|
| Visual Indicators | Creamy, opaque appearance without oil streaks |
| Chemical State | Early saponification beginning |
| Mixture Stability | Stable enough for designs, still fluid |
| Working Time | Longer than at trace |
| Consistency | Smooth but not thickened |
During emulsion, saponification has just begun, but the mixture maintains fluidity. You'll recognize it when the mixture appears uniform without oil separation on the surface. Achieving a stable emulsion gives you more time to work on intricate designs before the thickening process accelerates toward trace.
Recognizing the Visual Signs of Proper Emulsion
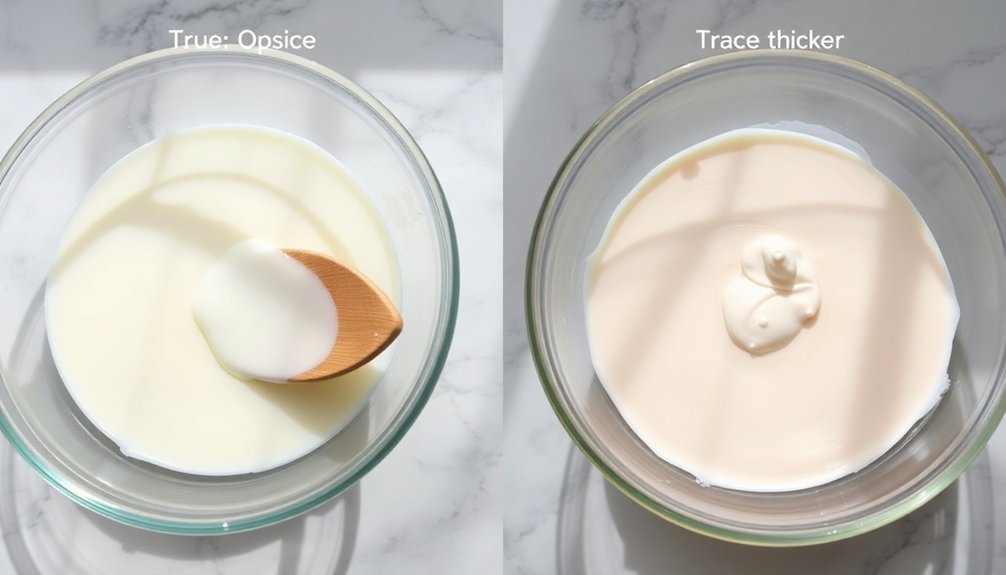
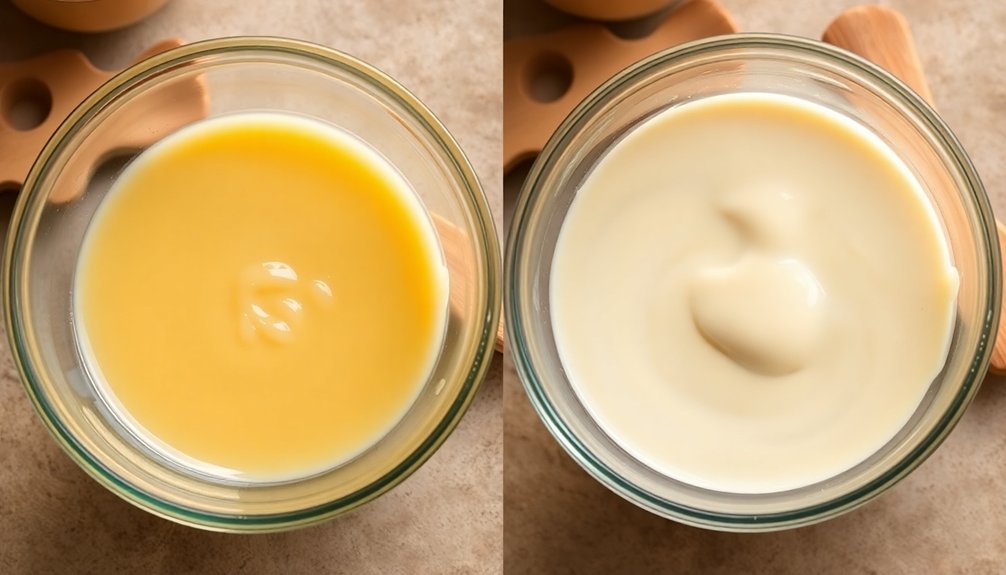
Recognizing proper emulsion can save your soapmaking project from common failures. When your lye solution and oils are properly combined, you'll notice a uniform color throughout the mixture, changing from separate translucent layers to a creamy, opaque consistency. This critical stage precedes trace but is equally important to identify.
- Look for the absence of streaks or oil pools floating on the surface—these indicate incomplete emulsion.
- Test by drizzling some soap mixture onto the surface—it should leave a visible pattern before incorporating.
- Watch for the shift from separated ingredients (lye at bottom, oils on top) to a homogeneous blend.
How Trace Develops From Initial Emulsion
The journey from emulsion to trace follows a predictable progression that you'll soon recognize with practice.
When your oils and lye first come together, you'll achieve emulsion—a uniform, creamy mixture with no visible oil separation. This is your foundation.
As you continue mixing, the emulsion gradually transforms into trace, where the mixture thickens enough to hold its shape.
Your mixing method greatly impacts this timeline—a stick blender accelerates the process compared to hand stirring.
Temperature and oil choices also influence how quickly trace develops.
At light trace, the mixture begins thickening slightly but remains fluid enough to incorporate colorants and fragrances.
This stage offers your best working time for intricate designs before the increasing thickness limits manipulation.
Testing for Trace: Drizzle Methods and Indicators
Three reliable methods exist for confirming when your soap batter has reached trace. The most popular is the drizzle method, where you lift your blender or spoon and allow some batter to fall onto the surface. If it sits on top rather than immediately sinking, trace has been reached. Your mixture should appear creamy and opaque, indicating lye and oils have thoroughly combined into a stable emulsion.
- Light trace resembles thin cake batter—perfect for adding colorants and fragrances
- The soap surface should maintain uniform color without oil separation
- Drizzled batter that holds its shape on the surface confirms you've achieved at least light trace
Testing for trace is essential before pouring your soap. While a stable emulsion forms first, patience is key to reaching the ideal trace consistency for your specific design needs.
Common Misconceptions About Emulsion and Trace
Confusion between emulsion and trace represents one of the most common pitfalls for soap makers.
You might think reaching trace is your primary goal, when achieving stable emulsion is actually essential for preventing separation.
Don't assume that thickness always indicates trace. False trace can fool you – a mixture appears thick but hasn't fully emulsified. This misconception leads to failed batches when separation occurs later.
Many crafters incorrectly interpret visual indicators, not realizing emulsion and trace are distinct stages in the soap making process.
While emulsion happens when oils and lye uniformly combine, trace marks the beginning of saponification.
You'll reach emulsion relatively quickly with stick blending, but true trace takes longer and varies with temperature and oil types.
Understanding this distinction helps you create more consistent soap batches.
Working With Light Trace for Intricate Soap Designs
Working with light trace opens up a world of creative possibilities for intricate soap designs that simply aren't achievable at heavier trace stages. This thin cake batter consistency provides the perfect medium for your artistic expression.
You'll recognize light trace when your mixture has fully emulsified without oil separation—ideal for safely adding colorants and fragrances.
- Use stick blending for 1-2 minutes rather than hours of hand stirring to achieve this perfect state
- Maintain temperatures between 100-110°F for superior working time and manipulation
- Take advantage of the extended working time to create layers, swirls, and embed decorative elements
Mastering light trace gives you control over your soap's appearance while allowing enough time to execute your vision before the mixture thickens too much.
Temperature Effects on Emulsion and Trace Development
Temperature plays a pivotal role in how quickly your soap mixture moves from emulsion to trace, directly impacting your creative potential.
Working at 100-130°F accelerates the emulsification process, while lower temperatures (100-110°F) offer more time for intricate swirls and designs.
You'll notice recipes high in hard oils and butters reach trace faster than those with mainly liquid oils due to different saponification rates.
Water discounting also speeds up trace development, resulting in harder bars with shorter cure times.
Be cautious about false trace—when your mixture appears thick but hasn't fully saponified—which can occur with improper temperature management.
Remember that while higher temperatures may reduce your working time for adding colorants and fragrances, they can be beneficial when you're seeking a quick trace for simpler designs.
Stick Blending Techniques to Control Trace Progression
Achieving proper trace control requires understanding when to pulse your stick blender rather than running it continuously.
You'll notice quicker trace development when your oils and lye solution are warmer, so adjust your blending technique accordingly for ideal results.
Mastering the rhythm between short bursts of blending and manual stirring gives you the power to maintain thin trace for colorants and additives or accelerate to medium trace when needed.
Subheading Discussion Points
While mastering the stick blender might seem intimidating at first, it's an essential skill that transforms soap making from a lengthy process into a manageable craft.
You'll achieve emulsion in just 1-2 minutes compared to hours of hand stirring, giving you better control over the saponification process. The key is alternating between short bursts of blending and manual stirring to prevent your soap from thickening too quickly.
- Monitor temperature carefully—warmer mixtures accelerate trace while cooler temperatures extend your working time for intricate designs
- Use the stick blender to eliminate false trace, ensuring no unsaponified oil remains in your mixture
- Practice pulse blending to maintain the ideal consistency as you progress through the soapmaking process
This technique helps you distinguish between true emulsion and various stages of trace, allowing for creative expression in your soap designs.
Pulse Vs Continuous Blending
Now that you understand the fundamentals of emulsion and trace, let's examine the two primary stick blending approaches that determine your control over the process.
Pulse blending gives you maximum control, using short bursts of your stick blender to gradually progress from emulsion to trace. This technique preserves working time, allowing you to incorporate additives and execute intricate designs before thickening occurs.
While a stick blender reduces mixing time from hours to mere minutes, continuous blending can cause your soap batter to thicken rapidly, potentially ruining complex designs.
For ideal trace consistency, consider alternating between pulse and continuous blending. This combination helps you achieve a stable emulsion while preventing false trace, giving you the perfect balance of efficiency and control throughout your soapmaking process.
Temperature's Trace Effect
The temperature of your soap ingredients plays a crucial role in controlling trace progression during the stick blending process. Warmer temperatures (100-130°F) accelerate trace, while cooler ranges (100-110°F) provide more working time for intricate designs.
When combined with stick blending, temperature dramatically influences emulsification speed—what would take hours by hand occurs in minutes with a blender.
- Alternate between short blending pulses and hand stirring to maintain precise control over trace consistency.
- Add cold additives at the end of your process, as they can unexpectedly accelerate trace when you least want it.
- Consider your water discount carefully—less water means faster trace and harder soap, requiring even more careful temperature management.
Mastering temperature's trace effect gives you the power to achieve exactly the working time you need for your design.
Ingredients That Accelerate or Decelerate Trace
Understanding which ingredients affect trace can transform your soapmaking experience from frustrating to fulfilling.
Fragrance oils are notorious for causing soap to trace faster, potentially limiting your design options. Similarly, recipes with high percentages of hard oils and butters accelerate trace compared to those dominated by liquid oils.
Be cautious with additives like clay which absorb water and speed up thickening; pre-mixing them with distilled water helps manage their effects.
Water discounting creates harder bars with shorter cure times but sacrifices working time. For complex designs, aim for cooler temperatures (100-110°F) to slow down the process.
Unlike some fragrance oils, many essential oils are gentler on trace, giving you more control over your soap's consistency and artistic possibilities.
Design Opportunities at Different Stages of Trace
As your soap batter evolves from emulsion to thick trace, different artistic possibilities emerge for your handcrafted bars.
Understanding when to implement your design techniques in cold process soap creates stunning results that match your vision.
At light trace, you'll find a thin cake batter consistency perfect for adding colorants and creating intricate designs with plenty of working time.
Medium trace resembles thin pudding, allowing for oil streaks on the surface and incorporation of heavier additives like poppy seeds.
When you reach thick trace, your soap holds its shape, making it ideal for textured tops and defined layers.
- Choose light trace for swirls, intricate patterns, and maximum working time
- Work with medium trace for partial gel effects and moderate-weight additives
- Utilize thick trace for sculptural elements, distinct layers, and textured tops
Troubleshooting Separation Issues After Emulsion
If you notice separation occurring after achieving emulsion, you'll need to immediately re-blend your soap batter with a stick blender until it reunifies.
Temperature fluctuations outside the 100-130°F range can destabilize your emulsion, so keep your workspace and ingredients within this ideal zone.
An imbalanced oil-to-lye ratio may also cause persistent separation issues, requiring you to double-check your recipe calculations and measurement accuracy before your next batch.
Troubleshooting Separation Issues After Emulsion
Even when you've achieved what appears to be a successful emulsion, separation issues can still emerge and potentially ruin your soap batch.
If you notice unsaponified oil floating on top, it's a clear sign that full emulsification hasn't occurred. Temperature plays a critical role—maintain your mixture between 100-130°F to prevent cooling-induced separation.
If separation occurs:
- Immediately reach for your stick blender and re-mix vigorously until you achieve a stable emulsion
- Check that you've added fragrance oils and heavy additives only after establishing a solid emulsion
- Look for visual cues of proper emulsification—uniform color with no streaks indicates success
Temperature Fluctuation Problems
Temperature fluctuations represent one of the most common culprits behind post-emulsion separation problems.
When your oils and lye solution fall outside the ideal 100-130°F range, you risk improper emulsification even after reaching what appears to be trace.
If temperatures drop too low during mixing, solid oils may not fully dissolve, creating a deceptive false trace. Your soap might look emulsified but will separate as it sets.
Conversely, rapid cooling (like placing molds in a freezer) causes uneven setting and "sweating" as components cool at different rates.
To prevent these separation issues, consistently monitor temperatures throughout your process.
Maintain thermal stability from mixing through pouring to guarantee your emulsification remains stable.
This temperature vigilance is essential for achieving that perfect uniform texture in your finished soap.
Oil-Lye Ratio Imbalance
Several soap batches fail after achieving what appears to be a perfect emulsion due to an underlying oil-lye ratio imbalance.
When your lye concentration is insufficient, you'll notice separation even after initial emulsification occurs. This incomplete saponification happens because there's not enough lye to react with all the oils in your formula.
To prevent separation issues:
- Measure oils and lye precisely using a digital scale—excess oils prevent proper trace and leave unsaponified oil floating in your mixture.
- Monitor temperature during mixing—cooling too quickly creates false emulsions that separate after pouring.
- Perform pH testing a few days after making soap to confirm complete saponification (pH 8-10 is ideal).
Remember that true trace indicates chemical reactions are progressing properly, while mere emulsion might look stable temporarily but separate later if your calculations were off.
Frequently Asked Questions
What Is Trace in Soapmaking?
Trace in soapmaking is when your oil-lye mixture thickens and emulsifies. You'll recognize it when your soap batter holds its shape temporarily, indicating saponification has begun. It's essential for adding fragrance and pouring into molds.
What Is Emulsion in Soap Making?
Emulsion in soap making is when you've mixed your oils and lye water enough that they've combined uniformly without separating. It's thinner than trace and appears slightly opaque, marking the beginning of saponification in your batch.
What Causes False Traces in Soap Making?
False trace occurs when your oils prematurely thicken or solidify before true saponification. You'll see this when temperatures drop too low, causing solid oils to cool below their melting point while lye remains unsaponified.
What Is the Soaping Effect of Emulsions?
Emulsions give you more working time with your soap batter. You'll notice oils and lye are fully mixed but still fluid, allowing you to add colors and fragrances while maintaining control over intricate designs.
In Summary
Understanding the difference between emulsion and trace gives you greater control over your soapmaking process. You'll achieve better results when you recognize that emulsion happens first, when oils and lye initially combine, while trace develops later as saponification progresses. By mastering these distinct stages, you can time your additives perfectly, prevent separation issues, and create more complex designs. Keep practicing—soon you'll instinctively know exactly when to pour.


Leave a Reply