To make cold process soap safely, you'll need protective gear including safety goggles, chemical-resistant gloves, and an apron. Essential tools include a digital scale for precise measurements, heat-resistant containers, a stick blender, silicone spatulas, and reliable thermometers. You'll also require dedicated mixing bowls, molds, and proper storage containers for your ingredients and finished soaps. Understanding these fundamentals is just the beginning of your soapmaking journey.
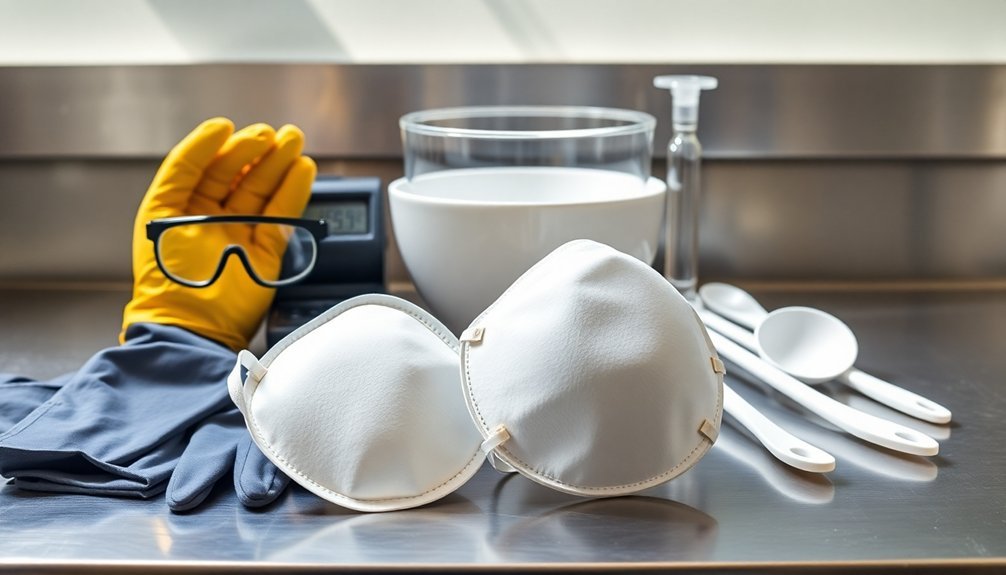
Safety Equipment and Personal Protection

While making cold process soap can be a rewarding hobby, you'll need proper safety equipment to protect yourself from dangerous chemicals, particularly lye.
Start with eye protection – wear safety goggles or a full-face respirator with N95 rating to guard against splashes and fumes. You'll also need elbow-length rubber gloves and protective sleeves to shield your hands and arms.
Having a separate set of tools for soapmaking prevents contamination of household items.
Dress appropriately in long sleeves, long trousers, and an apron without pockets to prevent lye from getting trapped. Keep your hair secured with ties or nets to avoid contamination.
Work in a well-ventilated area with a fan to direct fumes outside. Don't forget to mark your lye containers clearly and keep dedicated supplies, rags, and paper towels ready for immediate spill cleanup.
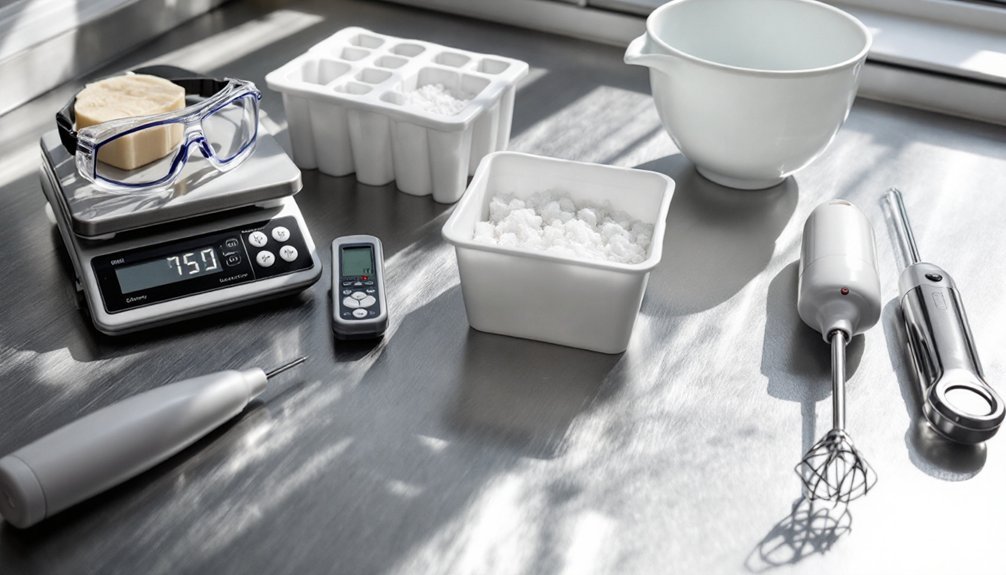
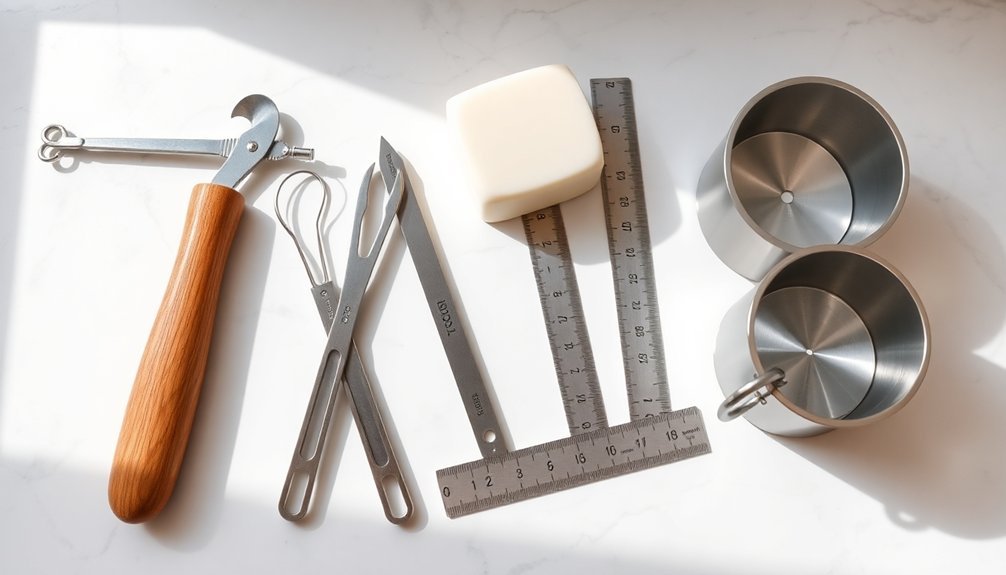
Mixing and Measuring Tools
To make soap safely and successfully, you'll need a digital kitchen scale and accurate measuring containers for precise ingredient proportions.
Your essential mixing tools should include a stick blender for quick emulsification, sturdy silicone spatulas, and stainless steel bowls for combining ingredients effectively. Make sure to keep your soapmaking tools separate from any equipment used for food preparation.
Temperature monitoring tools like an infrared thermometer or digital thermometer are vital for maintaining proper heat levels throughout the soap-making process.
Precision Measuring Equipment
Precision is paramount when making cold process soap, as even small measurement errors can ruin an entire batch.
You'll need a reliable digital kitchen scale that measures in grams, especially for accurate lye measurements where precision to the nearest gram is essential. For tiny quantities of essential oils and additives, a jeweler's scale provides the necessary accuracy. Keep all equipment dedicated to soapmaking and never use these measuring tools for food preparation.
Don't rely on recipes that use cup measurements, as they're not safe or precise enough for soap making. Instead, stick to weight measurements for consistent results.
Your scale should be able to handle both small and large quantities, from a few grams of colorants to several pounds of oils. Remember to calibrate your scale regularly and keep it clean to maintain accuracy throughout your soap-making process.
Blending Tool Requirements
Beyond accurate measurements, proper blending tools form the backbone of successful soap making.
You'll need a stick blender (also called an immersion blender) as your primary mixing tool, as it reduces blending time from hours to mere seconds and guarantees even distribution of oils and lye.
Your stick blender should be dedicated solely to soap making to prevent contamination. While there are various brands available, less expensive models often work just as effectively as pricier ones.
For optimal results during the soap making process, use heat-resistant pitchers when handling hot ingredients.
Complement your blender with silicone spatulas and whisks, which are essential for scraping bowls and incorporating additives.
These tools not only increase efficiency but also enhance safety by minimizing direct contact with caustic lye. They'll help you achieve consistent results and enable creative techniques like swirls and special designs with less effort.
Temperature Control Instruments
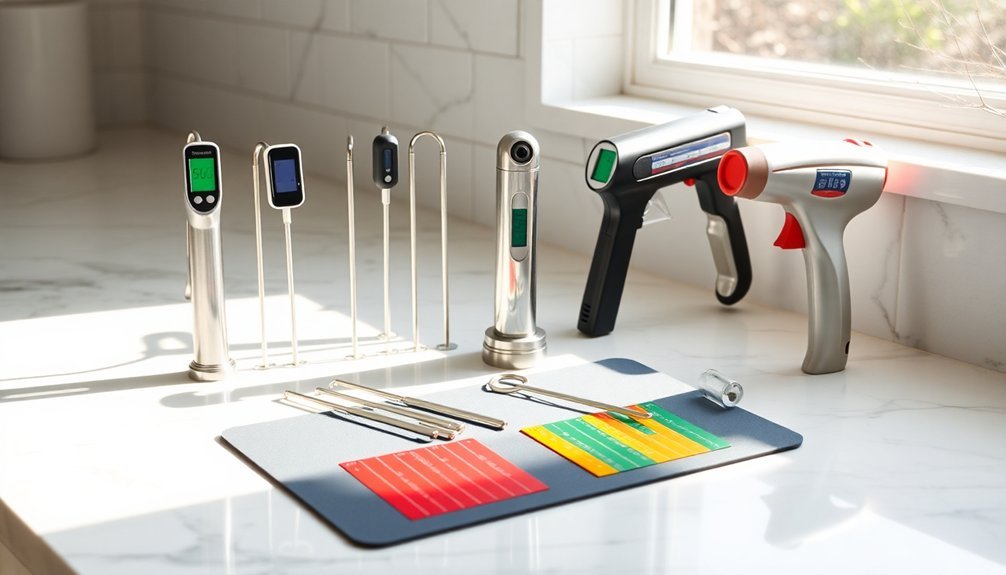
Accurate temperature control stands as a cornerstone of successful cold process soap making. You'll need reliable thermometers to monitor both your lye solution and oils, guaranteeing they're within the ideal range of 120-130°F and within 10 degrees of each other.
An infrared thermometer is your best choice, offering quick readings in less than a second without contact. While digital kitchen thermometers work well too, they're slower than infrared options. Glass thermometers, though functional, risk breakage and take longer to read. Hot lye solution can reach temperatures of up to 200°F when first mixed, making temperature monitoring essential for safety.
You'll want to check temperatures throughout the process, from initial mixing to trace. If you're working with temperature-sensitive ingredients like milk or trying to prevent gel phase, aim for cooler temperatures around 100-110°F.
Remember to keep your thermometer clean and ready between uses to guarantee accurate readings.
Soap Mold Selection Guide
When making cold process soap, you'll need to choose between plastic, wood, HDPE, or silicone molds – each offering distinct advantages for different soap recipes and processes.
Your choice will depend on factors like the type of soap you're making, whether you'll use oven processing, and how frequently you plan to make soap.
The size of your mold should match your recipe volume and preferred bar dimensions, with silicone and wood molds being the most versatile options for beginners.
Types Of Soap Molds
Selecting the right soap mold can make or break your cold process soapmaking success.
You'll find four main types to choose from, each with distinct advantages.
Wooden molds excel at insulation and promote faster saponification through gel phase, but you'll need to line them with freezer paper or corrugated plastic.
Plastic and PVC molds offer unique shapes and designs, though they don't insulate as well and may require mineral oil preparation.
HDPE and acrylic molds function similarly to wood but mightn't need lining, depending on your recipe.
If you're looking for easy unmolding and cleanup, silicone molds are your best bet – they're heat-resistant and don't typically need lining, though they won't provide much insulation for the gel phase.
Choosing The Right Size
The size of your soap mold directly impacts the success of your batch calculations. To determine your mold's volume, you'll need to measure its interior dimensions carefully.
For rectangular molds, multiply length x width x height, while round molds require the formula Pi x radius² x height.
For irregular shapes, fill the mold with water, measure the fluid ounces, and multiply by 1.8 to get cubic inches. Once you've got the volume, multiply it by 0.4 to calculate the total oils needed. You can then use this number to adjust any recipe to fit your mold perfectly.
Take multiple measurements to account for manufacturing variations, especially with PVC pipes or handmade molds. Remember to measure the inside dimensions and consider your desired soap height when calculating the final pour depth.
Lye Handling Equipment
Safe handling of lye requires specialized equipment that protects you from its caustic nature. You'll need proper safety gear, including goggles, chemical-resistant gloves, and protective clothing to prevent skin contact. For measuring and mixing, use dedicated tools that won't react with lye.
| Equipment Type | Essential Items |
|---|---|
| Safety Gear | Goggles, Gloves, Long Sleeves |
| Measuring Tools | Plastic Bowl, Heatproof Cup |
| Temperature Tools | Infrared or Candy Thermometer |
| Storage Items | Labeled Containers, Safe Storage Area |
Monitor temperatures carefully when mixing lye solutions, keeping them below 150°F. You'll want a stick blender for combining oils with your lye solution, but never use it directly with lye. Always store your lye equipment separately from other kitchen tools and label everything clearly to prevent accidents.
Essential Oil and Fragrance Tools
With your lye equipment properly organized, let's focus on the tools needed for adding scents to your soap.
You'll need small, accurate scales that measure in grams for precise essential oil measurements, along with clean glass droppers or pipettes for controlled dispensing.
Keep several small glass beakers or containers handy for pre-measuring your oils before adding them to your soap batch.
To guarantee proper usage rates, you'll want to invest in a soap calculator or EOCalc tool to determine safe amounts of each essential oil.
Store your measuring tools separately from your lye equipment to prevent cross-contamination.
Don't forget to include small funnels for transferring oils and airtight storage containers to maintain the quality of your essential oils between batches.
Colorant Application Supplies
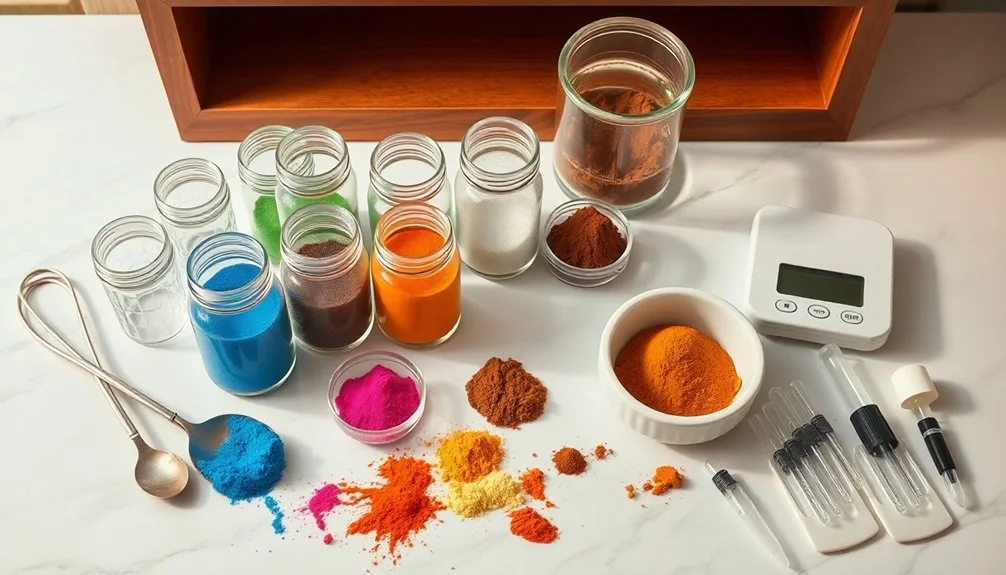
Your colorant toolkit needs a mini mixer or sturdy spatula to properly blend pigments and prevent clumping in your soap batches.
Accurate measuring cups and small containers will help you portion and store your colorants safely while keeping your workspace organized.
Don't forget to protect yourself with safety gear like goggles when working with fine particles that can become airborne during mixing.
Mixing Tools For Pigments
Mastering the art of cold process soap making requires the right tools for mixing colorants effectively. You'll need specific equipment to achieve smooth, well-blended pigments in your soaps.
| Tool Type | Best Use | Key Benefit |
|---|---|---|
| Stick Blender | Large Batches | Prevents bubbles |
| Mini Blender | Small Batches | Perfect for details |
| Manual Whisk | Mica Colors | Controls trace |
For ideal results, premix your pigments with lightweight oils like sweet almond or sunflower using a 1:3 ratio. Your arsenal should include battery-powered mixers for quick blending and manual tools for precise control. When working with oxides and ultramarines, you'll want to guarantee thorough premixing to avoid clumping. Remember that different colorants require different approaches – natural colorants may need extra attention, while micas blend more easily with gentle stirring.
Safe Color Measuring Equipment
Safety stands paramount when measuring and handling soap colorants.
You'll need protective equipment including gloves, safety goggles, and a well-ventilated workspace to handle colorants safely.
For precise color measurements, you'll want a reliable spectrophotometer like the Konica Minolta CM-5, paired with SpectraMagic NX software for accurate color analysis.
Don't forget color charts for visual comparison, especially when working with natural colorants.
Heat-proof containers are essential for the infusion process, whether you're using the hot or cold method.
You'll need measuring tools calibrated specifically for your colorants – remember that natural colorants often require different ratios than synthetic ones.
Keep detailed records of your measurements and results, and always test small batches first to verify consistency in your final product.
Storage For Colorant Supplies
Proper storage of colorant supplies plays an essential role in maintaining their quality and extending their lifespan. You'll need to store your colorants in a cool, dry location away from direct sunlight and heat sources, maintaining temperatures between 60°F to 70°F.
Keep your supplies organized using labeled, airtight containers to protect against moisture and contamination. You can maximize space by using shelving or racks with dividers to separate different types of colorants.
Don't forget to store frequently used items within easy reach.
To prevent contamination, make certain your storage area stays clean and dust-free. Use protective coverings and keep containers sealed when not in use.
If you're in a humid climate, consider using a dehumidifier to maintain ideal storage conditions. Always keep your supplies away from children and pets.
Soap Cutting and Trimming Tools
When creating professional-looking soap bars, you'll need reliable cutting and trimming tools to achieve consistent results. While kitchen knives are budget-friendly, they won't give you the uniform cuts needed for selling soap. Instead, consider investing in specialized tools like single-bar wire cutters or multi-bar cutters for larger batches.
For trimming and beveling, you'll find stainless steel tools that can transform rough edges into smooth, professional finishes. Options include manual bevelers, planer-beveler combos, and grip-and-trim tools. These come in different bevel sizes and are dishwasher safe for easy cleaning.
You can enhance the trimming process by using water or a wet rag. While professional tools may cost more initially, they're built to last and will help you consistently produce market-ready soap bars.
Workspace Organization Essentials
Beyond having the right tools, your soap making workspace needs thoughtful organization to support safe and efficient production.
Set up your space with proper ventilation near a window or install a vent fan to handle lye fumes safely. You'll need at least a 5×3 foot flat, stable work area that's well-lit and equipped with a stainless steel workbench for easy cleanup.
Install shelving on casters to store your supplies efficiently – keep base oils, colorants, and additives on labeled shelves, while using closed cabinets for finished products.
Create dedicated stations for different tasks and store tools in separate bins for each process. A curing rack placed in a cool, dry area is essential.
Don't forget to include a sink for convenient cleaning of equipment.
Documentation and Record-Keeping Materials
Maintaining detailed records is vital for consistent soap making success. You'll need a dedicated notebook or digital system to track your recipes, including precise measurements, temperatures, and procedures.
Create templates for your soap recipes and batch logs to guarantee you're capturing all significant information consistently. Download reliable lye calculator apps or bookmark trusted online calculators to determine accurate lye amounts for your formulations.
Keep detailed batch records with unique numbers, dates, and curing times. Document any variations, problems, or successes you encounter during the process.
Don't forget to maintain safety checklists and protocols, including emergency contacts and first aid procedures. Consider creating feedback forms to track how your soaps perform and gather user insights for future improvements.
Cleaning and Maintenance Supplies
Proper cleaning and maintenance supplies form the backbone of safe soap making operations.
You'll need white vinegar or lemon juice to neutralize lye spills, heavy-duty paper towels, and cleaning cloths dedicated solely to your soap making workspace. Keep parchment paper, greaseproof paper, or waxed paper handy to protect your surfaces.
For equipment cleaning, stock up on dish soap, hot water, and specialized cleaning brushes that won't scratch your stainless steel or glass tools.
Don't forget old blankets or towels for covering soap molds and containing spills. You'll also want cling film and clean tea towels for wrapping soap during the curing process.
Remember to maintain a supply of protective gear, including rubber gloves, goggles, and masks, to guarantee safe cleanup procedures.
Storage and Curing Equipment
Three essential pieces of storage and curing equipment will set you up for successful soapmaking: ventilated drying trays, well-organized shelving units, and moisture-controlled storage containers.
You'll want stackable drying trays with slots or vents to guarantee maximum air circulation around each bar of soap, and they can be made of wood, coated metal, or food-grade polyethylene.
For long-term storage, opt for open-air shelving units or ventilated containers that keep your soap dry and well-organized.
Remember to store your soap in a cool, dry location away from direct sunlight and heat sources.
If you're using plastic storage boxes, drill holes for airflow to prevent your soap from becoming rancid.
Don't forget to label your containers with dates and ingredients for easy tracking.
Frequently Asked Questions
How Long Should I Wait Before Using Freshly Made Cold Process Soap?
You'll need to wait 4-6 weeks before using your cold process soap. This curing time guarantees the soap's safe to use, develops better lather, becomes milder, and allows excess water to evaporate properly.
Can I Substitute Regular Tap Water for Distilled Water?
While you can use tap water, it's not recommended. You'll get better, more consistent results with distilled water since tap water contains minerals and chemicals that can affect your soap's quality and appearance.
What Causes Soap Batter to Suddenly Thicken or "Seize"?
Your soap can seize when fragrances, essential oils, or alcoholic additives react too quickly. High temperatures, incorrect mixing techniques, and natural sugars in ingredients can also cause sudden thickening during the soap-making process.
How Do I Prevent Soda Ash From Forming on My Soap?
You'll prevent soda ash by keeping your soap temperatures above 115°F, using a 30-45% water discount, spraying the top with isopropyl alcohol, and insulating well after pouring. These steps create ideal curing conditions.
Why Do Some of My Essential Oils Disappear During Curing?
Your essential oils disappear during curing because they evaporate with water and undergo chemical changes during saponification. The high temperatures in gel phase can also break down oils, especially those with low flashpoints.
In Summary
You'll need all these essential tools to create safe, high-quality cold process soap at home. Keep your workspace organized, maintain detailed records, and always prioritize safety with proper equipment. Don't skimp on protective gear or quality measuring tools – they're vital for consistent results. With the right setup and careful attention to storage and curing needs, you're ready to begin your soap-making journey.


Leave a Reply