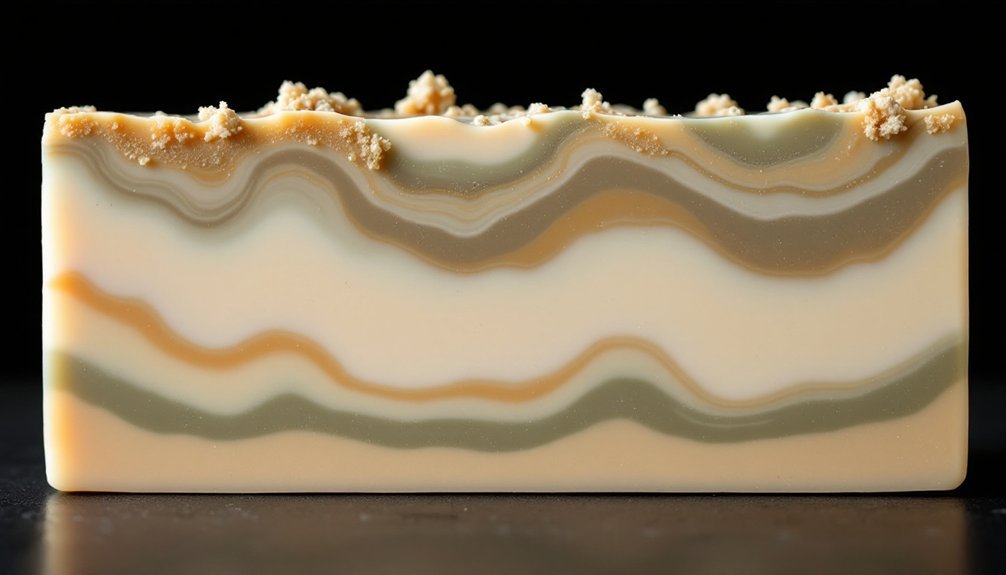
To achieve stunning natural color layers in cold process soap, you'll need precise temperature control around 120°F and careful management of trace levels. Mix your natural colorants like turmeric, spirulina, or clay with lightweight carrier oils (1 teaspoon per tablespoon) at 100°F to prevent clumping. Pour each layer at light to medium trace, and spritz with alcohol between layers for proper adhesion. Understanding these key elements will reveal the secrets to creating professional-looking, naturally-colored designs.
Understanding Natural Colorants for Cold Process Soap

When working with natural colorants in cold process soap making, you'll discover a world of vibrant options derived from clays, herbs, botanicals, and other earth-based ingredients. Each colorant offers unique properties and benefits for your soap creations.
White kaolin clay is especially suitable for normal and sensitive skin while providing gentle cleansing properties.
Rose kaolin clay produces lovely purple and lavender hues, while turmeric delivers bright yellow tones with anti-inflammatory benefits.
You'll find that botanical extracts like spirulina create rich green colors while nourishing the skin, and annatto seeds offer vibrant orange shades packed with antioxidants.
Plant roots such as madder and alkanet give you a range of pinks and purples to work with. For earthier tones, Dead Sea mud and cocoa powder provide beautiful brown and green variations.
These natural options not only color your soap but also contribute therapeutic properties, making them ideal for crafting beneficial, skin-loving products.
Essential Tools and Equipment for Color Layering
To create beautifully layered cold process soaps, you'll need reliable molds and dividing tools that guarantee clean separations between colors.
Your measuring and mixing equipment must include precise scales, temperature-safe containers, and non-reactive spatulas for handling different colored batches. A measuring cup is essential for holding colored soap portions while working on subsequent layers.
Temperature control devices like infrared thermometers and water baths will help you maintain the ideal consistency for each layer as you work.
Molds and Dividing Tools
Selecting the right molds and dividing tools plays an essential role in achieving beautiful layered soap designs. You'll want to choose open, rectangular molds without dividers, as they're ideal for layering and swirling colors.
Make sure your mold size matches your batch size – a 2-3 pound loaf mold works well for corresponding soap amounts. Consider using wide rectangular molds for creating varied swirl designs like circles and zigzags.
For precise layering, you can create homemade cardboard dividers or use thin cutting tools to make reusable ones. Hold these dividers securely and seal the bottoms quickly to prevent leakage between layers.
Line your molds with wax paper for easier soap removal. When working with layers, maintain consistent soap batter temperatures and use a spatula to pour gently.
Test your molds and dividers beforehand to identify any potential issues that could affect your final design.
Measuring and Mixing Equipment
Successful color layering in cold process soap making requires a thorough set of measuring and mixing equipment.
You'll need a digital scale for precise measurements of your ingredients and a stick blender to achieve proper emulsification. Keep several glass measuring cups and mixing bowls handy for preparing different colored portions of your soap batter. Temperature monitoring helps you achieve proper layer setup during the layering process.
For your colorants, use small glass or stainless steel containers along with measuring spoons to guarantee accurate proportions.
Don't forget to have rubber spatulas for smooth mixing and clean pours between layers. A microwave or low heat burner will help you melt solid oils, while a water bath maintains consistent temperatures.
When working with powdered colorants, mix them with glycerin first in separate bowls for even dispersion throughout your soap layers.
Temperature Control Devices
While color layering demands careful attention to many details, maintaining precise temperature control stands as one of the most critical factors for success.
Monitoring temperatures carefully helps prevent false trace issues that can ruin layered designs.
You'll need digital temperature controllers that provide accurate readings from -0° to 212°F, featuring easy-to-read LCD displays and LED status indicators.
Your heated pot tippers should include permanent heating elements and variable speed agitators, operating between 180-700 RPM.
These tools, made from US 304 Stainless Steel, guarantee even heating without hot spots. For ideal layering results, you'll want to maintain temperatures around 120°F, which allows quick setup between layers.
If you're working at cooler temperatures (80-100°F), expect longer wait times.
The equipment's advanced features, including SPDT output relay and adjustable anti-short cycle delay, help prevent equipment wear while guaranteeing consistent temperature control throughout your layering process.
Preparing Natural Colorants for Optimal Results
To achieve vibrant and consistent colors in natural soap making, proper preparation of your colorants is essential.
Start by mixing your chosen natural colorant with a lightweight carrier oil like canola or sweet almond oil. You'll want to use 1 teaspoon of colorant for every tablespoon of oil to create an effective dispersion.
Warm your carrier oil to 100°F before mixing to guarantee smooth blending and prevent clumping. Use a mini-mixer to thoroughly combine the colorant and oil until you've achieved a uniform consistency.
You can add this mixture directly to your soap batter at light trace, or blend it into your liquid oils before combining with your lye solution.
Remember to test your colorants and document results, as natural colors may fade over time. For plant materials, consider using infused oils or creating water-based infusions for your lye solution.
Mastering the Perfect Trace for Layering
You'll need to recognize the difference between light and medium trace to create successful layers in your natural soap designs.
Light trace resembles thin cake batter and works best for swirled patterns, while medium trace provides the stability needed for supporting distinct layers.
To test if you've reached the right consistency, let a small amount of soap batter drip from your spatula – light trace will form ribbons that sink back into the mixture, while medium trace will leave a slight mound on the surface.
Light Trace Versus Medium
Mastering soap trace consistency is essential for achieving distinct, beautiful layers in cold process soap making.
When working with light trace, you'll notice a thin cake batter consistency that's perfect for creating delicate, wispy swirls. Your soap mixture will quickly sink back when drizzled, and you won't see oil streaks in the raw soap.
Medium trace, however, offers more stability with its pudding-like consistency. Your soap will sit on the surface rather than immediately sinking back in, making it ideal for suspending additives and creating distinct layers.
While light trace gives you more time to work with colorants and achieve intricate designs, medium trace provides better control over layer thickness and color separation.
Choose light trace for detailed swirls and flood-filling, and medium trace when you need more stability and defined layers.
Testing Drop-in Consistency
Now that you're familiar with different trace consistencies, testing your soap batter's readiness for layering becomes a practical skill.
You'll want to check if your batter has reached the right consistency by drizzling a small amount across the surface. For light trace, the batter should pour smoothly like thin cake batter without leaving oil streaks. If you're aiming for medium trace, the drizzle should rest momentarily on the surface before sinking.
To achieve ideal layering, keep your temperatures below 110°F to avoid premature thickening.
Watch out for false trace, which can occur when saturated fats solidify at cooler temperatures. If you're working with natural colorants or additives like clay, remember they'll speed up trace time, so you'll need to work more quickly.
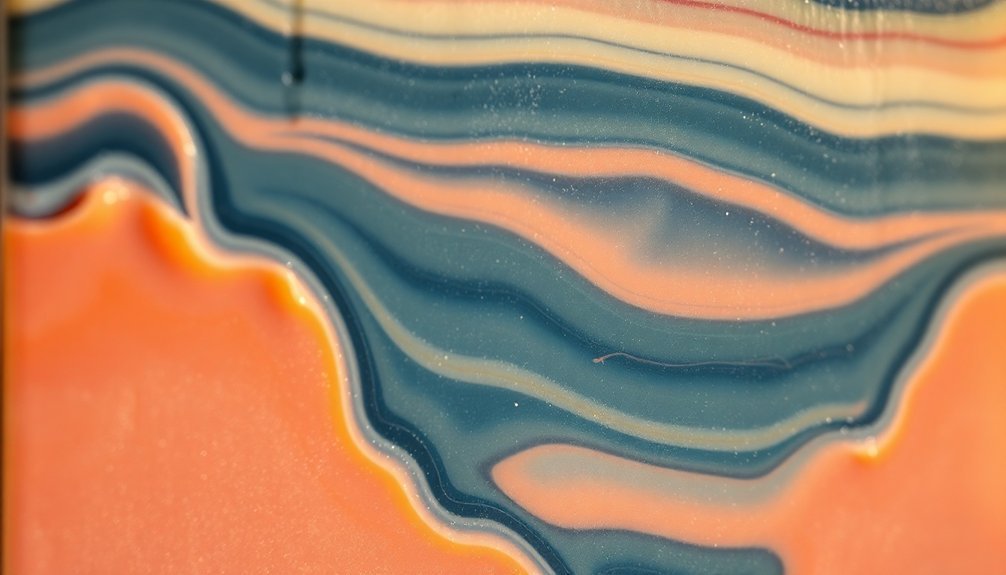
Creating Stunning Gradient Effects With Natural Dyes
Have you ever marveled at the mesmerizing gradient effects in handmade soaps? You can create these stunning shifts using natural colorants like indigo, turmeric, and annatto seeds.
Start by infusing your chosen botanicals in organic olive oil to achieve ideal color intensity.
To craft perfect gradients, begin with your most saturated color at the bottom and progressively lighten each layer by adjusting the colorant concentration. You'll need to carefully flood-fill each layer, making sure to "burp" the soap batter to eliminate air pockets.
Don't overmix – this can lead to uneven color distribution. As you work with natural dyes, remember they'll require some experimentation, as they can behave unpredictably.
Keep detailed records of your colorant concentrations and combinations to replicate your successful gradients in future batches.
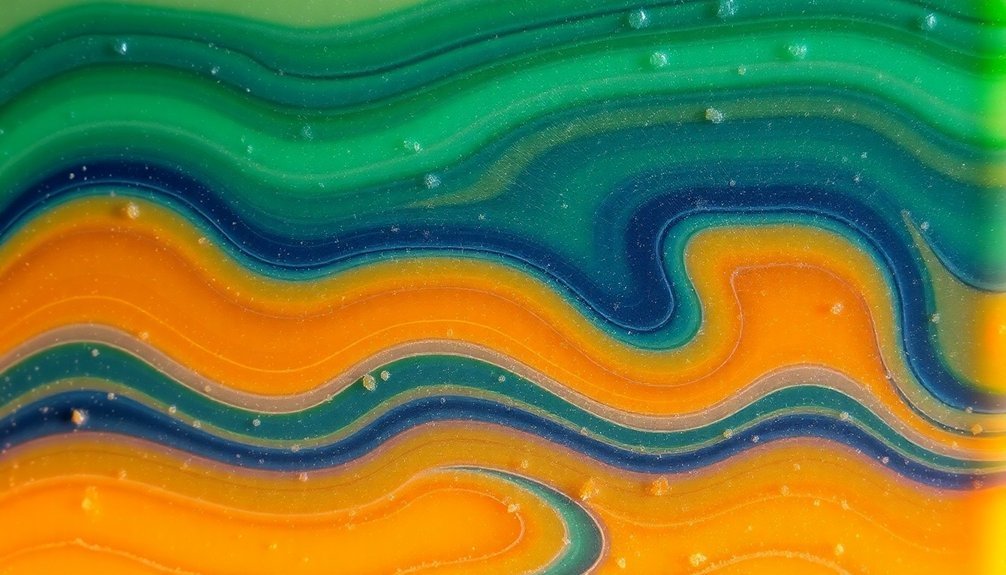
Advanced Swirling Techniques With Plant-Based Colors
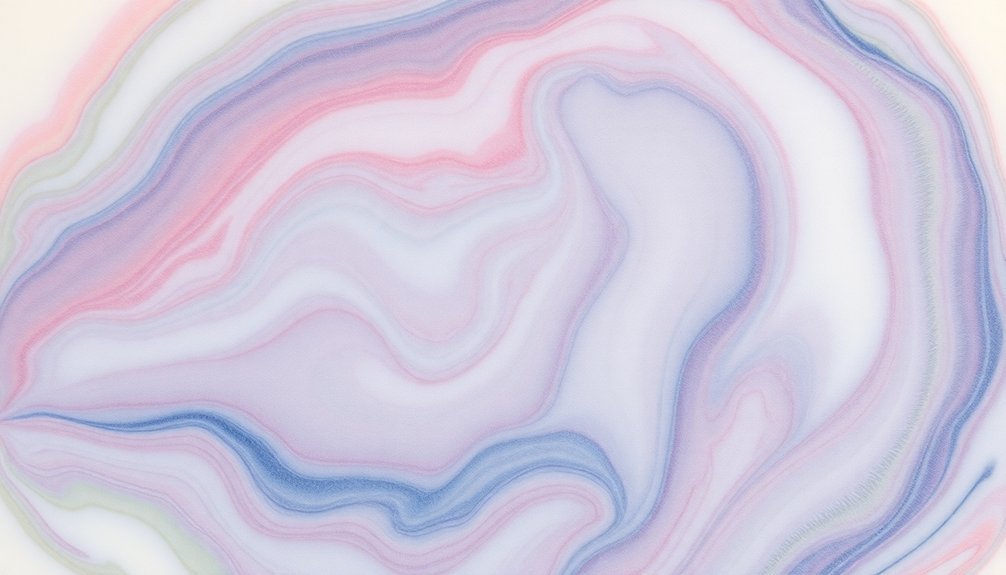
Building on the beauty of gradient effects, the art of swirling with plant-based colors offers endless creative possibilities.
You'll achieve the best results by selecting natural colorants like powdered herbs, spices, and infused oils. To maintain workable consistency, mix your colorants with a small amount of water to create a smooth paste before adding them to your soap base.
For stunning natural swirls, follow these essential steps:
- Choose slow-tracing oils like olive, almond, and avocado as your base.
- Mix your lye solution and oils between 85-95°F for ideal working time.
- Divide your soap mixture and add different natural colorants to each portion.
- Pour using either in-the-pot or drop swirl techniques, varying your angles and heights.
Finish with a light alcohol spray to prevent ash and preserve your design's integrity.
Troubleshooting Common Color Layering Challenges
While creating beautiful layered soaps can be rewarding, several common challenges can affect your final product's appearance. To prevent color bleeding, you'll want to use non-migrating colorants like mica or pigments instead of lake dyes.
When pouring layers, make certain your first layer has formed a thick skin – test it with a toothpick before proceeding.
Temperature control is essential for maintaining clean lines. Don't pour your second layer above 130°F, and spritz 90% rubbing alcohol between layers to enhance adhesion.
You can speed up setting time with short freezer bursts, but don't let the first layer harden completely, or it'll shrink.
Keep your mold level and complete your soap within a day or two to minimize gaps and guarantee proper layer bonding.
Preserving Natural Color Vibrancy in Cold Process Soap
The art of preserving vibrant natural colors in cold process soap requires careful attention to several key factors.
You'll need to start by selecting high-quality natural colorants and properly pre-mixing them with glycerin or isopropyl alcohol to prevent speckling.
Consider using the CPOP method or insulating your soap to encourage gel phase, which greatly enhances color intensity.
- Pre-mix your natural colorants with appropriate mediums at manufacturer-recommended rates
- Force gel phase through CPOP or insulation to maximize color vibrancy
- Store finished soaps in a cool, dark place away from direct sunlight
- Use breathable packaging materials to prevent humidity damage while allowing proper curing
Test your colorants in small batches first, and remember that natural colors typically produce more subdued hues than synthetic alternatives.
Clay additives can help boost vibrancy when combined with natural pigments.
Combining Multiple Natural Colorants for Complex Designs
Creating complex designs with multiple natural colorants requires strategic planning and precise execution.
You'll need to calculate specific ratios for each color and divide your soap batter accordingly. Start by breaking down your design into manageable parts, assigning portions for each natural colorant you'll use.
For best results, mix your powdered colorants with a small amount of oil or water to create a smooth paste before adding them to your soap.
When you're working with multiple colors, maintain your soap batter at a light trace and aim for temperatures between 120-130°F to enhance color vibrancy.
You can combine different colorants like madder root with annatto seed oil to create unique shades, using approximately 1 teaspoon per pound of soap.
Remember to include any infused oils in your overall recipe calculations to prevent seepage issues.
Frequently Asked Questions
Can Natural Colorants Be Used Effectively in Hot Process Soap Making?
Yes, you can effectively use natural colorants in hot process soap. The high heat can actually enhance color vibrancy, and when you add colorants like clays, spirulina, or botanicals, they'll blend well during saponification.
How Do Different Oils Affect the Final Color Outcome?
Your oil choices directly impact soap color. You'll find olive oil creates yellow tones, while whiter oils like coconut and palm stay neutral. Dark-colored oils can affect your final color outcome considerably.
Will Natural Colorants Fade When Exposed to Sunlight During Curing?
Yes, your natural colorants will fade when exposed to sunlight during curing. You'll need to cure your soaps in a dark, cool place to maintain their vibrant colors and prevent premature fading.
Does the Ph Level of Lye Solution Impact Natural Color Intensity?
Yes, your lye solution's pH level directly affects natural color intensity. When pH rises above 10, you'll notice fading and less vibrant colors. For best results, keep your soap's pH between 8-10.
Can Essential Oils Alter the Appearance of Natural Colorants?
Yes, you'll find that essential oils can greatly alter your natural colorants. They'll cause darkening, fading, or unexpected color changes through chemical reactions, and their concentration directly affects how much your soap's colors transform.
In Summary
You've now mastered the art of creating beautifully layered soaps using natural colorants. With your newfound knowledge of proper trace control, color preparation, and advanced swirling techniques, you're ready to experiment with complex designs. Don't forget to document your recipes and results as you continue exploring natural soap making. Keep testing different plant-based combinations and remember that patience is key to achieving those stunning, Instagram-worthy layers.


Leave a Reply