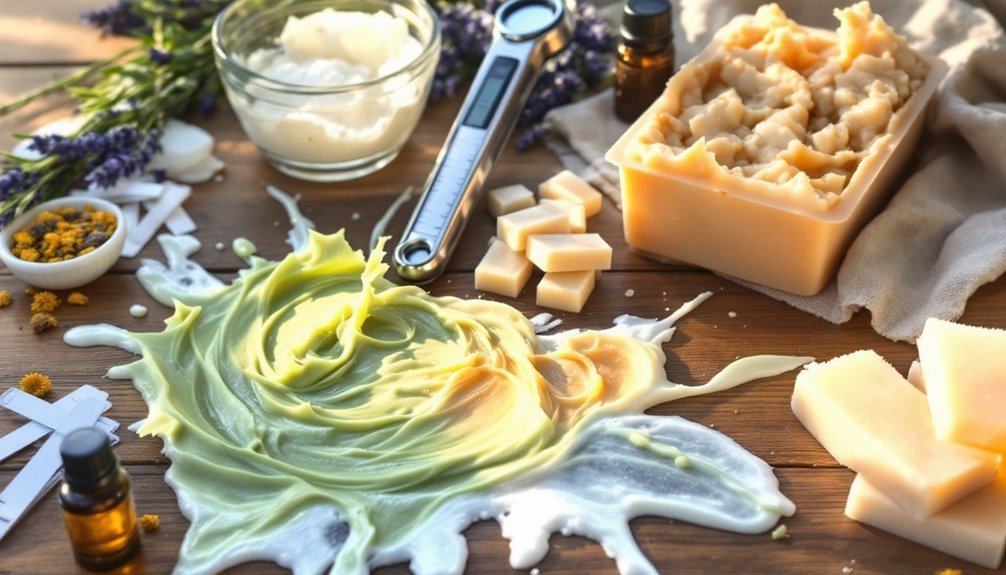
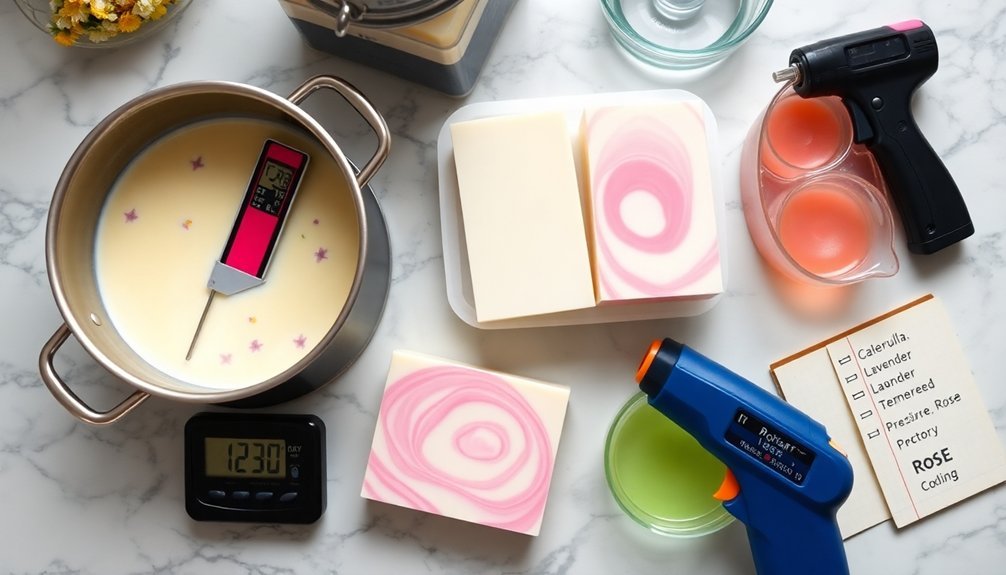
To fix botanical soap making problems fast, maintain temperatures between 100-120°F for proper emulsification. Blend fragrance oils with base oils before adding lye to prevent ricing and seizing. Use your stick blender in short bursts to avoid over-mixing. Spritz freshly poured soap with rubbing alcohol to prevent soda ash, and finely grind botanicals for even distribution. Test small batches when trying new plant extracts. These quick fixes will transform your next herbal soap batch from frustrating to flawless.
11 SECOND-LEVEL HEADINGS FOR "FIX COMMON BOTANICAL SOAP MAKING PROBLEMS FAST"
When you're tackling botanical soap making issues, having a clear troubleshooting framework can make all the difference between frustration and success.
For your article, consider these second-level headings that address key problem areas:
- "Temperature Control: Preventing Separation and Acceleration"
- "Selecting Quality Essential Oils and Fragrance Oils That Behave"
- "Measurement Precision: Using Digital Scales for Consistent Results"
- "Mastering Stick Blending Techniques to Achieve Perfect Trace"
- "Troubleshooting Discoloration in Natural Botanical Soaps"
- "Testing Protocols for New Colorants and Additives"
- "Common Problems: From Ricing to Seizing and How to Recover"
These headings provide a logical progression through the most frequent challenges while emphasizing the relationship between proper technique and ingredient quality.
Each section can offer specific solutions to problems you'll inevitably encounter along your soap making journey.
Preventing Botanical Discoloration in Cold Process Soap
One of the most disheartening moments in botanical soap making happens when your beautifully colored bars transform into something entirely different than what you envisioned. To maintain those vibrant botanical hues, you'll need a strategic approach.
| Discoloration Factor | Prevention Strategy |
|---|---|
| Oxidation process | Add antioxidants like vitamin E |
| Exposure to light | Store soaps in cool, dark places |
| Unstable botanicals | Test small batches first |
| Mineral reactions | Use distilled water in lye solution |
| Color degradation | Apply soap-specific color stabilizers |
Always incorporate color stabilizers formulated specifically for soap making when working with botanical ingredients. These products help maintain your desired colors by slowing oxidation. Remember that prevention starts with testing—create small batches to observe how your natural colorants react before scaling up your production.
Solving Ricing Issues When Using Plant Extracts
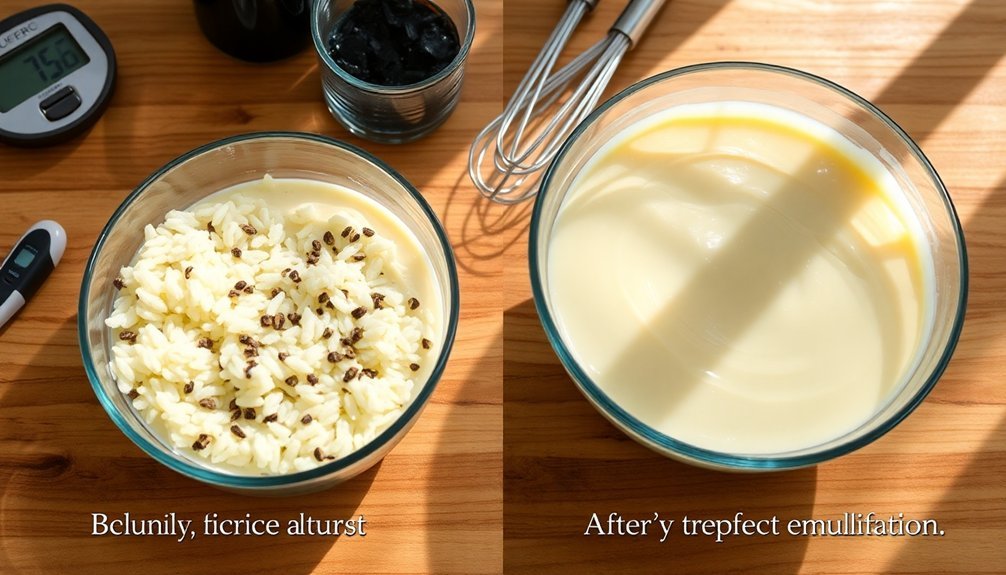
When you're confronted with ricing in botanical soap, first identify if certain plant extracts are binding with your hard fats, causing those unwanted lumpy formations.
You'll find temperature control essential—try blending your fragrance oils with melted base oils before adding lye solution, as this prevents the chemical reaction that triggers ricing.
Before committing to full batches, always conduct small test batches with new plant extracts to determine compatibility, saving yourself the frustration of rebatching ricey soap later.
Identifying Rice Formation Causes
Botanical extracts, while adding wonderful properties to your handmade soaps, can sometimes trigger frustrating ricing issues that appear as small, rice-like lumps throughout your soap batter.
Understanding what causes these rice-like formations is essential to preventing them in your cold process soap making.
The main culprits behind ricing include:
- Certain fragrance oils that chemically react with hard fats in your recipe
- Plant extracts that accelerate trace, giving you less working time
- Temperature differences that can trigger premature solidification
When you notice your batter starting to rice, immediately reach for your immersion blender.
Work quickly but carefully to smooth out those lumps. If separation occurs, don't panic—rebatching can save your soap.
Always research fragrance oils beforehand and mix them with warm base oils before adding lye.
Temperature Control Techniques
Maintaining precise temperature control stands as your strongest defense against ricing issues when working with botanical extracts in soap making. Keep your oils and lye within 100-120°F to guarantee proper emulsification and prevent separation.
When blending plant extracts, consider working at the lower end of this range to avoid accelerated saponification process, which often triggers ricing.
For best results, warm your oils before adding extracts, and use a hand mixer instead of a stick blender for gentler incorporation. This technique provides greater control over trace development and helps maintain consistent soap consistency throughout.
Additionally, adjust your recipe's ratio of hard oils to soft oils—too many hard oils can contribute to ricing when combined with plant materials. Always test new extracts in small batches first to understand how they'll behave under your specific temperature control techniques.
Extract Compatibility Testing
Since plant extracts vary widely in their chemical composition, testing compatibility before full-scale production becomes essential to prevent frustrating ricing issues.
When plant extracts interact poorly with soap fats, you'll notice rice-like clumps disrupting your smooth consistency. To avoid this common cold process soap problem:
- Warm your oils before introducing extracts to improve the blending process and help botanicals integrate properly with fats
- Use your immersion blender in short, controlled bursts when incorporating plant extracts to monitor consistency changes without over-mixing
- Always create small test batches with new extracts before committing to larger productions
Before selecting extracts for your soap formula, research which botanicals work well with your chosen oils.
Reading reviews from experienced soapmakers can save you from discovering compatibility issues the hard way.
Avoiding Acceleration and Seizing With Herbal Additives
Working with herbal additives in soap making can sometimes feel like a chemistry experiment gone wrong when your beautiful mixture suddenly seizes or accelerates. To prevent this, preheat your oils and mix them with your herbal additives before introducing the lye solution, creating a smoother integration.
Lighter oils like olive or almond can slow down trace and prevent your soap batter from thickening too quickly. Always monitor temperatures carefully—cooler temps reduce acceleration during saponification.
| Herbal Additive Type | Recommended Oils | Temperature Range |
|---|---|---|
| Ground herbs | Olive, almond | 90-100°F |
| Infusions | Sweet almond | 85-95°F |
| Essential oils | Olive, coconut | 80-90°F |
| Botanical powders | Olive, castor | 90-100°F |
Test new additives in small batches first to understand how they'll affect your recipe.
Tackling Uneven Distribution of Botanical Materials
Even when you've mastered controlling acceleration, botanical materials can still create unattractive, spotty-looking soap if they're not properly distributed. For consistently beautiful results, preparation is key. Finely grind or chop your botanicals before adding them to prevent clumping and sinking issues.
For ideal integration:
- Add botanical materials to your oils before introducing the lye solution, then mix thoroughly with a stick blender until evenly dispersed.
- Adjust your recipe's water content to accommodate moisture absorption from the additives.
- Test small batches with different concentrations to find the best amount for your soap batter.
Don't overblend while incorporating botanicals, as this may trigger rapid trace. The perfect balance ensures your soap batter maintains proper consistency while allowing your beautiful botanical materials to shine throughout each bar.
Managing Temperature Control for Flower-Infused Soaps
When working with floral oils in your soap, you'll need to avoid the bath temperature danger zone of 130°F and above where heat-sensitive botanical properties rapidly deteriorate.
You can preserve the integrity of flower infusions by maintaining both your lye solution and oils between 100-120°F throughout the mixing process.
Following cold process timing tips—like soaping at room temperature for delicate ingredients and using a reliable thermometer—will guarantee your botanical additions retain their beneficial properties rather than scorching in excessive heat.
Bath Temperature Danger Zone
Although many soapmakers focus on ingredients and molds, maintaining the proper temperature range between 100°F and 120°F stands as the critical factor determining success or failure with floral-infused soaps.
When you allow your bath temperature to drift outside this ideal range, you risk compromising the entire saponification process.
Always use a thermometer to verify both your lye solution and oils fall within the sweet spot before combining them. Working at cooler temperatures helps preserve delicate floral properties that high heat would destroy.
- Thickening soap batter too quickly often indicates you've worked at excessive temperatures
- Proper insulating of molds maintains consistent heat without causing overheating
- Unwanted textures like discoloration or grainy consistency typically result from temperature fluctuations during curing
Monitor temperature vigilantly—it's your best defense against botanical soap failures.
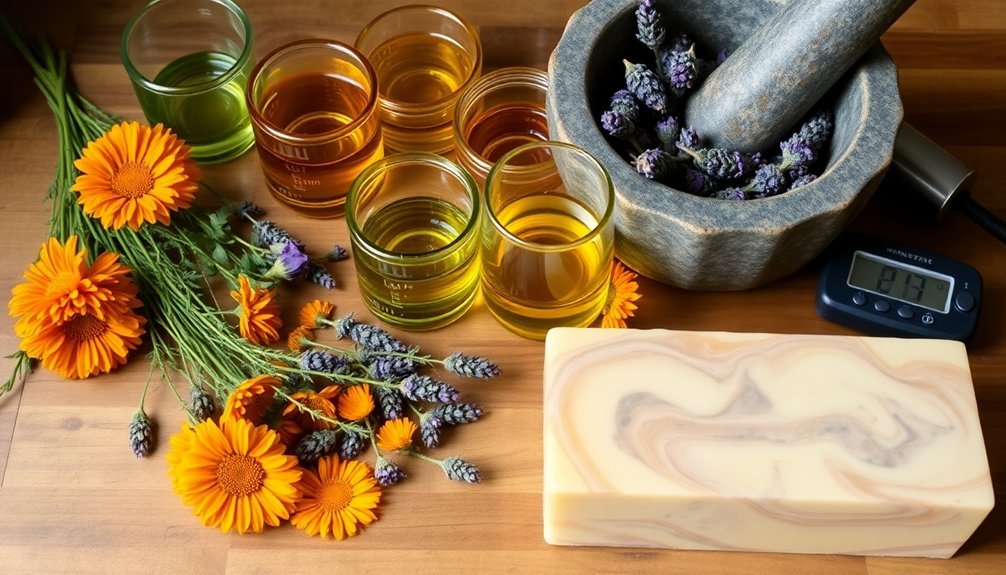
Heat-Sensitive Floral Oils
Three critical floral oils—jasmine, rose, and lavender—require special handling when incorporating them into your botanical soap recipes. These heat-sensitive floral oils can accelerate trace or cause ricing if your temperatures climb too high.
To master temperature control, pre-melt your base oils and combine them with your floral additions before introducing the lye solution. Keep both components below 120°F to preserve delicate scents.
| Oil Type | Temperature Sensitivity | Special Considerations |
|---|---|---|
| Jasmine | Very High | Add at light trace |
| Rose | High | Use water discount |
| Lavender | Medium | Works well in cold process |
| Neroli | Very High | Avoid full gel phase |
Consider implementing a water discount in your formula to reduce excess heat during saponification. The cold process method with controlled gel phase will help maintain the integrity of your botanical additives.
Cold Process Timing Tips
Building on our knowledge of heat-sensitive floral oils, the timing of each step in cold process soap making becomes a major factor in your success with botanical additions.
Maintaining temperatures between 100-120°F guarantees smooth saponification, especially when working with floral infusions that can affect thermal stability.
When creating flower-infused soap:
- Monitor temperatures consistently with a thermometer, adjusting insulation to encourage proper gel phase without overheating
- Select lighter oil blends to slow trace, giving you more working time to incorporate fragrance thoroughly
- Compensate for additional moisture from flower-infused liquids by reducing water content in your recipe
Remember that avoiding temperature fluctuations during curing is equally important—this prevents glycerin rivers and preserves the natural beauty of your botanical soap creations.
Preventing Mold and Spoilage in Natural Ingredient Soaps
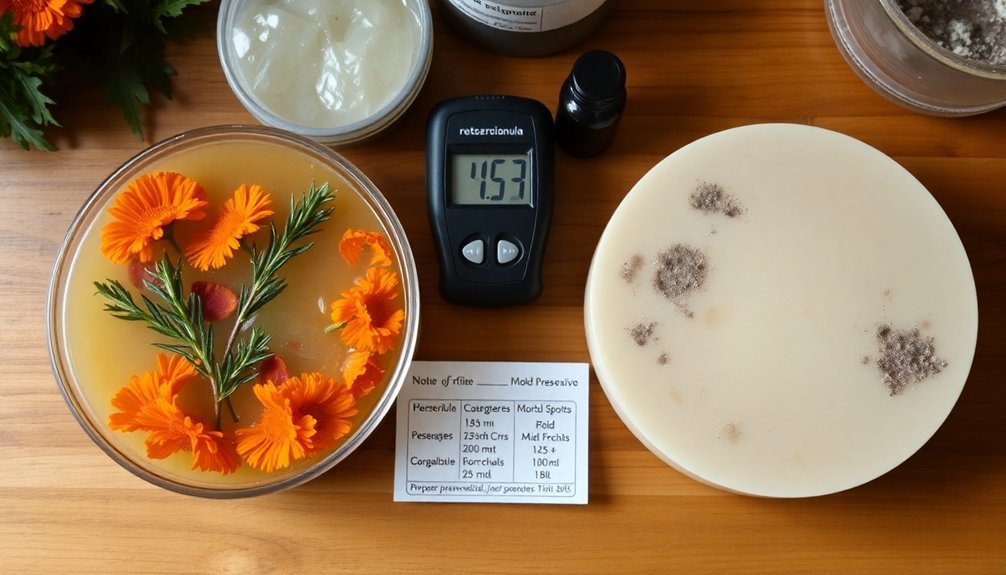
Creating natural soaps with botanical ingredients brings beauty and skin benefits, but these wholesome additions can present preservation challenges.
To prevent mold, maintain a proper water-to-oil ratio in your recipe—excess water creates the perfect environment for unwanted microbial growth.
Incorporate natural preservatives like vitamin E or rosemary extract to extend your soap's shelf life.
During the curing process, place your bars in a well-ventilated area with low humidity, allowing them to dry thoroughly.
Check your soaps regularly for discoloration or unusual odors and remove any affected bars immediately.
Once cured, store your botanical ingredients away from heat, moisture, and direct sunlight.
These simple practices will guarantee your handcrafted soaps remain beautiful and safe to use for months to come.
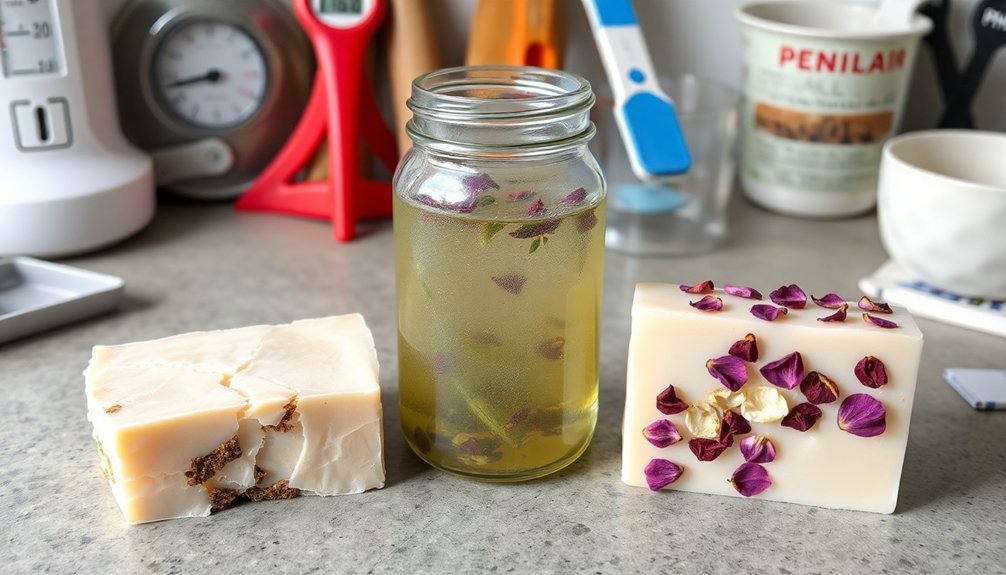
Treating Soda Ash Formation on Botanical Soap Surfaces
While handcrafted botanical soaps emerge from their molds with beautiful designs, they often develop a powdery white layer called soda ash that can diminish their visual appeal.
Soda ash forms when soap reacts with carbon dioxide during the curing process, especially in high humidity environments.
To prevent or minimize this common issue:
- Spritz freshly poured soap with rubbing alcohol to create a protective barrier between soap surfaces and air
- Increase the percentage of hard oils in your recipe for firmer soaps that resist soda ash formation
- Guarantee proper ventilation in your curing area to control humidity levels
If soda ash appears despite your preventive efforts, don't worry—you can gently scrape it off once your soap has fully cured, revealing the beautiful botanical design underneath.
Correcting Separation in Essential Oil Blends
When you notice your soap batter separating after adding essential oils, you're experiencing one of the most frustrating challenges in botanical soap making.
To prevent this issue, make certain your oils and lye solution are at similar temperatures (100-120°F), which promotes proper emulsification.
Use your stick blender to thoroughly incorporate essential oils until reaching light trace. This vital step maintains a homogenous mixture.
Select fragrance oil combinations known to blend well—check reviews to identify compatible options that won't cause separation or ricing.
If separation occurs after pouring, gently remix the soap in the mold with your stick blender.
Keep essential oil concentrations between 5-7% of total oils, as excessive amounts often lead to separation problems.
With these techniques, you'll create beautifully blended botanical soaps with consistent texture and scent distribution.
Addressing Scratchy Textures From Plant Materials
When adding botanical materials to your soap, you'll need to strain any infusions before pouring to remove larger particles that cause scratchy textures.
Proper particle size matters considerably—always grind herbs, flowers, or exfoliants to a fine powder that won't irritate skin during use.
Consider strategic material placement by incorporating botanicals only in the soap's top layer rather than throughout the entire batch if you're concerned about potential abrasiveness.
Strain Before Pouring
Although botanical ingredients add wonderful properties to handmade soaps, they often create an unpleasant, scratchy texture that can diminish the bathing experience. The solution is simple—strain your plant materials before pouring your soap batter into molds.
Using a fine mesh strainer or cheesecloth removes coarse particles that would otherwise make your finishing soap feel rough against the skin.
For the smoothest, most appealing bars:
- Strain all herbal infusions and botanical additives before adding them to your soap mixture
- Implement a two-step process of blending then straining to maximize beneficial properties while eliminating texture issues
- Use proper straining techniques to enhance both the feel and visual appeal of your soap by preventing unsightly clumps
This extra step guarantees your natural soap delivers the therapeutic benefits of botanicals without the scratchy drawbacks.
Proper Particle Size
Even the most exquisite botanical blends can ruin your soap if the particles are too coarse. To create luxurious texture in your botanical soaps, you'll need to focus on proper particle size—aim for under 1mm to prevent that scratchy, uncomfortable feeling against skin.
Use a high-quality grinder to process your botanical ingredients to a fine consistency. After grinding, sift the materials to remove any larger fragments that might create an abrasive effect.
For best results, incorporate these finely ground additives at lower concentrations. Before scaling up production, test small batches with different particle sizes to assess how they affect the final product.
This methodical approach guarantees you'll achieve a uniform particle size throughout your soap, delivering the botanical benefits without the scratchy drawback.
Strategic Material Placement
Three strategic placement techniques can transform potentially scratchy botanicals into luxurious soap elements.
Where you position botanical materials greatly affects their texture impact on the finished product. By strategically incorporating herbs and exfoliants at trace, you'll minimize their abrasive effect while maintaining their beneficial properties.
- Add botanicals to your soap after reaching trace, allowing them to suspend evenly rather than sink to the bottom where they might create rough patches.
- Reserve some materials for decorative top layers, providing visual appeal without affecting the soap's overall texture.
- Blend skin-soothing properties of ingredients like oatmeal or calendula with higher percentages of soft oils to create a balanced feel.
Before scaling production, conduct small batch tests with various placements to determine the ideal technique for your specific botanical materials.
Resolving Gel Phase Issues With Herb-Infused Recipes
When creating herb-infused soaps, you'll likely encounter gel phase challenges that can affect your final product's appearance and quality. Successful saponification requires temperatures between 100-120°F to achieve complete gel phase in your herb-infused recipes.
| Issue | Cause | Solution |
|---|---|---|
| Partial gel (dark ring) | Inconsistent temperature | Insulate soap mold with towels or place in 170°F oven |
| Soda ash formation | Incomplete gel phase | Add natural sugars (honey, fruit purees) to recipe |
| Poor texture | Rapid cooling process | Allow soap to cool slowly in an insulated environment |
To maximize your success, monitor the cooling process carefully. Don't rush this step—slow cooling improves aesthetics and texture. If you notice a dark ring forming, quickly move your soap to a warmer area to encourage complete gelling throughout the batch.
Frequently Asked Questions
Can You Speed up the Soap Curing Process?
You can't rush proper curing, but you'll speed up the process by using less water in recipes, ensuring good airflow, placing bars in dry areas, using fans, and cutting smaller bars.
How to Speed up Trace in Soap Making?
You can speed up trace by heating oils and lye to 100-120°F, using short bursts with your stick blender, adding more hard oils to your recipe, and reducing water content slightly while maintaining quality.
Why Is My Soap Not Hardening After a Week?
Your soap's not hardening likely due to excess water, too many soft oils, or insufficient curing time. Try reducing water content, adding harder oils like coconut, and ensuring proper ventilation during the 4-6 week cure.
What Is the Biggest Mistake First Time Soapmakers Make?
You're likely skipping proper research on lye safety and techniques. Without understanding the chemistry, you'll risk accidents and poor results. Always measure by weight, not volume, and master basic recipes before trying complex formulas.
In Summary
You'll find that most botanical soap issues have simple solutions once you understand the science behind them. With the right techniques, you can prevent discoloration, control acceleration, and achieve even distribution of your herbal additives. Don't let these common challenges discourage you—they're part of the learning process. Keep experimenting, take good notes, and you'll soon master the art of creating beautiful botanical soaps.


Leave a Reply