Wooden and silicone molds work best for cold process soap making because of their durability and practical benefits. You'll find wooden molds excel at insulation, promoting better gel phase development, while silicone offers flexibility and easy unmolding without additional lining. Both can handle the heat generated during saponification, unlike some plastic options that may warp. Beginners can also start with recycled containers like milk cartons, but exploring professional mold options will enhance your soap making journey.
Understanding Different Mold Materials for Cold Process
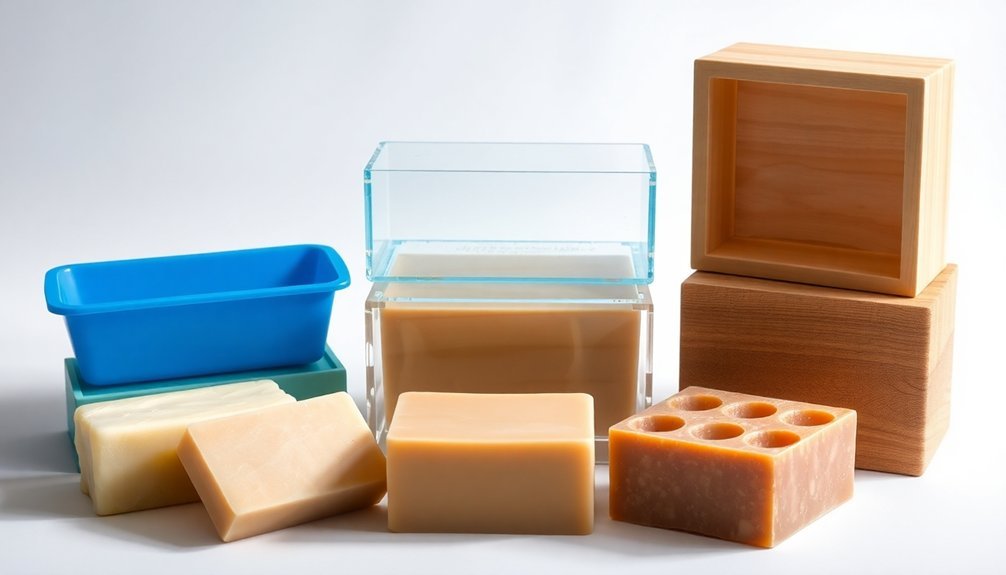
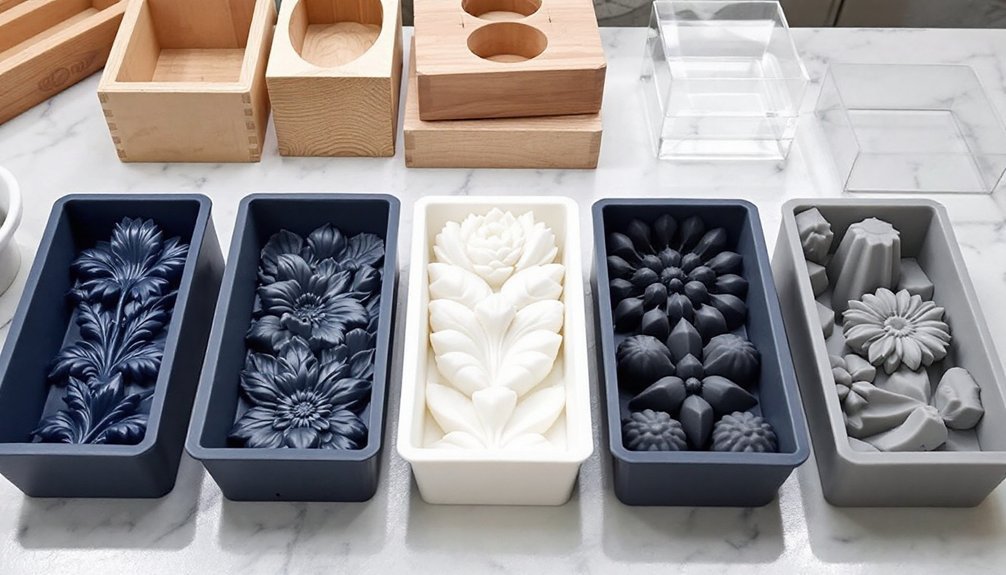
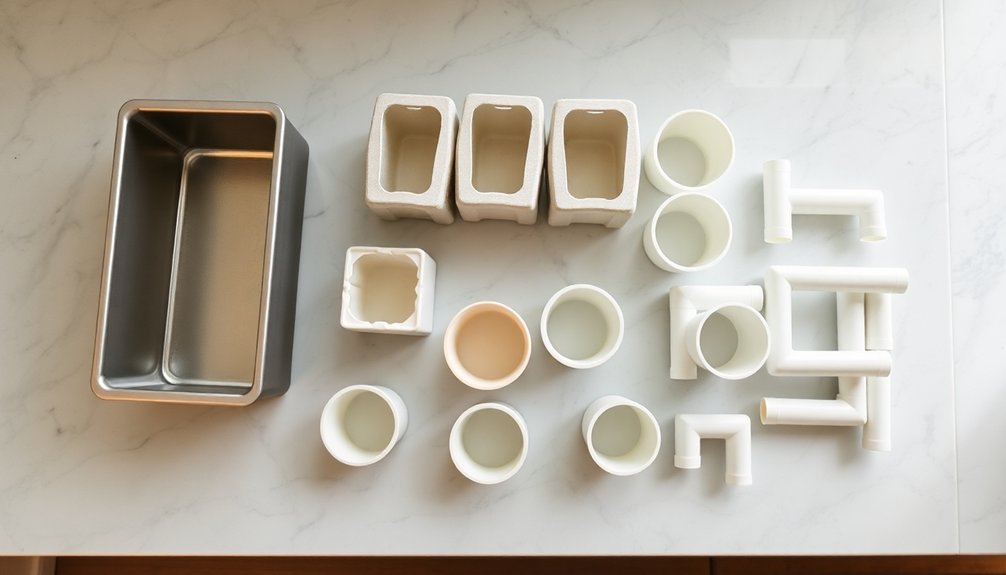
Selecting the right mold material for cold process soap can greatly impact your final product's quality and appearance. Each material offers distinct advantages that you'll want to evaluate for your specific needs.
You'll find silicone molds are highly popular due to their flexibility and easy unmolding properties, requiring no lining to produce professional bars.
Wood molds excel at insulation, helping achieve full gel phase, though you'll need to line them with freezer paper.
While plastic molds come in various designs, they're trickier to unmold and may need longer hardening time.
Custom molds from recycled containers provide cost-effective options for beginners.
For specific applications, HDPE molds might need lining depending on your formula, while acrylic molds let you monitor intricate designs during the process.
Each material brings unique benefits to your cold process soap making journey.
Benefits of Wooden Molds in Soap Making
Wooden molds stand out as exceptional tools for cold process soap making, offering superior insulation properties that promote ideal gel phase and saponification.
You'll find they're particularly versatile for both small and large-scale production, making them perfect for your soap making journey.
When you're working with wooden molds, you'll appreciate these key advantages:
- They provide excellent insulation that enhances gel phase development, resulting in higher-quality cold process soap.
- With proper lining with freezer paper, you'll achieve easy removal of your soap while protecting your mold's longevity.
- Custom wooden molds can be crafted to your exact specifications, letting you create unique soap sizes and designs.
These durable molds are a smart investment for your soap making venture, offering years of reliable service when properly maintained.
Silicone Molds: Advantages and Limitations
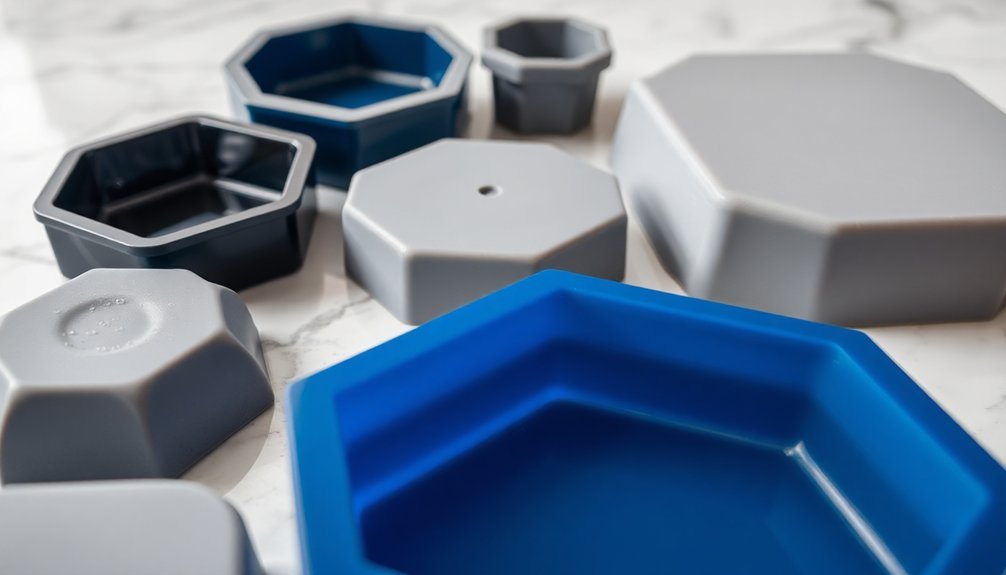
While many soap makers explore different mold options, silicone molds offer unique benefits that make them a popular choice for cold process soap making.
You'll find these molds particularly convenient due to their flexibility, which allows you to unmold your soaps without the hassle of additional lining.
When it comes to durability, silicone molds can last for years if you maintain them properly.
They're easy to clean and won't absorb lye, reducing contamination risks in your soap-making process.
While these molds typically take longer for soap to harden, you can speed up the process by adding sodium lactate to your recipe.
Just remember to avoid harsh scrubbing or dishwashing, as this can damage the mold's surface.
With proper care, you'll consistently produce professional-looking bars that release effortlessly.
Recycled Container Options for Soap Making
For soap makers seeking budget-friendly alternatives to silicone molds, recycled containers offer practical and environmentally conscious solutions.
You'll find that wax paper milk cartons and plastic yogurt containers make excellent choices for your soap making journey, especially when you're just starting out.
When selecting recycled containers for your molds, remember these essential points:
- Avoid containers with aluminum components, as they'll react negatively with your soap.
- Line your containers with freezer paper, wax paper, or plastic bags to guarantee easy unmolding.
- Choose containers that are readily available in your kitchen to support eco-friendly practices.
These versatile options not only save you money but also promote sustainable soap making.
They're particularly useful in teaching environments where specialized equipment isn't necessary.
Temperature Considerations for Various Mold Types
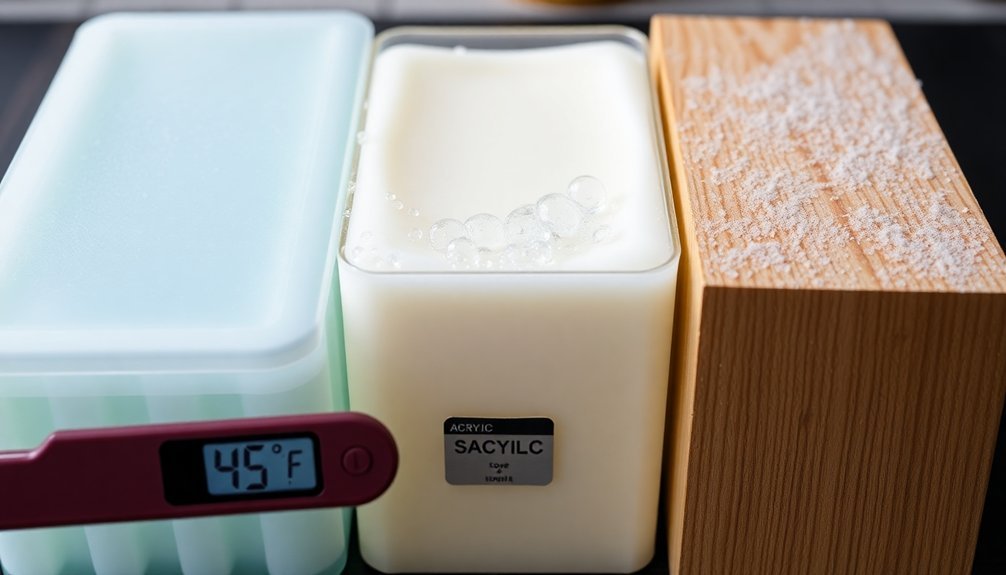
Understanding temperature management across different mold materials is essential for successful cold process soap making.
When you're working with silicone molds, you can safely heat up to 400°F, but you'll need careful temperature management to prevent soda ash formation.
Plastic molds require extra caution since they can warp above 140°F.
Wood molds are your best choice if you want to insulate your soap properly, as they naturally promote the gel phase and help achieve even coloring.
Wood molds provide superior insulation for soap making, naturally encouraging gel phase and ensuring consistent color throughout your bars.
HDPE molds handle heat well but might need lining depending on your recipe's heat generation during saponification.
If you're using acrylic molds, you'll appreciate the visibility they offer, but watch the temperature closely to prevent cracking or warping.
Each material has its temperature threshold, so match your mold choice to your specific recipe requirements.
Proper Lining Techniques for Different Materials
When choosing between freezer paper and parchment for lining your soap molds, you'll find freezer paper's waxy coating creates a superior non-stick barrier against caustic soap.
You'll want to position the shiny side of freezer paper facing the soap mixture, folding clean corners and securing edges to prevent any leaks that could compromise your soap's shape.
While parchment paper can work in a pinch, it's more likely to stick to your soap and won't provide the same moisture resistance as freezer paper, making it a less reliable option for cold process soaping.
Freezer Paper Vs Parchment
Choosing between freezer paper and parchment can greatly impact your soap's final appearance and ease of unmolding.
Freezer paper's plastic-coated side provides superior non-stick properties when lining molds, especially with its shiny side facing the soap. While parchment paper works well in silicone molds, it doesn't offer the same release properties as freezer paper.
When working with cold process soap, here's what you'll want to take into account:
- Freezer paper holds up better against the heat and moisture during saponification.
- For wooden and cardboard molds, freezer paper is essential to prevent sticking.
- Both materials need precise cutting, but freezer paper's secure fastening prevents leaks.
Remember to cut your chosen liner to size and secure it properly, especially when using freezer paper in wooden molds to avoid any potential leaks.
Preventing Soap Leaks
Proper lining techniques serve as your first defense against soap leaks, regardless of your chosen mold material.
When working with wooden molds, you'll need to line them with silicone or grease-proof paper to prevent leaks and guarantee easy removal. For cardboard molds, use freezer paper with the shiny side facing inward to create an effective barrier.
While silicone molds don't require lining due to their flexible nature, you'll want to keep them clean for peak performance.
If you're using plastic molds, line them with freezer paper or plastic bags, especially for detailed designs.
HDPE molds can work without lining if your recipe is well-balanced, but adding a liner helps assure smooth unmolding.
Remember that preventing leaks isn't just about keeping your workspace clean—it's essential for achieving professional-looking soap bars.
Calculating Mold Sizes and Soap Quantities
You'll need to master the basic formula for calculating soap mold volumes: multiply the length by width by height by 0.4 to determine the total oils needed for your batch.
When working with standard measurements, keep in mind that a 4-pound loaf mold typically accommodates 20 ounces of soap, which helps you plan your recipe quantities effectively.
For consistently sized bars, maintain a standard 1-inch thickness while calculating your measurements, adjusting your mold dimensions accordingly to achieve your desired batch size.
Standard Mold Volume Formulas
Calculating the correct mold volume is essential for successful cold process soap making. When you're working with different mold types, particularly silicone soap molds, you'll need to calculate the volume to guarantee you'll have enough finished soap for your project.
To determine your soapmaking molds' capacity, follow these simple steps:
- Multiply your mold's length x width x height (in inches)
- Multiply that result by 0.4 to account for lye and water
- Divide the total by your desired number of layers if making layered soap
For example, if you're using a mold measuring 8.25" x 6.375" x 1", you'll get approximately 21 ounces of soap.
Remember to use a digital scale for precise measurements of your ingredients, as this guarantees your cold process soap fills the mold perfectly.
Essential Weight Measurements
Precise weight measurements serve as the foundation for successful cold process soap making.
You'll need to calculate your soap molds' capacity using the formula: length x width x height x 0.4, which determines the total ounces of oils required. For standard bars with a 1-inch thickness, always use this height in your calculations.
When working with a digital kitchen scale, you can guarantee accurate weight measurements for your cold process soap.
Take, for instance, a mold measuring 8.25 x 6.375 x 1 inches – you'll need 21 ounces of oils to fill it properly. If you're creating three-layer soaps, divide your mixture into equal portions of about 6.7 ounces per layer.
This attention to precise measurements will help you achieve consistent, high-quality results every time.
Layer Thickness Guidelines
Building on proper weight measurements, understanding layer thickness guidelines helps create visually appealing multi-layered soaps.
When working with cold process soap, you'll need a digital kitchen scale to precisely measure your oils and sodium hydroxide for consistent results.
For successful layered soaps, follow these essential measurements:
- Calculate your total oils using Length x Width x Height x 0.4, with height typically being 1 inch.
- For a standard 8.25 x 6.375-inch mold, use 21 ounces of oils to allow space for other ingredients.
- Divide your soap batter evenly for each layer (approximately 6.7 ounces per layer in a three-layer design).
Your layer thickness will directly impact your soap's final appearance, so it's vital to maintain consistent measurements throughout the pouring process.
Storage and Maintenance of Soap Molds
Proper storage and maintenance of soap molds play an essential role in guaranteeing their longevity and consistent soap-making results.
When storing silicone molds, keep them in a cool, dry place, using racks or plastic bins to prevent warping from weight. You'll want to clean them thoroughly before storage to avoid soap or lye residue.
For wooden molds, line them with freezer paper and clean them right after use to maintain their durability. Don't let them soften over time from improper care.
With plastic molds, avoid placing heavy items on top and keep them away from high temperatures to prevent deformation.
Remember to regularly inspect all your molds for signs of wear. If you notice any damage, it's best to replace them to guarantee your soaps remain uncontaminated and professional-looking.
Custom Mold Creation and Design Tips
Creating custom soap molds opens up endless possibilities for unique designs while potentially reducing costs compared to commercial alternatives.
You'll find several effective approaches to crafting your own molds using custom silicone and upcycled materials.
- Start with silicone mold-making kits from craft suppliers – they provide everything you need to create professional-quality molds and include detailed instructions.
- Upcycle waste packaging like food containers by thoroughly cleaning them and using freezer paper to create a barrier that prevents soap from sticking.
- Learn from experienced crafters by engaging with online communities, where you'll discover valuable tips about working with custom silicone and troubleshooting common issues.
Consider sculpting your design in clay first to perfect the shape before creating your final mold.
This approach helps guarantee your finished product meets your expectations.
Insulation Properties of Different Materials
When choosing materials for cold process soap molds, understanding their insulation properties is crucial for achieving ideal saponification.
Wood molds offer superior natural insulation, promoting uniform heating and faster gel phase completion. You'll find they're highly effective at maintaining consistent temperatures throughout the curing process.
Wood's natural insulating properties make it the ideal choice for soap molds, ensuring even heat distribution and optimal gel phase results.
Silicone molds, while convenient, don't retain heat as effectively as wood. You'll need to take into account external insulation methods like towels or heating pads to achieve optimal results.
Plastic molds present the biggest challenge due to their poor insulation properties, often requiring additional measures to prevent issues like soda ash and guarantee proper gelling.
If you're using HDPE molds, know that their insulation effectiveness varies based on thickness.
For both silicone and plastic options, you'll want to implement supplementary insulation techniques to enhance your soap's overall quality.
Unmolding Techniques for Various Materials
Different mold materials require specific unmolding techniques to secure your soap comes out perfectly intact.
Silicone molds offer the easiest unmolding process, as their flexibility allows you to simply bend and pop out your creations.
When working with rigid molds like plastic or acrylic molds, you'll need extra care to prevent sticking.
Here's what you need to know about unmolding from different materials:
- Wooden molds require freezer paper lining to protect the wood and facilitate easy removal.
- Plastic molds work best when treated with mineral oil or cosmetic silicone before pouring.
- Acrylic molds need gentle flexing and occasional tool assistance to release intricate designs.
If you're using recycled containers, don't forget to line them with freezer paper, and consider placing them in the freezer briefly for easier unmolding.
Professional-Grade Mold Selection Guide
When selecting professional-grade soap molds, you'll need to weigh each material's durability against its heat resistance capabilities.
Silicone molds offer superior flexibility and longevity but may not insulate as effectively as wooden molds, which can withstand high temperatures during the gel phase.
Your choice between plastic, wood, silicone, or custom HDPE molds should factor in both your production volume and whether you'll be working with high-temperature techniques that could warp or damage less heat-resistant materials.
Mold Durability Factors
Understanding mold durability factors is essential for professional soap makers who need reliable, long-lasting equipment for consistent production.
When evaluating soap making molds, you'll find that material choice greatly impacts longevity and performance.
- Silicone molds and HDPE molds offer superior durability, with silicone providing excellent flexibility for unmolding and HDPE delivering robust performance for larger batches.
- Wooden molds demonstrate lasting durability when properly maintained, though they require lining and regular care to prevent degradation.
- While plastic molds are budget-friendly, they're less durable due to potential warping, making acrylic molds a better investment for long-term use despite requiring careful handling.
Select your mold material based on your production volume, soap formula, and maintenance preferences to guarantee ideal durability and consistent results.
Heat Resistance Comparison
How well your soap molds handle heat can make or break your cold process production success.
When comparing heat resistance across materials, silicone molds excel with their impressive 400°F melting point, ensuring they'll maintain their shape throughout the saponification process.
Wood molds offer natural insulation that's perfect for cold process soaping, as they help maintain consistent temperatures during the critical gel phase.
While plastic molds might warp above 140°F, HDPE molds provide better heat resistance for cold process applications, though you'll want to line them properly.
Acrylic molds, while offering great visibility, aren't your best choice for high-temperature processes.
For best results, consider silicone or wood molds as your primary options, especially when working with recipes that generate significant heat during saponification.
Troubleshooting Common Mold Issues
Each type of soap mold presents its own unique challenges that can affect your final product's quality and appearance.
You'll need specific solutions for different materials to guarantee successful unmolding and prevent common issues.
Here are key troubleshooting tips for various mold types:
- For silicone molds: Add sodium lactate to speed up hardening, as these flexible molds can slow down the setting process.
- With plastic molds: Combat soda ash by spritzing with alcohol, and if soap sticks after a week, try freezing the soap briefly for easier removal.
- When using wooden molds: Always focus on proper lining your mold with freezer paper to prevent sticking and protect the wood from deterioration caused by raw soap.
For any stubborn mold, remember that freezing the soap for a short time can be your best solution for trouble-free removal.
Frequently Asked Questions
What Is the Best Mold for Cold Process Soap?
You'll find silicone molds are your best choice for cold process soap making. They're flexible, durable, and easy to unmold. Plus, you won't need to line them, making the process smoother and more professional.
What Is the Best Material to Make a Mold With?
You'll find silicone is your best choice for making molds. It's flexible, durable, and non-stick. Plus, you can easily create custom shapes while ensuring your finished products release smoothly every time.
Can You Use Silicone Molds for Cold Process Soap?
Yes, you can definitely use silicone molds for cold process soap. They're ideal because they're flexible, durable, and make unmolding easy. You'll get professional-looking bars, and they'll last for years with proper care.
What Can You Use as Soap Molds?
You can use silicone molds, plastic containers, wooden boxes, or recycled materials like milk cartons for soap making. Silicone's the most popular choice since it's flexible and won't stick to your soap.
In Summary
Choose your mold material based on your specific needs and soap-making goals. You'll find that wooden molds provide excellent insulation and durability, while silicone offers flexibility and easy unmolding. If you're just starting out, you can't go wrong with HDPE plastic containers. Remember to take into account factors like batch size, gel phase requirements, and cleanup when selecting your mold material. Make sure it's properly lined and sealed before use.


Leave a Reply