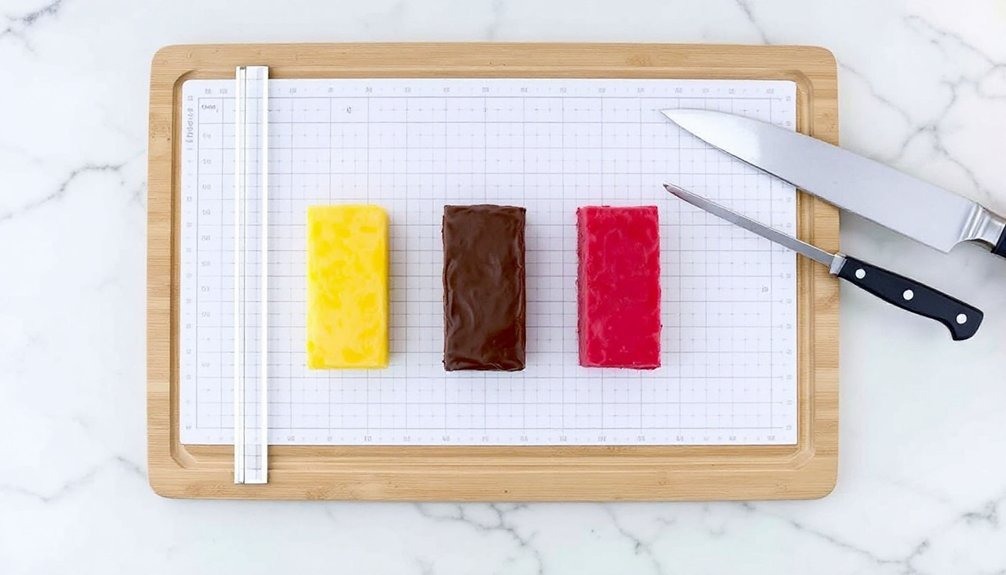
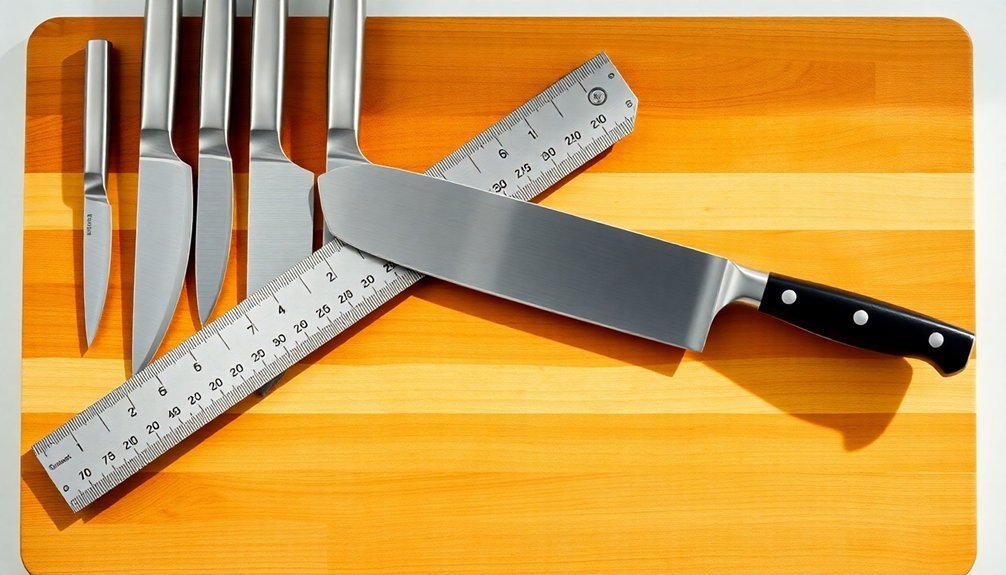
Use a bench scraper and sharp Santoku knife for superior control when cutting bar cookies. Line your pan with parchment, then measure and mark equal sections with a ruler before scoring guidelines. Chill bars for 30-60 minutes and maintain a hot, clean blade between cuts. You'll need a 90-degree angle and steady pressure for clean edges. These professional techniques are just the beginning of your journey to bakery-worthy precision.
Essential Tools and Equipment Setup
While achieving perfectly uniform dessert bars might seem challenging, having the right tools and setup makes all the difference.
You'll need a bench scraper for its superior cutting control and a sharp knife, preferably a Santoku, for precise slicing. Don't forget to grab a plastic knife as well, as it's particularly useful for bars that tend to stick.
Before you start cutting, line your baking pan with non-stick foil or parchment paper – this step's essential for easy removal later.
Lining your pan with non-stick foil or parchment isn't optional – it's your ticket to hassle-free dessert bar removal.
Keep a small offset spatula nearby to spread your cookie dough evenly in the pan, ensuring consistent thickness throughout.
Finally, have a ruler or straight-edge ready to mark your desired slice widths directly on the pan, guaranteeing perfectly uniform portions every time.
Measuring and Marking Your Guidelines
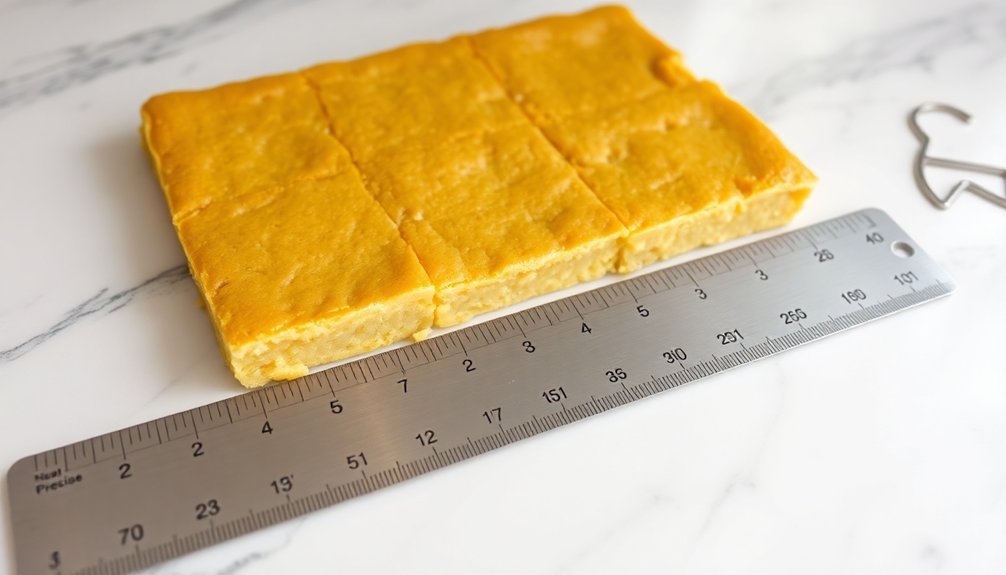
Before diving into the actual cutting, precise measurements and clear guidelines are your key to achieving perfectly uniform bars. Start by using a ruler to measure and mark your desired slice widths along the pan's edge. You'll want to create visual guidelines that guarantee consistent sizing throughout your cutting process.
For square bars on your cutting board, divide the pan into equal sections by making horizontal and vertical halves, then continue subdividing each portion. You can use a bench scraper as a straight edge to enhance the accuracy of your guidelines.
To make the cutting lines more visible, lightly score the surface with your knife or use a toothpick to create clear markers. These guidelines will serve as your roadmap when you're ready to make the final cuts.
Preparing Bars for Clean Cuts
The secret to pristine bar cuts starts well before you pick up your knife. To achieve perfectly sliced dessert bars, you'll need to take into account several essential preparation steps that make all the difference.
Perfect dessert bar slices begin with proper preparation. Every flawless cut depends on the steps you take before the knife touches your bars.
Line your baking pan with parchment paper or non-stick foil, extending it up the sides. This simple step guarantees easy removal and prevents your bars from sticking.
Once baked, let them cool thoroughly on a cooling rack, followed by a 30-minute chill in the refrigerator.
Here's your pre-cutting checklist:
- Set your bars on a stable cutting surface
- Have a clean, sharp knife ready
- Keep a damp cloth nearby for wiping the blade between cuts
- Make sure your ruler or straight-edge is within reach
These preparation steps will help you achieve professional-looking cuts that'll make your dessert bars showcase-worthy.
Proper Knife Selection and Care
Your knives need razor-sharp edges to achieve clean, precise cuts in bars and brownies, so invest in quality tools like the Wusthof Classic Santoku or a sturdy plastic knife for sticky desserts.
Keep your blades in top condition by wiping them clean between cuts and storing them properly to prevent dulling or damage.
Consider expanding your cutting arsenal with specialized tools like a bench scraper, which can help you create perfectly straight edges while maintaining consistent bar sizes.
Sharp Tools Matter Most
When crafting perfect cookie bars or brownies, sharp tools make all the difference between clean, professional-looking cuts and messy, crumbled edges.
You'll want to choose a sharp knife like a Santoku or Wusthof Classic to achieve those precise, clean cuts you're after.
Keep your tools in top condition for the best results:
- Hone and sharpen your knife regularly to maintain its cutting edge
- Clean your blade with hot water after each cut to prevent residue buildup
- Use a downward pressing motion instead of sawing to create cleaner slices
- Consider adding a bench scraper to your toolkit for better control and even cuts
Daily Knife Maintenance Tips
Building on the importance of sharp tools, proper knife selection and daily maintenance form the backbone of consistent, professional-quality cuts.
Start by investing in essential knives: a chef's knife, paring knife, and serrated knife. You'll want to hone your blades regularly with a honing rod to maintain their sharp edges and guarantee precise cuts.
After each use, wash your knives with warm soapy water and dry them thoroughly to prevent rust and deterioration.
Store your knives properly using a knife block, magnetic strip, or protective sheaths. This prevents unnecessary contact with other utensils that could dull or damage the blades.
Don't forget to schedule regular sharpening sessions, either using a whetstone or professional service. These simple maintenance habits will extend your knives' lifespan and keep them performing at their best.
Choose Your Blade Wisely
The right knife selection can make or break your dessert bar presentation. When you're ready to cut those perfect squares, reach for a Santoku knife to cut through your treats with precision.
If you're looking for an alternative, a bench scraper provides excellent control and consistently straight edges.
For the cleanest results, consider these essential techniques:
- Run your blade under hot water before slicing to prevent sticking
- Wipe the knife clean between each cut with a damp cloth
- Apply even pressure across the entire cutting surface
- Test different blade types to find what works best for your specific recipe
Mastering the Perfect Cutting Angle
Hold your knife at a precise 90-degree angle to achieve clean, professional-looking cuts in your bars.
You'll want to position straight-edge guides along your pre-marked measurements to keep your blade aligned throughout each slice. Maintaining this proper angle while using controlled, downward pressure will help you create consistently sized portions without the common problem of crumbling edges.
Knife Positioning Essentials
Mastering proper knife positioning stands as the cornerstone of achieving perfectly uniform bar cuts. When you're ready to cut down the middle of your bars, adopt a pinch grip by placing your thumb and forefinger on the blade for ideal control. This technique, combined with maintaining a consistent 20-30 degree angle, guarantees clean, precise cuts every time.
- Hold the knife with your dominant hand using the pinch grip method
- Position your guide hand in a protective claw grip to stabilize the bar
- Keep the knife tip anchored while using a smooth rocking motion
- Maintain the blade perpendicular to your cutting surface
Remember to apply steady, even pressure throughout each cut. This balanced approach prevents the bars from crumbling or becoming uneven, delivering professional-looking results that will impress your guests.
Measuring Guide Placement Techniques
Precise measuring guide placement transforms chaotic cutting into a streamlined process for achieving flawless bar portions.
You'll want to start by marking equal measurements along your pan's edge using a ruler, creating a reliable template for your cuts.
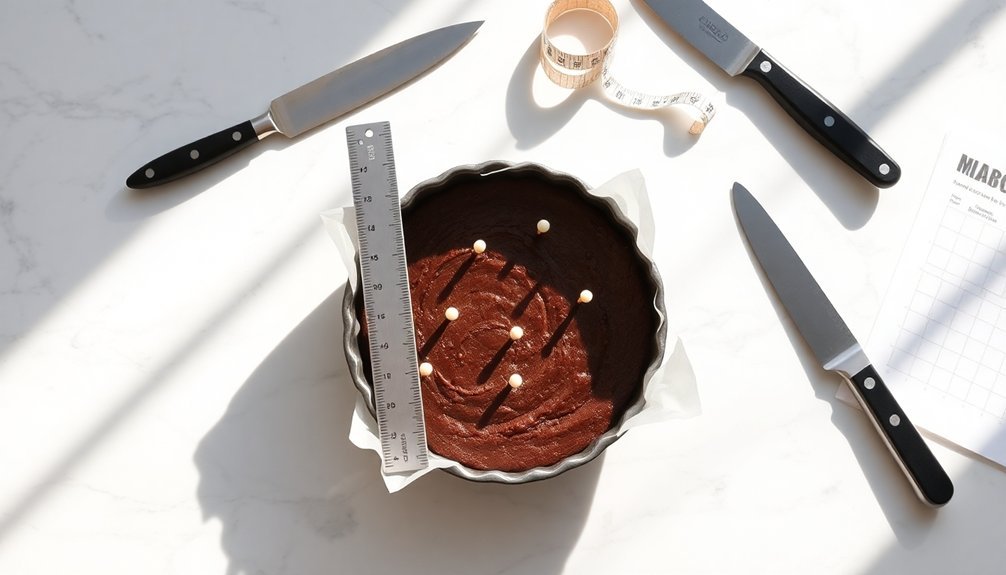
Position your measuring guide parallel to the pan's edge to establish a consistent cutting angle. Before the bars cool completely, score the surface lightly with your knife – this creates visual guidelines you'll follow for your final cuts.
When you're ready to cut brownies, use a bench scraper or large knife, pressing straight down along the measuring guide rather than sawing back and forth. Keep checking your measurements as you progress, making adjustments to maintain uniform sizing.
This systematic approach guarantees each slice meets your intended dimensions with professional precision.
Temperature Control for Optimal Results
Temperature plays an essential role in achieving perfectly cut dessert bars, with proper cooling being the key to success.
Proper temperature control and cooling procedures are crucial steps for creating beautifully cut, professional-looking dessert bars.
You'll find that proper temperature control guarantees your bars maintain their shape and structure during cutting. For the best results, let your bars cool completely on a rack before applying any chilling techniques.
For ideal temperature control and clean cuts, follow these steps:
- Chill your bars in the refrigerator for at least 30 minutes before cutting
- For gooey desserts like brownies or cheesecakes, extend refrigeration time to 1 hour
- Run your knife under hot water between cuts for smoother slicing
- Keep your kitchen at a consistent temperature to prevent layered desserts from melting
Adjustable Guide Rail Techniques
When you're aiming for perfectly uniform dessert bars, adjustable guide rails become your most valuable cutting tool. These precision instruments guarantee consistent results by eliminating guesswork and uneven cuts that often occur with freehand techniques.
| Feature | Benefit |
|---|---|
| Built-in Markings | Quick measurement setup |
| Stability Design | Prevents pan movement |
| Adjustable Width | Guarantees uniform bar sizes |
| Pan Lock System | Keeps workspace secure |
You'll find that investing in a quality guide rail system transforms your baking routine. The built-in measurement markings let you quickly set your desired width, while the stabilizing features hold your pan firmly in place. Whether you're preparing small batches or large quantities, you'll achieve professional-looking results every time. This efficiency boost makes the investment worthwhile for any serious baker.
Multi-Bar Batch Cutting Strategies
You'll save significant time by organizing your batch into a precise grid pattern before making any cuts, ensuring each section will yield identical bar sizes.
Position multiple bars in parallel rows, creating alignment markers at consistent intervals to guide your cuts across the entire batch simultaneously.
Grid-Based Batch Division
Creating perfectly uniform dessert bars starts with a strategic grid-based approach to batch cutting. You'll need to establish clear measurements before making your first cut. For an 8×8 pan, divide into 16 equal squares, while a 13×9 pan works best with six columns at 2 1/10 inches each.
- Place your ruler directly on the surface and mark your cutting lines.
- Position your bench scraper or sharp knife along the grid marks.
- Make one cut using steady, downward pressure.
- Lift finished bars using parchment paper for clean removal.
When cutting dessert bars, maintain consistency by following your measured grid lines precisely. The up-and-down cutting motion prevents dragging and creates cleaner edges with minimal crumbs.
This systematic approach guarantees each piece looks professional and maintains its shape during serving.
Multiple Bar Alignment
Three key elements make multi-bar batch cutting both efficient and precise.
First, you'll want to position your baking pans side by side on a stable surface, ensuring they're identical in size to maintain uniform dimensions.
Second, chill your bars for 30 minutes before cutting to make them firm enough for clean, precise cuts.
To execute perfect cuts across multiple bars, mark your cutting lines with a ruler on top of the bars.
Then, use a long, sharp knife or bench scraper to slice through all pans simultaneously.
For enhanced accuracy, you can make your cuts using a cutting guide or a notched board that matches your desired bar sizes.
This approach will save you time while ensuring consistently sized portions across all your batches.
Quick Mass-Cutting Techniques
Mastering quick mass-cutting techniques starts with proper preparation. For best results when cutting bars in bulk, chill them in the refrigerator for 30 minutes to achieve the right consistency. A bench scraper becomes your best ally for creating uniform squares with minimal crumbling.
- Mark your cutting lines with a ruler before slicing
- Score the surface lightly to create guide marks
- Divide 8×8 pans into halves both ways to form a grid
- Use long, clean strokes with your bench scraper
These strategic steps make mass-cutting more efficient and precise. By following this systematic approach, you'll transform larger batches into perfectly portioned pieces.
The combination of proper chilling time and precise measuring guarantees professional-looking results every time you're cutting multiple bars.
Edge Finishing and Trimming Methods
When you've finished cutting your bars, proper edge finishing can transform them from homemade treats to professional-looking delicacies.
Start by examining your bars' edges for any uneven or crumbly sections that need trimming. Using a sharp knife or bench scraper, carefully remove these imperfections while maintaining the bars' structural integrity.
For precise results, measure and mark your desired edge thickness before making any cuts. If you notice burnt or overly crispy edges, don't hesitate to slice them off – this will enhance both appearance and taste.
After trimming, you can smooth any remaining rough spots with a small offset spatula. This tool's also perfect for repositioning your bars on serving platters, ensuring they're perfectly aligned for an elegant presentation that'll impress your guests.
Storage and Maintenance of Cutting Tools
Proper storage and maintenance of your cutting tools directly impacts the quality of your bar cuts and the longevity of your equipment.
Taking care of your cutting tools isn't just about longevity – it's about maintaining quality and precision in every slice you make.
Whether you're using a serrated knife or other cutting implements, following proper care guidelines guarantees consistent, professional results.
- Store your tools in a dedicated knife block or magnetic strip to protect edges and prevent accidents.
- Use a honing steel regularly to maintain blade alignment and keep edges sharp.
- Clean immediately after use with warm, soapy water and dry thoroughly to prevent rusting.
- Always cut on wood or plastic boards, never on glass or stone surfaces.
Remember to inspect your cutting tools periodically for signs of wear or damage.
When you notice decreased performance or visible issues, it's time to replace them to maintain safety and cutting precision in your bar preparation work.
Frequently Asked Questions
How to Cut Bars Neatly?
You'll get neat bar slices if you let them cool fully, chill for 30 minutes, use a ruler to mark even sections, and cut with a clean, sharp knife that's wiped between slices.
How to Cut 24 Bars in a 9×13 Pan?
You'll need to mark your 9×13 pan in 2-inch intervals. First, cut three long rows lengthwise, creating 12 rectangles. Then cut each rectangle in half to make 24 equal-sized bars.
How to Cut Ooey Gooey Bars?
You'll need to chill your bars for 30 minutes, then use a hot, clean knife for each cut. Wipe the blade between slices, and lightly score the top first. This guarantees clean, even portions.
What Is the Trick to Cutting Lemon Bars?
You'll get perfect lemon bar cuts by chilling them first, using a hot knife dipped in water between slices, and scoring guidelines while they're cooling. Don't forget to line your pan with parchment paper.
In Summary
Now you're equipped with expert cutting guide techniques to create perfectly uniform bars every time. Keep your tools sharp, measurements precise, and cutting guides properly maintained. Whether you're batch cutting or working on individual pieces, these hacks will help you achieve professional results consistently. Remember to always prioritize safety and cleanliness while implementing these time-saving methods in your kitchen or workspace.


Leave a Reply