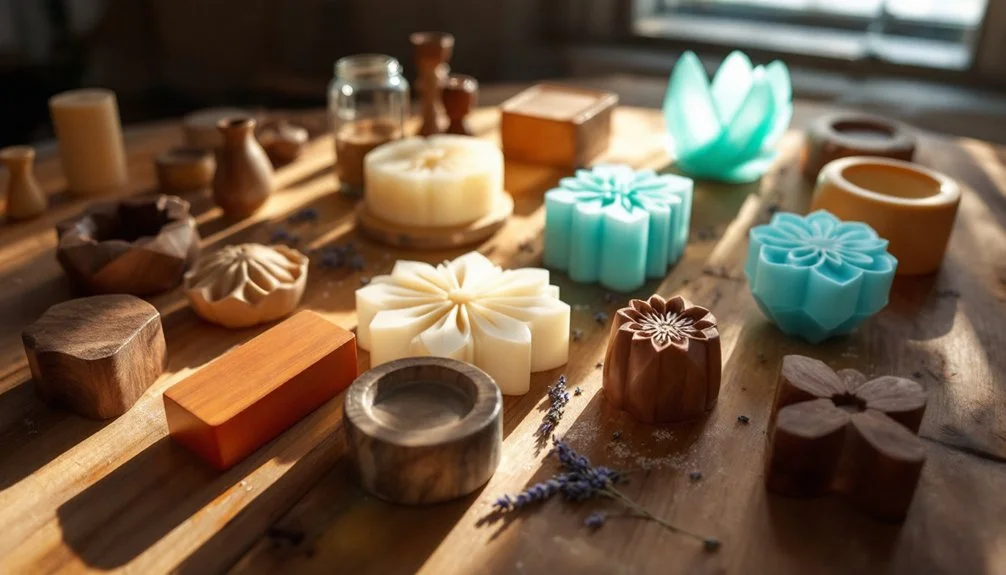
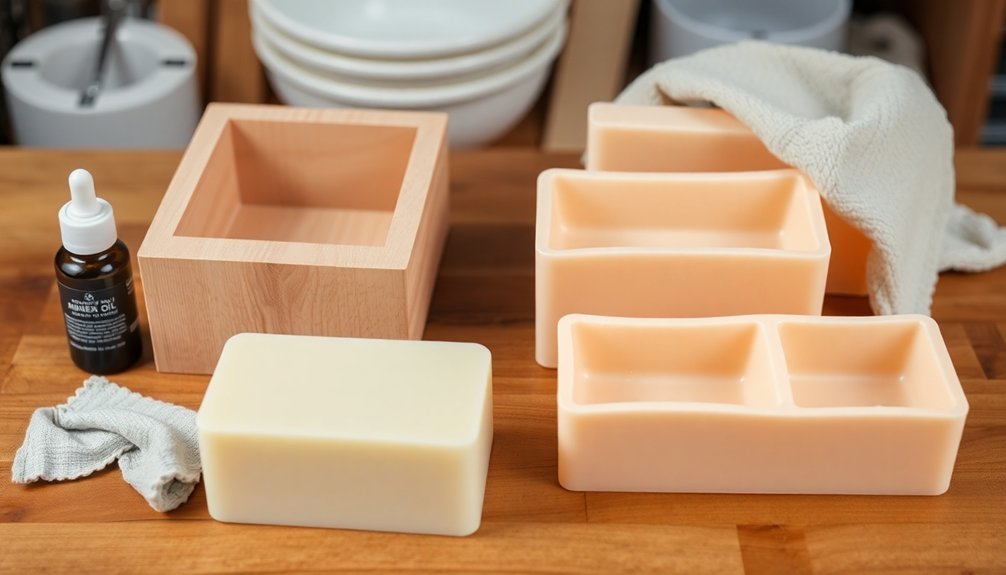
You'll find both wooden and silicone molds offer distinct advantages for CP soap making. Wooden molds, especially those made from poplar or Baltic birch plywood, provide superior insulation and heat retention for ideal gel phase. Silicone molds offer non-stick convenience, easy cleanup, and intricate design possibilities. For beginners, start with a basic loaf-style wooden mold lined with freezer paper or a simple silicone mold. Understanding each type's unique benefits will transform your soaping journey.
Understanding Different Types of Soap Molds
When choosing soap molds for cold process (CP) soap making, you'll primarily encounter two main types: wooden and silicone molds.
Wooden molds, often made from poplar or Baltic birch plywood, provide excellent insulation properties that help achieve a complete gel phase during saponification. You'll need to line them with freezer paper or similar materials to prevent sticking.
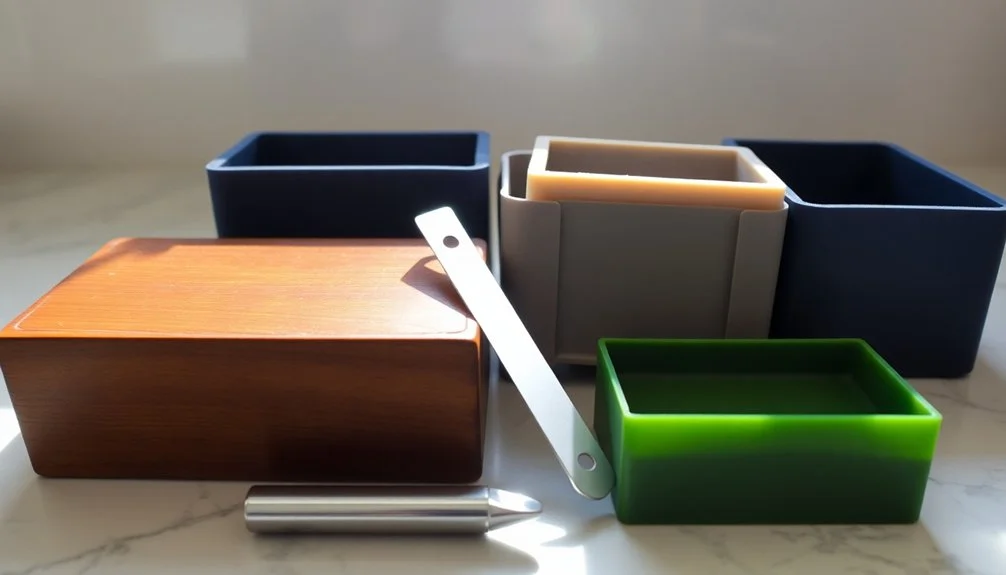
Silicone molds offer a different set of advantages. They're flexible, non-stick, and heat-resistant, eliminating the need for liners. You can find them in various shapes and sizes, from basic loaf molds to intricate designs. The non-stick feature makes them especially convenient for unmolding soaps without damage to detailed patterns.
While wooden molds excel in heat retention and customizability, silicone molds win at ease of use and quick unmolding. Your choice between the two will depend on your specific needs, batch size, and desired soap designs.
Benefits of Silicone Molds in CP Soap Making
When you're making CP soap, silicone molds offer unmatched benefits with their non-stick surface that lets you easily release and clean your creations without hassle.
You'll appreciate how these molds maintain consistent temperatures during the curing process, preventing warping or melting that can occur with other materials.
The flexible nature of silicone also allows for intricate designs and patterns that will give your soaps a professional, detailed finish while ensuring they pop out perfectly every time. Their eco-friendly characteristics make them a sustainable choice as they can be reused indefinitely, reducing waste compared to disposable alternatives.
Easy Release and Cleaning
Among the many advantages of silicone molds, their easy release properties and simple cleaning make them a top choice for cold process soap making.
You'll find that removing soap is effortless – just gently tug the sides and push from the bottom. For even smoother release, you can spray a light mist of alcohol or silicone release agent.
Cleaning these molds couldn't be simpler. Hot water and dish soap are all you need, and you won't have to worry about lining or prepping the molds beforehand. The food-grade silicone material ensures safe contact with your soaps while maintaining excellent durability.
Just avoid harsh chemicals or abrasive tools that could damage the silicone. Hand washing is your best bet for maintaining the mold's integrity.
The non-stick surface means soap residue washes away easily, often requiring just a quick rinse to restore the mold to pristine condition.
Temperature Control Benefits
Silicone molds excel in temperature control, making them invaluable for cold process soap making – especially if you're using the CPOP method. They can withstand temperatures up to 200°F (93°C), maintaining their shape and integrity throughout the process.
You'll appreciate how silicone molds distribute heat evenly during gel phase, reducing the risk of partial gelling and hot spots. This consistent heat distribution helps prevent common issues like glycerine rivers and 'alien brains,' particularly in low-water recipes. Smaller soap molds allow heat to dissipate more effectively, providing better control over the saponification process.
When using CPOP, you'll find that silicone molds help lock in fragrances better and accelerate the curing process.
However, watch out for silicone rash – you can prevent this by ensuring your soap batter has properly set before oven processing and by maintaining appropriate temperatures throughout the process.
Design Flexibility Matters
Whether you're aiming for classic bars or artistic designs, the versatility of silicone molds transforms your soap making possibilities. You'll find over 400 different designs, from simple rectangles to intricate patterns, helping you create unique and visually appealing soaps. Though soap may take more time to harden, the quality results are worth the wait.
| Feature | Benefit | Result |
|---|---|---|
| Flexible Material | Easy unmolding | Clean corners |
| No Lining Needed | Time-saving | Professional finish |
| Food-grade Silicone | Long-lasting | Cost-effective |
| Heat Resistant | Multiple techniques | Versatile use |
| Glossy Interior | Smooth surface | Premium look |
The design flexibility of silicone molds extends beyond just shapes. You'll appreciate how these molds deliver consistent results while being easy to clean and maintain. Their durability guarantees years of use, making them an excellent investment for both hobbyist and professional soap makers.
Top-Rated Silicone Molds for Artisanal Soaps
When crafting artisanal soaps, choosing the right silicone mold can make or break your creative process.
You'll find excellent options like the Ozera 6 Cavity Mold, which offers durability and easy unmolding at $9.99 for two molds.
If you're looking to create decorative soaps, consider Baker Depot's Rose Molds with their intricate petal details, or X-Haibei's Mooncake Molds for unique scalloped edges.
Both options are made from high-quality food-grade silicone and withstand temperatures from -40°F to over 440°F.
For larger batches, you can't go wrong with Moukiween's 12 Cavity Round Mold.
It's lightweight, features thick BPA-free silicone, and produces perfectly sized 1.9" diameter bars that pop out effortlessly.
The mold's temperature range extends from -104°F to +446°F.
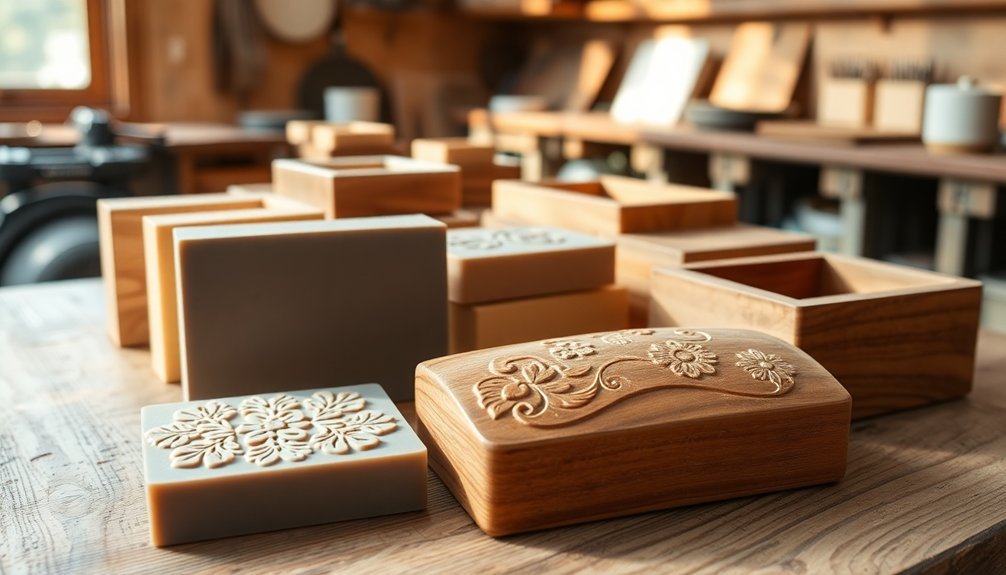
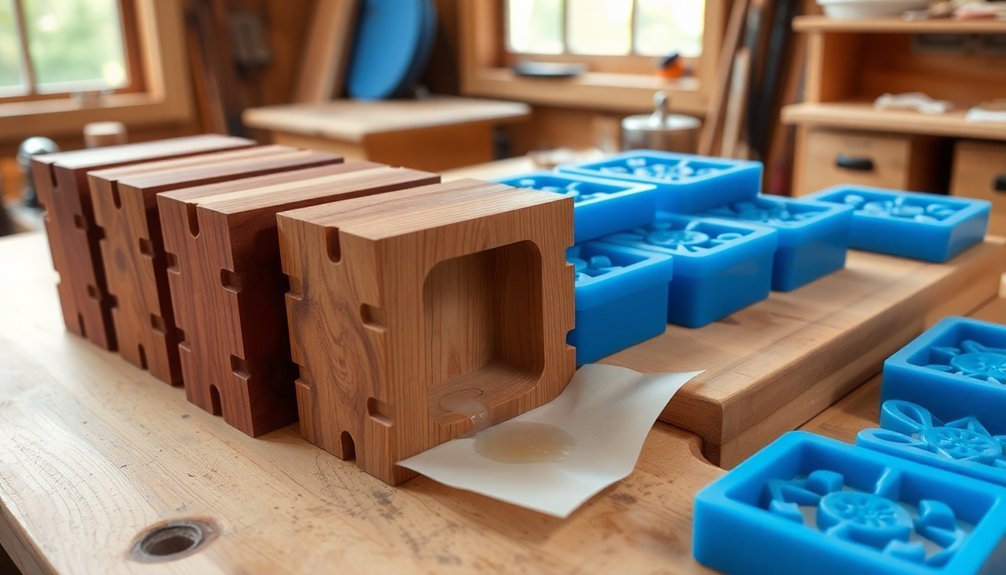
Wooden Mold Advantages for Cold Process Soaps
While silicone molds offer flexibility, wooden molds stand out as powerhouses for cold process soap making.
You'll find their natural insulation properties perfect for achieving complete gel phase without additional heating pads. They're particularly effective for CPOP techniques, handling temperatures up to 75°C while maintaining structural integrity.
When you're working with wooden molds, you'll benefit from these key advantages:
- Superior heat retention that guarantees uniform cooling and ideal gel phase development
- Exceptional durability with years of reliable use when properly maintained
- Versatility for various soaping techniques, especially CPOP methods
- Easy maintenance with simple freezer paper lining for clean releases
For the best results, you'll want to use high-quality Birch plywood and guarantee proper assembly with metal hardware.
Just remember to mark your assembly points and keep the wood well-dried to prevent warping.
Essential Features of Quality Wooden Soap Molds
When choosing a wooden soap mold, you'll want to focus on robust construction features like removable ends and integrated cutting slots that make the demolding process easier.
Quality wooden molds should be crafted from untreated hardwoods like poplar or top-grade birch plywood to guarantee durability and proper insulation.
Your mold needs proper moisture protection through appropriate lining materials, such as freezer paper or silicone inserts, to prevent the soap from sticking and protect the wood from deterioration.
Construction and Design Elements
A well-constructed wooden soap mold combines essential design elements that maximize both functionality and durability.
You'll want to focus on features that make soap-making easier and more efficient while ensuring your mold lasts for many batches.
Key construction elements should include:
- Removable ends and bottoms that allow for easy soap removal without damaging your finished product
- Integrated cutting slots or notches along the edges for precise bar measurements
- Adjustable width and length components that accommodate different batch sizes
- Design compatibility with silicone liners or impression mats for pattern creation
When selecting your mold, look for hardwoods like poplar or non-treated pine that provide excellent insulation.
The best designs come almost completely apart for convenient storage and cleaning, while still maintaining structural integrity during the curing process.
Moisture Protection Properties
Proper moisture protection stands as one of the most critical features in quality wooden soap molds. You'll find that non-treated pine and birch plywood offer superior moisture resistance while maintaining excellent insulation properties. When choosing your mold, look for high-quality wood that's free from chemical treatments that could react with your soap.
| Feature | Benefit | Maintenance |
|---|---|---|
| Natural Wood | Chemical-free | Regular polish |
| Birch Plywood | Stability | Alcohol wipe |
| Oil Finish | Moisture barrier | Quick dry |
| Smooth Surface | Easy release | Gentle clean |
| Proper Sealing | Long life | No soaking |
To maintain your mold's moisture protection, you'll want to clean it with 99% isopropyl alcohol and allow complete drying between uses. Consider applying a citrus-based polish periodically to enhance the wood's natural moisture resistance while keeping your soaping process chemical-free.
Temperature Management in Different Mold Types
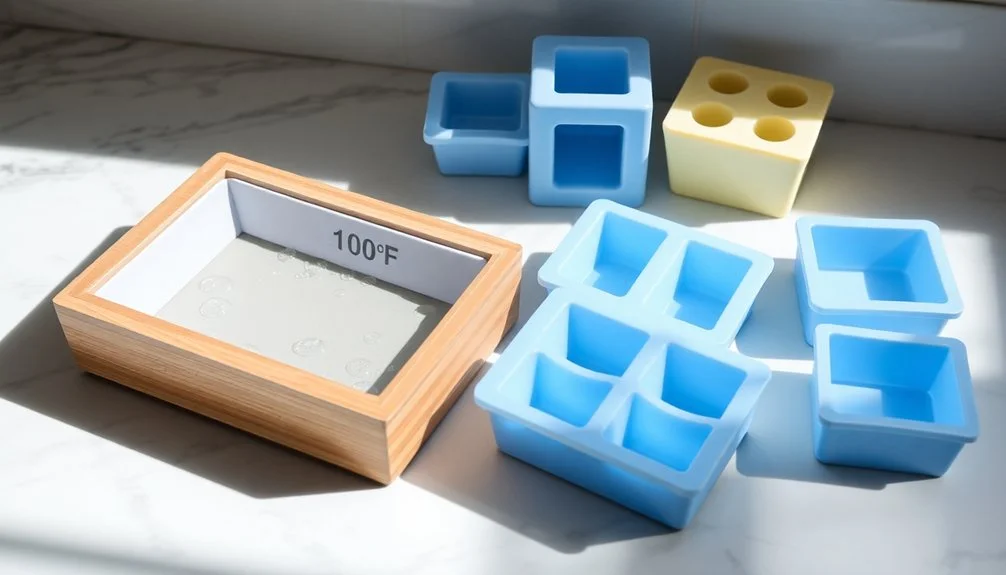
Since both wooden and silicone molds require different approaches to temperature management, understanding their unique heating characteristics can make or break your soap-making success.
While wooden molds need extra insulation to maintain heat during saponification, silicone molds distribute heat more evenly but lose it quickly.
- For wooden molds, you'll need cardboard and blankets for insulation, plus a heating pad underneath to maintain temperatures up to 180°F during gel phase.
- Silicone molds work best when pre-heated in a low-temperature oven (140°F) and wrapped in insulating materials.
- Monitor room temperature and humidity closely, as environmental factors affect both mold types differently.
- Consider using low water formulas in silicone molds to control heat peaks, while wooden molds benefit from proper sealing to prevent heat loss.
When properly managed, both mold types can produce excellent results.
Comparing Single Cavity vs. Multiple Cavity Molds
Understanding two distinct mold options – single cavity and multiple cavity – can help you make informed decisions for your CP soap making journey. Single cavity molds produce one soap at a time, offering flexibility for small batches and design changes, while multiple cavity molds create several identical soaps simultaneously, perfect for larger production runs.
| Feature | Single Cavity | Multiple Cavity |
|---|---|---|
| Production Rate | One soap per cycle | Multiple soaps per cycle |
| Initial Cost | Lower investment | Higher investment |
| Flexibility | Easy design changes | Fixed design |
| Best Use | Small batches, testing | Mass production |
You'll find single cavity molds ideal for experimenting with new recipes or creating unique designs, while multiple cavity molds shine when you're ready to scale up production and need consistent results across batches.
Proper Care and Maintenance of Soap Molds
Taking care of your soap molds will greatly extend their lifespan and maintain the quality of your finished products.
For silicone molds, simply wash with dish soap and warm water, while wood molds require gentle cleaning with isopropyl alcohol and a towel.
When dealing with residue and stains, you'll need different approaches based on your mold type:
- Clean silicone molds immediately after use for the smoothest finish and easiest maintenance
- Wipe wooden molds with 99% isopropyl alcohol to remove colorants and soap residue
- Use rubbing alcohol or hand sanitizer to tackle stubborn dye stains
- Store all molds in a dry, well-ventilated area to prevent moisture damage
Remember to wear protective gear when cleaning fresh soap residue, and never put your molds in the dishwasher, as this can cause permanent damage.
Selecting the Right Mold Size for Your Batch
Selecting the proper mold size can make or break your soap-making success. To determine the right size, you'll need to calculate your mold's volume and the amount of oils required for your batch.
For rectangular molds, multiply length, width, and height to get cubic inches. If you're working with cylindrical molds, use the formula: Pi × radius² × height.
For irregular shapes, fill the mold with water and measure in fluid ounces, then multiply by 1.8 to convert to cubic inches.
Once you've got your volume, multiply it by 0.40 to determine the total oils needed. You can adjust this factor down to 0.36-0.38 if you want extra room in your mold.
For precise measurements, try online soap calculators – they'll help you resize recipes and guarantee your batch fits perfectly.
Professional Tips for Using Wooden Soap Molds
You'll get the best results from your wooden soap molds by carefully lining them with parchment paper, ensuring the main cavity is completely covered while leaving the ends and partitions bare for easy removal.
To maintain ideal temperature control, place your lined wooden mold in a warm spot and consider covering it with a towel or blanket to promote even gel phase development.
Your soap's success depends on proper insulation, as wooden molds excel at maintaining consistent temperatures throughout the curing process.
Proper Lining Methods
When making cold process soap in wooden molds, proper lining methods are essential for protecting both your soap and the mold itself.
You'll find several effective materials to choose from, with freezer paper and silicone liners being the most popular choices among experienced soapmakers.
- Use freezer paper with the shiny side facing your soap for an affordable, reliable option that won't stick.
- Consider silicone liners for a reusable solution that makes unmolding effortless.
- Save time by creating templates from your successful liner measurements.
- Implement triangle folds or end caps when using paper liners to prevent leaks.
For best results, confirm your chosen liner fits snugly in the mold and extends slightly above the edges.
You can secure it with tape if needed, and always test the fit before pouring your soap mixture.
Temperature Control Tips
Managing temperature effectively in wooden soap molds can make the difference between perfect and problematic soap. When you're working with cold process recipes, wooden molds are excellent for maintaining consistent temperatures, particularly during the gel phase, as they can handle temperatures up to 75°C.
For recipes containing temperature-sensitive ingredients like honey, milk, or sugar, you'll need to be extra cautious. Consider switching to silicone molds for these formulations, as they provide better heat regulation.
If you're sticking with wooden molds, verify proper ventilation and monitor the temperature closely. Don't forget that light wood is your best choice – it's easier to handle and less prone to warping.
Remember to keep your mold assembly properly ventilated and insulated to maintain ideal temperature control throughout the curing process.
Maximizing Results With Silicone Mold Techniques
Several key techniques can dramatically improve your cold process soap making when working with silicone molds. For best results, use recipes with high percentages of hard oils and avoid fast-moving fragrances that can set too quickly.
You'll want to verify your soap goes through the gel phase while maintaining proper insulation, especially with cavity molds.
- Allow soaps to harden completely for 4-6 hours before attempting to unmold
- Gently push and twist to remove soap without damaging the mold
- Spray rubbing alcohol between layers for better adhesion
- Keep molds flat and level to prevent soap deformation
Remember to pull away the sides of the mold occasionally to help with air circulation and hardening.
For the most professional finish, combine lab colors and cosmetic micas to achieve stunning patterns and realistic colors.
DIY Wood Mold Construction Guide
Building your own wooden soap mold offers both cost savings and customization options that commercial molds can't match. You'll need 1/2" thick light wood like poplar or pine, basic tools including a drill, and essential hardware for assembly.
| Material | Purpose |
|---|---|
| Light Wood | Main structure |
| Wood Glue | Secure joints |
| Steel Bolts | Adjustable sides |
| Freezer Paper | Liner material |
For a standard loaf mold, cut pieces to create a 12" long x 4.5" wide x 4" high cavity. Assemble using wood glue and clamps, ensuring precise fits between end boards and sideboards. Add wood screws to reinforce the baseboard connection. Don't forget to drill holes for bolts if you're making an adjustable mold. Line with freezer paper or silicone before use, and always clean thoroughly after each batch.
Frequently Asked Questions
Can Silicone Molds Be Used for Both Hot and Cold Process Soaps?
Yes, you can use silicone molds for both hot and cold process soaps. They're heat-resistant, non-stick, and durable enough to handle the different temperatures and chemical reactions in both soap-making methods.
How Long Should Wooden Molds Be Seasoned Before First Use?
You'll need to season your wooden soap molds for 2-3 weeks before first use. Apply mineral oil or beeswax weekly, letting each coat dry completely to create a protective barrier against lye.
Do Certain Fragrance Oils React Differently With Silicone Versus Wooden Molds?
You'll find fragrance oils react more with silicone molds, as they can absorb and retain scents. Wood molds, when properly lined, don't interact with fragrances since there's no direct contact with the soap.
What's the Average Lifespan of Silicone Molds With Daily Commercial Use?
With proper care, you'll get 1-2 years of daily commercial use from high-quality silicone molds. You can expect 100-200 successful castings, but this varies based on your cleaning practices and material compatibility.
Can Wooden Molds Be Sterilized Without Damaging Their Protective Coating?
No, you can't fully sterilize wooden molds without risking damage. Instead, use alcohol wipes for sanitizing or a gentle vinegar-water solution. Always avoid heat sterilization and harsh chemicals to protect the coating.
In Summary
Whether you're using wooden or silicone molds, you'll find each has unique benefits for your CP soap making. Wooden molds offer durability and excellent insulation, while silicone provides flexibility and intricate designs. Choose based on your batch size, design needs, and budget. With proper care and handling, both types will serve you well in creating professional-quality soap bars that you'll be proud to share or sell.


Leave a Reply