Start your tallow soap making journey with seven time-tested farmhouse recipes that range from pure tallow bars to luxurious milk-based blends. You'll need basic ingredients like rendered tallow, lye, and distilled water, plus optional add-ins like coconut oil, essential oils, and natural colorants. With proper safety equipment and simple techniques, you can create long-lasting, skin-nourishing soaps in your own kitchen. Let's explore these traditional recipes that'll transform your natural skincare routine.
Essential Tools and Safety Equipment for Tallow Soap Making

Before you begin making tallow soap, gathering the right tools and safety equipment is essential for a successful and secure soap-making experience.
You'll need essential tools like an immersion blender for thorough mixing and a digital scale to measure ingredients precisely. For your safety equipment, don't forget goggles, gloves, and long sleeves to protect against lye burns.
You'll also need a heat-safe glass container for mixing your lye solution in a well-ventilated area, and a stainless steel pot for melting your tallow.
Keep a thermometer handy to monitor temperatures, aiming for 125°F when combining your ingredients.
Finally, prepare your silicone soap molds for shaping the finished product. Remember to wear closed-toe shoes to protect your feet from accidental spills during the soap-making process.
Simple Pure Tallow Soap Recipe for First-Time Makers

Before you begin making tallow soap, you'll need protective gear including chemical-resistant gloves, safety goggles, and access to proper ventilation to handle the caustic lye safely.
You'll carefully weigh your ingredients using an accurate scale – 1 kg tallow, 132 g lye, and 300 g distilled water – and mix them while maintaining temperatures between 90-125°F.
Once you've poured your traced mixture into molds, let your soap cure for 3-6 weeks in a cool, dry space to allow for complete saponification and hardening.
Essential Safety Equipment Needed
Since safety is paramount when working with lye and hot oils, you'll need specific protective equipment before starting your tallow soap-making journey.
Start with protective gear that fully covers your body: closed-toe shoes, long sleeves, chemical-resistant gloves, and safety goggles to prevent lye burns. Your well-ventilated workspace should have windows open or exhaust fans running to disperse fumes.
A digital scale is essential safety equipment for accurately measuring ingredients to guarantee proper saponification process.
You'll also need a heat-safe glass container for mixing lye with water, as this reaction generates significant heat. Keep your first aid kit within reach and post emergency procedures where they're easily visible.
Having these safety measures in place will help you confidently create soap while protecting yourself from potential hazards.
Measuring and Mixing Steps
With your safety equipment ready, let's start making your first batch of pure tallow soap.
Begin by measuring your ingredients precisely: 500g tallow, 142g lye, and 300g distilled water.
In a well-ventilated area, slowly pour the lye into the water, never the reverse.
While the lye solution cools, melt your tallow over low heat until it's completely liquid.
Let it cool to 90°F (32°C).
Once both mixtures reach the right temperature, carefully combine them.
Use your immersion blender to mix until you achieve a light trace – the mixture will look like pudding.
Pour your soap into molds and let it set for 24-48 hours before removing.
Don't rush to use it yet – your soap needs to cure for at least four weeks to reach its ideal hardness and quality.
Curing Time and Storage
While your soap may look ready after demolding, proper curing plays an essential role in creating high-quality tallow bars.
You'll need to wait at least four weeks for proper saponification, ensuring your soap reaches its ideal hardness and quality.
After removing your soap from the mold, cut the bars into smaller pieces to enable faster curing.
Store them in a cool, dry area away from direct sunlight throughout the curing process.
Your patience will be rewarded – properly cured tallow soap is a long-lasting option that can remain usable for up to two years when stored in a cool place.
Once your soap has fully cured, you'll want to preserve its quality by wrapping cured soap in wax paper or placing it in airtight containers until you're ready to use it.
Tallow and Coconut Oil Blend Recipe

This classic tallow and coconut oil blend recipe combines the best of two powerhouse soap-making ingredients.
You'll need 500 grams of beef tallow and 55 grams of coconut oil to create a hard bar that produces an incredibly creamy lather.
Start by melting your tallow and coconut oil together until they're fully liquefied, then let them cool to 125°F.
While waiting, prepare your lye solution by carefully mixing 142 grams of lye with 300 grams of distilled water.
Once both mixtures reach the proper temperature, combine them and blend until you achieve a light trace.
Pour your mixture into a soap mold and let it set.
For ideal skin benefits, you'll need to be patient – allow your soap to cure for at least four weeks.
The result? A perfectly balanced bar that's both nourishing and long-lasting.
Milk and Tallow Farmhouse Soap Recipe
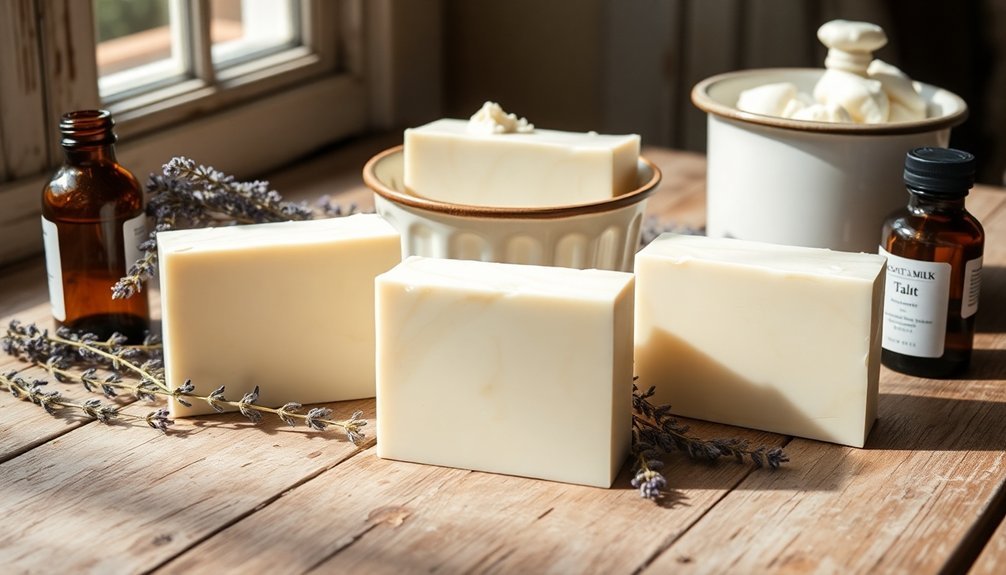
When you're making milk and tallow soap, you'll find that goat's milk adds extra moisture and gentle exfoliating properties to your finished bars.
The core ingredients you'll need are 24 oz tallow, 4 oz olive oil, 3 oz coconut oil, and 4 oz shea butter, along with 4.58 oz lye and 10.23 oz frozen milk.
You'll want to keep the milk frozen during the soap-making process to prevent scorching and preserve its beneficial proteins and vitamins.
Goat Milk Benefits
For centuries, goat milk has enhanced traditional farmhouse soap recipes with its remarkable skin-nourishing properties.
You'll find this natural ingredient packed with vitamins and minerals, including vitamin A, selenium, and fatty acids that deeply moisturize your skin.
What makes goat milk especially unique is its pH level, which closely matches your skin's natural balance, making it a gentle choice if you're prone to sensitivity.
When you combine goat milk with tallow soap, you're getting the best of both worlds.
The milk's natural lactose creates a creamy lather while providing mild exfoliation.
Plus, it perfectly complements tallow's durability, resulting in a luxurious bar that's ideal for daily use.
Together, these ingredients create a soap with improved texture and enhanced nourishing properties that'll leave your skin feeling pampered and healthy.
Essential Recipe Components
Building on the natural synergy between goat milk and tallow, let's explore the specific ingredients that create a perfect farmhouse soap bar. You'll need precise measurements of tallow, olive oil, coconut oil, and shea butter for the base, along with sodium hydroxide mixed with frozen milk for the lye solution.
| Ingredient | Amount |
|---|---|
| Tallow | 24 oz |
| Olive Oil | 4 oz |
| Coconut Oil | 3 oz |
| Shea Butter | 4 oz |
| Essential Oils | 2 oz |
Start by melting tallow and combining it with your other oils. Mix your lye solution carefully, then blend both mixtures until reaching a thin trace. Your soap will need 3-6 weeks curing time to achieve ideal hardness. Remember, exact measurements are essential – always use a digital scale for consistent results in your tallow soap recipes.
Rendering and Preparing Tallow for Soap Making
Before diving into soap making, you'll need to properly render and prepare your tallow, which serves as the foundation for farmhouse soap. You can source beef fat from local butchers or your own cattle, then transform it into quality tallow through a simple rendering process.
To render the fat, place it in a slow cooker or large pot and heat it gently to melt it down. As the fat melts, it'll separate from any impurities.
Work in a well-ventilated area to manage any odors during the process. Once melted, strain the liquid carefully to remove remaining solids. The resulting tallow should have a mild scent with no meaty smell.
Store your rendered tallow in airtight containers and keep it in the refrigerator or freezer until you're ready to start making soap.
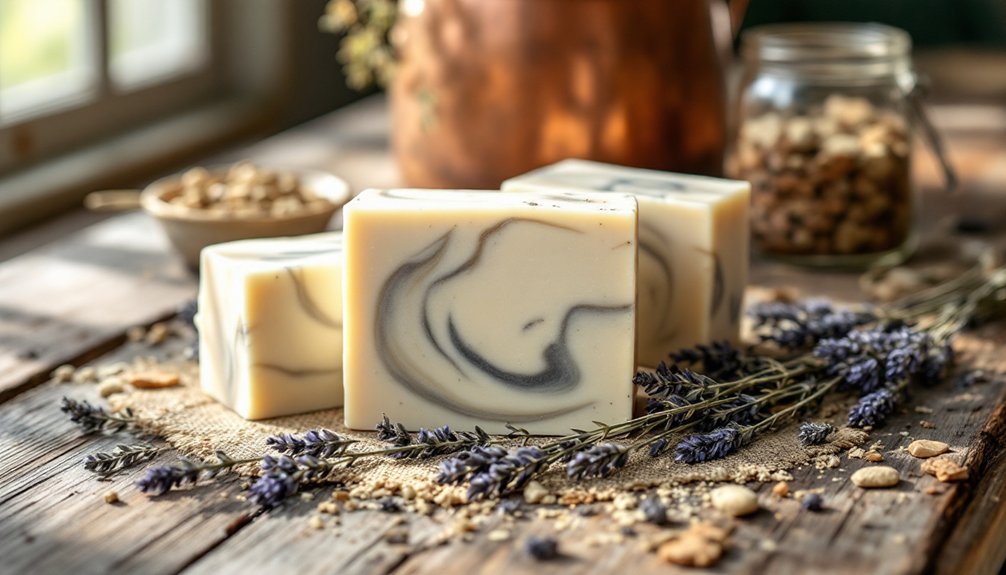
Scenting and Coloring Your Tallow Soap Naturally
Once you've prepared your pure tallow base, you can transform your soap into a naturally scented and colored creation.
Natural colorants like spirulina, turmeric, and beetroot powder offer vibrant hues while keeping your soap chemical-free. When scenting your soap, essential oils serve a dual purpose – they provide both fragrance and natural color variations.
Remember to limit essential oils to a maximum amount of 4 teaspoons per batch to maintain skin safety.
To enhance the longevity of your soap's fragrance, try adding clay as an anchor for the essential oils during curing.
For a gentle fragrance with added visual appeal, incorporate dried herbs like lavender or chamomile into your mixture. These botanicals not only create a subtle scent but also add beautiful natural textures to your finished soap bars.
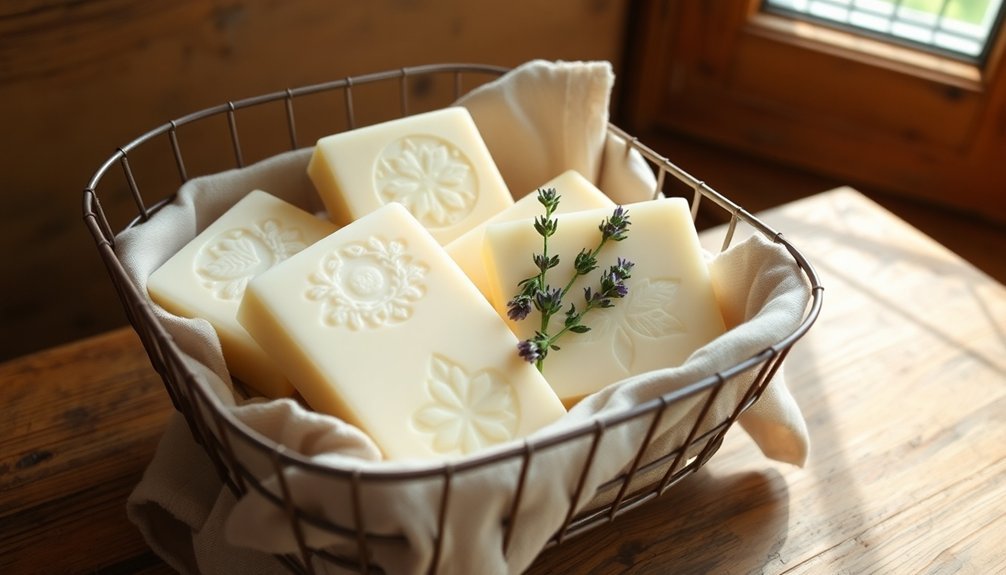
Curing and Storing Your Handmade Tallow Soaps
The proper curing and storage of your tallow soaps will determine their ultimate quality and longevity. After pouring, you'll need to let your soaps set for 48 hours before unmolding. Then, place them on drying racks for a four-week curing period, allowing excess moisture to evaporate and improving their quality.
| Stage | Duration | Conditions |
|---|---|---|
| Initial Set | 48 hours | Room temperature |
| Curing | 4 weeks | Flat surface/rack |
| Storage | Up to 2 years | Cool, dry place |
To maximize your tallow soaps' shelf life, store them in a cool, dry place away from direct sunlight. You'll want to wrap them in wax paper or keep them in airtight containers to protect against humidity. With proper storage conditions, your soaps can last up to two years.
Frequently Asked Questions
What Is the Best Superfat for Tallow Soap?
You'll get the best results with a 5-6% superfat for tallow soap. If you've got dry skin, you can increase it to 8%, but don't go higher or you'll risk compromising the soap's quality.
How Do You Increase Lather in Tallow Soap?
You'll get better lather by adding 10-15% coconut oil or castor oil to your tallow soap. Set superfat at 6-8% and blend thoroughly. For extra bubbles, try incorporating natural additives like honey or sugar.
How Much Essential Oils to Add to Tallow Soap?
You'll want to add essential oils at 3% of your total soap batch weight. For a 1kg batch, that's 30g of oils. Mix them with clay or arrowroot powder to help anchor the scent.
How Long Does Tallow Soap Need to Cure?
You'll need to cure your tallow soap for at least 4 weeks, though 6 weeks is preferred. During the first 2 days, keep it in molds, then remove and continue curing to achieve maximum hardness and mildness.
In Summary
Making tallow soap at home isn't as intimidating as you might think. With these seven recipes, you'll be well on your way to creating beautiful, natural farmhouse soaps. Remember to always prioritize safety, follow the proper curing times, and start with the basic recipes before moving on to more complex formulations. Once you've mastered these techniques, you'll find endless possibilities for customizing your own unique tallow soap creations.


Leave a Reply