To fix common cold process soap making mistakes, you'll need to focus on precise measurements, proper temperatures, and safety precautions. Use a digital scale accurate to 0.1 ounces, keep lye and oils within 10 degrees of each other (95-110°F), and always wear protective gear. Control trace by using your stick blender in short bursts, and carefully measure fragrances at 3-5% of oil weight. Master these fundamentals, and you'll reveal the secrets to consistently beautiful, high-quality soap.
Understanding Lye Safety and Proper Handling
When working with lye in cold process soap making, proper safety measures aren't optional – they're essential.
You'll need to wear thick gloves, goggles, a respirator, and protective clothing that covers your skin completely. Keep your hair tied back and wear closed-toe shoes.
Always add lye to water in a well-ventilated area, using lye-resistant containers made of polypropylene, PVC, stainless steel, or glass.
Don't use aluminum containers, as they'll react with lye and create dangerous hydrogen gas. Work in a clear space away from children and pets, preferably near a sink to contain spills.
Keep first aid supplies nearby, including an eyewash station. If lye contacts your skin, wash immediately and remove contaminated clothing. Having white vinegar on hand can help neutralize accidental lye spills.
The solution gets extremely hot, so be prepared for the heat and fumes.
Mastering Accurate Measurements and Ratios
When making cold process soap, your digital scale needs to measure in both ounces and grams with at least 0.1-ounce accuracy to guarantee precise measurements of oils, lye, and additives.
You'll need to master proper measuring techniques, including taring your containers and weighing ingredients individually, as even small measurement errors can ruin an entire batch. Understanding percentage-based recipes allows for easier scaling and consistent quality across different batch sizes.
Quick reference to measurement conversion charts helps you confidently work with recipes using different units, guaranteeing consistent results every time.
Digital Scale Selection Guide
Selecting the right digital scale can make or break your soap making success.
You'll need a scale that measures in both metric and English units, allowing you to switch between grams, ounces, pounds, and kilograms effortlessly.
Look for a platform that's at least 6 x 6 inches to safely handle caustic materials like lye. A removable stainless steel platform makes cleaning easier and guarantees longevity.
Your scale should measure in 1-gram and 0.1-ounce increments for precise measurements up to 22 pounds. Testing your scale with known weight objects ensures optimal accuracy and reliable results.
Don't forget essential features like tare function, auto backlight, and programmable shutoff.
Regular maintenance is vital – wipe down your scale after each use and avoid overloading it.
Choose a scale with calibration capabilities to maintain accuracy over time. These features will help you achieve consistent, professional results in your soap making journey.
Proper Measuring Techniques
Now that you've got the right scale, mastering proper measuring techniques will determine your soap's success or failure. Always weigh your ingredients instead of using volume measurements to guarantee consistent results. Even small variations can lead to lye-heavy or oil-heavy soap. Using weak or inactive lye can prevent proper saponification, so always store lye in an airtight container.
| Measurement Type | Impact | Solution |
|---|---|---|
| Weight | Precise, consistent | Use digital scale |
| Volume | Unreliable, varies | Avoid measuring cups |
| Percentages | Easy to scale | Convert recipes |
| Temperature | Affects reaction | Monitor carefully |
When converting recipes to percentages, simply divide each oil's weight by the total weight of all oils. This makes scaling recipes up or down effortless. Remember to test your scale's accuracy before each soap-making session and always wear protective gear when handling lye. Don't rush measurements – they're essential for creating safe, high-quality soap.
Common Measurement Conversion Charts
Four essential conversion charts form the backbone of accurate soap making measurements.
First, you'll need a weight conversion chart showing that 1 pound equals 16 ounces or 454 grams, and 1 kilogram equals 2.2 pounds.
Second, keep a SAP value chart handy to determine your lye ratios – divide by 1000 for KOH (liquid soap) or 1402.50 for NaOH (solid soap). Using consistent SAP values helps prevent making soaps that are lye-heavy and unsafe.
Third, reference a water-to-lye ratio chart showing typical concentrations: 30% for solid soaps, 20% for hard bars, and 10% for liquid soaps.
Finally, maintain an oil ratio chart listing common combinations like 34/33/33 for olive, coconut, and palm oils.
These charts will help you avoid measurement errors and guarantee consistent, quality soap production every time.
Achieving the Perfect Temperature Balance
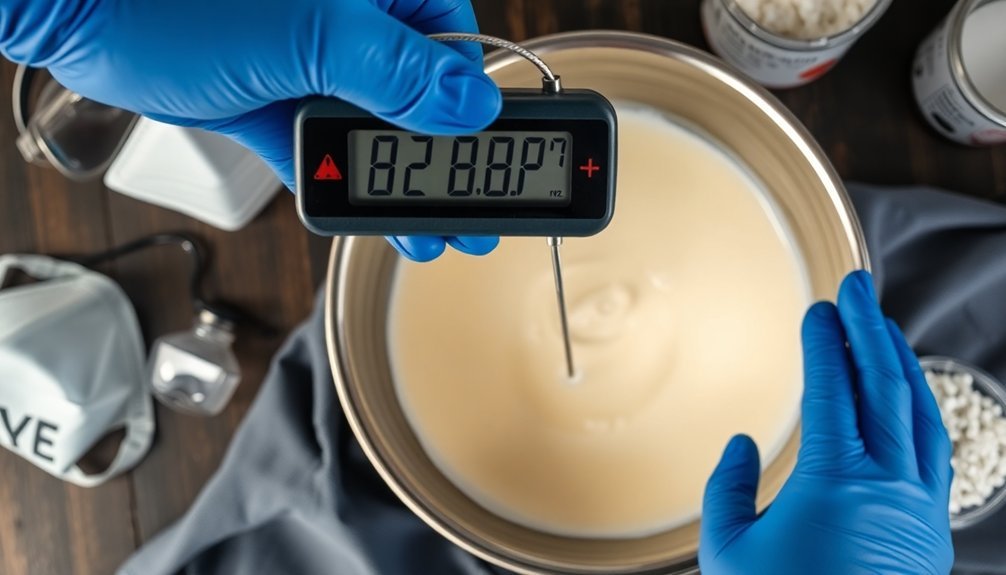
Using reliable temperature testing tools like a digital thermometer can help you monitor exact temperatures throughout the soap-making process.
You'll need to keep a close eye on both your oils and lye solution, ensuring they stay within the ideal range of 40-45°C (104-113°F).
To prevent temperature shock, which can cause seizing or false trace, always maintain consistent heat levels and avoid sudden temperature changes during mixing and pouring.
Temperature Testing Tools
Achieving the perfect temperature balance in cold process soap making requires reliable testing tools that can make or break your final product. Choose a digital thermometer that's at least 5 inches long, waterproof, and specifically dedicated to your soap making process.
Don't use kitchen thermometers to avoid cross-contamination.
For best results, consider investing in a non-contact infrared thermometer with hold and scan features. You'll be able to monitor temperatures continuously without interrupting your process, especially when working with temperatures between 100-160°F.
- Picture a sleek stainless steel digital thermometer gliding through your oils, displaying precise readings instantly
- Imagine a hands-free infrared beam scanning your mixtures while you focus on other aspects
- Visualize temperature alarms alerting you when your lye and oils reach their perfect combining point
Consistent Heat Monitoring
The delicate balance of temperature control stands as a cornerstone of successful cold process soap making. You'll want to keep your lye solution and oils within 10 degrees of each other, ideally between 120-130°F. This range guarantees your ingredients melt properly while preventing common issues like false trace or acceleration.
Monitor your temperatures consistently using a digital thermometer, and don't forget to factor in room temperature, as it can affect your soap's behavior in the mold.
If you're working with specialty ingredients like beeswax, you'll need higher temperatures, while milk-based soaps require cooler temps to prevent scorching. Consider using the heat transfer method, where your lye solution's heat helps melt solid fats, creating a natural temperature balance.
Avoiding Temperature Shock
When balancing temperatures in cold process soap making, you'll need to carefully monitor both your lye solution and oils to prevent temperature shock.
Keep your lye and oils within 10 degrees of each other, typically between 120-130°F, to guarantee even saponification. If temperatures aren't balanced, you'll risk false trace, acceleration, or solidification issues that can ruin your batch.
- Picture your oils suddenly solidifying as cold lye solution hits them, creating unwanted chunks in your soap.
- Imagine your perfectly planned swirl design accelerating too quickly due to excessive heat.
- Visualize glycerin rivers forming throughout your soap, creating unwanted patterns due to temperature fluctuations.
Choose your temperature range based on your specific recipe and design goals. For milk soaps, work cooler (100-110°F) to prevent scorching, while beeswax recipes need higher temperatures for proper incorporation.
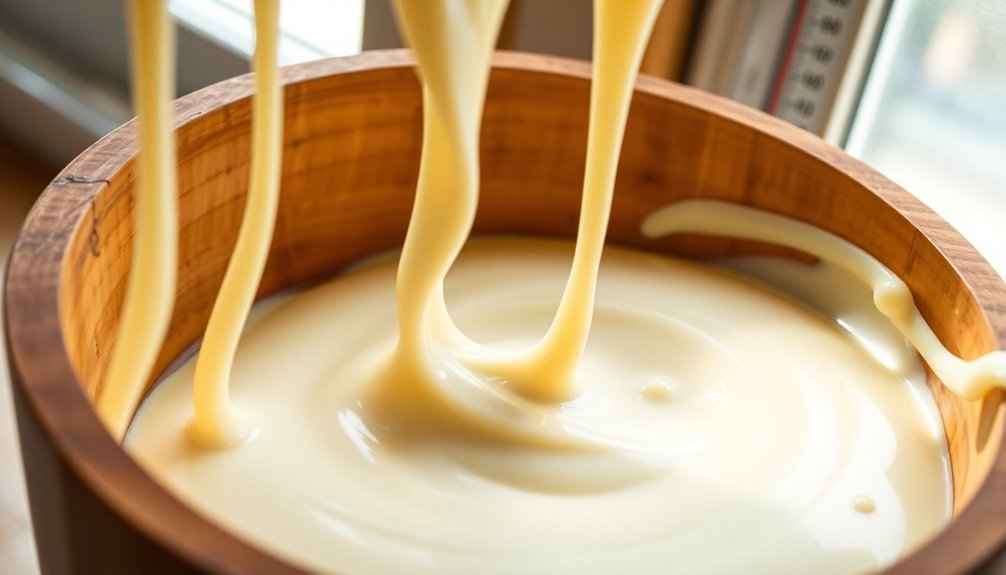
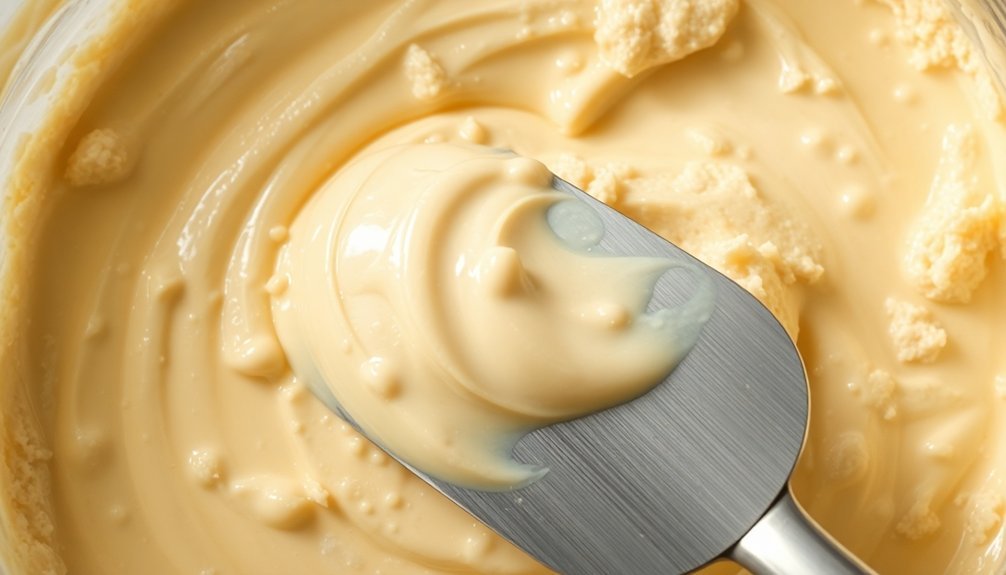
Recognizing and Controlling Trace
Successfully recognizing and controlling trace stands as one of the most critical skills in cold process soap making. You'll need to monitor the consistency of your soap batter carefully, as it progresses from light to medium to heavy trace.
| Trace Stage | Consistency | Best Used For |
|---|---|---|
| Light | Thin cake batter | Swirls, layers |
| Medium | Thick cake batter | Basic designs |
| Heavy | Pudding-like | Single colors |
To control trace effectively, keep your temperatures below 110°F and use your stick blender in short bursts. Remember that certain ingredients will affect your trace time – coconut oil and honey speed it up, while olive oil slows it down. For intricate designs, opt for a slower trace by increasing water content and avoiding known accelerants like clove oil or certain floral fragrances.
Selecting and Adding Fragrances Successfully
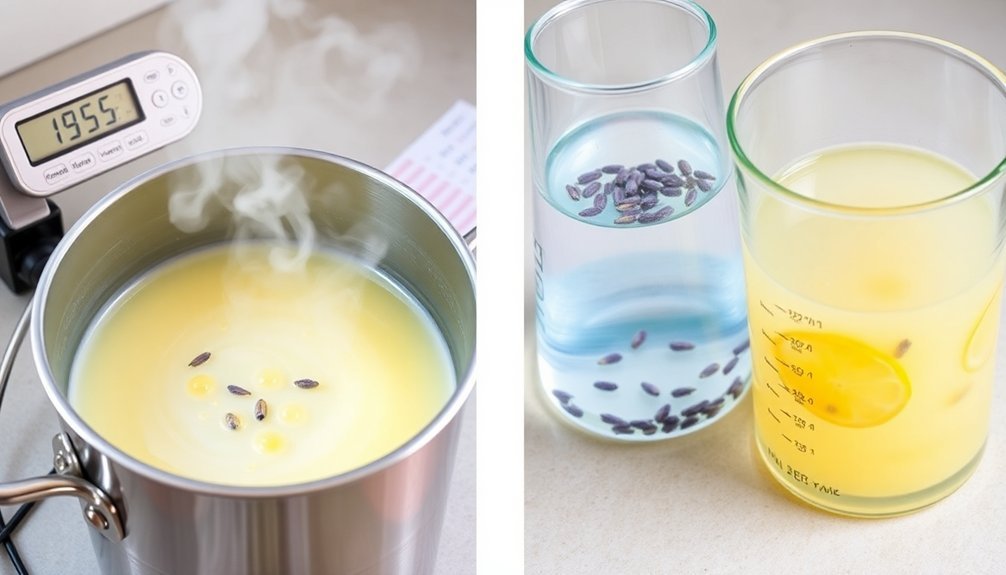
Selecting fragrances for cold process soap requires careful consideration of both technical and creative aspects.
You'll want to choose fragrance oils that hold up well during the process, with stronger scents like sandalwood and patchouli being more reliable than lighter citrus notes. Add your fragrances at a thin trace or mix them with warmed oils beforehand to prevent acceleration and guarantee even distribution.
- A rich vanilla-based fragrance swirling through creamy soap batter, leaving behind subtle amber undertones
- Delicate lavender and chamomile mixing together to create a soothing, spa-like aroma
- Fresh rosemary and mint dancing through the soap mixture, creating an invigorating blend
Keep your fragrance ratios between 3-5% of oil weight, and consider adding kaolin clay to anchor scents.
Test new fragrances in small batches first to avoid costly mistakes and guarantee consistent quality.
Managing Natural Colorants and Additives
Natural colorants bring both beauty and beneficial properties to cold process soap, though they require careful attention to detail for ideal results. You'll need to take into account both timing and temperature when adding these ingredients. For the most vibrant results, infuse oils with colorants like annatto seeds or alkanet root before soapmaking, or add them at trace for better control.
| Colorant | Effect |
|---|---|
| Turmeric | Sunny yellow with anti-inflammatory benefits |
| Spirulina | Rich green with skin-nourishing properties |
| Alkanet Root | Pink to purple tones depending on usage |
| Clay | Stable, consistent coloring that won't fade |
Keep temperatures cool to prevent color changes, and always test in small batches first. Using oils that produce whiter soap bases will help you achieve clearer, more consistent colors. Avoid fragrances that might alter your chosen shade.
Preventing Soap Seizing and Acceleration
You'll find that controlling your soap's temperature and mixing speed are critical factors in preventing unwanted acceleration and seizing during the cold process.
When working with fragrance oils, it's vital to research their behavior in cold process soap and incorporate them at cooler temperatures, typically around 70°F, to maintain a workable batter.
You can further extend your trace time by hand-stirring instead of using a stick blender once you've reached a light trace, especially after adding fragrances or essential oils.
Temperature Control Tips
Maintaining proper temperature control stands as one of the most critical aspects of successful cold process soap making. You'll achieve the best results by keeping both lye and oils between 120-130°F, though there's flexibility based on your specific needs.
When working with milk-based recipes or trying to prevent gel phase, aim for 100-110°F. For designs requiring gel phase or when using beeswax, temperatures up to 160°F work well.
- Picture yourself using an infrared thermometer, taking quick readings of your oils and lye solution like a professional chef checking food temperatures.
- Imagine your soap batter flowing smoothly like warm honey as you maintain ideal temperature balance.
- Visualize your perfectly traced soap, free from glycerin rivers and soda ash, thanks to your precise temperature control.
Fragrances And Trace Time
While selecting fragrances for your soap may seem straightforward, certain fragrance and essential oils can dramatically affect trace time and potentially cause seizing.
Floral and spicy fragrance oils are particularly notorious for acceleration, while essential oils containing eugenol, like clove and cinnamon, can speed up saponification.
To minimize these risks, add your fragrances to the base oils before introducing the lye solution.
You'll also want to use more water in your recipe and limit other accelerating ingredients like solid oils, butters, or honey.
If seizing occurs, don't panic – try gently heating the batter in a crock pot or stirring manually to restore fluidity.
For severe cases, you can salvage the batch through hot processing or rebatching.
Always test new fragrances in small batches first to understand their behavior.
Optimizing the Curing Environment
Creating an ideal curing environment stands as one of the most essential factors in successful soap making. You'll want to find a dark, airy space away from direct sunlight where you can maintain consistent temperature and humidity levels.
Using fans and dehumidifiers can markedly speed up the curing process, especially if you're in a humid climate.
- Picture your soaps resting on clean, well-ventilated racks with space between each bar
- Imagine a gentle breeze from a fan circulating around your curing area
- Envision your soaps gradually becoming harder and lighter as they lose moisture
Monitor your soap's progress by weighing the bars regularly. If you're looking to speed up the process, try water discounting or cutting smaller bars.
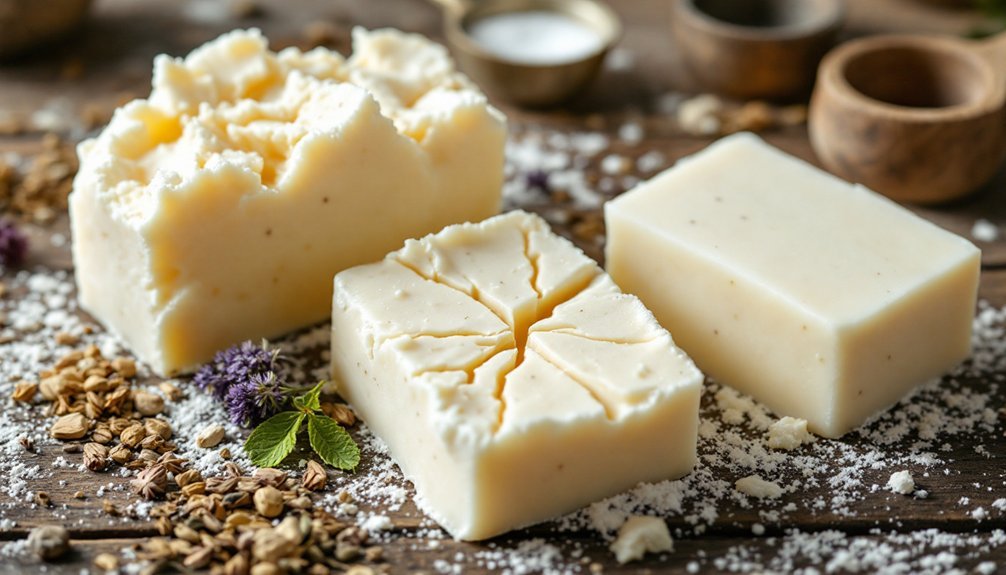
Resolving Common Texture Problems
Successful soap makers must tackle texture problems head-on to achieve the perfect bar. If you're dealing with chalky or powdery soap, check your temperature first.
Keep your mix between 95-110°F for ideal results. Working outside this range can lead to texture issues and accelerated saponification.
Watch for proper gel phase, as incomplete gelling often causes powdery edges. You'll need adequate insulation and correct temperatures, especially with low-water recipes.
When mixing, use your immersion blender in short bursts to prevent over-mixing while ensuring all ingredients combine fully.
Don't overlook your ingredients' impact. Too much zinc oxide creates chalkiness, while certain fragrance oils can speed up trace.
If you're using natural sugars like honey or milk, monitor temperatures carefully to prevent overheating and texture problems.
Addressing Discoloration and Appearance Issues
How can you maintain your soap's intended color when so many factors threaten to alter its appearance? From vanilla-based fragrances turning your soap brown to natural sugars causing overheating, discoloration challenges are common in cold process soapmaking. You'll need to carefully manage temperatures and ingredients to preserve your desired aesthetics.
- A beautiful swirled design morphing into muddy browns due to vanillin bleeding
- A perfectly white soap developing a dark ring in the center from partial gel phase
- Creamy coconut milk soap transforming into caramel-colored bars from overheating
To prevent these issues, consider refrigerating your soap for 5-24 hours after pouring, using vanillin stabilizers for fragrance-induced discoloration, and maintaining cooler soaping temperatures between 80-90 degrees.
If separation occurs, you can rescue your batch using the hot process method.
Correcting Lather and Performance Problems
While achieving the perfect color in your soap is important, lather quality can make or break your final product.
You'll want to carefully select ingredients known for creating rich, stable lather, such as castor oil and controlled amounts of coconut oil. Add natural lather boosters like sugar, honey, or milk, but be mindful of temperature control to prevent overheating.
Watch out for common pitfalls that can ruin your soap's performance. Hard water minerals, excessive coconut oil, and poor-quality fragrance oils can all diminish lather.
Keep your temperatures between 95°F to 110°F, and don't over-blend your soap batter. If you're working with water-reduced formulas, you'll need slightly higher temperatures to reach the gel phase.
Remember to let your lye solution cool adequately before mixing to guarantee ideal results.
Maintaining Quality Through Storage
Proper storage conditions make the difference between soap that stays fresh for months and bars that quickly deteriorate.
You'll need to store your cold process soap in a cool, dry place with good ventilation to prevent dreaded orange spots (DOS) and maintain quality. Wire racks are your best friends during the 6-8 week curing process, but make sure they're coated to prevent rust from contaminating your soap.
- Picture rows of beautiful soap bars resting on clean, white-coated wire racks with gentle air circulation
- Imagine a well-organized storage area away from windows, with consistent room temperature
- Visualize partially-covered storage bins that allow your fully-cured soap to breathe while staying protected
Don't seal your soap in airtight containers – it needs to breathe even after curing.
Use dehumidifiers if your storage area tends to be damp.
Frequently Asked Questions
Can I Reuse Molds Without Cleaning Them Between Batches?
No, you shouldn't reuse soap molds without cleaning them. You'll risk contamination, altered scents, and texture problems in your new batch. Always clean molds thoroughly between uses to guarantee quality results.
Why Does My Soap Develop White Crystals on the Surface?
Your soap's white crystals are likely soda ash, formed when lye reacts with air. It's harmless but preventable by soaping at warmer temperatures (110-120°F), using distilled water, and insulating your molds properly.
How Can I Prevent My Wooden Molds From Sticking?
Line your wooden molds with freezer paper or silicone mats, apply a light coating of oil, and guarantee they're properly sealed. Don't forget to let your soap fully set before attempting removal.
Does Placing Soap in the Freezer Speed up Curing Time?
No, placing your soap in the freezer won't speed up curing time. While it can temporarily harden the soap and prevent glycerine rivers, the actual curing process requires proper air circulation and natural drying time.
Why Do Some of My Soap Batches Develop Orange Spots?
Your soap's orange spots (DOS) are likely caused by rancid oils, too high superfat levels, or water issues. You'll want to check your oil freshness, reduce superfat percentages, and use distilled water instead.
In Summary
You'll find that mastering cold process soap making takes practice and attention to detail. From proper lye handling to measuring ingredients precisely, every step matters. Don't get discouraged by initial mistakes – they're valuable learning opportunities. Keep detailed notes, maintain safety protocols, and learn from each batch. With patience and these troubleshooting tips, you'll soon create beautiful, high-quality soaps you can be proud of.


Leave a Reply