The 5 best quality tests for handmade soap include visual inspection for consistency, pH testing (aim for 8-10), lather quality assessment, skin feel evaluation, and curing completion checks. You'll want to examine your soap's appearance for abnormalities, use pH strips for safety verification, evaluate lather performance with different techniques, note how your skin feels after use, and confirm proper curing through weight and hardness tests. These simple quality checks guarantee your handmade soaps meet both safety and performance standards.
5 Best Quality Tests For Handmade Soap
When creating handmade soap, quality testing guarantees your products are safe, effective, and meet consumer expectations. For ideal results, test your soap's pH to make certain it falls between 7-10, indicating complete saponification and safety for skin use.
Don't rely solely on pH testing, though. Incorporate saponification value testing to confirm proper fat-to-lye ratios, which affects texture and performance.
While pH testing is essential, saponification value testing ensures perfect oil-to-lye balance for optimal texture and performance.
Test moisture content to improve shelf life and prevent premature disintegration. This is especially important as caustic lye can cause chemical burns if saponification is incomplete.
For thorough quality assurance, include heavy metals analysis to detect hazardous elements like lead or mercury.
Finally, conduct performance testing to evaluate latherability and potential skin irritation.
The Visual and Physical Inspection Method
Four critical aspects of visual inspection form the foundation of quality assessment for handmade soap. Start by examining the bar for color consistency and any unusual pockets or crystallization that might indicate lye heaviness. Then, evaluate the texture by gently pressing the soap—it should feel uniformly firm without soft spots. Remember that a properly made soap will typically have an alkaline pH range of 8 to 10, which is normal despite being higher than neutral.
| Test Type | What to Look For | Quality Indicator |
|---|---|---|
| Visual | Color consistency, no liquid pockets | Proper saponification |
| Texture | Smooth surface, even firmness | Complete curing |
| Hardness | Solid response to gentle tapping | Water management ability |
| Fragrance | Uniform scent throughout | Proper mixing and curing |
You'll also want to check for lather quality by testing a small portion with water. Rich, long-lasting lather indicates well-balanced ingredients and guarantees effective cleaning performance.
Measuring Ph Levels to Ensure Safe Soap
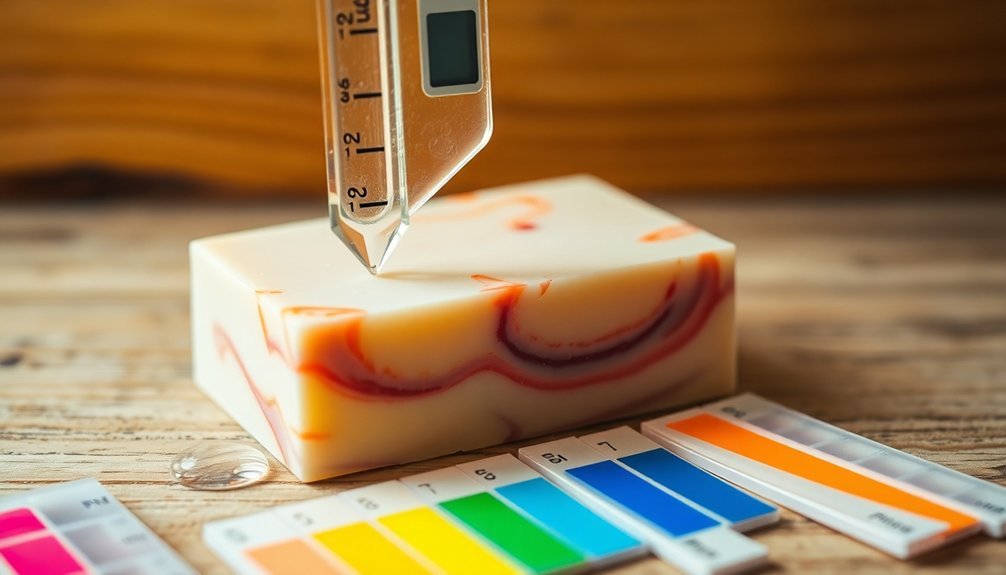
Safety requires understanding your soap's pH level, which serves as a critical indicator of its skin compatibility.
While human skin maintains a slightly acidic pH between 4-6, properly made soap typically falls between 8-10 on the alkaline side. Testing guarantees your soap won't irritate skin, as anything above pH 11 is considered too harsh.
Three effective testing methods include:
- pH strips – inexpensive and quick for general range assessment
- Digital pH meters – provide precise measurements for serious soapmakers
- Solution testing – diluting soap in water (1-10% concentration) simulates actual usage conditions
Remember that pH testing alone can't confirm complete safety. Consider other factors like superfatting and ingredient selection.
Test after complete saponification, and document results to track changes during the curing process. Using the Red Cabbage Indicator is a chemical-free alternative for those seeking natural testing methods.
Testing Lather Performance and Skin Feel
Beyond pH testing, a soap's performance is ultimately judged by how it feels and functions during use. You'll notice significant differences in lather quality between fresh and cured soaps. As soap cures, it produces more abundant and stable lather while requiring less product. The proper curing process is essential as it enhances both mildness and moisturizing properties of the final soap bar.
When testing lather, try both rubbing between palms and rolling techniques. The environment matters too—conduct tests in controlled temperature and humidity for consistent results.
| Lather Type | Characteristics | Contributing Factors |
|---|---|---|
| Bubbly | Large, airy bubbles | High coconut oil content |
| Creamy | Dense, cushiony | High olive/rice bran oil |
| Quick-forming | Immediate lather | Short cure time |
| Long-lasting | Stable during use | Extended cure time |
| Moisturizing | Leaves skin soft | Superfatting, avocado oil |
Note skin feel after rinsing—whether it feels moisturized, normal, or dry—as this reflects your soap's conditioning properties.
Evaluating Curing Process Completion
Determining when your handmade soap has properly cured represents one of the most essential quality assessments you'll make. A well-cured soap offers ideal performance, longevity, and skin-friendliness. You'll need to track multiple indicators to confirm completion of this crucial process.
- Weight loss monitoring – Weigh your soap bars daily during the first week, then weekly. When measurements stabilize (typically after 4-6 weeks), your soap has likely reached its equilibrium moisture content.
- Hardness testing – Perform simple indentation tests throughout curing. Your soap should become progressively harder, eventually resisting significant indentation. Effective evaluation of soap hardness is a social act, involving conversation with other crafters and incorporating feedback from users.
- pH stability – Test pH levels weekly using a quality meter. A properly cured soap will maintain a consistent, slightly alkaline pH, indicating that saponification has completed and the soap is stable.
Frequently Asked Questions
How Do I Test Homemade Soap for Commercial Standards Compliance?
To test homemade soap for commercial standards, you'll need to conduct pH testing (7-10 range), stability assessments, microbial testing, and guarantee proper labeling. Follow ASTM standards and obtain necessary certifications for your market.
Can I Use Scientific Equipment to Measure Soap Quality?
Yes, you can use scientific equipment like pH meters, conductivity testers, and hardness analyzers to measure your soap's quality. These tools provide precise measurements that help guarantee your products meet commercial standards.
How Do Different Water Types Affect Soap Testing Results?
Water type greatly impacts your soap testing results. Hard water creates less lather and more scum, while soft water produces abundant, stable foam. You'll get clearer results using distilled water as your control standard.
What Shelf-Life Tests Are Reliable for Handmade Soap?
You'll find visual inspections for discoloration, sniff tests for rancidity, texture checks for sliminess, and pH testing most reliable. Don't forget usage tests on small skin patches to verify safety over time.
How Do I Perform Accelerated Aging Tests on Soap?
You'll need to place your soap in a chamber at 50-60°C for several weeks, regularly checking physical properties like hardness, appearance, and scent. Compare these results to baseline samples to estimate shelf life.
In Summary
You've now mastered the five essential tests to evaluate your handmade soap's quality. By performing visual inspections, measuring pH levels, gauging lather performance, and verifying proper curing, you're ensuring your creations are both safe and effective. These simple tests don't require expensive equipment yet provide valuable information about your soap's quality. Start implementing these practices today, and you'll consistently produce premium handmade soap your customers will love.


Leave a Reply