There's no universal perfect mixing duration for cold process soap—it depends on your recipe, temperature, and method. Using a stick blender, you'll reach trace in 1-3 minutes, while hand-stirring takes 30+ minutes. Watch for visual cues like thickening and opacity rather than timing strictly. Different oils affect speed: coconut oil accelerates trace while olive oil slows it down. Master these variables and you'll gain complete control over your soap's texture and design possibilities.
Understanding the Meaning of "Trace" in Cold Process Soap Making
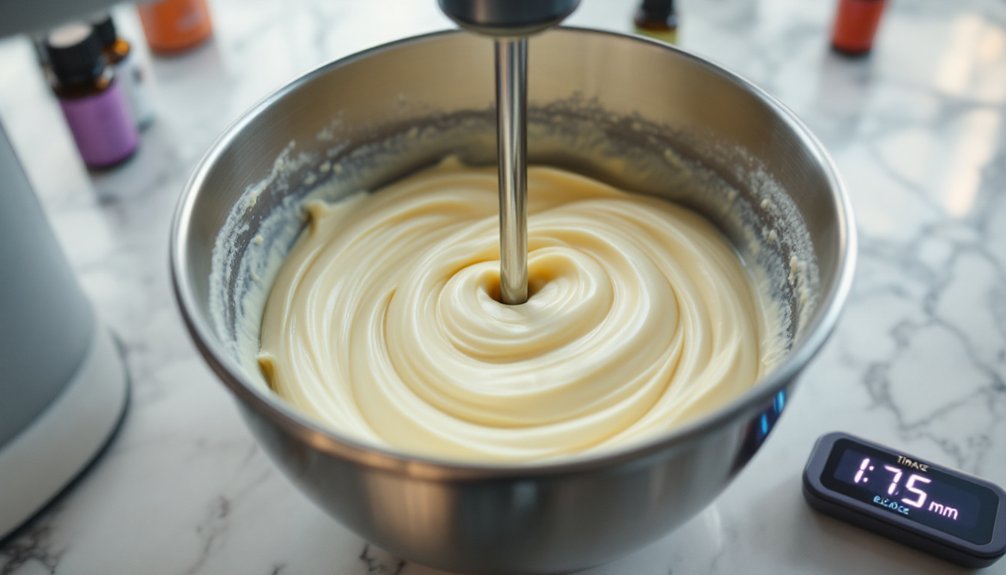
The backbone of successful soap making lies in recognizing trace—that vital moment when your soap batter has thickened enough to leave a visible trail when drizzled across its surface. This indicates that emulsification is complete and saponification is underway.
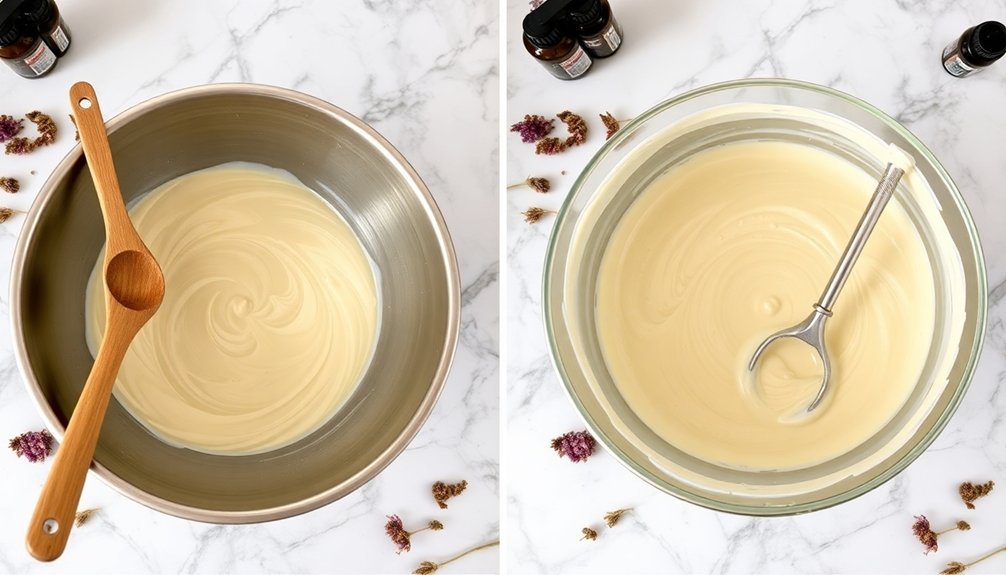
Trace progresses through distinct stages: very light (barely visible), light (thin cake batter), medium (thick cake batter), and thick (pudding consistency). Each stage serves different purposes in your soap design journey.
Light trace works best for intricate swirls, while medium trace helps suspend additives like poppy seeds. Thick trace excels at creating defined layers. Being able to identify false trace is essential, as it occurs when oils cool too quickly, leading to poor emulsification and potential soap defects.
Understanding trace isn't just about aesthetics—it's essential for proper chemical reactions. Without reaching trace, your oils and lye solution won't properly combine, potentially resulting in separation or improper curing.
Factors That Impact Soap Mixing Duration
While every soapmaker yearns for that perfect trace, several essential factors determine how long you'll need to mix your cold process soap.
Temperature stands as a primary influence—when your lye solution runs too hot (above 130°F), you'll reach trace much faster, while cooler temperatures slow the process down. For best results, strive to maintain lye and oil temperatures within 10 degrees of each other.
Your oil selection greatly impacts mixing duration. Hard oils like coconut and palm accelerate trace, while liquid oils such as olive oil extend it.
The fragrance oils you choose matter too; some can dramatically speed up saponification.
Environmental conditions in your workspace also play a role. Warmer rooms accelerate the chemical reaction, while cooler spaces slow it down.
Finally, additives like sodium lactate can shorten mixing time, allowing you to unmold your soap sooner.
Hand-Stirring vs. Stick Blender: Time Comparison
When comparing hand-stirring to using a stick blender, you'll immediately notice the dramatic time investment difference, with manual mixing often taking 30+ minutes versus just 1-3 minutes with an immersion blender.
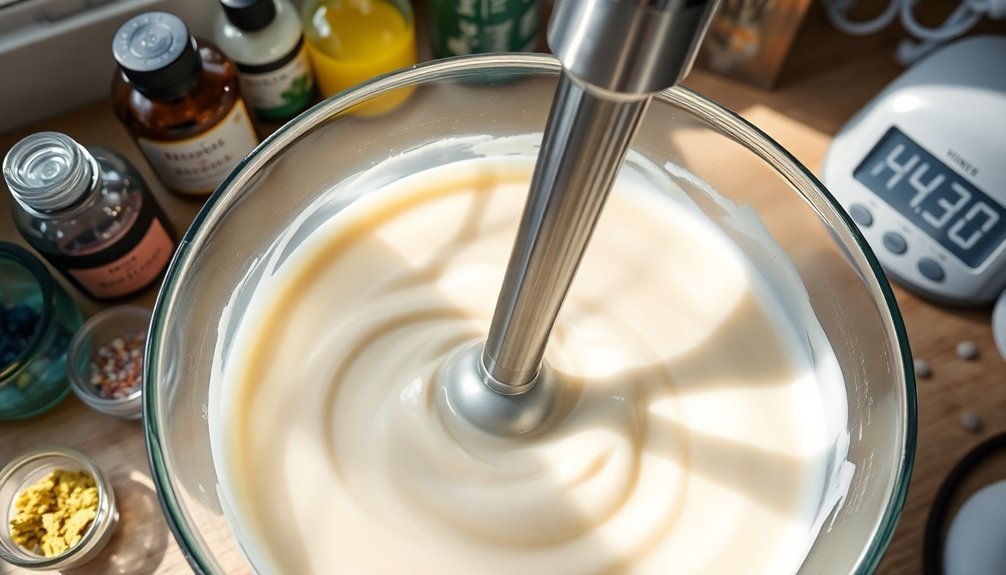
Your choice of equipment directly affects how quickly your soap reaches trace, as stick blenders accelerate saponification through increased aeration and heat generation.
Mastering both techniques will give you better control over your soap's texture, allowing you to switch between methods depending on whether you need more working time or faster results.
Achieving the right consistency is essential as insufficient trace can result in leaks from molds, while over-traced mixtures become difficult to pour properly.
Time Investment Differences
Most cold process soap makers face a critical choice that greatly impacts their production time: hand-stirring versus using a stick blender. The difference is substantial – you'll reach trace in 1-3 minutes with a stick blender compared to potentially much longer when hand-stirring.
When you use a stick blender, you'll work in short bursts for about 3-6 minutes total, reducing physical strain while achieving better consistency in your soap batter. Quality stick blenders provide enough power for effective mixing throughout the entire soap-making process.
You'll also have more control over the mixing process.
Hand-stirring requires considerably more effort and time but offers advantages for specific recipes, particularly those with high coconut oil content.
It also allows for more gradual thickening, giving you time to make adjustments to your soap mixture before it sets.
Equipment Affects Trace
The equipment you choose dramatically impacts how quickly your soap reaches trace. With a stick blender, you'll achieve thin trace in under a minute, while medium to thick trace takes just a few minutes of intermittent blending. This efficiency comes with a caution—use short bursts to avoid motor burnout and unwanted air incorporation.
Hand-stirring, by contrast, extends your process to 3-5 minutes depending on your recipe, offering precise texture control at the cost of physical effort. Temperature also influences trace development, so ensure your combined oils have cooled to 90-110°F before adding lye. You'll find this method particularly suitable for recipes with harder oils, though it's less efficient for achieving thick traces.
Both methods require proper temperature control and safety precautions due to lye's caustic nature, but your stick blender will accommodate a wider variety of recipes thanks to its speed and consistent mixing.
Mixing Technique Results
Despite common assumptions, your choice between hand-stirring and stick blending dramatically influences not just the time investment but also the quality of your final soap. Each method offers distinct advantages depending on your recipe complexity and desired outcome. Successful soapmaking requires creating an atmosphere conducive to maintaining focus throughout the entire mixing process.
| Technique | Time to Trace | Best For | Control Level |
|---|---|---|---|
| Stick Blender | 2-5 minutes | Complex recipes, production batches | Moderate |
| Hand-Stirring | 30-60+ minutes | Intricate designs, beginners | High |
| Combination | 10-20 minutes | Balanced approach | Very high |
When using a stick blender, work in short 5-10 second bursts with rest periods to prevent air bubbles and overheating. Hand-stirring provides maximum control but requires significant patience—useful when working with delicate colorants or swirl techniques. Remember that cooler temperatures typically extend mixing time regardless of your chosen method.
Signs That Your Soap Has Mixed Long Enough
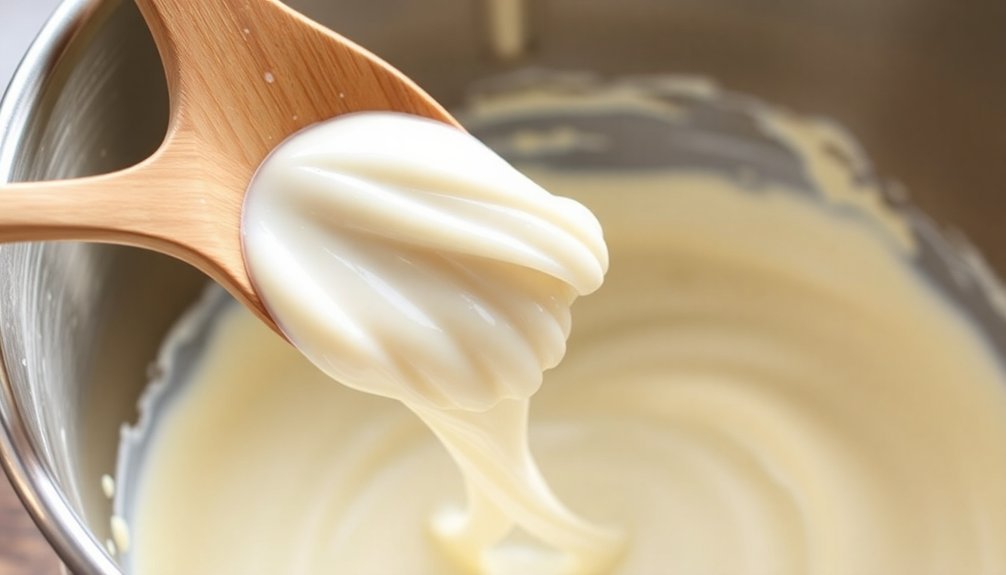
When mixing your cold process soap, watch for the telltale "trace" that appears when batter dripped onto the surface leaves a visible imprint before sinking back in.
You'll notice your mixture gradually thickening from light trace (similar to thin cake batter) to medium or thick trace, depending on your recipe requirements.
Rather than relying solely on timing, focus on these visual indicators as your primary guide since factors like oil selection and temperature can greatly affect how quickly your soap reaches the proper consistency. A higher percentage of olive oil content will typically result in a slower time to reach trace, giving beginners more working time to mix thoroughly.
Visual Trace Indicators
Identifying proper trace in your soap batter represents one of the most critical skills for successful cold process soapmaking.
You'll notice different stages as you mix your soap—light, medium, and thick trace—each with distinct visual characteristics.
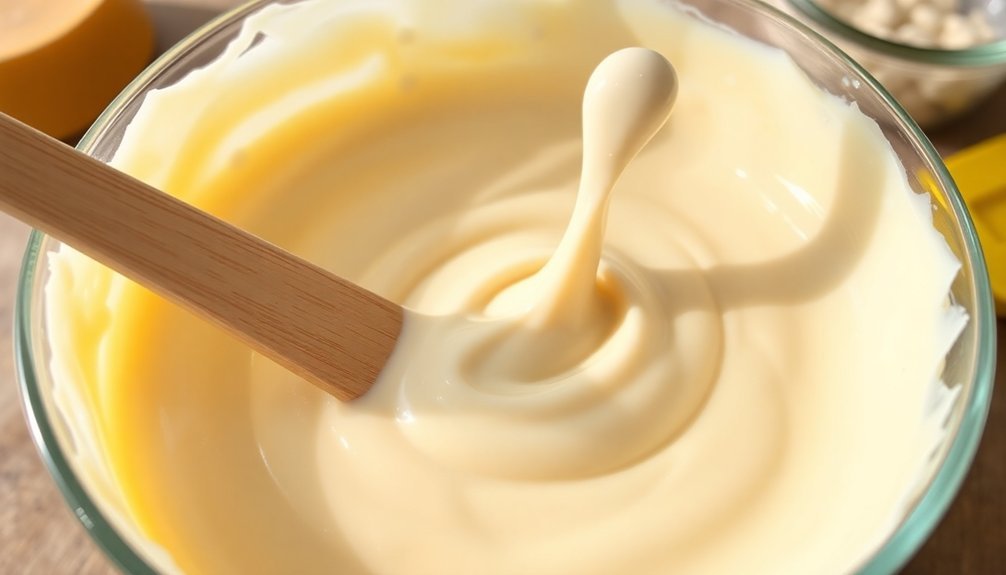
At light trace, your mixture resembles thin custard with faint surface trails when you lift your stirring utensil. This consistency works perfectly for intricate swirl designs.
Medium trace appears thicker, like cake batter, while thick trace resembles heavy pudding and works well for textured soaps.
Watch for false trace, which looks like curdled milk rather than true emulsification. If this happens, continue mixing until properly combined.
Use your stick blender in short bursts to prevent overmixing. Different oils, additives, water content, and even room temperature can accelerate or slow your trace, so adjust accordingly. The lye concentration in your formula significantly impacts how quickly your soap reaches trace, with stronger solutions speeding up the process.
Timing vs. Technique
Successful cold process soapmaking relies more on recognizing the right consistency than adhering to specific timing guidelines.
While a stick blender greatly reduces mixing time compared to hand stirring, your focus should be on reaching proper trace rather than watching the clock.
Look for visual cues: your soap mixture should thicken noticeably, becoming more opaque. When drizzled soap leaves a temporary pattern on the surface before sinking, you've reached light trace. At this stage, the consistency resembles thin cake batter.
Rather than mixing continuously, blend in short bursts to prevent overheating and premature thickening.
Remember that hard oils like coconut accelerate trace, while olive oil slows it down. Environmental conditions and additives further influence this process, so adapt your technique based on your specific recipe and conditions.
Measure your ingredients with precision using heat-safe containers to ensure consistent results each time you make a batch of cold process soap.
Common Mistakes When Timing Your Cold Process Mix
Many soap makers encounter frustrating setbacks because they mistime essential steps in the cold process. Understanding common timing pitfalls can help you avoid disappointment and achieve consistent results with your soap batches.
| Mistake | Consequence |
|---|---|
| Undermixing | Incomplete saponification, separation |
| Overmixing | Accelerated trace, burned blender motor |
| Premature fragrance addition | Seizing, uncontrollable acceleration |
| Improper trace recognition | Difficult molding, texture issues |
When adding colorants, timing is vital—too early can result in uneven distribution. Similarly, unmolding too soon leaves you with soap too soft to cut cleanly. For optimal results, blend in 5-10 second bursts rather than continuous mixing to maintain better control over the soap batter consistency. Remember that proper curing requires patience; skipping this step produces soap that's harsh or doesn't last. Turn your bars regularly during curing to guarantee even drying.
Temperature's Role in Soap Mixing Efficiency
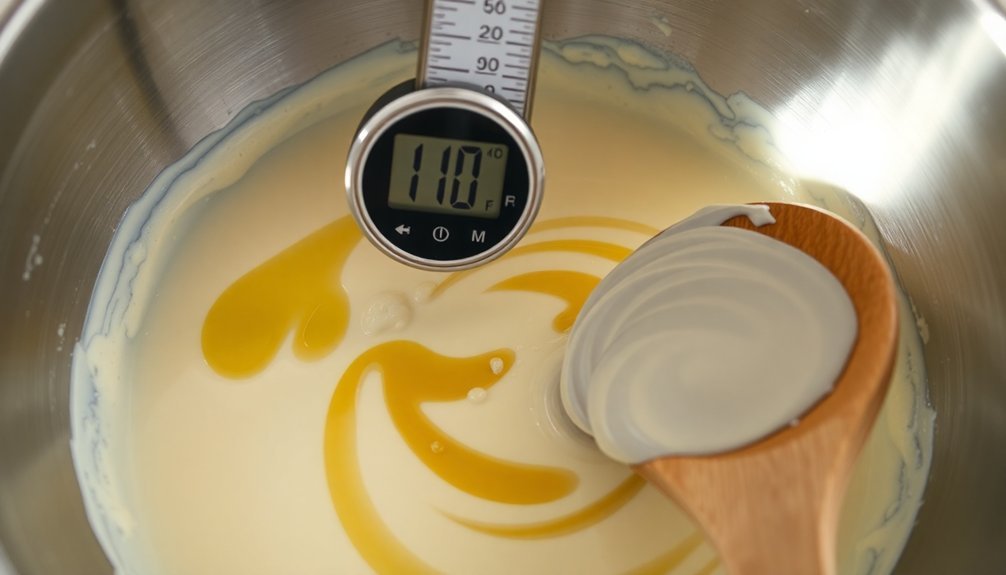
Temperature profoundly impacts the efficiency and success of cold process soap mixing. When your lye solution and oils are within 10°F of each other, you'll achieve ideal saponification without risking acceleration or seizing.
Remember that exothermic reactions generate heat naturally during mixing. If you're working with hard oils or waxes, you'll need higher temperatures to keep them melted, while fragrance oils often perform better at cooler temperatures to prevent acceleration.
Using a thermometer isn't just good practice—it's essential for consistency. By preparing your lye solution ahead of time and allowing it to cool properly, you'll save time during the actual mixing process.
The hydroxide ions from sodium hydroxide play a crucial role in breaking down triglyceride ester bonds during the mixing phase.
Room temperature soaping can be your ally when working with temperamental additives, giving you more control over the entire process.
Oil Selection and Its Effect on Mixing Duration
While beginners often focus solely on temperature, your oil selection actually determines much of your soap's mixing duration and final properties.
Hard oils like palm and coconut accelerate trace, creating firmer bars faster, while liquid oils like olive and sweet almond slow the process down.
The classic 34/33/33 ratio of olive, coconut, and palm oils provides a balanced blend that's manageable for most soapmakers.
If you're planning intricate designs, increase your liquid oil percentage to extend working time. Conversely, recipes heavy in butters like cocoa or shea will thicken quickly, requiring faster work.
Remember that oil choices impact more than just mixing time—they determine hardness, lather quality, and moisturizing properties. Sunflower oil, with its 6-month shelf life, creates silky smooth soap but requires more careful storage planning than longer-lasting oils.
Sustainable options should also factor into your selection process.
Balancing Speed and Quality in Your Soap Making Process
Achieving the perfect balance between speed and quality forms the cornerstone of successful cold process soap making.
You'll need to maintain ideal temperatures between 95°F and 105°F for both your lye solution and oils to prevent false trace while ensuring proper saponification.
When mixing, pour your lye solution slowly into your oils while stirring constantly.
Use your stick blender in short bursts, keeping it submerged to prevent air bubbles.
Watch for trace—that visible path on the surface when the mixture is poured—before adding fragrances or colors.
Never sacrifice safety for speed.
Always wear protective gear, use proper non-aluminum equipment, and work in a well-ventilated area.
Allow your soap to set for 24-48 hours before unmolding, then cure for several weeks to achieve ideal hardness and quality.
The average blending time for cold process soap is typically between 30 to 60 seconds to reach proper emulsification.
Frequently Asked Questions
Can I Remelt Soap if It Traced Too Quickly?
Yes, you can remelt soap that traced too quickly. It's called rebatching. You'll need to grate the soap, then slowly heat it in a crockpot or double boiler, adding minimal water if necessary.
How Does Altitude Affect Soap Mixing Duration?
Altitude doesn't considerably affect your soap mixing duration. You'll notice minimal impact on trace time, though higher altitudes may create drier conditions that slightly accelerate the overall process due to lower humidity levels.
Is Intermittent Blending Better for Intricate Swirl Designs?
Yes, you'll find intermittent blending is ideal for intricate swirl designs. It gives you better control over trace development, prevents overmixing, and allows distinct colors to maintain separation while creating beautiful, complex patterns.
Should Mixing Duration Change for Milk-Based Soap Recipes?
Yes, you'll need to adjust mixing duration for milk-based soaps. Blend more gently and for shorter periods to prevent overheating and scorching. Watch for a lighter trace since milk accelerates saponification compared to water-based recipes.
Will Antioxidants or Preservatives Affect the Trace Time?
Antioxidants typically won't affect your trace time considerably, but preservatives can accelerate it. You'll notice some natural preservatives like rosemary extract or vitamin E have minimal impact, while synthetic ones might speed up saponification.
In Summary
You've now discovered there's no "perfect" mixing duration for cold process soap—it depends on your recipe, tools, and preferences. Whether you're reaching trace in 2 minutes with a stick blender or 30 minutes by hand, trust your eyes and experience. Watch for those telltale thickness changes, respect your oils' properties, and adjust your technique. With practice, you'll develop your own sense of timing that works perfectly for you.


Leave a Reply