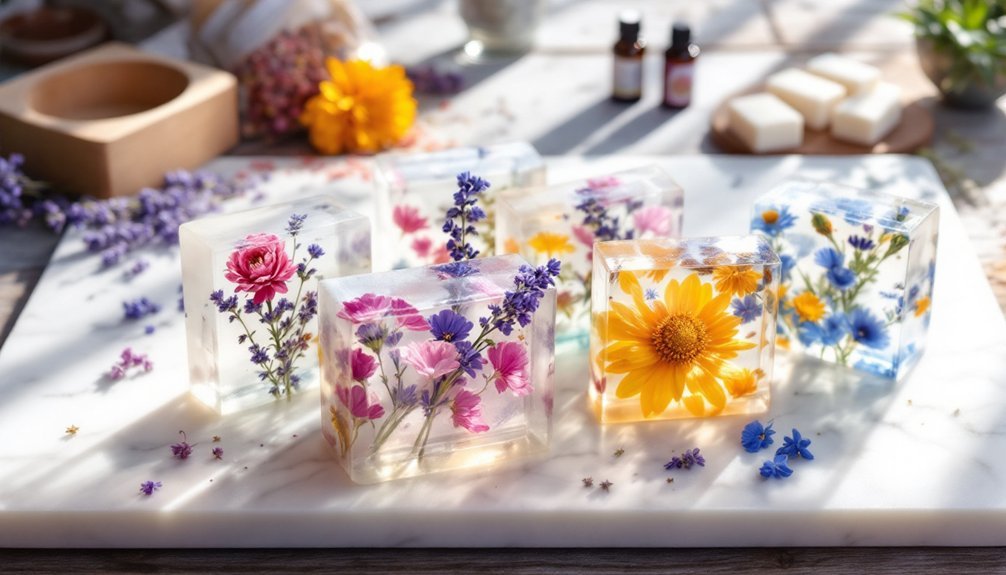
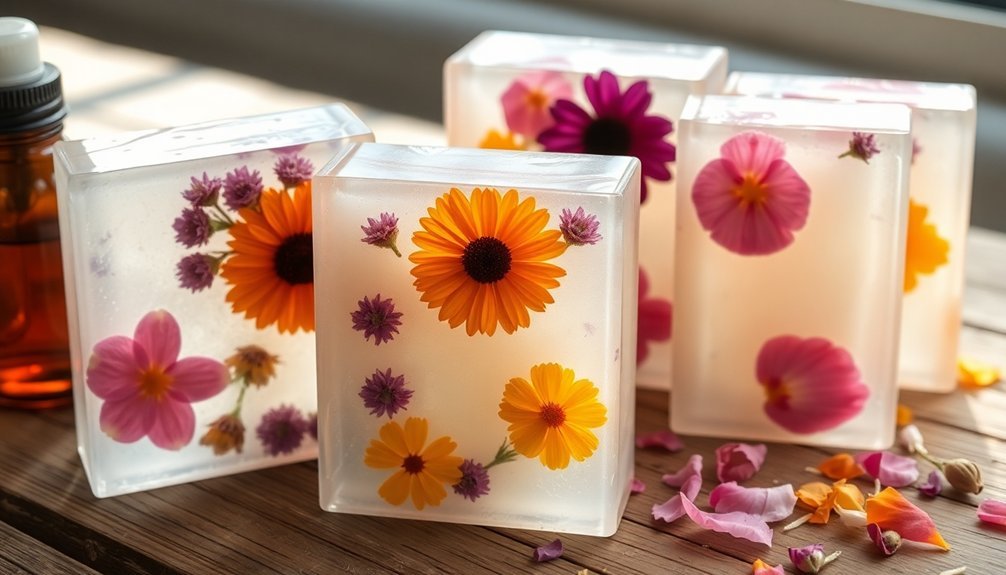
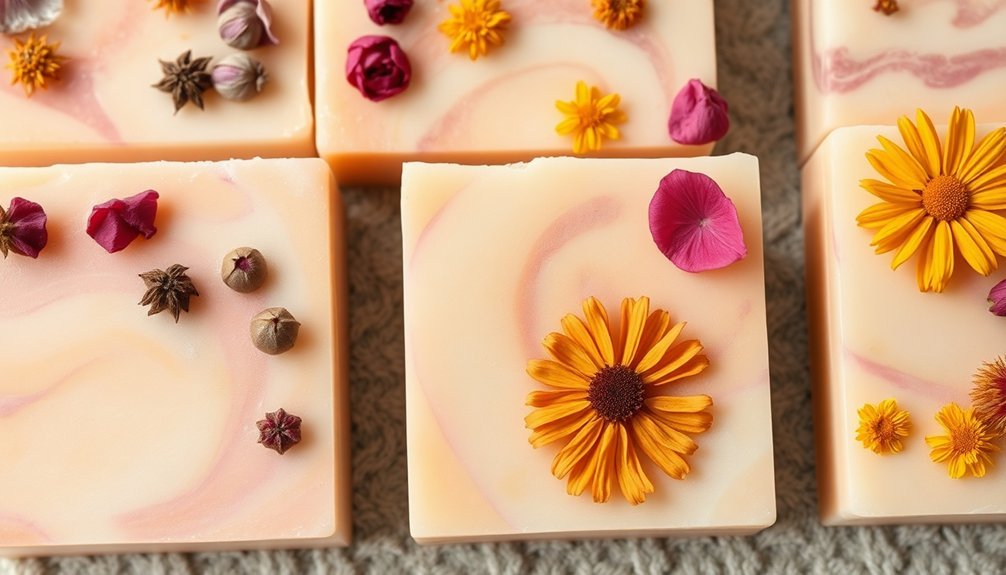
You can embed dried blooms in soap using seven distinct techniques: suspend and layer, pressed flower surface designs, between clear layers, as soap embeds for larger batches, with alcohol spray for color preservation, through cold process pour-through, or atop rebatch soap. For best results, mist with rubbing alcohol between layers, control temperature carefully, and choose lightweight blooms that retain their color. These methods transform ordinary soap into botanical art that's both beautiful and functional.
The Suspend and Layer Method
Many soap artisans consider the suspend and layer method the most effective technique for showcasing dried blooms in transparent soap. This approach creates a floating effect that highlights your botanical elements beautifully.
To execute this method, pour a thin initial layer of melted soap into your mold and allow it to partially set. When the soap reaches a slightly thickened state, carefully place your dried blooms on top. This critical timing prevents flowers from sinking to the bottom. Choose small, lightweight blooms for best results.
Between soap layers, lightly mist with rubbing alcohol to reduce air bubbles and improve adhesion. Then add subsequent layers to secure your botanicals in place.
Always allow each layer to adequately cool and harden before adding the next, creating distinct soap layers that frame your suspended dried blooms.
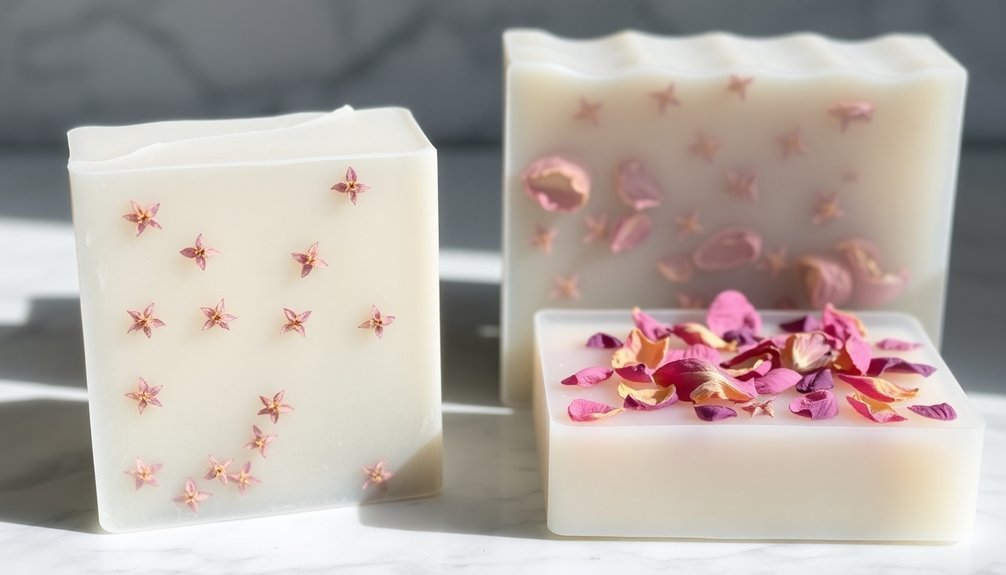
Pressed Flower Soap Surface Designs
Creating pressed flower soap designs on the surface offers you a canvas for beautiful floral arrangements that become permanent decorative elements.
You'll find that strategically placing dried blooms between clear and white glycerin layers creates a stunning visual effect reminiscent of botanical art.
These surface designs won't just enhance your bathroom aesthetics—they'll maintain their artistic appeal throughout the soap's use, making each wash a moment of natural luxury.
Beautiful Surface Arrangements
Surface design artistry elevates pressed flower soap from simple homemade products to stunning botanical showcases. To create these eye-catching designs, sprinkle dried flowers evenly across each soap mold cavity before pouring your base.
Choose small, unscented or lightly scented varieties like wax flowers and spray roses to decorate soap without irritating sensitive skin. Calendula flowers are excellent choices as they retain their vibrant color when exposed to moisture, unlike lavender and rose petals that typically brown.
For layered designs, allow the first layer to set for five minutes, then spritz with rubbing alcohol before adding more. This technique helps layers adhere properly while preventing moisture-induced discoloration of your flower petals.
The alcohol spray creates a protective barrier that preserves the natural beauty of your botanical elements in the finished product.
Long-Lasting Decorative Techniques
While surface arrangements create immediate visual appeal, proper preparation techniques guarantee your pressed flower soaps maintain their beauty long-term. Select small, thoroughly dried petals with minimal scent to prevent discoloration. Flowers like calendula not only preserve their vibrant colors but also offer beneficial herbal properties.
Master the layering technique by pouring a thin base of clear glycerin soap into your mold. Once slightly set, carefully position your dried petals and spritz with rubbing alcohol before covering with another soap layer. This prevents air pockets and secures the flowers in place.
For striking contrast, try a 1:1 ratio of clear to white glycerin soap. This combination showcases your botanical elements while ensuring they remain visible through the finished product—creating both artistic appeal and functional beauty.
Embedding Botanicals Between Clear Soap Layers
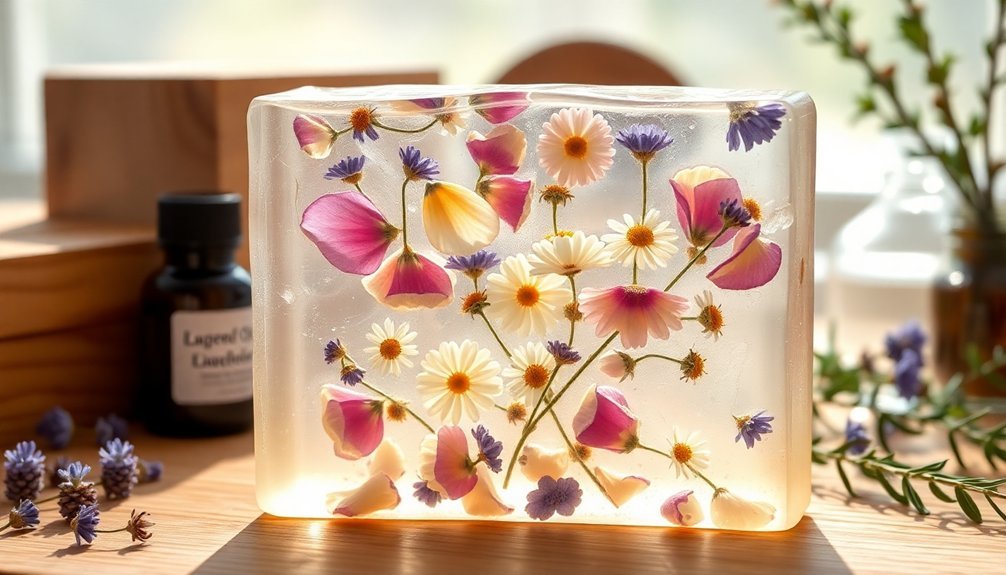
When embedding dried flowers between soap layers, you'll need to pour a thin base layer of clear glycerin soap first, let it partially set, then carefully position your botanicals on top.
Spray the cooled layer with rubbing alcohol before pouring additional melted soap to guarantee proper adhesion and eliminate air bubbles that could form around your flowers.
Maintain a 1:1 ratio of clear to white soap base for best results, preventing your botanicals from sinking while creating a professional-looking suspended effect.
Sandwiching Technique Essentials
The sandwiching technique creates stunning visual effects by preserving dried blooms between layers of soap.
Begin by melting clear glycerin soap base and pouring a thin ½-inch layer into your mold. Let it set for five minutes before arranging your dried petals or dried lavender on top.
Spray the surface with rubbing alcohol to prevent air bubbles and guarantee proper adhesion between layers.
Then melt white glycerin soap, possibly infused with essential oil, and pour it over your botanicals to fill the mold. This second layer encapsulates the flowers completely.
Allow your creation to cure for 40 minutes before unmolding.
Choose unscented or lightly scented blooms, especially if you're making soap for sensitive skin.
The finished product showcases beautifully preserved flowers suspended in clear, translucent soap.
Preventing Air Bubble Formation
Crafting bubble-free soap with suspended dried blooms requires careful temperature control and precise technique. When pouring your first layer, verify the melted soap isn't too hot as excessive heat causes flowers to release air. Allow this layer to cool slightly before adding the next one.
| Action | Purpose |
|---|---|
| Temperature control | Prevents flowers from releasing air |
| Cooling between layers | Reduces bubble formation chance |
| Alcohol spritz | Displaces air and improves bonding |
| Slow pouring | Minimizes disturbance to first layer |
| Pressing with spatula | Eliminates air pockets around blooms |
Lightly spritz the first layer with rubbing alcohol before adding your second layer. This helps create better bonding between layers in your soap bars. Use a thin, flexible spatula to gently press dried blooms, removing any trapped air pockets before proceeding with additional layers.
Creating Floral Soap Embeds for Larger Batches
Making beautiful floral embeds becomes essential as you scale up your soap production for gifts or small-batch sales.
Begin by melting your glycerin soap base and pouring a thin initial layer into your mold. This creates the perfect foundation for your dried petals and lavender buds.
After letting this layer set for just a few minutes, spray it with rubbing alcohol to guarantee proper bonding with subsequent layers.
Select lightweight blooms that won't sink in your natural soap mixture, preserving their visibility in your handmade products.
Carefully pour the remaining melted base over your arranged flowers, taking care not to disturb your design.
Allow your creation to cure for at least 40 minutes before unmolding to maintain the integrity of your floral display.
Preserving Vibrant Colors With Alcohol Spray Technique
While creating soaps with dried blooms, you'll quickly discover that preserving their natural colors requires special techniques. The alcohol spray technique is your best ally in maintaining those vibrant colors throughout the soap-making process.
Before adding additional soap layers, lightly mist the surface with rubbing alcohol. This creates a protective barrier that prevents moisture absorption, which typically causes dried blooms to brown or fade.
Apply the alcohol spray before your soap layers dry to guarantee the flowers retain their original hues during curing. For best results, spritz between each layer—this not only preserves color but also helps new layers adhere properly.
Choose unscented or lightly scented dried blooms, as strong fragrances might react with the alcohol and affect your flowers' appearance.
The Cold Process Pour-Through Method
For those who cherish the natural beauty of dried blooms, the cold process pour-through method offers an elegant solution to showcase flowers without the dreaded browning effect. This technique preserves both the visual appeal and skin-loving properties of your soap creation.
Begin by pouring a thin base layer of cold process soap into your mold and allow it to reach a soft trace. While still pliable, carefully arrange dried rose petals or other blooms on top of this layer.
Work quickly to pour a second layer over your arrangement, encapsulating the petals without stirring them in.
Timing is essential—don't let the first layer completely harden before adding the second, as this guarantees proper adhesion between layers while keeping those beautiful petals on top visible and vibrant.
Bloom-Topped Rebatch Soap Technique
The rebatch method offers another wonderful approach to preserving the beauty of dried blooms in your soap creations.
Begin by grating your soap base—goat milk soap works wonderfully—into small pieces and melting it slowly over gentle heat. Be careful not to overheat the mixture, as burning will affect both scent and texture.
Once melted, pour the soap into your chosen mold and let it cool slightly. This creates the perfect tacky surface for decorating.
Sprinkle dried petals, particularly dark lavender or chamomile, across the top. Gently press these delicate blooms into the surface to secure them.
Unlike other techniques, this method showcases your dried flowers precisely where you want them while preventing the discoloration that often occurs when mixing petals directly into soap batter.
Frequently Asked Questions
How to Put Dried Flowers in Soap?
To put dried flowers in soap, first sprinkle them in your mold, then pour a thin layer of melted glycerin soap. Spray with rubbing alcohol before adding more layers. You'll create beautiful, personalized bars.
How to Prevent Dried Flowers in Soap From Turning Brown?
You'll prevent dried flowers from browning in soap by sprinkling them on top rather than mixing them in. Choose stable flowers like calendula, infuse oils with botanicals beforehand, and store finished soaps in cool, dark places.
How Do You Embed Dried Flowers in Resin?
To embed dried flowers in resin, you'll need to thoroughly dry your blooms first. Pour a base layer of mixed resin, arrange your flowers, then cover with more resin. Let it cure completely before removing.
What Flowers Don't Turn Brown in Soap?
Calendula, chamomile, and marigold flowers won't turn brown in your soap. They'll maintain their vibrant colors while dried lavender and rose petals typically darken. You'll get better results using whole dried flowers with low moisture content.
In Summary
You've now discovered seven creative ways to incorporate beautiful dried blooms into your handmade soaps. Whether you're layering, suspending, or creating intricate surface designs, each technique offers unique artistic possibilities. Remember to properly dry your botanicals before use, and don't be afraid to experiment with combinations of methods. Your homemade floral soaps will make stunning gifts that showcase your crafting skills while delivering a luxurious bathing experience.


Leave a Reply