To filter ash for traditional lye, you'll need white hardwood ash from trees like apple, ash, or pear. Create a leaching container with small drainage holes and elevate it 3-4 feet off the ground. Layer the ash with clean straw for filtration, then slowly pour rainwater over the mixture. Collect the draining lye solution and test its strength using the egg float method. Proper safety gear and careful handling will help you master this ancient craft.
Understanding Wood Ash Selection
When making traditional lye from wood ash, selecting the right type of ash is essential for producing a potent and effective solution.
You'll want to focus on hardwoods rather than softwoods, as they yield more ash by weight and contain higher potassium levels. Broad-leaved hardwoods like ash, apple, and pear trees are your best options.
Look for white ash that's completely burned and free of charcoal or partially burned wood pieces. You don't want dark gray or black ash in your mix.
It's important to maintain lower burning temperatures that still produce white ash, as excessive heat above 900°C (1650°F) will break down the valuable potassium carbonate.
When collecting ash from your fireplace or stove, gather it after each fire while it's fresh and screen it to remove any unoxidized materials. Store the collected ash in airtight containers to prevent moisture contamination that could degrade its quality.
Essential Tools and Materials
Three essential categories of equipment are needed for filtering ash into lye: basic tools, filtration materials, and safety gear.
You'll need heat-resistant containers made of polypropylene plastic, stainless steel, or glass for the lye solution. A barrel with drilled holes serves as your leaching container, while pebbles and straw create the filtration layers.
For filtration, you'll want hardwood ashes from trees like hickory or sugar maple, along with rainwater or soft water. Broad-leaved hardwoods produce superior quality lye compared to softwood varieties.
Don't forget to gather straw fibers for multiple filtering passes. Your safety equipment must include protective gloves, goggles, and a face mask.
Work in a well-ventilated area and use only non-aluminum utensils, as lye reacts with aluminum. Keep a thermometer handy to monitor temperatures throughout the process.
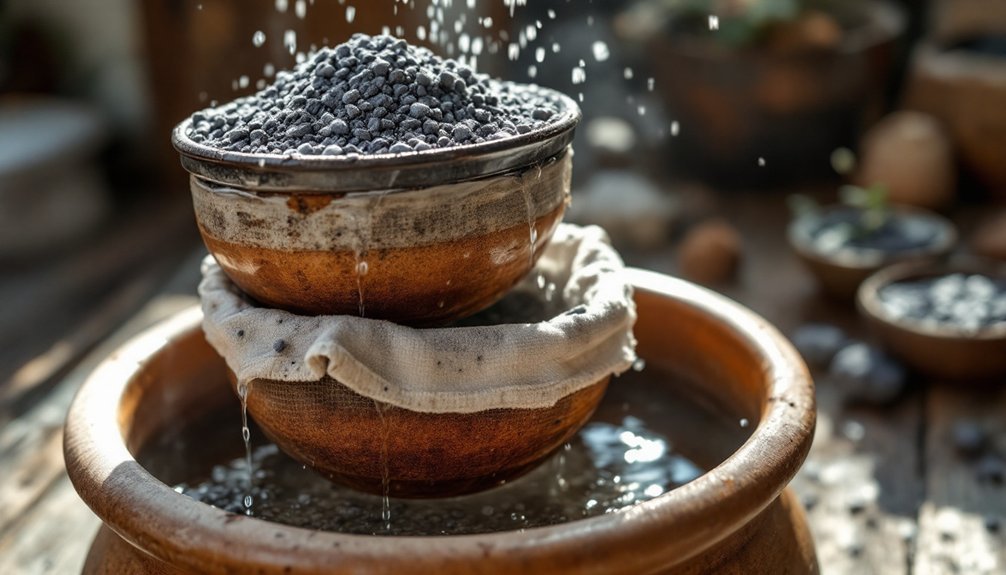
Setting Up the Leaching Container
Setting up your leaching container properly forms the foundation of successful lye production.
You'll need to elevate it 3-4 feet off the ground using blocks or a wooden frame, making sure it's protected from rain and positioned near your rainwater source.
Start by drilling six small 1/8-inch holes in the container's bottom, ensuring they're aligned with your collection bucket below.
You can temporarily plug these holes with bungs until you're ready to begin.
Next, fill the container with hardwood ashes from materials like hickory, ash, or beech, leaving 4 inches of space at the top. Layer clean straw bedding on top of the ashes to help with filtration.
Once positioned, pour rainwater slowly over the ashes until they begin to float.
Place your lye-safe bucket underneath to collect the draining lye water, which typically takes 6-8 hours to filter through.
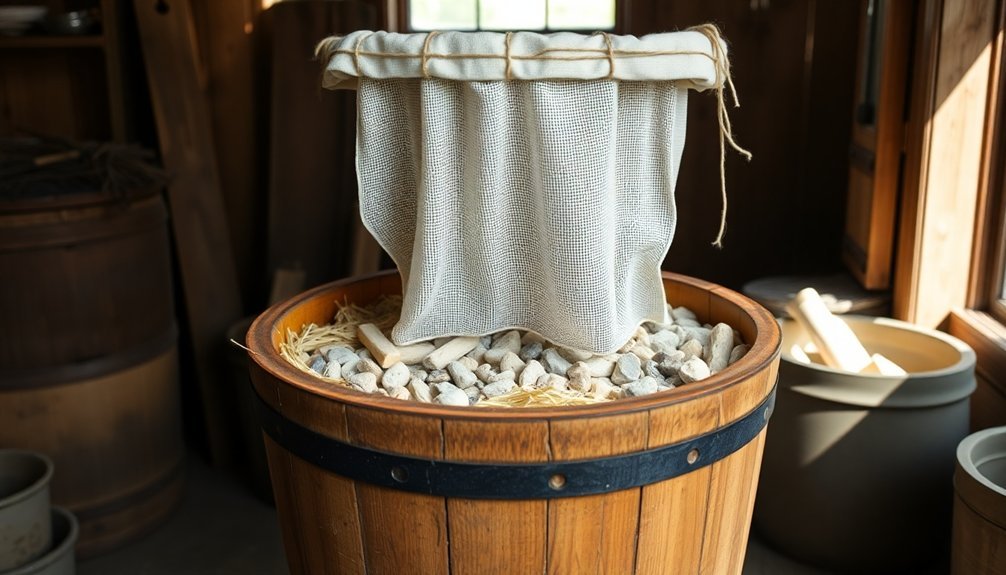
Building the Filtration Layers
Building effective filtration layers requires four distinct components working together.
Start by placing sticks or small branches at the base of your container to create proper drainage. Next, add a layer of straw or dried grass to catch larger particles, followed by a layer of pebbles or small rocks to prevent clogging. The elevated container setup allows gravity to help the lye solution drip through effectively.
For the main filtering system, you'll want to:
- Add hardwood ashes (like hickory, maple, or beech) in stages, tamping down each layer
- Create a slight depression at the top for water collection
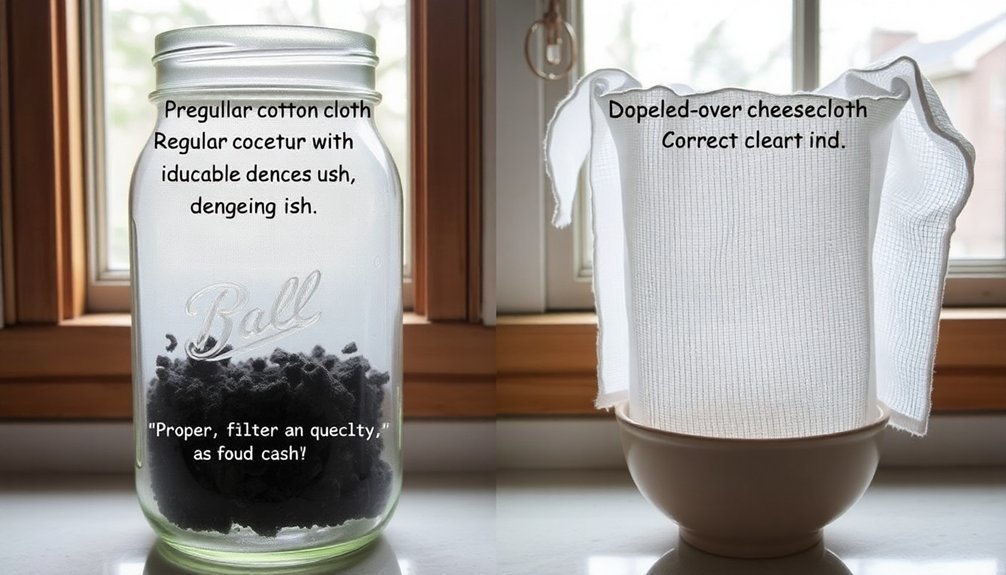
- Cover with a tightly-woven material like cheesecloth for final filtration
Remember to avoid softwood ashes, as their resins can compromise your lye solution.
Using hardwood ashes from completely burned wood guarantees the best results while minimizing contaminants in your final product.
Water Requirements and Temperature
When making traditional lye, choosing the right water source and temperature proves critical for success. You'll need about 10 pints of rainwater, which is ideal due to its low mineral content. Don't use hard water or city water, as their minerals will interfere with the soap-making process. Since lye requires hardwood ash for proper potassium content, avoid using any softwood remains in your mixture.
| Water Type | Suitability | Reason |
|---|---|---|
| Rainwater | Excellent | Low minerals |
| Well Water | Poor | High minerals |
| City Water | Poor | Chemicals |
| Hard Water | Unsuitable | Affects lather |
While you'll need to boil the ashes initially for about 30 minutes, the actual leaching process can occur at room temperature. Always wear protective gear when handling the solution, including rubber gloves and safety goggles. Remember to let your ashes cool for several days after burning before starting the extraction process.
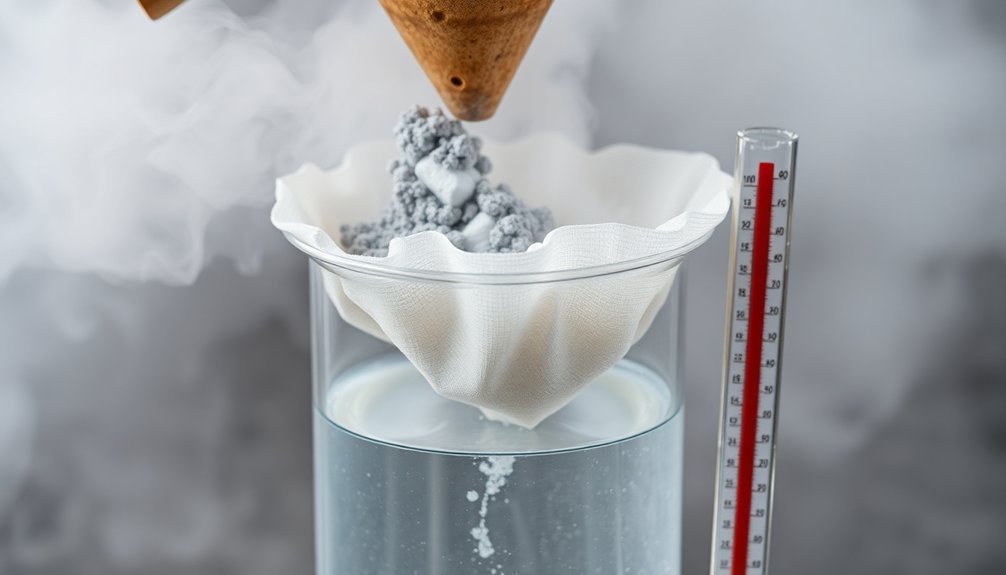
The Step-by-Step Leaching Process
The proper leaching process begins with careful ash selection and preparation.
You'll need to collect white ashes from hardwood fires and let them cool for several days before storing them in metal containers. Avoid softwoods like pine due to their high resin content.
Set up your leaching system by creating layers in a wooden barrel with a drainage hole:
- Place straw or dried grass at the bottom
- Add small pebbles for water flow
- Position the barrel on an elevated surface
Pour boiled or rainwater over your ashes slowly, maintaining a ratio of one gallon of ash to one and a half gallons of water.
Let the mixture seep for 6-8 hours, collecting the runoff in a separate container.
You'll need to repeat this process multiple times, boiling the collected solution between cycles until it reaches the desired strength.
Testing Lye Solution Strength
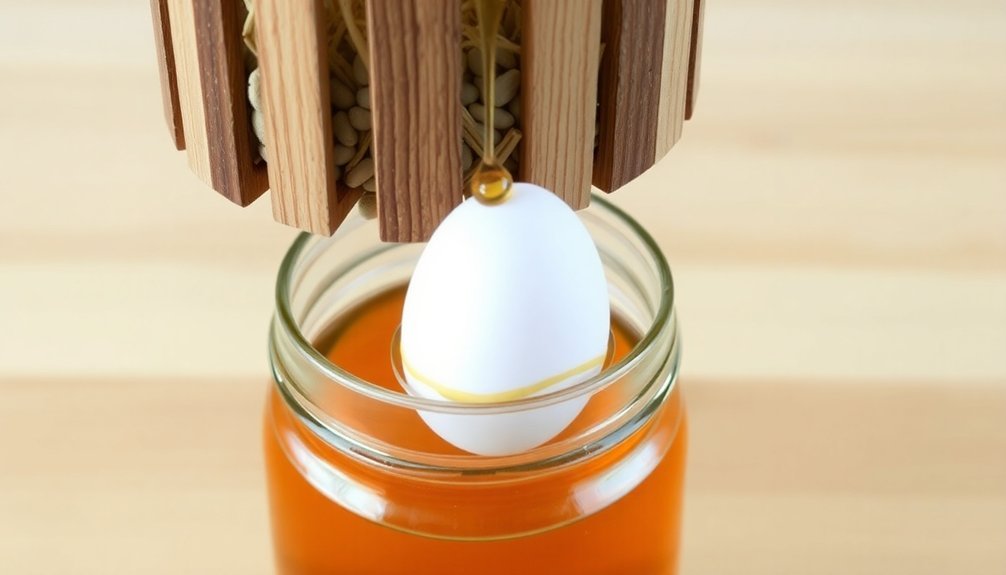
Several reliable methods exist for testing your lye solution's strength before use.
The most accurate traditional method is the egg float test – place a fresh egg in your solution, and it should float with just a quarter-sized portion above the surface. If it rises too high, your solution's too strong; if it sinks too low, it's too weak. Remember to discard the test egg afterward.
Alternatively, you can use a chicken feather, which should show signs of breaking down but not completely dissolve in a properly concentrated solution.
For more precise measurements, modern methods include pH meters, conductivity testing, or titration with acids. The speed of sound measurement offers a maintenance-free option that's particularly reliable across different conditions.
Choose the method that best matches your equipment and expertise level.
Safety Measures and Precautions
Before you begin filtering ash for lye, you'll need proper protective gear including rubber gloves, eye protection, a face mask, and clothing that covers all exposed skin.
You must work in a well-ventilated space away from children, pets, and any aluminum materials that could react with the lye.
Keep vinegar, water, and a first aid kit within reach for emergency situations, and make certain your workspace is equipped with a stable filtering container positioned at a height that allows for easy collection of the lye solution.
Essential Protective Equipment
Working with lye requires thorough safety equipment to protect yourself from potential burns, fumes, and other hazards.
You'll need to wear thick rubber, nitrile, or latex gloves that cover your wrists, with sleeves tucked in to prevent skin exposure. Don't forget eye protection like goggles or a full-face shield respirator, and make certain you're wearing protective clothing including long sleeves, pants, and closed-toe shoes.
For your workspace protection, follow these essential steps:
- Use lye-resistant surfaces like stainless steel, glass, or polypropylene
- Cover work areas with paper, cardboard, or plastic sheeting
- Keep your space well-ventilated and free from clutter
Remember to tie back long hair and wear an apron to protect your clothing.
Always keep safety supplies nearby for spill cleanup, including vinegar and rags.
Safe Handling Zones
Beyond personal protective equipment, establishing dedicated safe handling zones is a fundamental step in lye production.
Set up your workspace in a well-ventilated area away from children and pets, using non-reactive surfaces like stainless steel or glass. Cover your work area with paper or plastic sheeting for added protection.
Create distinct zones for your safety stations, including an eyewash station or sterile saline bottles, and guarantee easy access to washing facilities.
Keep your mixing area near a sink and stock it with paper towels and cleaning supplies like kitchen spray or non-clumping kitty litter for immediate spill response.
Use only polypropylene or stainless steel containers for mixing, and avoid any aluminum materials in your handling zones.
Remember to maintain clear pathways to all safety equipment and emergency supplies.
Common Mistakes to Avoid
When making traditional lye from wood ash, several critical mistakes can derail your efforts and waste valuable time.
You'll want to avoid using softwood ashes, as they contain resins and don't burn as cleanly as hardwoods like black locust. Proper filtering materials and technique are also essential for success.
To guarantee the best results, remember these key points:
- Use multiple filtering layers of straw, twigs, and activated carbon – don't rely on cheesecloth alone.
- Choose distilled, rain, or soft water instead of hard water to prevent precipitation issues in your soap.
- Don't rush the leaching process – allow 6-8 hours for proper filtration and perform multiple runs if needed.
Always be patient during the filtering process, as rushing can result in weak or impure lye solutions.
Storing and Using Filtered Lye
You'll need to store your filtered lye in containers made of stainless steel, high-quality glass, or HDPE plastic that's rated for alkali resistance.
Keep the lye in a cool, dry place using airtight containers to prevent moisture absorption, and always label everything clearly with content and safety warnings.
For long-term storage, place your sealed containers in a locked cabinet or high shelf, away from children and pets, and maintain a posted list of safety procedures nearby.
Safe Container Selection
Safety precautions with lye storage begin with selecting the right container material. The best options are thick-walled containers made from alkali-resistant materials that won't degrade or react with the lye solution. High-quality stainless steel and chemical-resistant plastics like HDPE are your safest choices, while glass containers are acceptable but less ideal.
When choosing your container, follow these critical requirements:
- Select containers that can support 1.5 times the weight of water and won't deform when warm.
- Avoid PET, PETG, PETE, and PVC plastics, which break down quickly when exposed to alkali.
- Confirm the container has a tight-fitting lid and is clearly labeled with safety information.
Store your container in a well-ventilated area, away from children and pets, and inform emergency personnel about its presence if needed.
Long-Term Storage Tips
Proper storage of filtered lye demands careful attention to both environmental conditions and container maintenance.
You'll need to store your filtered lye in a cool, dry place away from direct sunlight and moisture. Choose a secure location like a garage or high cupboard that's inaccessible to children and pets.
Always label your storage container with the date you filtered the lye, and plan to use it within one year for best results.
If you notice your lye turning grayish or forming clumps, it's likely absorbing moisture and losing potency. Check your stored lye regularly for these signs of degradation.
Keep the container tightly sealed when not in use, and don't mix hot lye solutions in closed containers.
For ideal safety, clearly mark your storage area and maintain regular inspections of both the container and its contents.
Frequently Asked Questions
How Long Can Filtered Lye Be Stored Before It Loses Potency?
You can store filtered lye for up to one year in a cool, dry place before it loses potency. Keep it in a tightly sealed container and watch for signs like color changes or clumping.
Can Ashes From Wood-Burning Stoves Be Used for Making Lye?
Yes, you can use wood-burning stove ashes to make lye, but you'll want to use hardwood ashes like oak or maple. They're perfect for this purpose since they contain the right amount of potassium carbonate.
What Color Should the Final Lye Solution Be?
Your final lye solution should be clear to slightly amber in color unless you've added natural colorants. Don't worry if it's a bit cloudy – what matters most is that it's concentrated enough to float an egg.
How Many Times Can the Same Ash Be Reused for Filtering?
You can reuse your ash multiple times for filtering, but you'll notice decreasing effectiveness with each use. Generally, after 3-4 leachings, the ash becomes too depleted of potassium salts to produce usable lye.
Does Seasonal Variation in Wood Affect the Strength of Lye Produced?
Yes, you'll find that seasonal wood variations affect your lye's strength. Wood grown in different seasons has varying densities and chemical compositions, which directly impacts the alkalinity and potency of the lye you produce.
In Summary
Successfully filtering ash for traditional lye relies on your careful attention to each step of the process. You'll need clean hardwood ash, proper safety gear, and patience to achieve the right strength. Remember to store your filtered lye solution in an appropriate container and always label it clearly. With practice and proper safety measures, you'll master this traditional skill for your soap-making or other homesteading projects.


Leave a Reply