In soap making, trace refers to emulsification stages between oils and lye. Light trace resembles thin cake batter, leaving faint trails when drizzled—perfect for intricate swirls and colorants. Full trace has pudding-like consistency that holds its shape with distinct peaks—ideal for textured designs and layering. Your mixing method affects development speed; stick blenders accelerate while hand stirring slows the process. Understanding these stages will transform your creative possibilities and help you avoid common pitfalls.
Light Vs Full Trace: Soap Making Stages Explained
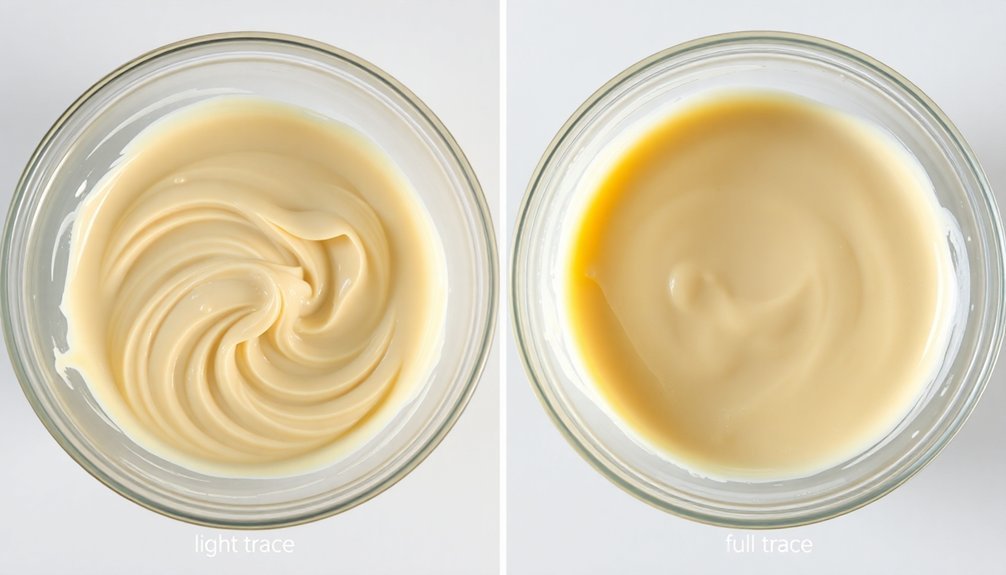
When making soap, understanding the difference between light and full trace is essential for achieving your desired results.
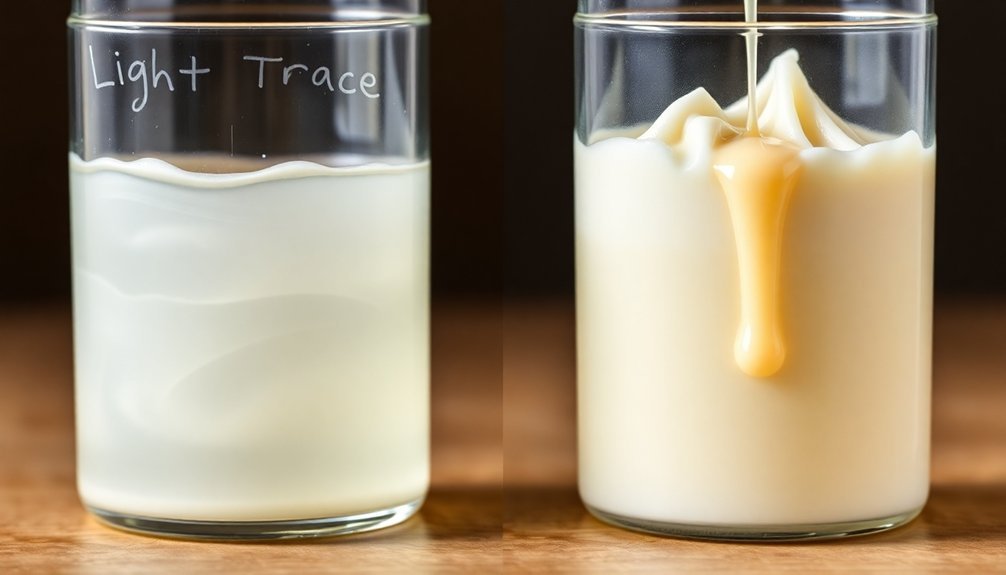
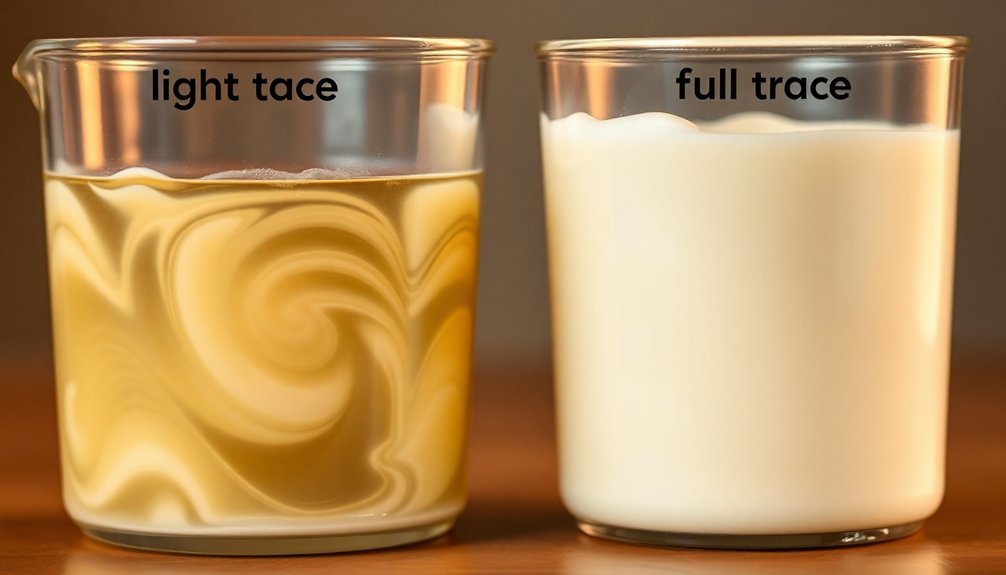
Light trace resembles thin cake batter, showing the first signs of emulsification while saponification is just beginning. When drizzled, it leaves a visible trail on the surface of your soap mixture. This stage is perfect for adding colorants and fragrances.
In contrast, full trace has a thick pudding consistency where the mixture holds its shape. You'll know you're at full trace when your soap can be sculpted and layered with stability.
The soap making process moves from light to full trace at varying speeds, influenced by oil and lye temperatures, ingredients, and whether you're stick blending or hand stirring. Mastering these stages will help you time your additives perfectly.
What Exactly Is Trace in Soap Making?
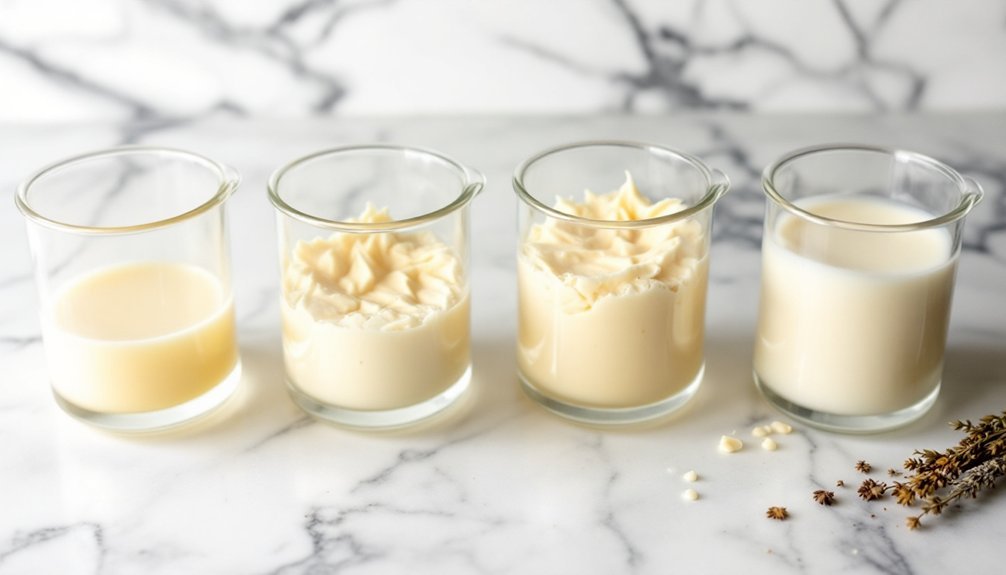
Trace represents the critical moment in soap making when your oils and lye water have successfully emulsified, marking the beginning of saponification. This stage confirms your mixture won't separate, ensuring a successful batch. The consistency changes visibly as you work, indicating how much time you have before the soap sets.
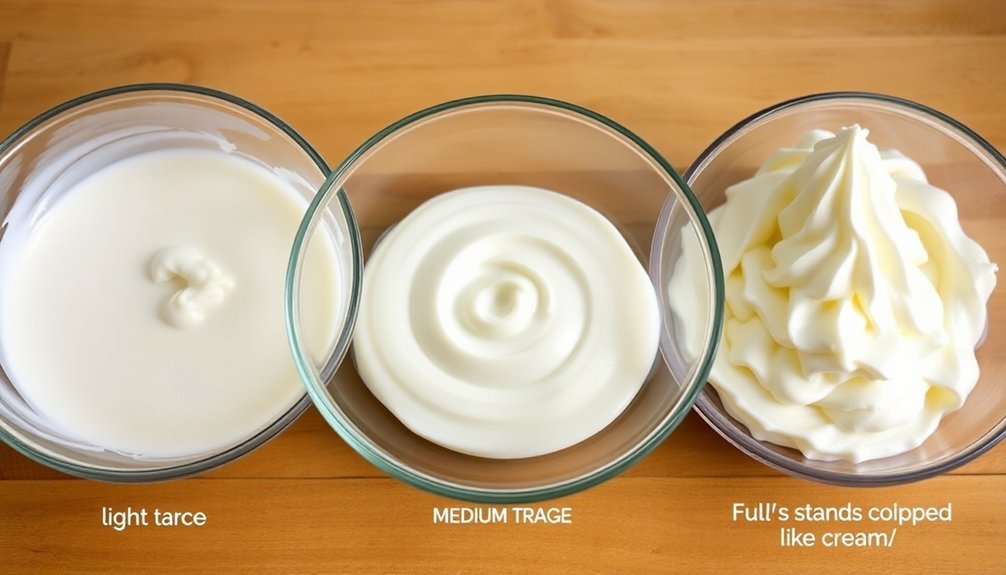
- Light trace resembles thin cake batter, showing no oil streaks – ideal for incorporating additives and fragrances while giving you maximum working time.
- Medium trace thickens like melted ice cream, allowing for swirls and basic designs.
- Full trace achieves pudding-like consistency that holds its shape, perfect for intricate designs and confirming complete emulsification.
Your mixing method dramatically affects trace development – a stick blender accelerates the process compared to hand stirring, giving you control over the saponification process.
The Science Behind Emulsification and Saponification
When you mix oils with lye, you're witnessing chemical reactions that transform raw ingredients into soap through two distinct processes.
Emulsification occurs first as the oil and lye form a stable mixture, creating that cloudy, milky appearance that indicates your batch has reached trace.
This molecular binding process then gives way to full saponification, where the lye chemically breaks down the fat molecules and reconstructs them into soap.
Chemical Reactions Begin
As you stir together your oils and lye water, an incredible scientific transformation begins at the molecular level. Emulsification occurs first, preventing separation and creating a uniform mixture that signals the soap-making process is underway.
When this mixture reaches trace, saponification has officially begun—your oils and lye water are actively becoming soap.
Three key stages to understand:
- Initial emulsification – oils and lye water permanently blend, laying groundwork for chemical reactions
- Light trace – mixture thickens to thin cake batter consistency with no oil streaks visible
- Full trace – reaches pudding-like thickness, indicating soap is ready for additives
Temperature management is essential during these stages—warmer ingredients accelerate the reaction while cooler ones may cause false trace before proper emulsification occurs.
Molecular Binding Process
The molecular binding process underlying soap creation represents one of chemistry's most elegant transformations. When you mix oils and lye water, emulsification begins—the first visible sign that saponification is underway.
At a molecular level, triglycerides in your oils are reacting with sodium hydroxide, breaking apart and reforming as soap molecules and glycerin.
As this chemical transformation progresses, you'll notice increasing viscosity in your soap batter. Light trace appears first—a slightly thickened, creamy consistency that's perfect for adding colorants and fragrances.
Continue stirring, and you'll eventually reach full trace, where the mixture becomes pudding-like. This thickening occurs because more triglycerides have converted to soap molecules, indicating saponification is well established.
The process transforms separate ingredients into a cohesive product with entirely new properties.
Recognizing Light Trace: Visual and Textural Cues
Identifying light trace marks a vital turning point in your soap-making journey.
At this stage, your mixture achieves a consistency similar to thin cake batter—smooth texture without oil streaks indicates proper emulsification has begun. When you drizzle the soap across the surface, you'll notice a visible trail that momentarily sits before disappearing.
This is the ideal moment to:
- Add colorants that will distribute evenly throughout your still-fluid mixture
- Incorporate fragrances without risking acceleration
- Pour into molds if creating complex designs requiring maximum workability
You'll typically reach light trace within minutes using a stick blender, while hand stirring takes considerably longer.
Recognizing this vital phase guarantees you're on track for a successful soapmaking process with peak design flexibility.
Full Trace Characteristics: When Your Soap Holds Its Shape
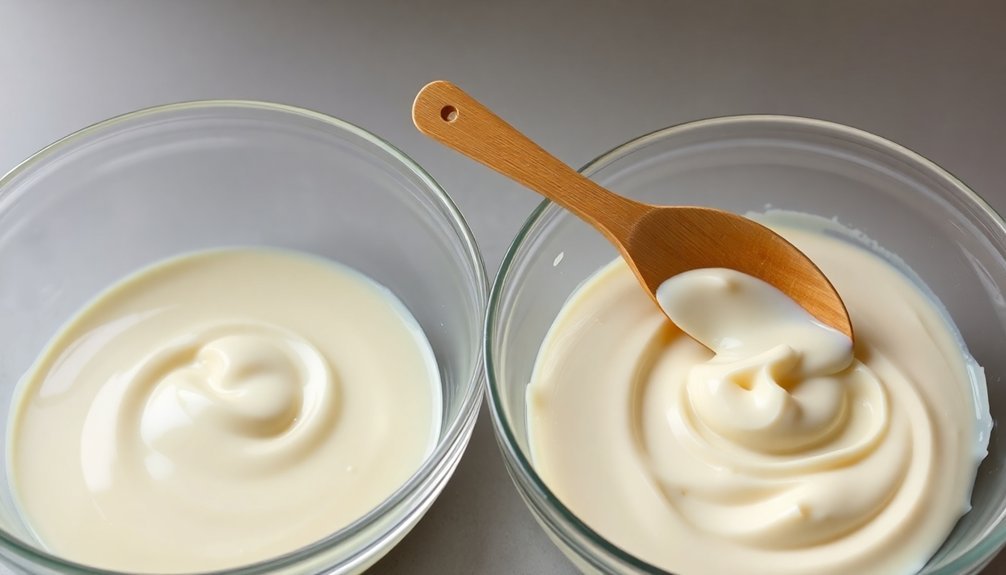
When your soap batter reaches full trace, you'll notice it has the consistency of thick pudding and holds its shape when you lift and drizzle it back onto the surface, forming distinct peaks that don't quickly disappear.
You can test this by dripping some batter onto the mixture's surface – if it leaves a permanent raised pattern rather than sinking back in, you've achieved full trace.
At this stage, your soap mixture will maintain detailed designs and textures, making it perfect for crafting layered soaps or creating decorative tops with depth and dimension.
Peak Firmness Test
As your soap mixture shifts into full trace, recognizing the peak firmness becomes essential for executing intricate designs. The peak firmness test confirms your soap has reached full trace when it maintains its shape like thick pudding. At this stage, soap drizzled over itself leaves a distinct trail that remains visible—ideal for creating textured tops and layered effects.
To perform a reliable peak firmness test:
- Lift your mixing tool and allow some soap mixture to fall back into the container—it should leave a mound that doesn't immediately disappear.
- Gently press a spoon into the surface—it should hold the impression without collapsing.
- Draw a line with a spatula—a defined ridge should remain, indicating proper saponification is underway.
Careful monitoring of temperature throughout this process prevents over-acceleration, giving you best working time.
Textural Indicators
The textural alteration of your soap mixture reveals its progression to full trace through several unmistakable indicators. When your batch reaches full trace, you'll notice a pudding-like consistency that's dramatically thicker than light trace. The soap mixture will confidently hold its shape when poured, unlike the more fluid state of light trace.
A reliable visual cue is when you drizzle soap across the surface and it creates a lasting trail without disappearing—signaling complete emulsification.
Your thick trace will support distinct peaks and valleys, ideal for textural designs and sculptural elements. Monitor this change carefully; once full trace develops, you'll need to work quickly before the mixture becomes too stiff for pouring.
This thick consistency guarantees your soap layers remain separated, allowing for more controlled artistic techniques.
Pattern Permanence
Full trace represents the artistic sweet spot in soap making where pattern permanence becomes truly achievable. At this stage, your soap batter has properly emulsified to a pudding-like consistency where designs stay exactly where you place them.
Unlike light trace, which flows and merges, full trace (also called thick trace) holds its shape when manipulated.
You'll know you've reached full trace when:
- The batter leaves distinct trails when drizzled over itself
- Patterns and textures remain separate without blending back together
- The mixture is thick enough to be sculpted but still pourable
This stability guarantees no unsaponified oil remains in your final product.
The perfect full trace creates a canvas where your creative designs maintain their integrity through the curing process.
Temperature's Critical Role in Trace Development
When creating handcrafted soap, temperature plays a pivotal role in determining how quickly your soap reaches trace and the quality of the final product. The ideal temperature range for achieving medium to thick trace is 100-130°F, ensuring optimal saponification while avoiding false trace issues.
| Temperature Range | Trace Speed | Best For |
|---|---|---|
| 70-90°F | Slow | Intricate designs |
| 100-130°F | Medium | General soaping |
| 130-150°F | Fast | Simple designs |
| 150°F+ | Very fast | Hot process |
| Below 70°F | Risk of false trace | Not recommended |
You'll find that water discounting accelerates the trace process but impacts the final texture. For consistent results, use an infrared thermometer to monitor temperatures throughout your soaping process. At higher temperatures, ingredients emulsify faster, while cooler temperatures give you more working time.
How Different Oils Affect Trace Progression
When formulating your soap recipe, you'll notice that saturated oils like coconut and palm reach trace much faster than unsaturated varieties such as olive and sunflower.
Your selection of fast or slow tracing oils directly impacts your available working time for design techniques and additives.
The temperature of your oils also plays an essential role in trace development—warmer oils accelerate the process while cooler temperatures provide more time for intricate patterns.
Fast vs. Slow Tracing Oils
Understanding how different oils affect trace progression is essential if you're aiming to create intricate soap designs or simply want to control your working time at the soap pot.
The fatty acid profiles of your chosen oils directly influence how quickly your soap batter will thicken. Fast tracing oils like coconut and palm contain high levels of saturated fatty acids, causing quicker emulsification.
Conversely, slow tracing oils such as olive oil, being mainly unsaturated, give you extended working time before the mixture thickens.
- Solid oils generally accelerate trace speed compared to liquid oils.
- Castor oil is a unique exception – despite being unsaturated, its high ricinoleic acid content can unexpectedly speed up trace.
- The ratio of solid to liquid oils in your recipe considerably impacts trace timing.
Oil Temperature Impact
Beyond the oils themselves, temperature plays a notable role in trace development. When you're working with warmer oil temperatures, you'll notice considerably faster emulsification, which accelerates your soap making process overall.
This temperature impact is particularly pronounced with hard oils like coconut and palm, which already trace quickly due to their high saturated fatty acid content.
Conversely, if you're seeking a slower trace progression for intricate designs, consider using cooler liquid oils. Oils like olive or sunflower have high unsaturated fatty acid profiles that naturally slow emulsification.
By manipulating both oil selection and temperature, you can better control your soap recipes.
Understanding how fatty acid profiles and temperatures interact gives you powerful tools to predict trace behavior, helping you plan your soap making sessions more effectively.
Fragrance and Essential Oils: Their Impact on Trace Speed
Although many soapmakers focus on colors and molds, fragrance and essential oils play an essential role in determining how quickly your soap reaches trace. Different oils will dramatically affect your soap making stages—some accelerate trace while others slow it down.
Floral fragrances like Lily of the Valley typically accelerate trace, while certain essential oils such as Lavender and Ylang Ylang give you more working time.
You'll notice citrus oils can even slow down trace when added early in the process.
To manage trace speed effectively:
- Test new fragrance oils in small batches before committing to larger projects
- Add colorants before introducing fragrances to maintain better control
- Consider using slow-trace essential oils when creating intricate designs requiring extended working time
Colorants and Additives: When to Add at Different Trace Stages
Timing your colorant and additive additions can make or break your soap design, as each trace stage offers different advantages for specific ingredients.
At light trace, when your mixture resembles thin cake batter, introduce colorants and fragrances for even distribution while the soap remains workable.
As you reach medium trace (thin pudding consistency), it's ideal to add heavier additives like poppy seeds or herbs, which will stay suspended throughout your soap.
For textured tops and layered designs, wait until thick trace when your soap holds its shape.
Always add colorants before fragrances during soap making, as fragrances can accelerate trace.
Be cautious of false trace—ensure your mixture is fully emulsified before adding any ingredients to avoid uneven distribution and design failures.
Troubleshooting False Trace and Seizing Issues
Two common challenges soap makers face are false trace and seizing, both of which can derail your carefully planned design.
False trace occurs when your soap batter appears to have reached light trace but hasn't actually saponified—it's simply solid oils solidifying due to cool temperatures, creating a deceptive thickness.
To troubleshoot these issues effectively:
- Temperature control – Keep your oils fully melted and maintain consistent temperatures to promote proper emulsification rather than premature hardening.
- Visual inspection – Look for smooth consistency versus grainy texture; false trace often appears lumpy with oil pools on the surface.
- Intervention techniques – If you suspect false trace, continue stirring to achieve proper emulsification; for seizing caused by high temperatures or fragrance oils, quickly pour your thick trace into molds before it becomes unworkable.
Techniques for Slowing Down an Accelerating Trace
When your soap batter starts tracing too quickly, you'll need effective strategies to regain control of the process. Switch from your stick blender to a whisk for gentler mixing that gives you more working time. Keep both your lye solution and oils at lower temperatures (around 100°F) to naturally slow the reaction.
| Technique | Effect on Trace |
|---|---|
| Use soft oils (olive, sunflower) | Extends working time |
| Add essential oils before blending | Citrus/lavender delays trace |
| Switch to manual whisking | Reduces mechanical acceleration |
| Introduce cold additives | Cools mixture, slows reaction |
Your recipe formulation matters considerably—higher percentages of soft oils contribute to a slower trace, giving you more time for complex design work. For intricate patterns, consider adding frozen additives toward the end of your mixing process.
Swirling Designs: Which Trace Stage Works Best
Creating beautiful swirled patterns in your handcrafted soap depends largely on achieving the right trace consistency before you begin.
Light trace, resembling thin cake batter, offers ideal fluidity for swirling designs and gives you ample time to incorporate additives and colorants before the mixture sets.
To achieve stunning swirling effects:
- Work primarily with light trace for intricate patterns – this consistency allows colors to blend seamlessly while maintaining definition.
- Consider medium trace (thin pudding consistency) for more defined swirls, but work quickly as it thickens faster.
- Avoid thick trace for swirling designs, as it's better suited for layering since it holds its shape rather than blending.
Timing is essential! Monitor trace stages closely to prevent premature thickening that could compromise your artistic vision.
Frequently Asked Questions
What Is Light Trace in Soap Making?
Light trace is when your soap mixture thickens slightly like thin cake batter. You'll see no oil streaks, just a uniform consistency that leaves visible trails when drizzled. It's perfect for adding fragrances and colorants.
What Are the Stages of Soap Making?
You'll encounter various soap making stages: Very Light Trace (like cream), Light Trace (thin batter), Medium Trace (thin pudding), Thick Trace (holds shape), and False Trace (grainy, indicates improper saponification).
What Is the Trace Stage in the Curing Process of Soaps?
Trace isn't part of the curing process but rather the mixing stage. It's when your soap batter thickens as oils and lye emulsify, indicating saponification has begun. You'll see it hold shape when drizzled.
Which Soap Making Process Is Better?
Neither is "better" – it depends on your design goals. You'll want light trace for swirls and details, while full trace works best for textured designs and structured layers. Choose based on your project's needs.
In Summary
Understanding trace stages is your key to soap making success. You'll find both light and full trace have their purposes—light trace for intricate designs, full trace for textured tops and embeds. As you practice, you'll develop an intuitive feel for how your soap batter behaves. Don't get discouraged by occasional seizing or false trace; they're valuable learning experiences on your soap crafting journey.


Leave a Reply