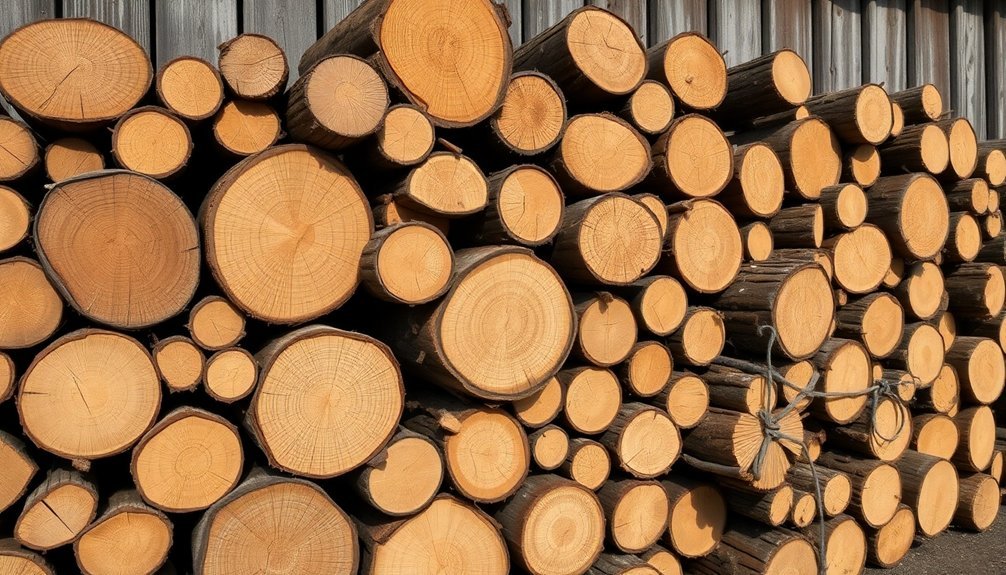
Select hardwoods like hickory, maple, or beech for ideal lye production, and burn them at low temperatures until you get white ash. Once cooled, collect the ashes in a metal container and set up a two-bucket leaching system with drainage holes. Always wear protective gear, including goggles and rubber gloves, and keep vinegar nearby for emergencies. Add water to your ashes gradually, never the reverse, and test strength using an egg float method. These fundamentals will set you up for successful lye-making mastery.
Selecting the Right Wood for Quality Lye
Three key factors determine the success of your lye-making process: wood selection, burning conditions, and ash quality.
When choosing wood for lye production, you'll want to focus on hardwoods like hickory, sugar maple, ash, beech, and buckeye. These varieties contain higher concentrations of potassium by weight compared to softwoods.
While you can use softwood ash, it'll require more effort to concentrate the lye to usable levels. It's best to avoid conifers altogether, as they produce inferior quality lye. Long-leaved hardwoods produce significantly better results for making traditional lye.
To get the most from your chosen wood, burn it at the lowest temperature that still produces white ash. You don't want dark gray or black ash, and there shouldn't be any charcoal or unburned pieces remaining.
Temperatures above 900°C will greatly reduce the potassium content.
Essential Tools and Equipment Setup
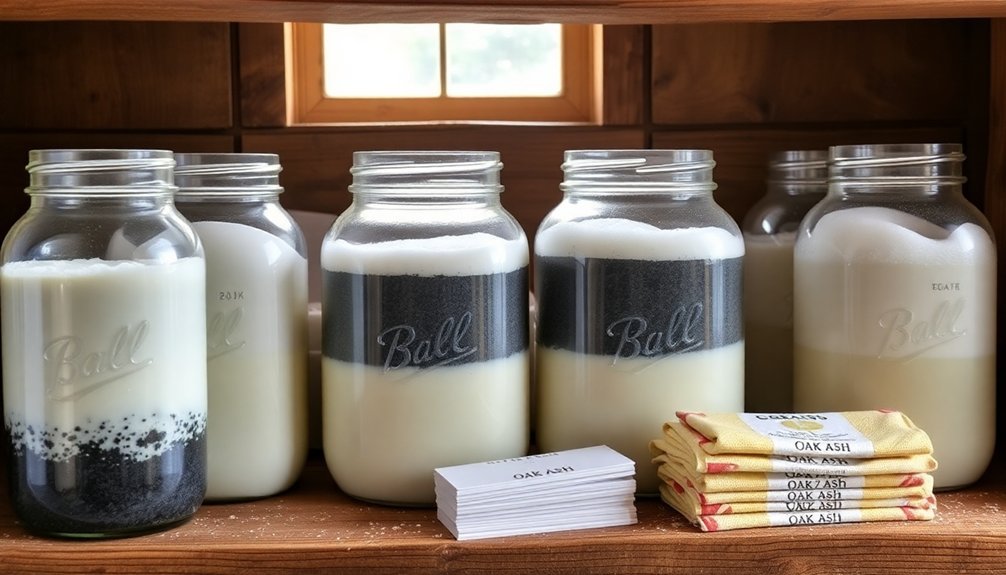
Gathering the right tools before making lye will guarantee both your safety and success. You'll need two main containers: a large bucket (5+ gallons) and a smaller pot with drainage holes. For safety, never skip wearing protective gear when handling lye. The process begins with hardwood ashes and water combined to create the lye solution.
Essential items for your lye-making setup:
- Safety equipment: goggles, rubber gloves, boots, and protective clothing
- Containers: large collection bucket, smaller filtration pot, and metal mesh (not aluminum)
- Tools: drill for making holes, soaker hose, and secured filtration materials
- Emergency supplies: vinegar for neutralizing spills and clean rainwater or distilled water
Position your smaller container inside the larger one, ensuring proper drainage through the holes.
Layer your metal mesh or pine needles for effective ash filtration, and you're ready to begin the lye-making process safely.
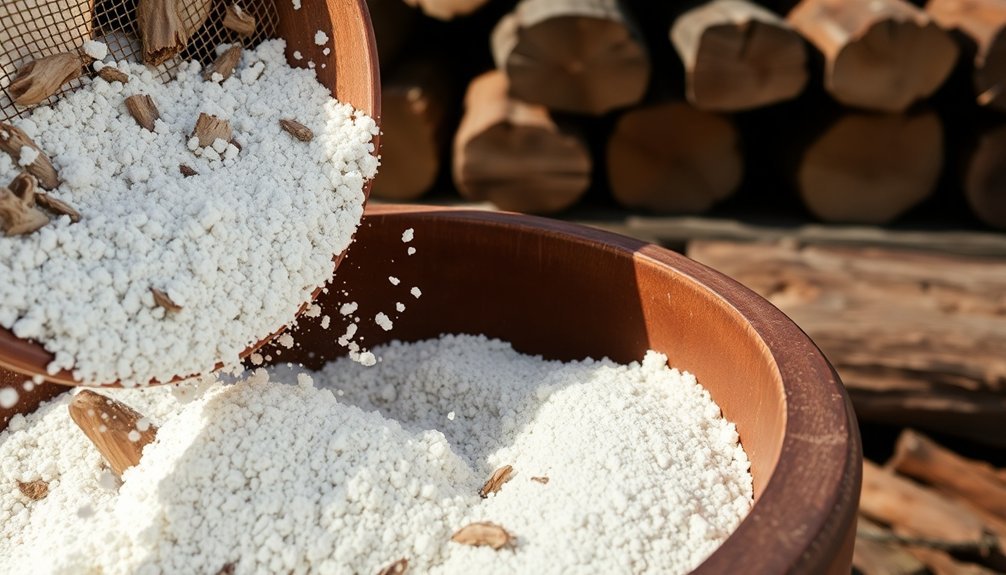
Proper Wood Ash Collection Methods
With your safety equipment ready, let's focus on collecting the right wood ashes for making lye.
You'll want to gather ashes from hardwoods like hickory, sugar maple, beech, or buckeye, as they contain more alkali and produce better-quality lye. Avoid softwoods like pine and fir, which won't give you effective results. Sift through your collected ashes to remove any remaining debris before storage.
Always let the ashes cool completely for 24-48 hours before collection. Use a metal or heat-resistant container, and keep it away from flammable materials and overhanging branches.
When you're collecting, store the ashes in a covered container in a dry, well-ventilated area. Make sure your storage spot is at least 50 feet from any water sources, including wells and farm ditches.
If you're transporting the ashes, keep them covered to prevent dust from escaping.
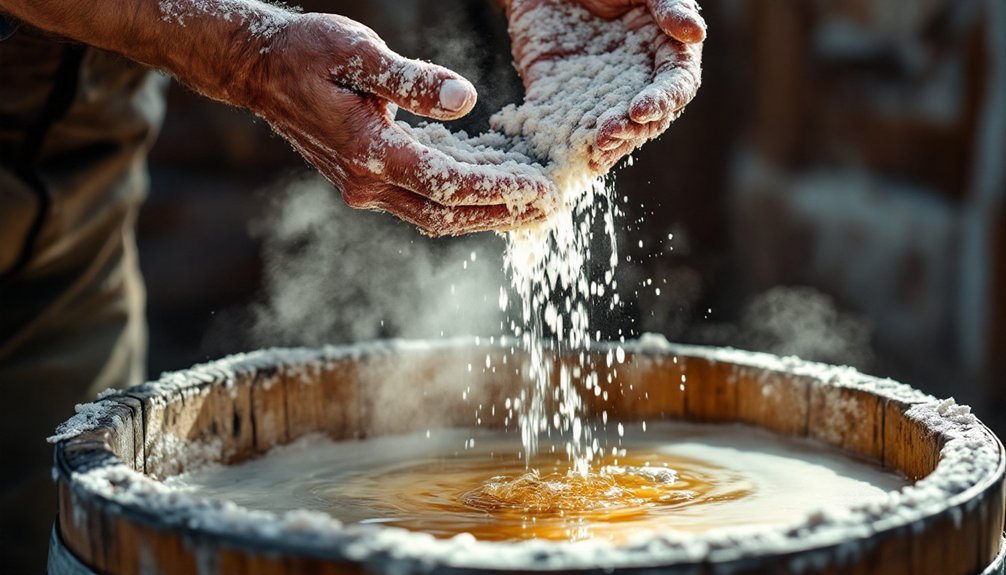
Safe Mixing and Leaching Techniques
Once you've collected your wood ashes, proper mixing and leaching techniques become essential for producing safe, high-quality lye.
You'll need to set up a leaching system using a large bucket or barrel with drainage holes at the bottom and a metal mesh filter to separate the liquid from the ashes.
Key safety steps when working with lye solutions:
- Always add lye to water, never reverse the order
- Wear protective gear including rubber gloves and goggles
- Work in a well-ventilated area to avoid inhaling fumes
- Keep vinegar nearby to neutralize potential skin contact
The white ash collected should be carefully sifted to remove any unburnt carbon chunks before use.
Use only glass, heat-resistant plastic, or stainless steel containers for mixing.
Pour water slowly through your ash setup and let it sit for at least 24 hours.
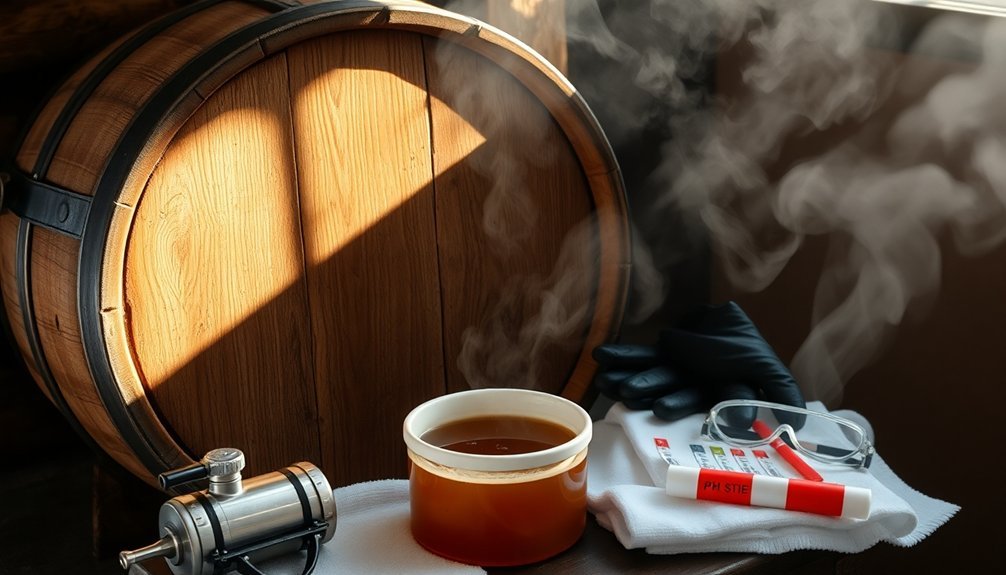
Test the resulting solution's strength using pH strips or the floating egg method.
Testing Lye Strength and Potency
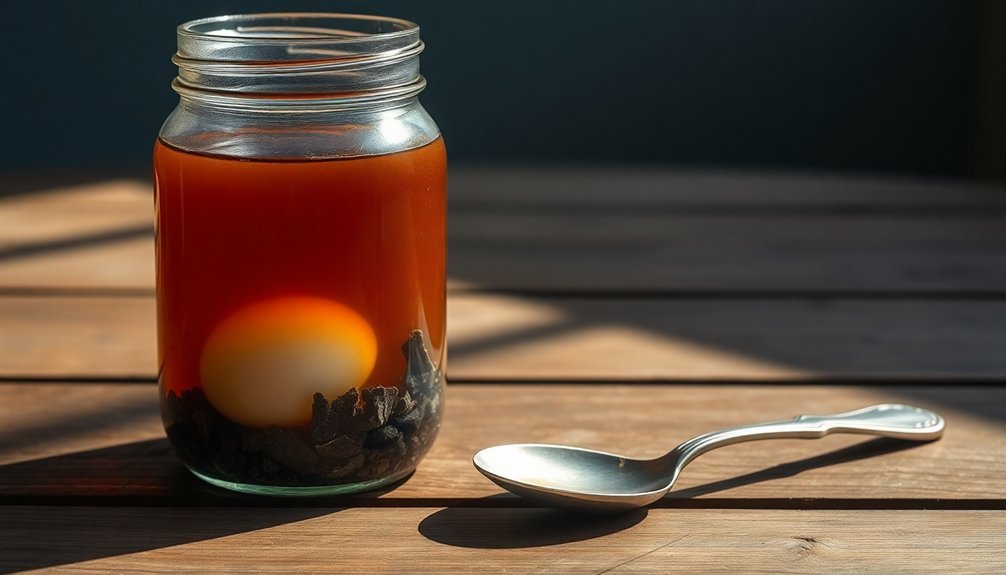
You'll want to test your lye's strength using traditional methods like the float test, where an egg or potato should sit partially submerged in properly concentrated lye water.
While modern soapmakers often use pH strips or meters for precise measurements, these historical techniques remain reliable and accessible for home production. For professional-grade accuracy, ultrasonic velocity measurements can determine exact alkaline concentrations.
If you're following historical practices, you can also test your lye's potency by observing how it affects a feather – proper strength lye will begin to dissolve the feather when submerged.
Float Test Method
Testing your lye's strength doesn't require complex equipment – just a simple egg or potato float test will do the job.
You'll need to place your test item in cold lye water and observe how it floats to determine if your solution needs adjusting.
For accurate results, follow these key steps:
- Choose a fresh egg or potato and place it gently in your cold lye solution.
- Watch the floating position – a quarter-sized circle above water indicates perfect strength.
- Add water if the egg floats too high, as this means your lye is too strong.
- Repeat the test after any adjustments until you achieve the right concentration.
Always wear protective gear like gloves and goggles during testing, and verify you're working in a well-ventilated area.
Never use the test egg for consumption afterward.
Measuring Ph Levels
Three reliable methods exist for measuring the pH levels of your lye solution: test strips, digital meters, and natural indicators. For basic testing, use pH 1-14 test strips to ascertain your lye reaches at least pH 13 before use. Match the strip's color to the chart for an accurate reading.
For precise measurements, invest in a pH meter. While these require regular calibration and maintenance, they'll provide consistent, accurate results over time.
If you need a cost-effective alternative, try natural indicators like red cabbage or elderberry juice, which change color based on pH levels.
Regardless of your chosen method, always wear safety gear – goggles, rubber gloves, and boots – when handling lye solutions. Work in a well-ventilated area and avoid splashing to prevent burns or injuries.
Historical Potency Techniques
Before modern pH testing methods existed, our ancestors developed several ingenious techniques to measure lye potency.
They primarily relied on floating objects and feather tests to determine if their lye solution was suitable for soap making.
Test your lye strength using these time-tested methods:
- Float a raw egg or potato in your solution – it should rest halfway beneath the surface for ideal strength
- Dip a feather into the lye – if it starts dissolving, you've achieved the right potency
- Check if crystals form on the feather edges after leaving it overnight
- Dilute the solution if objects float too high, or continue leaching if they sink
While these traditional methods weren't as precise as today's measurements, they helped our ancestors create effective soap for generations.
Storage Solutions for Homemade Lye
Store your homemade lye in thick HDPE (#2) or polypropylene (#5) containers with secure, airtight lids to prevent moisture absorption and maintain potency.
You'll need to clearly label each container with "LYE" or "POISON" and place them on high shelves, away from children, pets, and food items.
Keep your lye containers in a cool, well-ventilated area near a sink for quick spill response, but never store hot lye solutions in closed containers due to pressure buildup risks.
Safe Container Selection
Selecting appropriate containers for storing homemade lye requires careful consideration of material safety and durability. Your safest options are high-density polyethylene (HDPE #2) and polypropylene (PP #5) containers, which can withstand both heat and chemical reactions.
When choosing your container, follow these critical guidelines:
- Never use metal containers, especially aluminum or tin, as they'll react with lye and produce dangerous hydrogen gas.
- Avoid glass containers unless they're heavy-duty Pyrex, as standard glass can break unexpectedly.
- Don't use PET (#1), PVC (#3), or LDPE (#4) plastics, which can break down or deform when exposed to lye.
- Select containers that are sturdy enough to hold solutions up to 1.5 times heavier than water.
Always label your containers clearly with "LYE" or "POISON" and store them safely away from children and pets.
Long-Term Storage Tips
Once you've chosen the right container for your homemade lye, proper long-term storage becomes your next priority.
Label your container clearly with "LYE" and include the preparation date, handling instructions, and the specific type of lye you've made.
You'll need to store it in a secure, moisture-free location that's inaccessible to children and pets.
Don't forget to inspect your container regularly for damage or leaks.
Keep it on a high shelf or in a locked cabinet, and guarantee the lid remains tightly sealed to prevent moisture absorption.
When you need to transfer the lye, always use protective gear and a funnel to avoid spills.
Keep a neutralizing agent nearby for safety.
Remember to follow your local regulations for hazardous material storage, and never reuse containers that previously held other chemicals.
Temperature and Location Control
Proper temperature control plays an essential role in both preparing and storing your homemade lye solution. When mixing ashes with water, you'll need to monitor temperatures carefully and choose an appropriate location that's well-ventilated and away from children and pets.
- Keep your work area at room temperature and use cool water for mixing to prevent excessive heat buildup that could cause the solution to overflow.
- Store your lye solution in thick-walled HDPE (#2) or polypropylene (#5) containers that can withstand heat and alkalinity.
- Allow your solution to cool to 90-115°F before transferring it to storage containers.
- Set up your mixing station near a kitchen sink or outdoor area where you can contain potential splashes and guarantee proper ventilation.
Remember to turn your face away from the mixing area and always have a safety plan ready for accidental spills.
Emergency Response and Safety Measures
Because working with lye can be hazardous, you'll need to be prepared for potential emergencies and follow strict safety protocols.
Always keep distilled white vinegar within arm's reach to neutralize lye spills on skin. If lye contacts your skin, immediately dip the affected area in vinegar. For eye exposure, flush with water and seek medical help right away.
Wear protective gear including rubber gloves, eye protection, long sleeves, pants, and closed-toe shoes. Don't forget an apron to protect your clothing.
Work in a well-ventilated area near a sink, and keep children and pets out of the room. Store your lye solutions in glass, plastic, or stoneware containers – never metal. Label everything clearly and keep materials away from food preparation areas.
If someone swallows lye, call 911 immediately and don't induce vomiting.
Frequently Asked Questions
How Long Does Homemade Lye Remain Effective When Stored Properly?
You'll find that properly stored homemade lye can remain effective indefinitely, but you should check its potency regularly. It's best to test it every few months to guarantee it's still strong enough for your needs.
Can Wood Ash From a Campfire Be Used to Make Lye?
Yes, you can use campfire wood ash to make lye, but you'll need to carefully separate the white ash from unburnt pieces. Make sure you're using hardwood ash, not softwood, for the best results.
What Color Should the Final Lye Solution Be When Properly Made?
When you've properly made lye solution, it should appear transparent to light brown in color. You'll notice it's clearer if you've used white hardwood ash and filtered it multiple times.
How Many Times Can the Same Ashes Be Reused for Making Lye?
You can typically reuse your wood ashes 3-4 times before they're depleted. Each leaching produces weaker lye, so you'll need to boil later batches longer or run them through fresh ashes for strength.
Does Weather Affect the Quality of Wood Ash for Lye Making?
Yes, weather greatly impacts your ash quality. You'll get better results if you collect ashes from dry wood burned during clear weather, as rain-soaked wood and humid conditions can reduce the potassium content available for lye.
In Summary
You're now equipped to make your own lye safely from wood ashes. Remember to always wear protective gear, work in a well-ventilated area, and keep safety measures handy. With practice, you'll perfect your technique and produce consistent, high-quality lye for soap making and other household needs. Store your homemade lye properly, label it clearly, and you'll have a sustainable source of this versatile material.


Leave a Reply