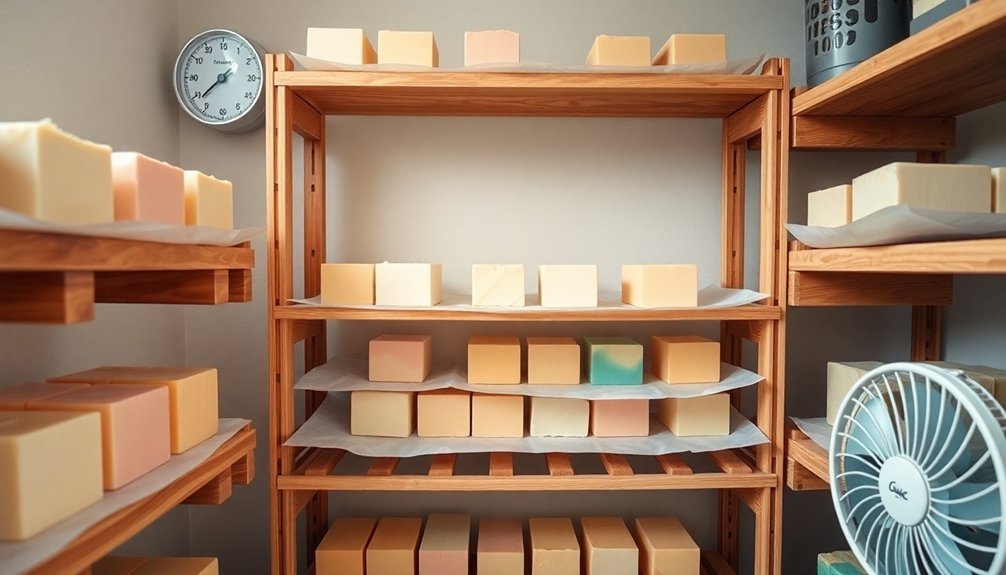
Proper soap curing requires 4-6 weeks in a cool, dry environment (60-80°F) with good airflow. Place your soap bars on wire racks with at least 1 inch of spacing, and rotate them every 3-4 days for even drying. During this period, excess moisture evaporates, pH levels normalize (7-10), and lye fully neutralizes. For long-term storage, use breathable wrapping materials and implement a first-in, first-out approach. The complete guide below reveals essential techniques for perfect soap every time.
Proper Soap Curing: Complete Storage & Handling Guide
While homemade soap may look beautiful right after unmolding, patience is essential for creating a truly exceptional product. The curing process typically requires 4-6 weeks, during which excess moisture evaporates and lye neutralizes completely.
To properly cure soap, place bars on wire racks with at least one inch of separation to guarantee good airflow around each piece. Store them in a cool, dry environment between 60°F and 80°F to prevent mold development.
You'll know your soap is fully cured when it feels hard and firm, producing rich, creamy lather.
For long-term storage, experienced soap makers recommend wrapping in breathable materials like muslin or parchment paper rather than airtight containers. Proper storage solutions maintain quality and extend the life of your handcrafted soaps.
Understanding the Science Behind Soap Curing
The science of soap curing revolves around the continuous chemical reactions where lye and oils fully transform into soap, while excess water gradually evaporates to create a harder, more stable bar.
You'll notice your soap's pH level decreases during this period, shifting from highly alkaline to a milder 8-10 range that's gentler on skin.
This fascinating transformation isn't just about drying but represents a complex maturation process that enhances your soap's longevity, performance, and skin-friendly properties.
Chemical Reactions Occurring
Behind every bar of handmade soap lies a fascinating array of chemical processes that continue long after you've poured your mixture into molds. The saponification process doesn't end when you combine fats with lye—it's merely the beginning of your soap's journey.
During curing, your soap undergoes essential transformations. Residual lye continues to neutralize, making your bars skin-safe and reducing potential irritation.
The evaporation of moisture contributes to the hardening of soap, dramatically improving its longevity and lather quality.
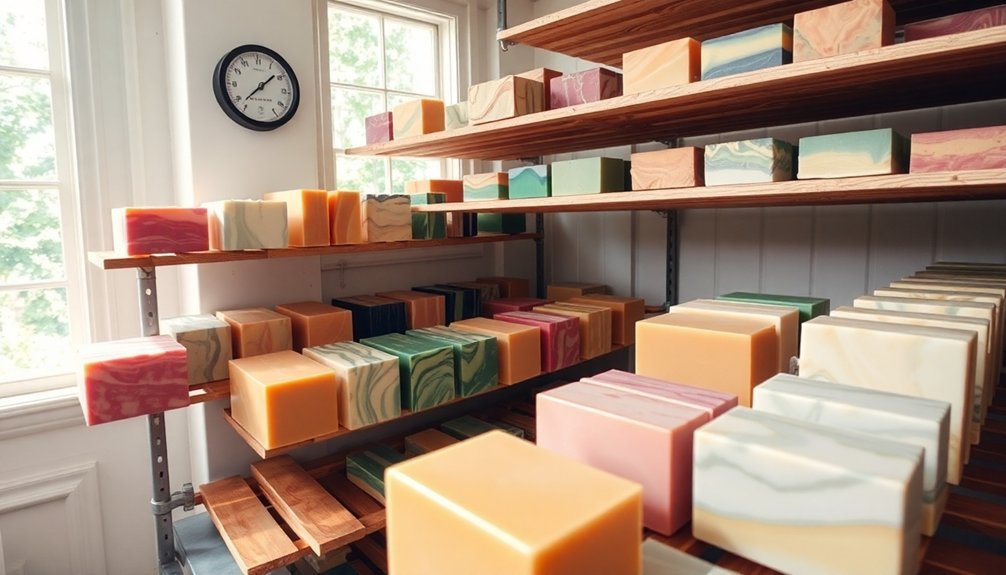
You'll notice your soap's chemical composition changing visibly as curing progresses—colors often deepen and scents develop their full character.
These changes aren't merely cosmetic; they represent the complete evolution of raw ingredients into a stable product with enhanced properties and performance.
Water Evaporation Process
Understanding how water evaporates from your soap during curing reveals why patience yields superior results. During the 4-6 week curing period, your soap loses approximately 20% of its water content, transforming into a hard and long-lasting bar.
This water evaporation process is essential while the saponification process continues, neutralizing all lye and making your soap skin-safe.
- Proper air circulation around your soaps enables even evaporation of excess moisture
- High humidity environments slow evaporation, sometimes requiring dehumidifiers or alternative storage
- Your soap needs to cure thoroughly to reach peak hardness, which extends its life in your shower
- Monitoring the evaporation helps guarantee the final product won't develop mold or deteriorate prematurely
Ph Level Changes
While your soap cures, a remarkable chemical transformation occurs as pH levels gradually shift from highly alkaline (12-14) to a milder, skin-friendly range (7-10).
This change happens as the saponification process completes, neutralizing all excess lye that could irritate your skin.
Monitoring pH levels throughout the curing process helps confirm your soap has fully saponified. You'll notice the pH level stabilizes over time, indicating successful completion.
Remember that environmental factors like humidity and temperature can affect this chemical process, so maintain ideal conditions for proper curing.
Testing pH level using strips or a meter provides quantitative confirmation that your soap is safe for use.
This measurement isn't just a number—it's your assurance that the transformation from caustic ingredients to gentle, cleansing soap has successfully occurred.
Essential Equipment for Optimal Soap Curing
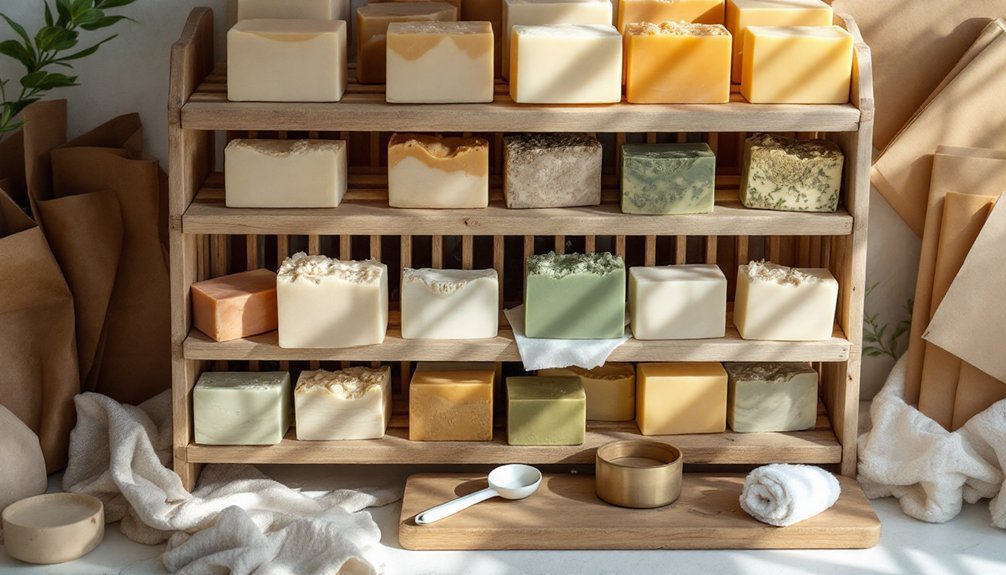
To create the perfect curing environment for your handcrafted soaps, you'll need dedicated racks or shelves that provide at least one inch of spacing between bars for proper airflow.
You'll find that wire racks work exceptionally well, while cardboard boxes or shop shelving units help organize multiple batches while protecting them from dust and contaminants.
Temperature control devices like hygrometers and dehumidifiers are vital investments for maintaining the ideal 60°F to 80°F range and preventing moisture-related issues such as DOS during the curing process.
Curing Racks and Shelves
Proper airflow stands as the cornerstone of successful soap curing, making the right racks and shelves indispensable tools for any soap maker. When selecting your curing racks, prioritize metal options with protective coatings to prevent rust that could contaminate your creations.
Bakers racks are particularly effective for cold process soap, offering excellent air circulation while accommodating multiple bars.
- Position your wire shelving in a cool, dry area away from direct sunlight
- Space soap bars at least 1 inch apart on your curing racks
- Check regularly to ascertain bars aren't touching as they cure
- Monitor your setup to maintain proper temperature and humidity levels
You'll need to regularly inspect your curing shelves to verify that air circulates freely around each bar, guaranteeing the curing process progresses effectively.
Air Circulation Systems
Effective air circulation systems represent the heart of professional soap curing operations, transforming ordinary batches into exceptional products through controlled airflow.
You'll need fans or ventilated racks to guarantee continuous airflow across your soap bars, facilitating essential moisture evaporation during the curing process.
Position your soaps on wire racks with ideal spacing between each bar to prevent moisture buildup that can lead to mold or DOS.
Maintain a well-ventilated area with temperatures between 60°F and 80°F for suitable curing conditions.
For larger batches, install exhaust fans or air purifiers to improve air quality and circulation.
Don't forget to monitor your setup regularly, adjusting as needed to eliminate stagnant air pockets.
This attention to ventilation guarantees uniform curing across all your soap bars, resulting in properly hardened products with superior performance.
Temperature Control Devices
While many soap makers focus primarily on ingredients and mixing techniques, maintaining precise temperature control during the curing phase greatly impacts your final product quality.
Temperature control devices provide a reliable way to maintain ideal curing conditions between 60°F to 80°F, preventing quality issues like Dreaded Orange Spots.
- Thermostats paired with heating mats create a consistently warm environment in cooler climates, ensuring your soap cures properly.
- Insulated storage units or repurposed wine coolers offer stable curing areas for those in hotter regions.
- Dehumidifiers work alongside temperature control to manage humidity levels, protecting your soap from moisture damage.
- Air circulation fans complement your temperature setup by promoting even drying and reducing mold risk.
Always use monitoring devices like hygrometers and thermometers to track conditions in your curing area and make necessary adjustments.
Creating the Ideal Curing Environment
Once you've poured and cut your soap, establishing the right environment becomes essential for its transformation from a soft, raw state to a hard, long-lasting bar.
Maintain temperatures between 60°F to 80°F to support proper saponification and moisture evaporation.
Choose a cool, dry location with good air circulation to prevent mold growth that can occur in high humidity conditions.
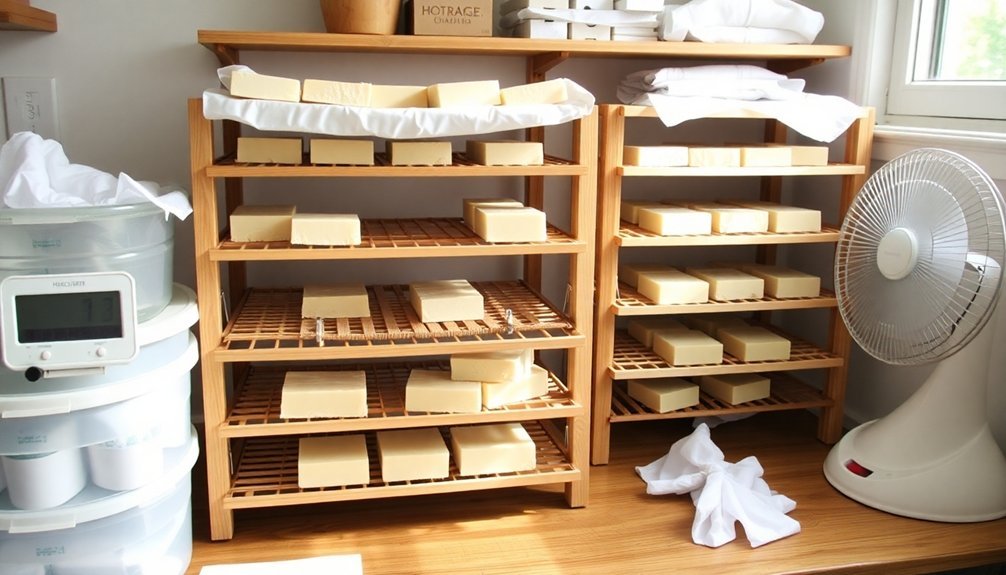
Position your soaps on wire rack or specialized drying racks, spacing bars at least one inch apart to guarantee even airflow around each piece.
Never place curing soap in direct sunlight, as UV rays will fade colors and degrade fragrances.
Instead, find a shaded spot that still offers good ventilation.
Check your soaps regularly during the curing process to identify any issues with moisture retention or quality deterioration.
Monitoring Humidity and Temperature During Curing
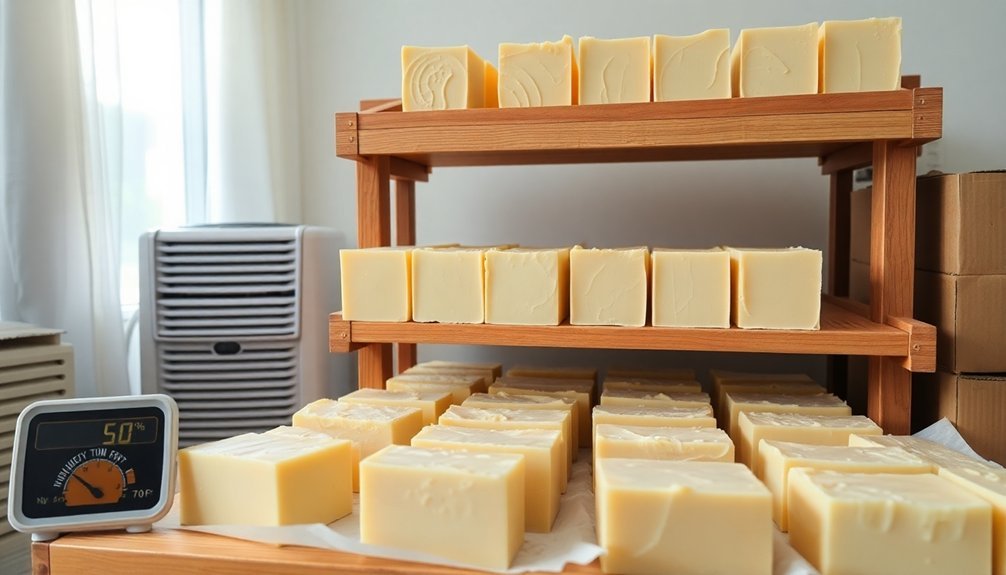
You'll need to maintain your soap curing area between 60°F to 80°F and below the critical 50% humidity threshold to prevent DOS and guarantee proper hardening.
A reliable hygrometer and thermometer setup will give you real-time readings, allowing for immediate adjustments when conditions change.
Consider investing in a quality dehumidifier if you're in a naturally humid climate, as it's one of the most effective tools for creating ideal curing conditions.
Ideal Storage Conditions
Creating the perfect environment for your soap to cure properly requires careful attention to both temperature and humidity levels. Your cure time will be most effective when you maintain temperatures between 60°F and 80°F, as this range guarantees optimal hardening while allowing moisture to evaporate correctly.
Good air circulation around your soap bars is essential—place them on wire racks with at least 1 inch of space between each bar.
- Use a dehumidifier in humid climates to prevent moisture accumulation and DOS formation
- Check your soap storage area regularly for signs of dampness or mold
- Guarantee consistent airflow around all sides of your soap bars by using open wire shelving
- Maintain ideal storage conditions by keeping soaps away from bathrooms or kitchens where humidity fluctuates
Monitoring Equipment Recommendations
Three vital monitoring tools can transform your soap curing process from guesswork to precision. A digital hygrometer accurately measures humidity levels, which should remain between 30-50% for ideal curing. Pair this with a reliable thermometer to maintain suitable temperatures of 60-80°F in your curing environment. For serious soapmakers, a data logger provides continuous monitoring of both metrics.
| Equipment | Function | Ideal Range |
|---|---|---|
| Digital Hygrometer | Measures humidity | 30-50% |
| Thermometer | Tracks temperature | 60-80°F |
| Data Logger | Continuous recording | Both metrics |
| Calibration Tools | Guarantees accuracy | As needed |
Position your monitoring equipment in multiple locations throughout your curing space to identify variations in conditions. Remember to calibrate devices regularly—accurate readings are vital for achieving consistent, high-quality soap curing results.
Proper Airflow Techniques for Even Drying
Achieving properly cured soap depends considerably on how air circulates around your bars during the drying process. For best results, you'll need proper airflow throughout the entire curing period.
Place your soap bars at least 1 inch apart on wire racks to prevent moisture accumulation and promote even drying.
- Store your curing racks in a well-ventilated area with low humidity to prevent mold development and DOS (Dreaded Orange Spots)
- Maintain temperatures between 60°F-80°F for ideal air circulation and drying consistency
- Rotate your soap bars every 3-4 days to guarantee all sides receive equal exposure to air
- Choose wire racks over solid surfaces as they allow superior air movement around each bar
Identifying Signs of Properly Cured Soap
When testing your handmade soap, you'll need to recognize several key indicators that signal proper curing has occurred. A properly cured soap feels hard and firm to the touch with no surface stickiness, which demonstrates that excess moisture has evaporated during the curing process.
| Physical Sign | What It Indicates |
|---|---|
| Firm texture | Moisture has adequately evaporated |
| No stickiness | Complete drying has occurred |
| Color change | Chemical reactions have stabilized |
| Strong fragrance | Scent profile has developed |
You'll also notice that well-cured soap produces a rich and creamy lather when used, enhancing your washing experience. The fragrance may become more pronounced as curing progresses, while the color might deepen slightly. These signs of readiness indicate your soap has completed its transformation and is ready for use or packaging.
Troubleshooting Common Curing Issues
Despite your best efforts, you'll likely encounter challenges during the soap curing process that can affect your final product's quality. Understanding common issues can help you troubleshoot effectively and rescue your handcrafted soaps.
- Dreaded Orange Spots (DOS) often result from excessive moisture. Combat high humidity with a dehumidifier and guarantee proper air circulation during storage.
- Sticky or soft soap indicates incomplete curing. Improve ventilation and reduce ambient moisture to promote proper drying.
- Dark spots or discoloration typically signal rancid oils or inadequate saponification. Use fresh ingredients and verify your soap has fully cured.
- Poor lather or harsh feel suggests excess lye or incomplete reactions. Allow extra curing time and double-check your measurements in future batches.
Regular inspection of your curing soap helps identify issues early, allowing you to adjust storage conditions before problems become permanent.
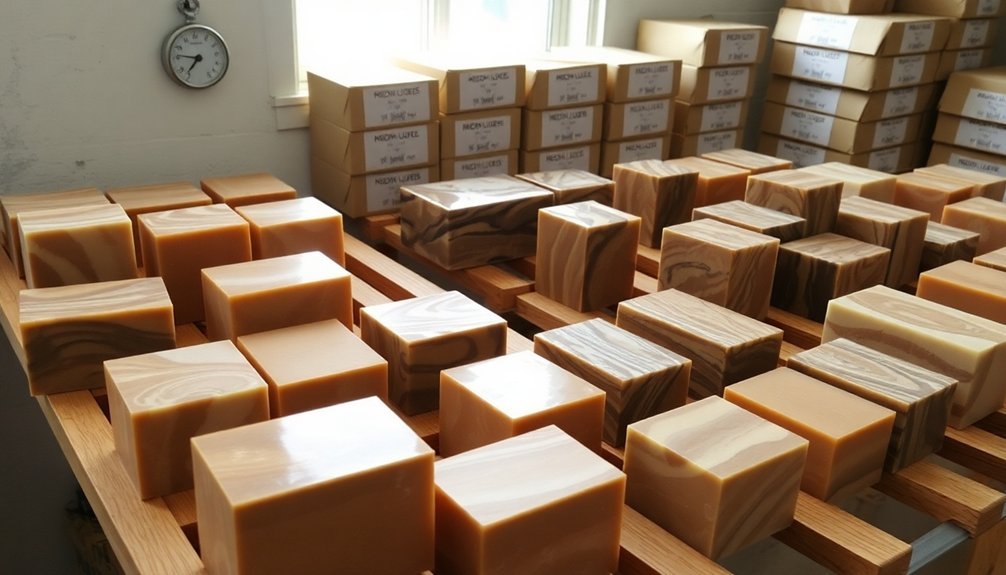
Long-Term Storage Solutions for Cured Soap
Once your soap has fully cured, proper storage becomes the next challenge for maintaining its quality and extending its life.
Store handmade soap in a cool, dry location with temperatures between 60°F and 80°F, ensuring good air circulation to prevent moisture buildup.
Wrap your cured soaps in breathable materials like muslin or parchment paper rather than plastic, which traps moisture.
Cardboard boxes or open shelving make excellent storage options, protecting soap from dust while allowing air to flow freely.
Don't forget to label your stored soaps with production dates, scents, and special ingredients to track their shelf life effectively.
Periodically inspect your inventory for signs of deterioration, such as unusual residue or moisture accumulation.
These simple practices will help preserve your soap's quality and appearance for months to come.
Managing Seasonal Changes in Soap Storage
As the seasons change throughout the year, your carefully crafted soaps face new environmental challenges that can affect their quality and longevity.
Maintaining consistent temperature between 60°F to 80°F during colder months prevents soap from hardening and losing lather quality. During humid periods, a dehumidifier helps create ideal curing conditions by controlling humidity levels.
- Monitor air circulation closely during seasonal changes—rearrange shelving and use fans to prevent moisture buildup.
- Store soaps in breathable cardboard boxes with ventilation during high humidity seasons to avoid Dreaded Orange Spots (DOS).
- Check curing soaps regularly as seasonal changes can greatly impact the curing process.
- Consider seasonal adjustments to your storage area before problems develop—prevention is always easier than correction.
Preventing Contamination and Cross-Scenting
While your soaps cure, they remain vulnerable to contamination and scent transfer that can diminish their quality and appeal. To prevent contamination, store different scented soaps with physical barriers like cardboard dividers between them. This simple step minimizes unwanted scent mingling during the curing process.
Always use clean and disinfected storage containers to reduce cross-contamination risks between soap batches. Don't wrap soaps tightly—choose breathable materials like muslin or parchment paper instead, allowing moisture to escape while protecting your products.
Regularly monitor stored soaps for signs of deterioration and address issues promptly to maintain quality.
When working with essential oils, store them in sealed, opaque containers in cool, dry places to preserve their potency and prevent their scents from affecting nearby products.
Packaging Strategies That Preserve Quality
Properly timing your soap packaging is essential for maintaining product integrity and shelf life. Always wait until your soaps have cured for at least 8 weeks to guarantee complete lye neutralization before packaging them for sale.
In humid environments, package just before selling to prevent moisture absorption that can compromise soap quality.
- Shrink wrapping provides excellent protection while maintaining freshness—use a heat gun to re-tighten if necessary
- Cigar bands offer a balance of protection and airflow, ideal for soaps that have cured for at least one month
- Consistent packaging organization helps with inventory management, preventing last-minute rushes before sales events
- Consider your local climate—higher humidity requires more attention to proper packaging timing to preserve soap integrity
Rotating Stock to Maintain Freshness
Once you've mastered the curing process, implementing an effective stock rotation system becomes essential for maintaining soap quality over time.
Establish a "first in, first out" (FIFO) approach to guarantee older soaps are used or sold before newer batches.
Label each soap batch with its production date to simplify tracking. Store your inventory in a dedicated area where older stock remains easily accessible, encouraging prompt use of these items first.
Make it a habit to rotate stock every few weeks so older bars don't get pushed to the back and forgotten.
Conduct regular quality checks on stored soap to identify any changes in texture, scent, or appearance.
This proactive monitoring allows you to take action before any degradation affects your product's freshness and overall quality.
Frequently Asked Questions
How to Store Soap While Curing?
Store your soap unwrapped on a wire rack in a cool, dry place with good airflow. Keep bars 1 inch apart, maintain 60-80°F, and avoid humidity. You'll know it's cured when it's hard and firm.
What Are the Storage Conditions for Soap?
Store your soap in a cool, dry place between 60-80°F with good air circulation. You'll want to avoid humidity, direct sunlight, and heat sources. Use breathable materials for wrapping once it's fully cured.
How to Correctly Store Soap?
Store your soap in a cool, dry place with good airflow at 60-80°F. Don't use airtight containers—opt for breathable wraps like muslin instead. Keep it away from direct sunlight to preserve colors and scents.
Should I Put My Cold Process Soap in the Fridge?
No, you shouldn't refrigerate your cold process soap. It'll create unwanted moisture and disrupt curing. Instead, store it at room temperature (60-80°F) in a dry place with good air circulation for 4-6 weeks.
In Summary
You're now equipped to master soap curing from start to finish. By understanding the science, using proper equipment, and maintaining ideal conditions, you'll produce superior soaps every time. Remember to monitor humidity, adapt to seasonal changes, prevent contamination, and package thoughtfully. With these techniques in your arsenal, you'll consistently create long-lasting, high-quality soaps that delight both you and your customers.


Leave a Reply