Restoring vintage soapmaking presses requires a methodical approach. First, assess and document the condition, then carefully disassemble, organizing small parts in labeled containers. Clean thoroughly, removing rust with vinegar and baking soda paste. Repair or replace damaged components, focusing on functionality over perfect historical accuracy. Apply food-safe lubricants to moving parts during reassembly. Finally, test with small soap batches and calibrate for consistent compression. Our detailed guide will show you every step to bring your antique press back to life.
Initial Assessment and Disassembly of Vintage Presses

When commencing on a vintage soapmaking press restoration, you'll need to start with a thorough evaluation of your equipment's condition. Look carefully for rust, cracks, worn parts, and old soap residue that might affect functionality. Document all damage with notes or photographs to create your repair roadmap.
Next, begin methodical disassembly. Take photos at each stage to reference during reassembly. This visual record will prove invaluable when you're putting everything back together.
Use labeled containers for all components, organizing screws, nuts, and small parts by their location in the press. This systematic approach prevents confusion later and guarantees you won't be left with mysterious "extra" parts when the restoration is complete.
Proper documentation now saves significant frustration during later stages.
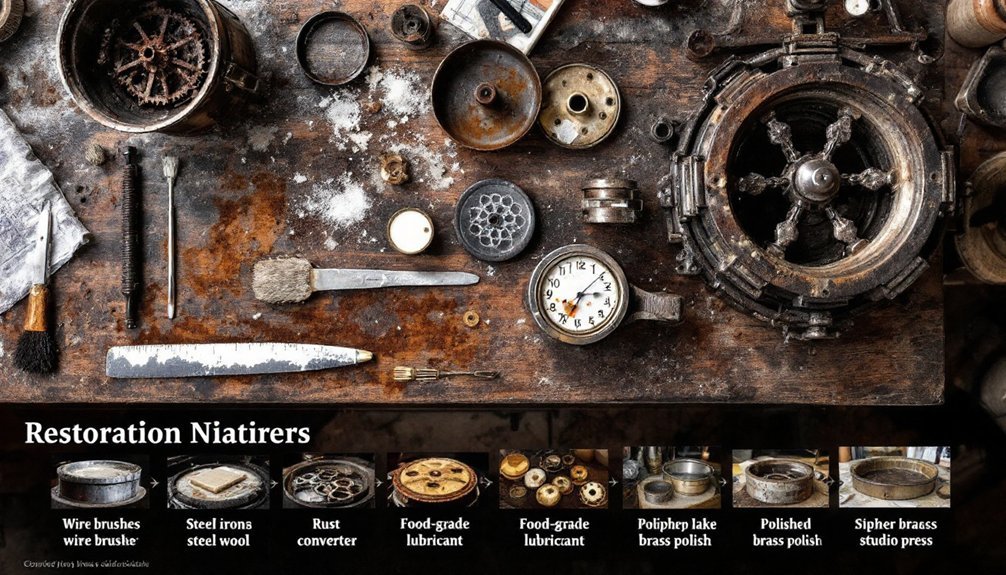
Cleaning and Rust Removal Techniques
Rust presents the most significant challenge in restoring vintage soapmaking presses. You'll need to tackle this issue with effective solutions that won't damage the historic metal.
Create a paste using vinegar and baking soda, applying it to rusted areas for at least 30 minutes before scrubbing with a soft brush. For stubborn rust, commercial removers or wire brushes may be necessary—but always test on an inconspicuous spot first to prevent surface damage.
After cleaning, thoroughly rinse all components with water to remove residue and cleaning agents.
Dry everything completely to prevent new rust from forming. Finish by applying a light coating of mineral oil or rust preventive spray to protect your restored press from future oxidation and moisture damage.
Repairing and Replacing Damaged Components

Once you've removed rust and thoroughly cleaned your vintage soapmaking press, you'll need to address any damaged or missing parts.
Begin by inspecting the entire press for cracks, breaks, or excessive wear that might compromise its function.
For wooden components showing signs of drying or cracking, apply food-safe wood conditioner or mineral oil to restore moisture and prevent further damage.
Don't overlook rubber seals and gaskets – these often deteriorate over time and should be replaced to guarantee proper compression during soap pressing.
For severely damaged metal parts, you'll need to decide between repair and replacement.
Check specialty suppliers for authentic replacement components, or consider having replicas fabricated if the parts are unavailable.
Remember that maintaining the press's original functionality is more important than perfect historical accuracy when restoring for practical use.
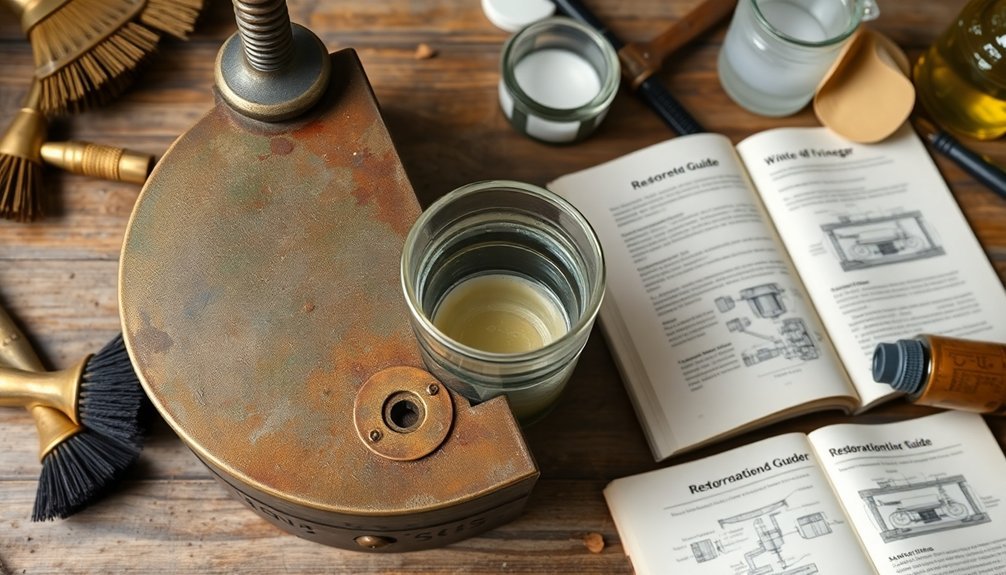
Proper Lubrication and Mechanical Restoration

Three critical steps govern the mechanical restoration of any vintage soapmaking press: careful disassembly, thorough cleaning, and proper lubrication. Begin by taking apart the press, documenting the position of each component to guarantee proper reassembly later.
Once disassembled, clean all parts with a non-corrosive cleaner to remove soap residue, rust, and debris that could affect performance. After cleaning, apply food-safe lubricant to all moving parts like gears and pistons to guarantee smooth operation.
| Component | Recommended Maintenance |
|---|---|
| Gears | Food-safe grease application |
| Pistons | Light oil coating |
| Threads | Beeswax or tallow treatment |
| Metal surfaces | Rust inhibitor application |
After lubrication, carefully reassemble the press, guaranteeing perfect alignment of all components. Test with a small soap batch to confirm the restoration's success.
Testing and Calibration for Soap Production

After completing the mechanical restoration of your vintage soapmaking press, you'll need to properly test and calibrate it before beginning full production.
Start by thoroughly cleaning and inspecting all components for damage or wear to guarantee safe operation.
Calibrate the pressing mechanism by adjusting settings or replacing worn parts to achieve consistent compression. This will produce uniform soap bars with the proper density and finish.
Begin testing with small batches to evaluate compression quality and bar durability. Make necessary adjustments if you notice crumbling or inconsistent results.
Document your process meticulously, recording soap quantities and pressing times. This documentation will help you refine techniques and improve efficiency.
Maintain your press regularly by lubricating moving parts and checking for blockages or residue that could affect performance.
Frequently Asked Questions
How to Reuse Old Soap Bars?
You can reuse old soap bars by grating them into shavings, melting them in a crockpot, or soaking slivers in water to make softsoap. You'll also find them useful as stain removers for laundry.
How Do You Cure Cold Pressed Soap?
You'll need to cut your cold pressed soap into bars, then place them in a cool, dry area with good air circulation for 4-6 weeks. Rotate them regularly to guarantee even drying and proper pH balance.
What Happens if You Put Too Much Fragrance Oil in Soap?
If you add too much fragrance oil to soap, you'll risk seizing, overpowering scents, potential skin irritation, improper curing, and soap instability. It can also cause overheating during curing, affecting the final texture and quality.
How to Rebatch Cold Pressed Soap?
To rebatch cold-pressed soap, grate your soap into shavings, melt them in a slow cooker with a little liquid, stir until smooth, add desired additives, pour into molds, and let cool completely overnight.
In Summary
You've now restored your vintage soapmaking press to its former glory! Remember, regular maintenance will keep it functioning for years to come. Whether you're a hobbyist or professional soapmaker, your restored press connects you to traditional craftsmanship while producing beautiful, consistent soaps. Don't forget to document your restoration process—you've not just salvaged equipment, you've preserved a piece of soapmaking history.


Leave a Reply