
Your cold process soap needs 4-6 weeks of curing time before use, even though the initial saponification happens within 48 hours. During curing, excess water evaporates, making your bars harder and longer-lasting. The process also allows pH levels to balance, creating gentler soap for your skin. Temperature, humidity, and proper airflow all play essential roles in achieving the perfect cure. Understanding these factors will help you create superior handmade soap.
Understanding the Science Behind Soap Curing
While many soap makers are enthusiastic to use their freshly made bars, understanding the science behind cold process soap curing reveals why patience is essential.
During this vital period, two main processes occur simultaneously: excess water evaporates, creating a harder bar, and saponification continues to completion, lowering the soap's pH to make it gentler on your skin.
Environmental factors play a significant role in your soap's development. You'll notice that humidity and temperature directly affect curing time and how quickly water evaporates from your bars.
As your soap cures, you'll see improvements in lather quality and texture. Different oils in soap-making require varying cure times – for instance, if you're working with olive oil soaps, you might need to wait up to a year for the best results.
Essential Conditions for Proper Curing

When setting up your soap curing space, you'll need to create specific conditions to guarantee ideal results. The proper curing of cold process soap depends on maintaining consistent temperature, managing humidity levels, and ensuring good airflow around your soap bars.
| Condition | Ideal Range | What to Avoid |
|---|---|---|
| Temperature | 60-80°F | Extreme fluctuations |
| Humidity | Low-moderate | High moisture areas |
| Air Flow | Continuous | Stagnant air |
| Storage | Wire racks | Solid surfaces |
| Light | Indirect | Direct sunlight |
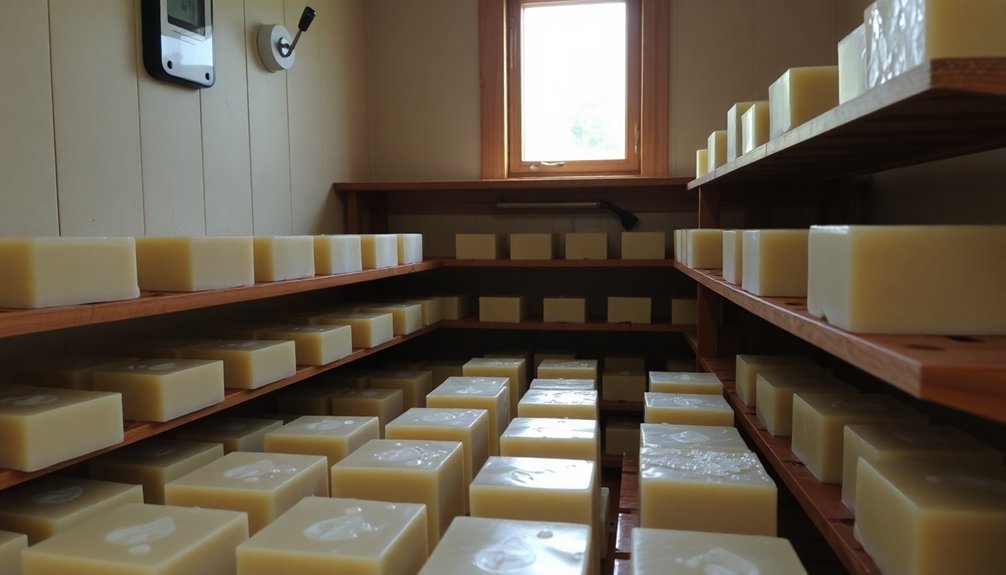
To achieve proper curing, place your soap bars on wire racks in a cool, dry area with consistent air circulation. You'll want to avoid basements or bathrooms where excess moisture can slow the curing process. Remember that good airflow is essential for removing moisture effectively, so space your bars adequately and rotate them periodically for even drying.
Saponification Process and Timeline
The saponification process forms the foundation of cold process soap making, occurring long before the curing phase begins. During this vital 48-hour period, the lye and oils used undergo a molecular transformation, creating soap and glycerin.
You'll find that while your handmade soaps are technically safe to use after saponification completes, they're not yet fully cured.
The distinction between saponification and cure time is important to understand. While the chemical reaction happens within two days, water evaporation and pH stabilization require 4-6 weeks of curing.
You're waiting for two separate processes: first, the complete neutralization of lye through saponification, and then the gradual improvement of your soap's quality through curing. This timeline guarantees your soap making efforts result in both safe and high-quality products.
Environmental Factors Affecting Cure Time
The climate where you cure your cold process soap plays an essential role in determining how long it'll take to fully mature, with warmer temperatures potentially speeding up the process while high humidity can considerably slow it down.
You'll find that soaps cured in humid environments like Florida may stay softer longer and require extended curing periods compared to those in drier climates.
To maintain ideal curing conditions, you can use a dehumidifier in your curing area and keep temperatures between 60°F and 80°F, ensuring more predictable results.
Climate Impact On Curing
Climate conditions play an essential role in determining how long your cold-process soap needs to cure.
Your geographic location and seasonal changes can greatly impact the curing duration through varying humidity levels and temperatures.
Here's how different climates affect your soap's curing process:
- Hot, dry climates like Arizona accelerate evaporation rates, potentially reducing your soap's curing time.
- Humid environments such as Florida slow down water loss, extending the necessary curing period.
- Ideal curing occurs between 60°F to 80°F, with temperatures outside this range potentially compromising soap quality.
- High humidity locations require additional measures, like using a dehumidifier, to maintain effective curing conditions.
Understanding these environmental factors helps you adjust your curing practices accordingly, ensuring consistent results regardless of your local climate conditions.
Humidity Control Methods
Since humidity levels directly impact soap curing times, maintaining proper moisture control becomes crucial for achieving high-quality results.
You'll need to focus on creating ideal conditions for proper evaporation and soap quality.
To control humidity effectively during the curing process, you can use a dehumidifier in your curing area. This device helps remove excess moisture from the air, allowing your soap bars to dry more efficiently.
Additionally, guarantee good air circulation by placing your curing soap in a well-ventilated space where air can flow freely around each bar.
Keep the temperature between 60°F and 80°F while monitoring humidity levels regularly. If you notice your soap taking longer to harden, adjust your setup accordingly.
Remember that stagnant air and high moisture levels will slow down evaporation, potentially compromising your final product's quality.
Testing Methods for Cure Completion
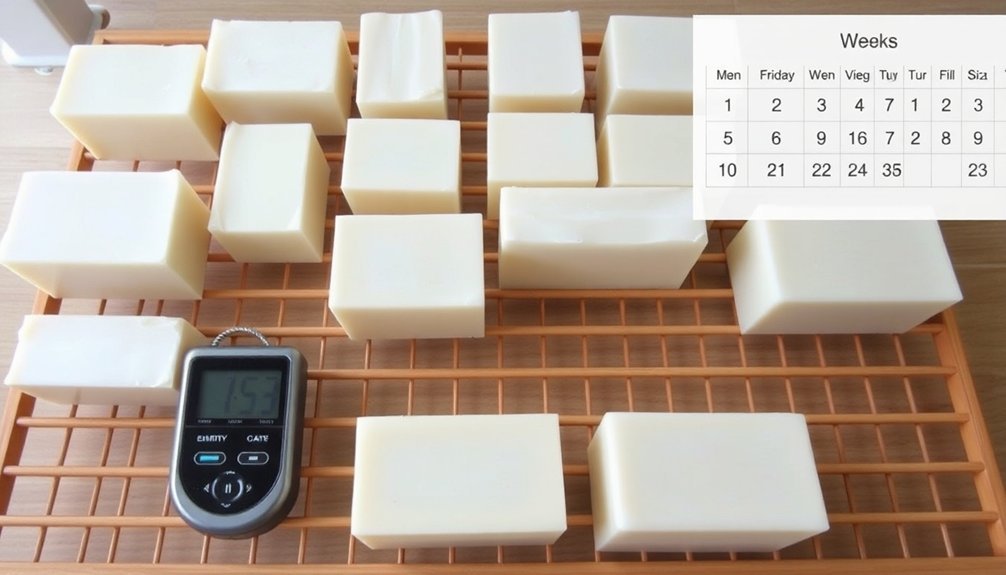
You'll need several key tests to confirm your soap has fully cured, starting with weight measurements taken at 5-day intervals to track moisture loss.
Testing the bar's hardness and durability involves washing it under warm water for 30 seconds, which reveals how well it maintains its shape and resists dissolving.
Your final assessment should focus on lather quality, checking for rich foam production and evaluating the soap's effect on your skin during use.
Hardness and Weight Tests
Testing your soap's cure progress requires two reliable methods: hardness assessment and weight monitoring.
You'll need to evaluate your soap bars throughout the curing process to guarantee they're reaching ideal quality.
- Track weight changes using a precise scale to measure moisture loss, as properly cured soap bars will show consistent weight reduction over time.
- Press your soap bars to check if they're firm to the touch – fully cured soap should feel hard with minimal give.
- Conduct hardness tests at 15-30 day intervals, when you'll typically notice significant improvements.
- Test lather quality at different stages, as better lathering properties develop during proper curing.
Lather Quality Assessment
Beyond physical hardness and weight measurements, lather quality serves as a key indicator of proper soap curing.
You'll notice that uncured soap produces low-lying lather with minimal bubbles, while properly cured bars create abundant lather with moisturizing properties.
To assess lather quality, scrub your soap under warm water for 30 seconds and observe the results.
Soap bars with longer curing duration demonstrate superior performance, developing fluffy lather that's gentler on your skin.
Testing shows that bars need at least 20 days of cure time to achieve ideal lather characteristics.
Monitoring over a 30-day period reveals significant improvements from the initial 24-hour mark, with well-cured soaps producing rich, creamy lather that's more suitable for skin use.
Storage Requirements During Curing
Proper storage conditions play an essential role in the soap curing process. You'll need to store your soaps in a cool, dry place with temperatures between 60°F to 80°F to guarantee ideal moisture evaporation.
Store handmade soaps in cool, dry spaces between 60-80°F to ensure proper curing and optimal moisture release during the process.
For successful curing, follow these critical storage requirements:
- Place soaps on wire racks to maintain good air circulation and prevent moisture accumulation.
- Keep bars away from direct sunlight to protect against UV damage and quality degradation.
- Control humidity levels using a dehumidifier if needed.
- Wrap finished soaps in breathable materials like muslin or parchment paper, not plastic.
Common Curing Mistakes to Avoid
Even with ideal storage conditions, soapmakers can encounter several pitfalls during the curing process. One of the most common mistakes is using soap too early, before the recommended 4-6 week cure time, which results in poor lather and excessive drying effects on your skin.
Don't rush the saponification process before curing begins, as residual lye can cause skin irritation.
You'll also want to avoid wrapping your soap in plastic, which traps moisture and creates softer bars. Instead, choose breathable materials like muslin or parchment paper for storage.
Monitor humidity levels carefully during the cure time, as high moisture can slow down the drying process.
Always store your soap in a cool, dry space with good air circulation to prevent mold growth and guarantee proper hardening.
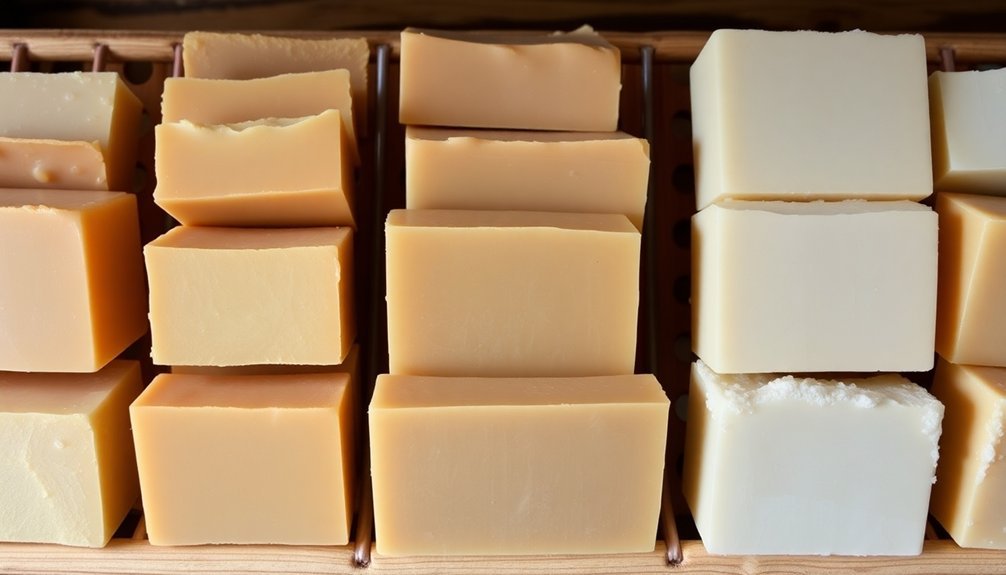
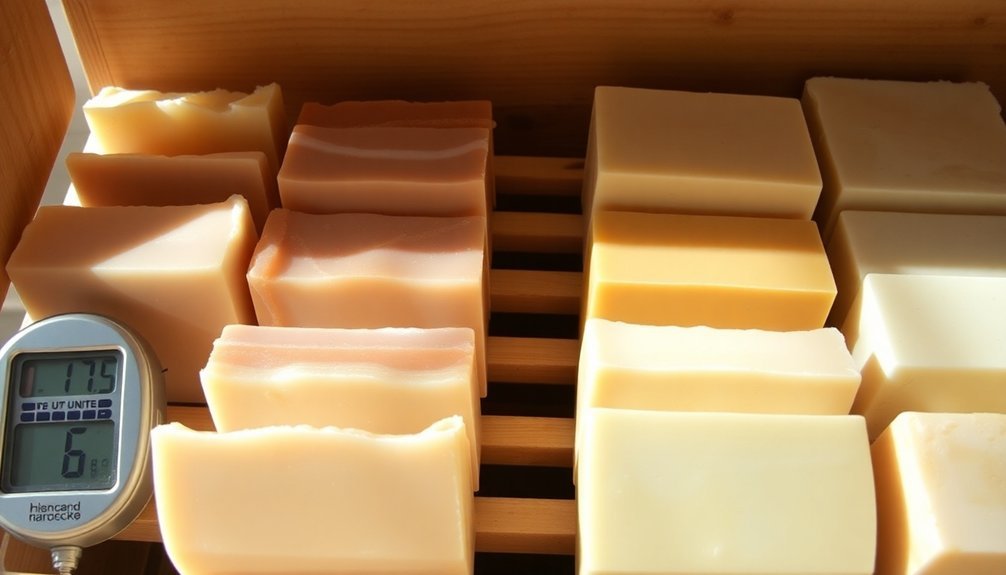
Quality Indicators of Well-Cured Soap
Experienced soapmakers know that well-cured soap exhibits distinct physical characteristics that confirm it's ready for use.
When evaluating quality indicators, you'll find that properly cured soap feels firm to the touch, signaling ideal hardness and that saponification is complete.
Here's what to look for in well-cured soap:
- A hard, solid texture with no excess moisture or sticky residue
- Deeper, more stabilized coloring that reflects completed chemical reactions
- Rich and creamy lather that forms easily when used with water
- Enhanced fragrance that's developed fully through the curing process
You can determine if your soap has reached its peak quality by checking these characteristics.
When all these indicators are present, you'll know your soap has cured properly and is ready for use.
Best Practices for Long-Term Soap Storage
To maximize the shelf life of your handmade soap, careful storage practices make all the difference. Store cured soap in a cool, dry area away from direct sunlight to help your cold process soaps cure properly and long last.
You'll want to guarantee good airflow around each bar by placing them on wire racks or trays.
Choose breathable storage materials like cardboard boxes, muslin bags, or parchment paper that promote air circulation while preventing moisture buildup. Avoid wrapping your soaps in plastic, which can trap moisture and encourage mold growth.
If you're packaging soaps as gifts, select containers that maintain proper ventilation while still looking attractive. These simple storage techniques will help preserve your soap's scent, appearance, and quality for months to come.
Frequently Asked Questions
Why Does Cold Process Soap Need to Cure?
Your cold process soap needs to cure so water can evaporate, making a harder bar that'll last longer. The process also completes saponification, neutralizes lye, and improves lather quality for better skin care.
What Happens if You Don't Let Soap Cure?
If you don't let your soap cure, you'll get a soft bar that dissolves quickly, creates poor lather, and may irritate your skin due to excess lye. The fragrance won't develop properly either.
How to Speed up Cure Time for Cold Process Soap?
You can speed up soap curing by maintaining 70-80°F temperatures, using a dehumidifier, cutting smaller bars, ensuring good air circulation with fans, and considering a water discount in your recipe. Watch quality though!
How to Know When Cold Process Soap Is Cured?
You'll know your soap is cured when it's hard to the touch, produces rich lather, has no sticky residue, and has rested 4-6 weeks. Check for deepened color and stronger fragrance development.
In Summary
You'll find that a proper cold process soap cure time typically ranges from 4-6 weeks, but can benefit from even longer curing. During this period, excess water evaporates, creating a harder, longer-lasting bar with milder pH levels. Keep your soaps in a well-ventilated area, monitor them regularly, and resist the urge to use them too soon. Your patience will reward you with superior quality soap.


Leave a Reply