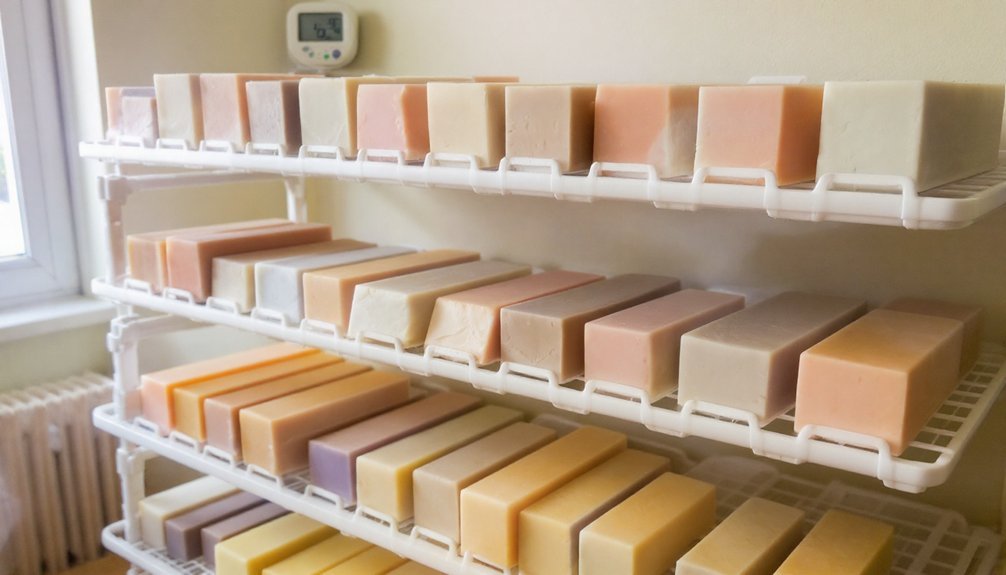
Store your cold process soap bars on wire racks in a well-ventilated area away from direct sunlight, maintaining temperatures between 60°F and 80°F. Space bars at least an inch apart to guarantee proper airflow, and rotate them weekly for even curing. Use a dehumidifier to control moisture levels and prevent mold growth. Place racks in cardboard boxes to protect bars while allowing air circulation. Discover more expert techniques to perfect your soap's curing process.
Essential Equipment for Proper Soap Curing
The three most important pieces of equipment for proper soap curing are wire racks, cardboard boxes, and a dehumidifier.
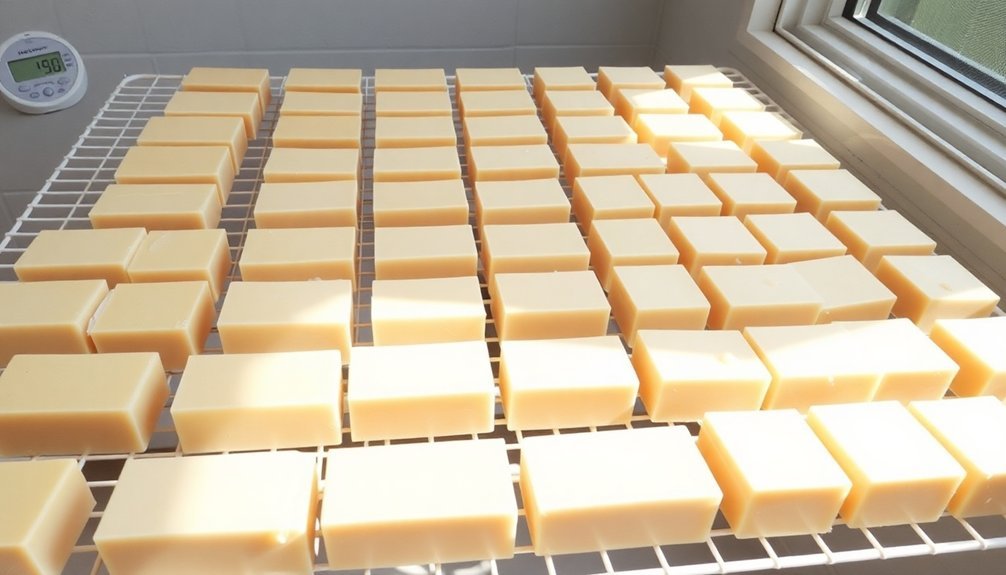
Soap needs to cure for 4-6 weeks, and using wire racks guarantees good airflow around all sides of your bars. Position these racks in a cool, dry space where temperatures stay between 60°F and 80°F.
Cardboard boxes help you organize your soap while maintaining proper air circulation throughout the curing process.
Don't overcrowd the boxes, as this can trap moisture and slow down curing. You'll also want to monitor humidity levels closely, as excess moisture can lead to mold.
That's where a dehumidifier becomes vital – it helps maintain ideal conditions while you store soap.
Remember to rotate your bars weekly to guarantee even drying and prevent any flat spots from forming.
Creating the Ideal Curing Environment
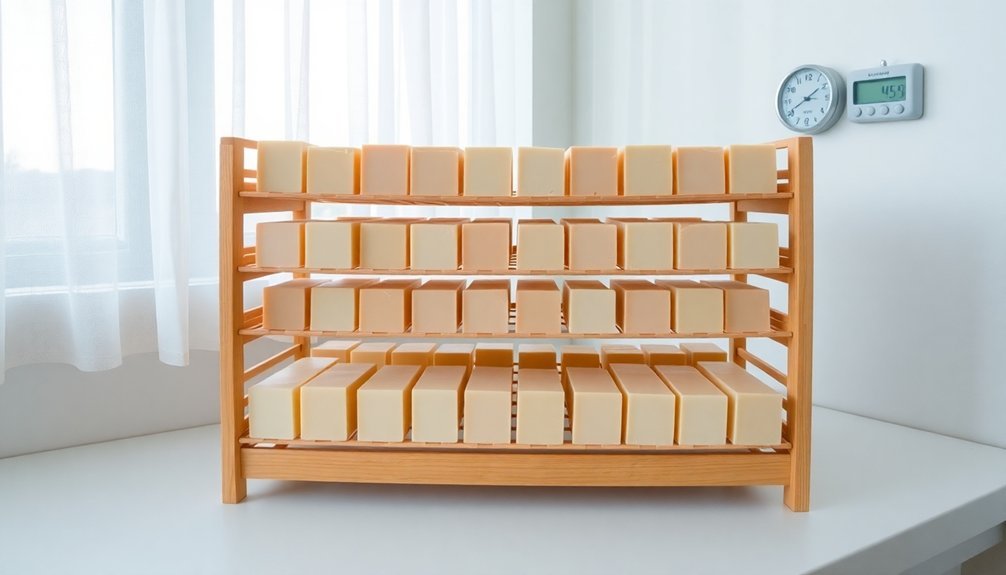
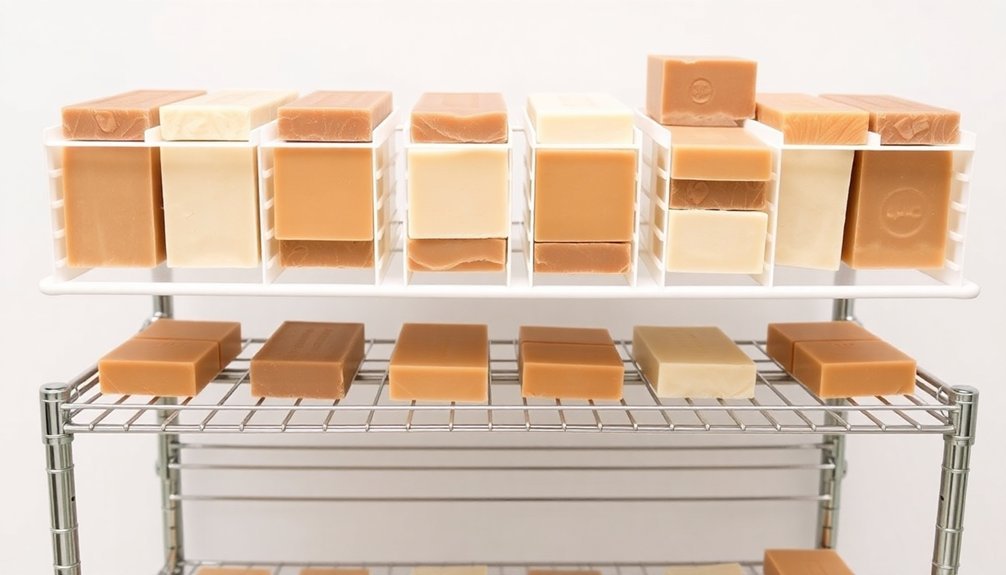
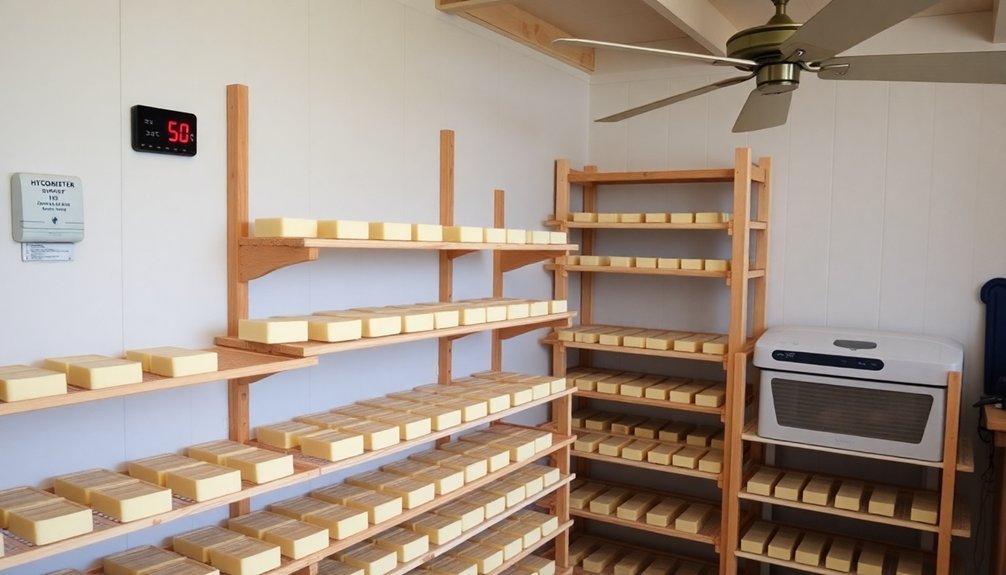
You'll want to set up your soap curing area with proper ventilation and air flow, using wire racks that allow air to circulate freely around each bar.
Keep your curing space at a steady temperature between 60°F to 80°F, away from direct sunlight and heat sources that could affect the soap's quality.
Monitor humidity levels and guarantee they stay low, as excess moisture can interfere with proper curing and potentially lead to soap sweating.
Ventilation and Air Flow
Proper ventilation stands at the heart of successful cold process soap curing. To guarantee ideal airflow, you'll want to place your soap bars on a wire rack or an old oven rack. This setup allows air to circulate freely around each bar, promoting even moisture evaporation.
Choose a cool, dry place with temperatures between 60°F to 80°F for storing your soaps. Keep them away from direct sunlight, as this can interfere with the curing process and affect the final quality.
Remember to space your bars apart, guaranteeing they don't touch each other. This maximizes airflow around each bar and prevents any potential sticking or warping.
Don't forget to turn your soap bars weekly, exposing all sides to air for uniform curing. These simple ventilation practices will help you achieve perfectly cured soap bars.
Temperature and Humidity Control
Creating an ideal curing environment requires careful attention to both temperature and humidity levels.
You'll want to maintain temperatures between 60°F to 80°F (15°C to 27°C) to guarantee proper saponification and moisture evaporation during the curing process. Keep your soap bars away from high humidity areas, which can promote mold growth and interfere with proper curing.
Monitor your storage space regularly for temperature fluctuations and maintain consistent conditions.
While good airflow is essential, don't place your soap bars in direct sunlight, as this can alter their color and fragrance. Instead, store them in a well-ventilated area with stable temperatures and low humidity.
A simple thermometer and humidity gauge can help you track these conditions, ensuring your soap cures properly and develops the desired hardness and quality.
Temperature and Humidity Control Methods
Successful cold process soap storage depends heavily on maintaining precise temperature and humidity levels throughout the curing process.
Keep your curing area between 60°F to 80°F to guarantee proper hardening and moisture evaporation. You'll want to monitor humidity levels, aiming to keep them below 50% for ideal results.
If you're in a high-humidity environment, use a dehumidifier to prevent excess moisture that could lead to mold growth.
Place your soaps on wire racks to promote proper airflow around each bar, which helps achieve even drying.
Don't store your curing soaps near windows or heating vents, as temperature fluctuations can interfere with the curing process.
These consistent conditions will help guarantee your cold process soaps cure properly and develop the desired hardness and quality.
Airflow Requirements During the Curing Process
Because airflow plays an important role in soap curing, you'll need to position your cold process bars strategically to guarantee ideal results.
To guarantee proper curing process and prevent moisture accumulation, place your bars on a wire rack with good ventilation, maintaining at least an inch of space between each one.
- Never stack your soap bars directly on top of each other, as this blocks important airflow.
- Keep your storage area's temperature between 60°F and 80°F for best curing conditions.
- Turn your bars weekly to promote even curing on all sides.
- Use wire racks or shelves that allow air to circulate freely around each bar.
Remember that consistent airflow is vital for successful curing, so choose a cool, dry location where air can move freely around your soap bars without obstruction.
Organizing Your Curing Space Efficiently
You'll get the most from your curing space by arranging soap bars in a single layer on wire racks with at least an inch of space between each bar.
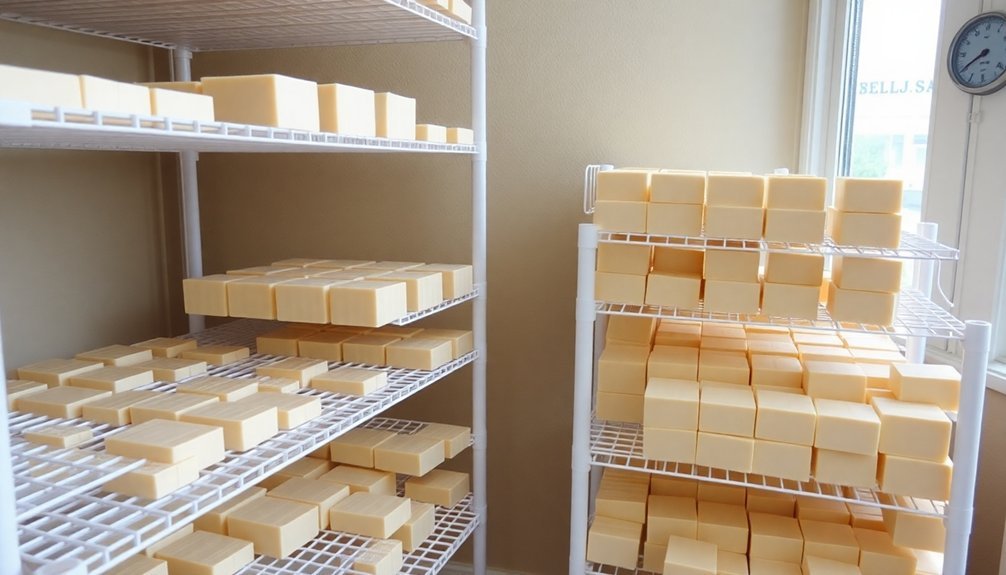
Create zones within your storage area using labeled cardboard boxes to separate different soap varieties while maintaining proper airflow around each bar.
If you're working with limited shelf space, consider stacking multiple wire racks vertically, ensuring enough clearance between levels for adequate air circulation.
Maximizing Limited Shelf Space
When space comes at a premium, organizing your soap curing area efficiently becomes vital for maintaining product quality. For soap makers looking to maximize vertical space, stackable storage solutions offer a perfect place to store their creations while guaranteeing proper airflow around each bar.
- Use plastic baskets or cardboard boxes with ventilation holes to store handmade soaps in layers.
- Install wire racks inside kitchen cabinets or basement shelves to keep bars elevated.
- Line storage containers with paper towels to manage moisture levels.
- Label containers clearly to track different batches and scents.
Remember to rotate your soap bars weekly if you're stacking them. This practice guarantees even curing and prevents moisture buildup on any single side.
Air Circulation Best Practices
Proper air circulation stands as a cornerstone for successfully curing cold process soap bars. To optimize airflow, elevate your bars using a cooling rack or old oven rack, which allows air to move freely around all sides during the curing process.
Space your bars carefully, guaranteeing they don't touch each other. This prevents moisture accumulation and promotes even drying. Set up your curing area in a well-ventilated space, and consider using a fan to enhance air circulation.
Remember to rotate your bars every few days for uniform curing. Pay attention to adequate spacing between bars and avoid overcrowding your storage area.
When you maintain proper ventilation and spacing, you'll reduce the risk of mold growth and guarantee your soap cures evenly, resulting in high-quality, properly hardened bars.
Rotating and Monitoring Soap Bars
Regular rotation and monitoring of your cold process soap bars play an essential role in achieving an even cure.
Proper rotation and careful monitoring ensure cold process soap cures evenly, resulting in the highest quality handmade bars.
You'll need to rotate each bar weekly to prevent warping and uneven moisture distribution. Keep a close eye on your soaps for any signs of excess moisture or humidity, and adjust their storage location to maintain ideal curing conditions with proper airflow.
- Check soap hardness frequently – they should feel firm, not sticky
- Turn bars every few days for uniform air exposure
- Monitor humidity levels in your storage area
- Rotate bars weekly to prevent warping from surface contact
Signs of Properly Curing Soap
You'll notice several physical changes as your soap bars cure properly, including a deepening color, enhanced fragrance, and a solidifying texture that feels firm to the touch.
Testing your soap's readiness involves checking for any residual moisture or stickiness on the surface, which should be completely absent in a well-cured bar.
The ideal hardness of your soap becomes evident when it produces a rich, creamy lather and maintains its shape without any soft spots or indentations.
Physical Changes During Cure
Watching your cold process soap cure involves monitoring several key physical changes that indicate proper aging. As you cure soap, you'll notice the bars becoming firmer and harder as excess moisture evaporates. The alteration process results in fully cured bars with enhanced qualities that improve their performance.
Here are the physical changes you'll observe:
- Your bars will feel increasingly hard and firm to the touch.
- The soap's surface shifts from slightly tacky to completely dry.
- Colors may intensify or shift slightly as the soap ages.
- A pronounced fragrance develops, creating a more appealing scent profile.
These changes are essential indicators that your soap is curing properly. The gradual hardening process allows excess moisture to evaporate while improving the soap's lathering properties, resulting in a superior finished product.
Testing Soap Readiness
Once you've observed the physical changes during curing, knowing how to test your soap's readiness becomes the next key focus.
You'll want to check several key indicators to verify your soap has cured properly.
When testing soap readiness, first examine the bar's hardness – it should feel firm and dry to the touch with no sticky residue, indicating complete moisture evaporation.
You'll notice the soap's color may have deepened, showing proper chemical development.
Create a lather test; properly cured soap will produce rich, creamy bubbles.
The fragrance from essential oils should be more pronounced as they've had time to mature.
For a final check, try the "zap test" – if there's no tingling sensation when touching the soap to your tongue, the lye has fully neutralized, confirming your soap is ready for use.
Optimal Hardness Indicators
Knowing the telltale signs of properly cured soap guarantees your handmade bars are ready for use.
When checking for best hardness, you'll notice that well-cured soap feels firm and solid to the touch, indicating quality throughout the cure time.
- Press your finger against the bar – it should feel hard with no give or softness, confirming moisture has fully evaporated.
- Check the surface texture – you shouldn't detect any stickiness or residual dampness.
- Look for color changes – your soap may develop deeper, richer tones as it properly cures.
- Test the lather – well-cured soap produces a creamy, abundant foam when used.
As your soap reaches its ideal hardness, you'll also notice that fragrances become more refined and pronounced, signaling the completion of the curing process.
Common Curing Problems and Solutions
While curing cold process soap can be a rewarding process, several common issues may arise that require attention. You'll want to maintain good air circulation to prevent mold growth caused by high humidity.
Consider using a dehumidifier to control moisture accumulation in your curing space.
If you notice your soap bars are soft or sticky, they likely need more time to cure. Extend the curing process to at least 6 weeks for best results.
Remember to rotate your bars every few days to prevent warping, and keep them separated during curing.
Watch for signs of rancidity, such as strong odors or discoloration. Store your soap in a cool, dry place away from direct sunlight, maintaining temperatures between 60°F and 80°F to guarantee proper hardening.
Best Practices for Long-Term Storage
After mastering the curing process, proper long-term storage becomes your next focus for maintaining high-quality cold process soap. To store your soap effectively, you'll need a dry place with good air circulation that maintains temperatures between 60°F to 80°F.
Key storage practices to follow:
- Use wire racks or trays to elevate soap bars, allowing air to flow around all sides.
- Organize different scents in separate cardboard boxes lined with paper towels to absorb excess moisture.
- Keep soap away from direct sunlight to prevent degradation.
- Check and rotate bars regularly to maintain even dryness.
Remember to monitor your storage area for humidity changes and adjust conditions as needed. This systematic approach guarantees your handcrafted soaps maintain their quality and properties throughout their shelf life.
Seasonal Adjustments for Soap Curing
Since seasonal changes can greatly impact soap curing, you'll need to adjust your curing environment throughout the year.
During warmer months, maintain proper airflow by using fans and ensuring good ventilation to prevent rapid moisture loss from your soap bars.
Keep soap curing consistent in summer by using fans and good airflow to avoid moisture evaporating too quickly.
When temperatures drop, keep your curing space between 60°F and 80°F, and don't place soap bars near heating sources or drafts. This prevents them from hardening too quickly and maintains proper curing.
If you're dealing with high humidity, use a dehumidifier to protect against mold growth.
Remember to rotate your soap bars weekly for even curing, especially when temperatures fluctuate between seasons.
Space-Saving Curing Techniques
Making the most of limited space while curing cold process soap requires smart storage solutions that don't compromise airflow. Your space-saving strategy should focus on vertical storage options that maintain proper ventilation while maximizing your available area.
- Stack wire racks or baker's racks vertically to create multiple curing levels without sacrificing precious floor space.
- Install wall-mounted or tiered shelving units to utilize unused vertical space while guaranteeing proper air circulation.
- Use ventilated plastic or stainless steel shelves for efficient organization and ideal airflow.
- Sort soaps in cardboard boxes with ventilation holes, arranged by scent or type for easy access.
Remember to rotate your bars weekly during the curing process, even in tight storage configurations. This guarantees even moisture evaporation and prevents any shape distortion while maintaining an organized system.
Safety Measures During the Curing Period
While cold process soap requires several weeks to cure properly, implementing essential safety measures during this period protects you and your household from potential hazards.
Always wear gloves when handling fresh soap, as it may contain active lye that can burn your skin.
Keep your curing area well-ventilated to prevent fume buildup, and make certain it's completely inaccessible to children and pets.
You'll need to monitor your soap regularly for signs of moisture or mold, adjusting storage conditions as needed to maintain a dry environment.
Don't skip the zap test after the first 24 hours of curing – it's vital to confirm complete saponification before use.
These safety measures during the curing period guarantee both your soap's quality and your family's wellbeing.
Frequently Asked Questions
How to Store Cold Process Soap When Curing?
Place your cold process soap on a wire rack in a cool, dry area between 60-80°F. Keep bars separated and away from sunlight. Rotate them weekly and guarantee good airflow during the 4-6 week cure.
How to Store Bar Soap When Not Using?
Store your unused bar soap in a cool, dry place using a wire rack or dish that allows airflow. Don't wrap it in plastic – use breathable materials instead. Keep it away from direct sunlight and moisture.
Should I Put My Cold Process Soap in the Fridge?
No, you shouldn't put cold process soap in the fridge. It'll cause uneven curing, sweating, and potential mold growth. Instead, store your bars in a cool, dry place with good air circulation.
How to Store Melt and Pour Soap Bars?
You'll need to wrap your melt and pour soap bars immediately in plastic wrap to prevent sweating. Store them in a cool, dry place away from sunlight. Don't refrigerate them, as this causes brittleness.
In Summary
Proper soap curing doesn't have to be complicated. Follow these guidelines to guarantee your cold process bars cure successfully: maintain good airflow, control humidity levels, and organize your space efficiently. You'll need patience during the 4-6 week curing period, but your efforts will reward you with harder, longer-lasting bars. Remember to adjust your methods seasonally and always prioritize safety in your curing space.


Leave a Reply