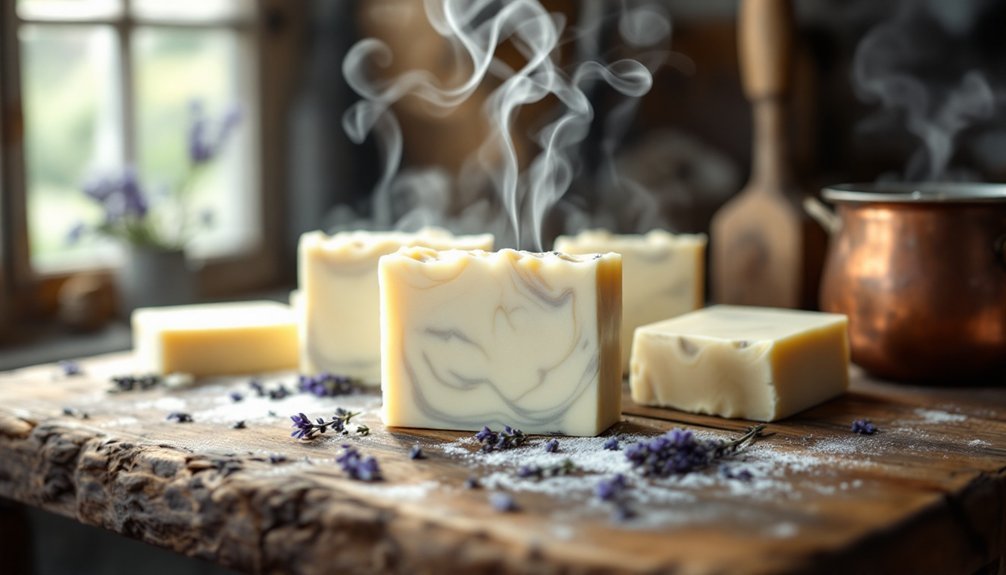
To make perfect goat milk soap, you'll need to master seven essential techniques. Start by freezing your goat milk into cubes and maintaining precise temperatures between your lye mixture and oils. Use high-quality ingredients, including fresh raw milk and premium oils. Always wear proper safety gear and work in a ventilated space. Mix carefully to achieve the right trace, pour into suitable molds, and cure properly. These foundational secrets will transform your soap-making journey.
The Secret of Perfect Temperature Control
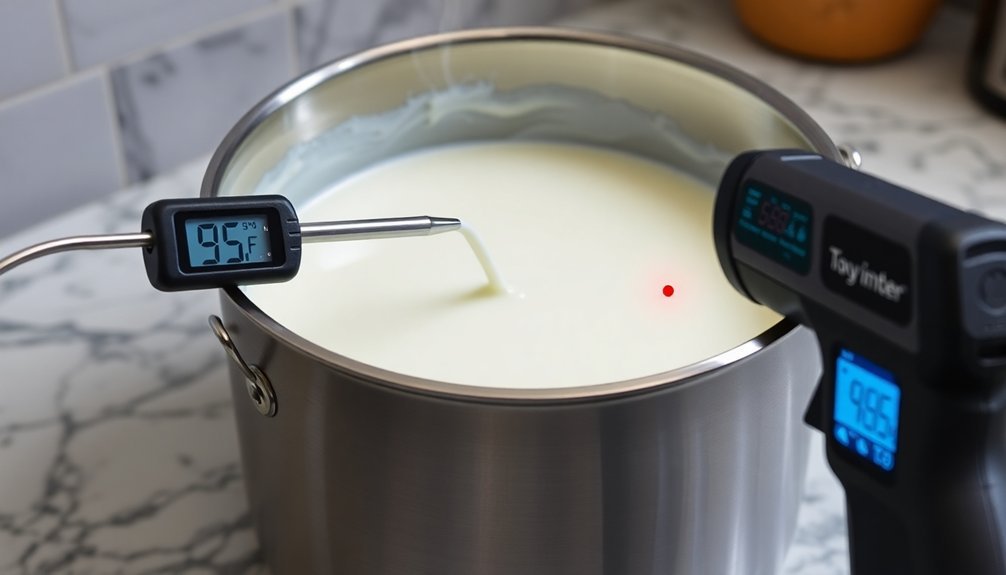
Why do so many goat milk soap makers struggle with temperature control? The challenge lies in maintaining consistent temperatures between your lye solution and oils, which must stay within 5-10 degrees of each other for ideal results.
Freezing goat milk helps prevent scorching and overheating during the soap making process. You'll achieve the best outcomes by keeping your mixing temperatures between 68-130°F, though you'll want to stay on the lower end when working with goat milk to prevent scorching.
Start by freezing your goat milk into small ice cubes – not large blocks – before mixing with lye. Then, aim to warm your oils to 85-110°F, slightly above your lye-milk mixture.
Don't skip using a reliable thermometer to monitor both mixtures. If your lye-milk solution gets too cold, you can gently warm it to around 100°F before combining with your oils.
Mastering the Art of Lye-Milk Combination
While many soapmakers find the lye-milk combination challenging, mastering this essential step will assure your goat milk soap retains its signature creamy color and rich qualities.
Start by freezing your goat milk solid – this prevents scorching and assures better temperature control when you add the lye.
You'll need to measure your lye in a glass dish, then combine it slowly with the frozen milk in a large glass bowl. Stir continuously as you add the lye, keeping the temperature below 70°F or around 100°F. If needed, use an ice bath to maintain control.
Don't forget to wear protective gear and work in a well-ventilated area.
Once you've achieved complete dissolution, strain the mixture to remove any undissolved particles. The proper pH balance achieved through this careful mixing helps protect against harmful bacteria on the skin.
Remember to clean all supplies thoroughly afterward with hot water and dish soap.
Essential Equipment and Safety Protocols
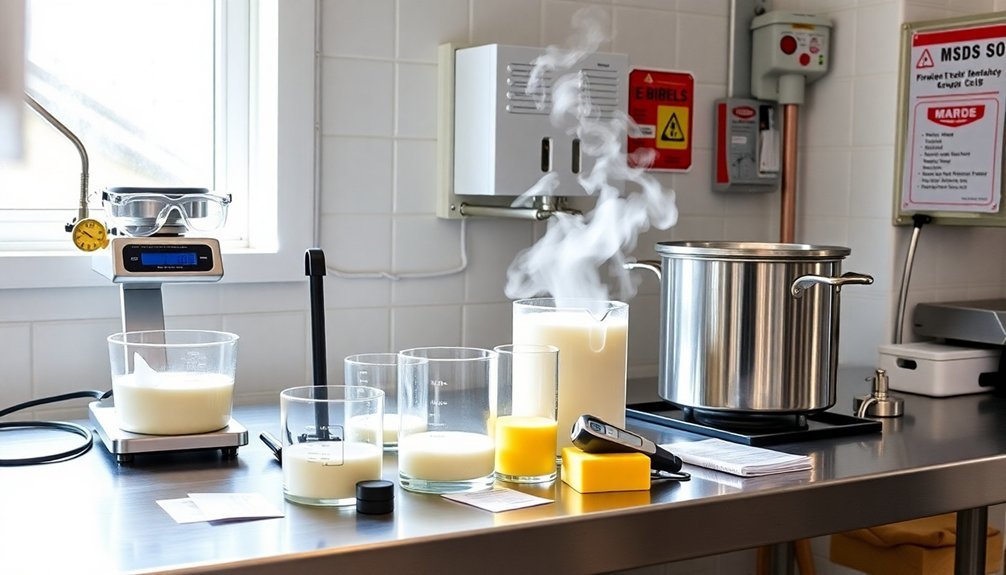
Before starting your goat milk soap-making journey, you'll need the right tools and safety measures in place. Gather your essential equipment: safety goggles, heavy-duty rubber gloves, a digital kitchen scale, stainless steel stick blender, and appropriate soap molds. A milk carton alternative can serve as an excellent makeshift mold for beginners.
For handling lye safely, you must wear a face mask or respirator, and work in a well-ventilated area. Don protective gear including long-sleeved clothing, an apron, and closed-toe shoes. Remove jewelry and tie back your hair to prevent accidents.
Set up your workspace with stainless steel pots, heat-safe rubber spatulas, and glass mixing bowls. Never use aluminum utensils as they'll react with lye.
Keep your area clean, uncluttered, and guarantee you have easy access to water for emergencies.
Achieving the Perfect Trace Every Time
You'll need to carefully monitor the temperature difference between your lye-milk mixture and oils, keeping them within 10 degrees of each other for ideal trace development.
While blending with your stick blender, watch for the mixture to leave visible trails that resemble ribbon patterns when drizzled across the surface.
These telltale ribbon formations signal that you've reached the perfect trace consistency, making your soap ready for any fragrance additions and molding.
Using a cold process method helps prevent scorching of the goat milk during saponification while achieving proper trace.
Temperature Control Matters Most
When making goat milk soap, precise temperature control stands as the cornerstone of achieving consistent, high-quality results.
Start by freezing your goat milk in ice cube trays – this prevents scorching and helps maintain the soap's creamy white color when mixed with lye.
You'll want to cool your lye solution to around 100°F before combining it with the frozen milk.
Meanwhile, heat your oils to a temperature within 10 degrees of your lye solution's temperature.
The ideal mixing range falls between 68°F-130°F, though you'll get the best results around 100°F. Using smaller frozen cubes results in better temperature management during the mixing process.
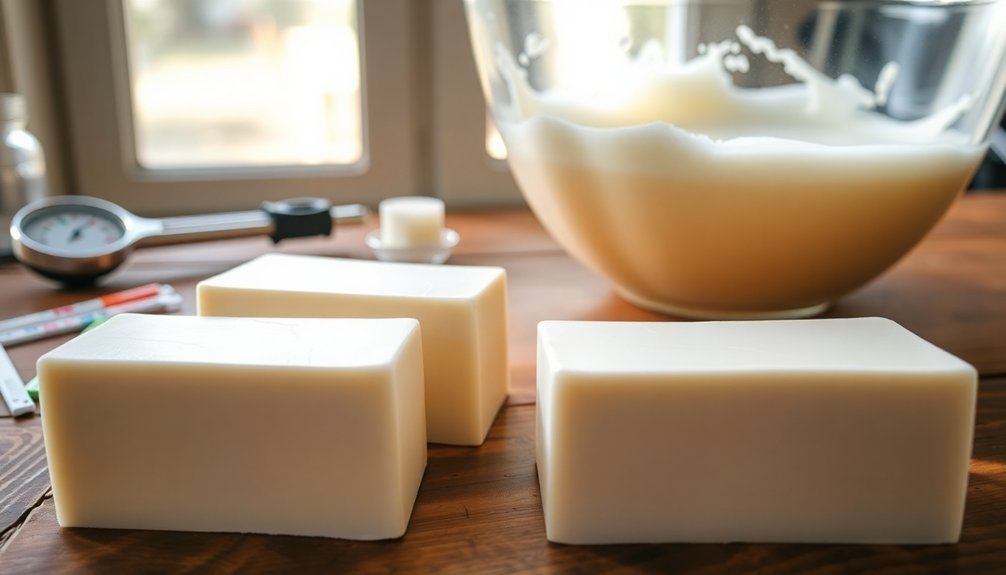
Mix Until Ribbon Forms
The perfect trace marks a critical turning point in your soap-making process. You'll know you've reached this stage when your mixture thickens to a pudding-like consistency and leaves a visible trail when stirred.
To achieve the ideal trace, you'll want to use a stick blender for best results. Keep your blender near the bottom of your container and work in short bursts on low speed to avoid trapping air bubbles.
Don't rush this process – periodic pauses will help you monitor the consistency carefully.
Once you've reached trace, quickly add your fragrance oils and other additives while the mixture is still pourable. Remember to blend these additions gently to maintain the right consistency.
You'll need the soap to remain fluid enough to pour into your molds while ensuring everything's fully incorporated.
Preventing Common Milk Soap Mistakes
Making goat milk soap requires careful attention to detail, as even minor mistakes can lead to unusable batches. To prevent common errors, you'll need to use a lye calculator to guarantee precise ratios and avoid volume measurements in favor of weight-based ones.
Always freeze your goat milk before use to prevent bacterial growth and maintain stability during the process.
When mixing, use your stick blender in short bursts to prevent overheating while guaranteeing thorough incorporation. Don't forget to adjust your superfat percentage based on your specific recipe, typically using 4-5% for most formulations, but less for goat milk soaps.
Store your finished products in cool, dry places away from direct sunlight, and use non-reactive containers to maintain quality. If separation occurs, you can remelt the batch while including all original liquids.
Superior Ingredients for Premium Results
Your goat milk soap's quality starts with fresh, raw goat milk sourced directly from local farms to guarantee maximum nutritional benefits.
High-quality oils, particularly olive and coconut, work together to create the perfect balance of hardness, lather, and skin-nourishing properties.
To elevate your soap to premium status, you'll want to incorporate natural additives like shea butter and carefully selected essential oils that provide both therapeutic benefits and luxurious appeal.
Fresh Raw Milk Sources
Obtaining superior quality raw goat milk stands as an essential first step in creating exceptional handcrafted soap. You'll find the best raw milk by connecting directly with local farms, where you can guarantee the milk is fresh, additive-free, and properly handled. Health food stores can also be reliable sources, though you'll want to verify the milk's freshness and purity.
- When sourcing your milk, confirm it's completely free of preservatives and additives that could interfere with the saponification process.
- Choose farms that maintain strict cleanliness standards and proper milking procedures.
- Test small batches from each new source to guarantee consistent quality before committing to larger purchases.
Remember to freeze your milk immediately after purchase to maintain its beneficial properties and prepare it properly for soap making.
Quality Oils Matter Most
While goat milk provides the foundation for luxurious soap, premium-quality oils serve as the cornerstone of successful soap making.
You'll need to select and blend your oils carefully to achieve the perfect balance of cleansing, hardness, and moisturizing properties.
Start with olive oil for a mild, stable lather that's gentle on sensitive skin. Add coconut or palm kernel oil to create hardness and fluffy lather. For enhanced conditioning, incorporate lard, tallow, or a small amount of shea butter.
Don't waste money on expensive virgin oils – pomace olive oil actually performs better in soap making, and lower-grade oils contain similar fatty acid profiles to their premium counterparts.
Remember to maintain proper temperatures between 80-120°F when mixing your oils, and use an immersion blender to achieve trace quickly and efficiently.
Natural Additives for Luxury
Beyond selecting quality oils, elevating your goat milk soap requires carefully chosen natural additives that transform an ordinary bar into a luxury experience.
You'll find that goat milk itself provides exceptional benefits with its rich vitamin content and natural exfoliating properties. When you combine it with honey, you'll create a moisturizing powerhouse that generates smooth lather while providing antibacterial protection.
- Start with premium additives like lanolin and kaolin to enhance hydration and gentle exfoliation.
- Incorporate sodium lactate and your proprietary probiotic blend to maintain skin's natural balance.
- Finish with luxury butters (shea and mango) and essential oil blends for superior conditioning and personalized scents.
These natural additives work together to create a spa-quality soap that's both effective and indulgent.
Expert Curing and Storage Methods
Successfully curing and storing goat milk soap requires careful attention to environmental conditions and proper handling techniques.
After pouring your soap, let it harden in the mold for 3-4 days before cutting. You'll need to cure the bars for at least 4-6 weeks in a cool, dry place with good air circulation.
To maintain your soap's quality, store it in non-reactive containers made of glass or high-quality plastic. Don't use aluminum or copper containers, as they'll react with the soap's ingredients.
Keep your bars away from direct sunlight and moisture by using a proper soap dish with drainage. If you're storing multiple scented soaps, wrap them separately in wax paper and keep them in sealed containers to preserve their unique fragrances.
Remember to rotate your stock regularly to guarantee ideal freshness.
Frequently Asked Questions
Can I Substitute Goat's Milk With Other Animal Milk in Soap Making?
Yes, you can use cow's milk instead of goat's milk in soap making, but you'll need to adjust your recipe using a soap calculator since different animal milks have varying fat contents and properties.
Why Does My Goat Milk Soap Turn Brown or Orange?
Your goat milk soap turns brown or orange because of milk sugars caramelizing during the heating process. When lye interacts with milk proteins, it triggers this color change, especially if you're not controlling temperatures carefully.
How Long Will Homemade Goat Milk Soap Stay Fresh?
Your properly cured goat milk soap will stay fresh for 1-3 years when stored correctly. You'll get the best results if you store it in a cool, dry place and let it cure for 6+ weeks.
Can I Add Fresh Herbs From My Garden to Goat Milk Soap?
Yes, you can add herbs from your garden, but you'll need to dry them completely first. Fresh herbs contain moisture that can spoil your soap, so it's crucial to properly dry or infuse them beforehand.
Is Goat Milk Soap Safe to Use on Babies and Children?
Yes, you can use goat milk soap on babies, but choose unscented, natural varieties and do a patch test first. It's gentle and moisturizing, but consult your pediatrician and watch for any allergic reactions.
In Summary
You're now equipped with the key secrets to creating exceptional goat milk soap. By controlling temperatures, carefully combining lye and milk, using proper equipment, achieving the right trace, avoiding common pitfalls, selecting premium ingredients, and mastering curing techniques, you'll produce luxurious, creamy bars every time. Don't forget to document your successful batches and continue experimenting with different techniques to perfect your craft.


Leave a Reply