
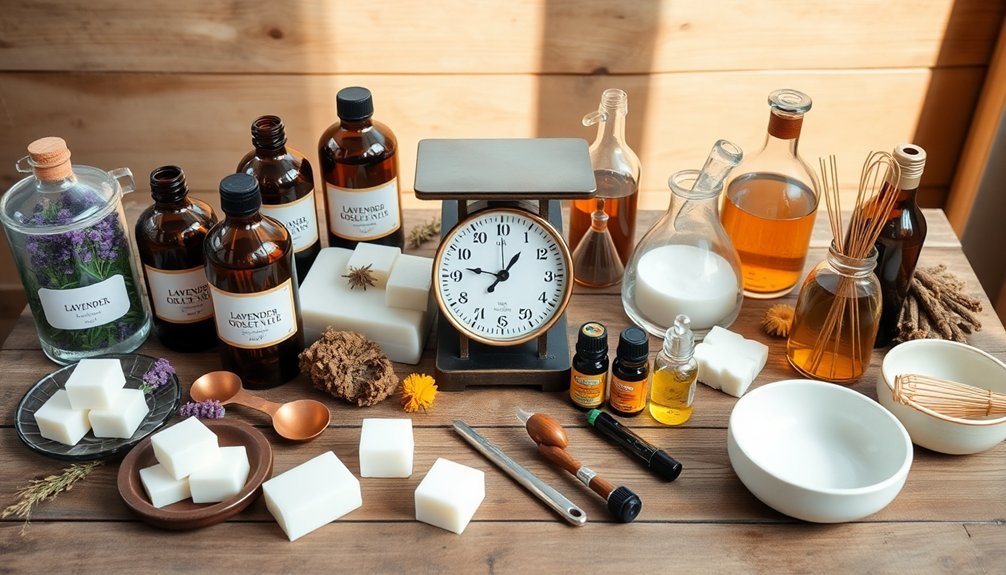
You'll need essential equipment like a crock pot, dark glass containers, and precise measuring tools to create oil-infused soaps. Start with safety gear including goggles, gloves, and protective clothing. Choose between cold infusion (2-6 weeks) or hot infusion (2-4 hours) methods, using proper herb-to-oil ratios of 1 cup fresh or ½ cup dried herbs per quart of oil. The right tools and techniques will set your foundation for mastering this rewarding craft.
Essential Equipment for Oil-Infused Soaping
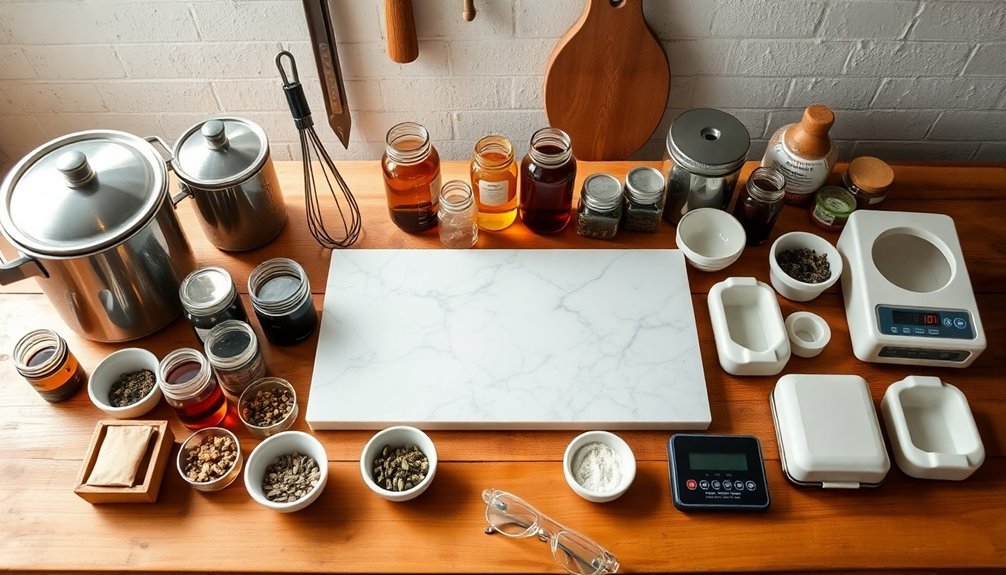
Five essential tools form the foundation of oil-infused soap making.
You'll need a small crock pot specifically for creating your infused oils, as it maintains the perfect temperature to extract herbal properties overnight.
A set of glass jars with dark-tinted surfaces protects your oils from light damage and extends their shelf life.
Your soap making supplies must include fine-mesh cheesecloth for straining the infused oils until they're crystal clear.
Fine-mesh cheesecloth is an indispensable tool for filtering infused oils, ensuring your final product achieves perfect clarity and professional quality.
Don't forget sterilizing equipment – you'll want a large pot or dishwasher-safe containers to sanitize all your tools before starting.
Finally, precise measuring cups are vital for maintaining the right ratio of herbs to oil, typically one cup of fresh herbs or half a cup of dried herbs per quart of oil when creating your infusions.
Safety Gear and Protective Measures
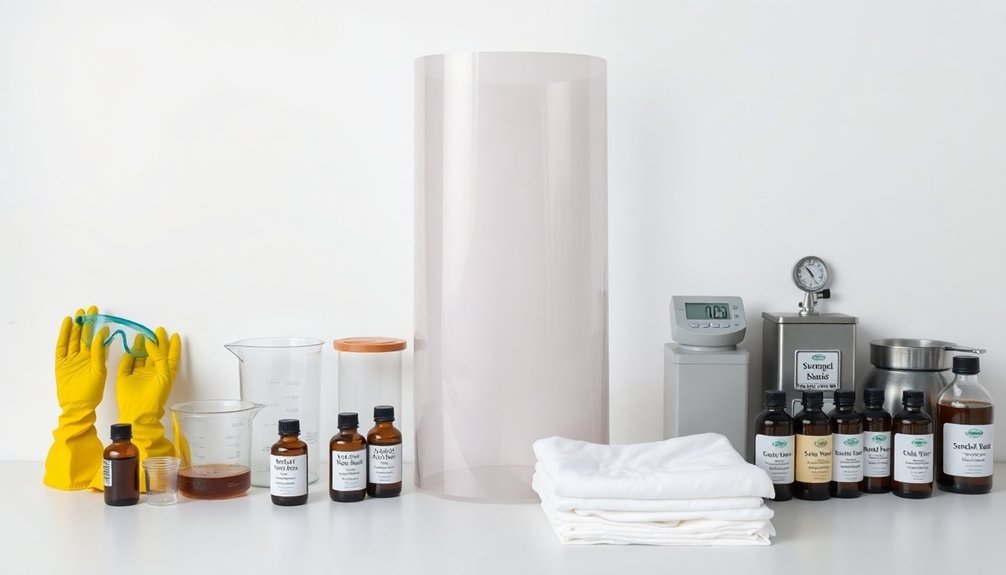
Safety stands as the cornerstone of oil-infused soap making, requiring specific protective gear before you begin handling any materials.
You'll need safety goggles to shield your eyes from splashes, along with disposable latex or nitrile gloves to protect your hands from caustic substances during the process.
Don't overlook the importance of wearing long sleeves and closed-toed shoes to safeguard your skin and feet from accidental spills.
When working with hot lye solutions, you'll want to use a respirator mask to avoid inhaling harmful vapors, especially during larger batches.
Keep a first aid kit within easy reach for emergencies, and familiarize yourself with proper procedures for handling accidents.
Base Oils and Carrier Selection
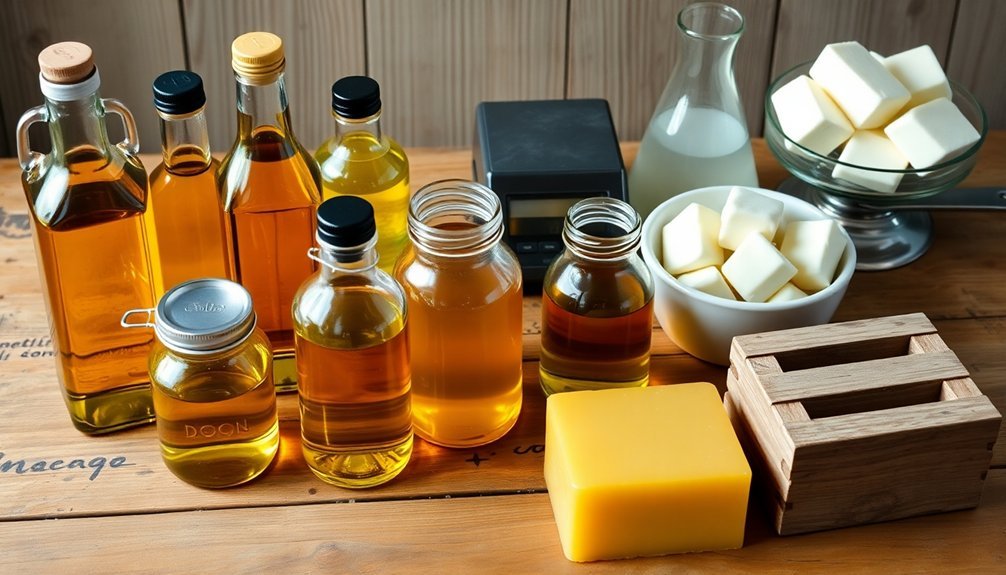
When crafting oil-infused soaps, selecting the right combination of base oils and carriers forms the foundation of your recipe's success.
You'll want to balance solid and liquid oils in your soap making, aiming for 30-50% solid oils and 50-70% liquid oils for the perfect texture.
Start with high-quality, cold-pressed base oils like olive oil for its gentle, moisturizing properties, and coconut oil to create harder bars with excellent lather.
For your carrier oils, consider jojoba or sweet almond oil, as they're excellent at capturing the essence of infused herbs.
Don't forget to include oils rich in oleic acid, such as avocado oil, to enhance your soap's moisturizing properties.
These oils won't just carry your chosen scents effectively – they'll also provide essential skin-nourishing benefits to your final product.
Herb and Botanical Preparation
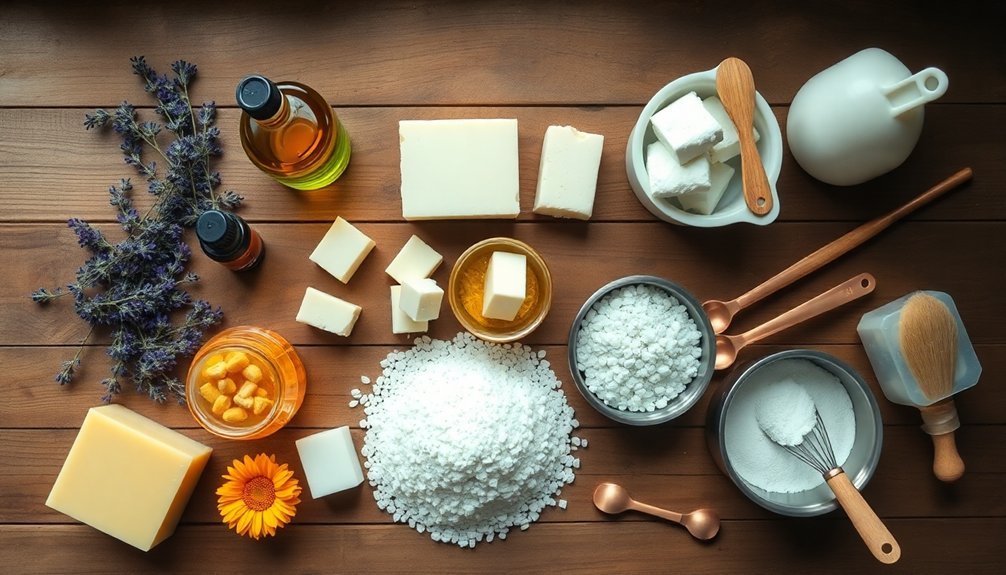
When preparing herbs for soap-making infusions, you'll need to wilt fresh botanicals or use dried plant materials, maintaining a 1:2 ratio of dried to fresh herbs per quart of oil.
You must sterilize your jars and tools before combining the herbs with your chosen oil, then place the mixture in a sunny location while shaking daily for several weeks.
Once infused, strain the mixture through cheesecloth into dark, sterilized containers, making sure to label each jar with the date and contents for your soap-making projects.
Drying Fresh Plant Material
Before infusing herbs into your soap-making oils, proper drying is essential to prevent mold and guarantee the highest quality results.
You'll want to harvest your herbs in the morning after the dew has evaporated, when their essential oils are most concentrated. Aim for a moisture content below 10% in your dried plant material.
You've got several drying options. Air drying works well by hanging small herb bundles upside down in a cool, dark space with good ventilation for 1-2 weeks.
If you're short on time, use dehydrators or low-temperature ovens at 95-115°F for several hours until the herbs become crisp.
Once dried, store your botanicals in airtight containers away from light, and don't forget to add labeling with the drying date to track freshness.
Infusing Oils With Herbs
Now that your herbs are properly dried, it's time to transform them into fragrant oil infusions for your soap-making journey.
Fill a clear jar with either 1 cup of fresh herbs or 1/2 cup of dried herbs, then cover with 1 quart of oil. Coconut oil works exceptionally well due to its neutral scent.
Place your jar in a sunny spot and give it a gentle daily shake. Let the mixture infuse for several weeks to achieve stronger scent retention. You'll get great results with herbs like peppermint, rosemary, lemon balm, or calendula.
Once your oil infusion is complete, strain the mixture through cheesecloth to remove the plant material. Transfer your strained mixture to a sterilized jar, preferably dark-colored, to maintain quality.
Start with small batches to test how different herbs perform in your infusions.
Straining Botanical Preparations
Properly straining your botanical preparations marks a critical step in creating high-quality soap infusions. You'll need to remove all plant materials that could potentially spoil your final product or affect its texture.
Using cheesecloth or a fine mesh strainer, filter your infused oils to eliminate any herbal residues, ensuring your soap maintains a smooth consistency.
Once you've completed straining, transfer your clean infusion into a sterilized jar, preferably dark-colored, to maintain freshness and prevent deterioration.
Don't forget to label your jar with the infusion date and contents – this helps you track potency over time.
Keep an eye on your strained oil for any signs of spoilage, such as unusual odors or cloudy appearance. These issues can arise if you haven't filtered thoroughly or if you've extended the infusion period too long.
Oil Infusion Techniques and Methods
You'll want to reflect on two primary methods for infusing oils: the traditional cold infusion, where herbs steep in oil under sunlight for several weeks, and the faster hot infusion using a tiny crock pot for just a few hours.
Your steeping time depends heavily on your chosen method – cold infusions require 2-6 weeks with daily gentle shaking, while hot infusions need only 2-4 hours of controlled heat.
For the strongest results in either method, you can extend the process by letting your strained oils rest in dark glass containers for an additional week before soap making.
Hot Vs Cold Infusion
When deciding between hot and cold oil infusion methods, understanding their distinct characteristics will help you choose the right approach for your soap-making needs.
Cold infusion involves steeping herbs in oil at room temperature for 2-4 weeks in a sunny spot, producing milder scents and properties. You'll get stronger results the longer you let it infuse.
Hot infusion offers a quicker alternative, using heat to extract herbs' properties and scents in just a few hours. You can use a crock pot to warm the oil and herbs gently, ensuring proper extraction without compromising the oil's quality.
When working with hot infusion, it's best to use dried herbs or zest rather than fresh herbs, as the pith can create unwanted scents.
Each method has its merits, with time and desired potency being key factors in your choice.
Steeping Time Guidelines
Since steeping times greatly impact the potency of infused oils, understanding the proper duration for each method is crucial for successful soap making.
You'll need to steep your infused oils for 2-6 weeks to achieve ideal results, with longer durations producing stronger scents and beneficial compounds.
If you're short on time, try the crock pot method – combine dried herbs with oil and heat for a few hours to extract properties quickly.
When using fresh herbs, let them wilt slightly first to improve oil absorption.
During the steeping process, remember to shake your jar regularly to guarantee even extraction and prevent herbs from settling.
Don't forget to strain your final product through cheesecloth or a fine mesh strainer to remove solid particles, resulting in a smooth final product that's perfect for soap making.
Storage Solutions and Containers
Proper storage of your oil-infused soap ingredients plays an essential role in maintaining their quality and extending shelf life. You'll need dark glass jars and airtight containers to protect your infused oils from light exposure and oxidation. Before using any storage containers, make sure you've sterilized them thoroughly to prevent contamination.
| Container Type | Best For | Storage Tips |
|---|---|---|
| Dark Glass Jars | Base Oils | Keep in cool dark place |
| Amber Bottles | Essential Oils | Seal tightly after use |
| Mason Jars | Dried Herbs | Store away from sunlight |
| Metal Tins | Finished Soaps | Maintain room temperature |
Don't forget to label each container with the infusion date and contents. This simple step helps you track freshness and avoid mixing up ingredients. Store all your supplies in a cool, dark place to preserve their beneficial properties and maximize shelf life.
Temperature Control and Monitoring
Temperature control stands as a critical factor in creating successful oil-infused soaps, with both lye solutions and oils requiring precise monitoring to reach their ideal 100°F (38°C) mixing point.
Precise temperature monitoring at 100°F is essential when mixing lye solutions and oils for perfectly infused handmade soaps.
You'll need a reliable digital thermometer to monitor temperatures throughout the saponification process. Don't use glass thermometers when measuring lye solution temperatures – they're fragile and respond too slowly. Instead, opt for a digital or infrared thermometer for quick, accurate readings.
When you're working with infused oils in your crock pot, maintaining proper temperature is vital. Keep it on low heat to preserve the herbs' beneficial properties.
Remember to add lye to water (never the reverse) and check temperatures consistently. Your careful attention to temperature control will help guarantee your oil-infused soaps turn out perfectly every time.
Straining and Filtering Tools
Once you've carefully monitored your oil infusions, you'll need the right straining equipment to remove herbs and guarantee a clean final product.
Cheesecloth serves as your primary straining tool, effectively separating botanical materials while preserving your valuable infused oils.
For best results, combine your straining methods by using a fine mesh strainer after the cheesecloth to catch any remaining particles.
You'll want to sterilize all your filtering equipment before use to maintain oil purity.
Use a funnel system to transfer your strained oils directly into storage containers without messy spills.
Choose dark glass jars for storing your filtered oils, as they'll protect your infusions from light exposure and extend their shelf life.
This careful attention to your straining process ensures your soap-making ingredients remain pure and potent.
Quality Testing Equipment
Essential quality testing tools guarantee your oil infusions meet safety and performance standards.
You'll need a digital refractometer to measure specific gravity and verify the concentration of your infused oils. For soap making, a pH meter or pH strips are vital to confirm your final product's safety for skin use.
Monitor your oil temperatures during infusion with a temperature probe or infrared thermometer to achieve ideal results. A hydrometer helps you detect any quality issues by measuring oil density, while a colorimeter guarantees consistent coloring across your products.
These precision instruments remove the guesswork from your soap-making process and help you maintain professional quality standards. By incorporating these testing tools into your routine, you'll create reliable, safe, and consistent oil-infused soaps every time.
Measuring and Precision Tools
Accurate measuring tools form the foundation of successful oil-infused soap making.
You'll need a digital kitchen scale to weigh oils and lye precisely, as measuring cups and spoons won't provide the accuracy your soap recipes require. A thermometer is essential to monitor both your lye solution and oils, keeping them around 100°F for ideal saponification.
To speed up the emulsification process, you'll want an immersion blender that creates a stable bond between oils and lye much faster than hand stirring.
For crafting scented soaps, consider adding a jeweler's scale to your precision tools collection – it'll help you measure small amounts of essential oils with exceptional accuracy.
These tools guarantee consistency and reliability in your soap-making process, leading to better results every time.
Soap Mold Selection for Infused Oils
Selecting the right molds for your oil-infused soaps can greatly impact their final presentation and ease of production.
You'll want to prioritize silicone molds for their excellent nonstick properties, making it simple to remove your finished soap bars without damage.
When choosing between mold types, you've got two main options.
Loaf molds are perfect for larger batches, allowing you to cut uniform bars after curing.
Decorative molds, on the other hand, let you create intricate designs that showcase your infused oils' unique colors and textures.
Remember to verify that your soap molds are made from heat-resistant materials, as they'll need to withstand temperature changes during the saponification process.
This is especially important when working with infused oils, which can affect the heat levels during soap making.
Curing and Drying Equipment
Three key pieces of equipment form the foundation of proper soap curing: drying racks, ventilated storage areas, and breathable covers. You'll need plastic or wooden drying racks that promote air circulation around your soap bars during the curing process. Remember, you can't stack fresh soap or store it in airtight containers, as this leads to moisture retention and potential spoilage.
| Equipment | Purpose | Essential Features |
|---|---|---|
| Drying Racks | Air Flow | Plastic/Wood Construction |
| Storage Area | Environment Control | Cool, Dark Space |
| Covers | Protection | Breathable Material |
| Monitoring Tools | Quality Check | Temperature/Humidity Gauges |
| Storage Containers | Final Storage | Paper/Cardboard Options |
Monitor your soaps regularly for ideal drying conditions and spoilage signs during the 4-6 week curing period. Once cured, transfer them to breathable packaging and store in a cool, dark place.
Documentation and Labeling Systems
Proper documentation and labeling form the backbone of successful oil-infused soap making. You'll need dark glass jars with a thorough labeling system that protects your infused oils while clearly displaying essential information like infusion dates and contents.
Set up a detailed documentation log to track your oil ratios, herb types, and infusion durations. This system helps you maintain quality control and refine future batches.
Consider using color-coded labels for different infusions to quickly identify your ingredients during the soap-making process. Track important variables like temperature and herb freshness for each batch.
Keep your records flexible enough to accommodate changes in your ingredient preferences over time. Regular reviews of your documentation will help you spot trends, improve consistency, and adapt your methods for better results.
Frequently Asked Questions
What Are the Raw Materials for Soap Oil?
You'll need triglyceride oils from plants or animals, lye (sodium hydroxide), essential or fragrance oils for scent, colorants like clays or herbs, and glycerin. Together, these materials create effective soap products.
Do I Need FDA Approval to Sell Soap?
You don't need FDA approval to sell basic soap made with fats and lye. However, if you're adding drug ingredients or making health claims, you'll need to comply with FDA regulations and specific labeling requirements.
What Supplies Do You Need for Soap Making?
You'll need a digital scale, thermometer, safety gear (goggles and gloves), immersion blender, stainless steel containers, soap molds, cutting tools, oils, lye, and optional items like fragrances and colorants for soap making.
What Oils Increase Longevity in Soap?
You'll get longer-lasting soaps by using olive oil as your main base, combining it with 20-30% coconut oil, 5-10% castor oil, and adding specialty oils like jojoba or avocado for enhanced shelf life.
In Summary
You've now got everything you need to start making oil-infused soaps safely and effectively. Remember to keep detailed records of your recipes, maintain proper safety protocols, and allow adequate curing time for the best results. Don't forget to label your creations properly and store your supplies in appropriate conditions. With practice and patience, you'll master the art of creating beautiful, aromatic oil-infused soaps.


Leave a Reply